· Pool Maintenance · 20 min read
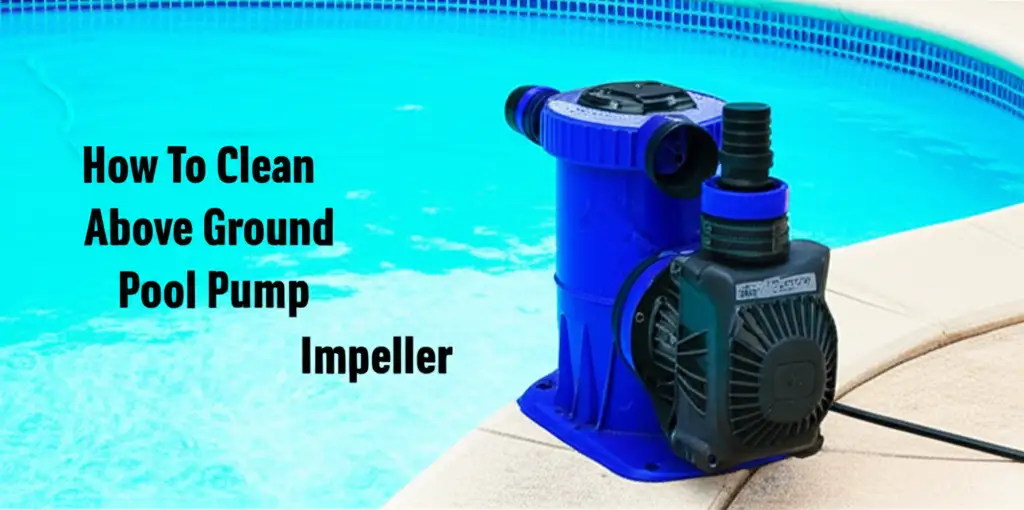
How To Clean Above Ground Pool Pump Impeller
Optimize Your Pool Flow: Clean Your Impeller Today
A sparkling clean above ground pool brings so much joy. Yet, cloudy water or weak jets can quickly ruin the fun. Often, the hidden culprit behind these issues is a dirty pool pump impeller. This small but mighty component moves water through your filtration system. When debris clogs it, your pool pump struggles to do its job.
Learning how to clean an above ground pool pump impeller is a vital skill. It improves water circulation. It also prevents costly pump damage. This guide gives you clear steps to restore your pool’s health. We will cover why cleaning matters, what tools you need, and the safe way to complete the job. Get ready to enjoy crystal clear water again.
Takeaway
- Turn off all power to the pump before starting work.
- Drain water from the pump housing.
- Remove debris from the impeller vanes and housing.
- Inspect parts for wear or damage.
- Reassemble carefully, ensuring O-rings are sealed.
- Prime the pump before restarting it.
A pool pump impeller moves water into the filter. To clean it, you must first disconnect power to the pump. Then, drain the pump and carefully remove its housing. Clear any debris from the impeller vanes. Reassemble the pump and prime it before restarting. This restores proper water flow.
Why Your Pool Pump Impeller Needs Regular Cleaning
Your above ground pool pump is the heart of its filtration system. It pulls water from the pool and pushes it through the filter. The impeller is a crucial part inside the pump. It acts like a propeller. Its spinning motion creates suction and pushes water forward. Over time, debris can build up around the impeller.
Leaves, hair, small toys, and even tiny grit can pass the skimmer basket. This debris collects on the impeller vanes. When this happens, the impeller cannot spin freely. It also cannot move water efficiently. This leads to several problems. Your pool water may become cloudy. Algae can grow more easily. Your pool pump might work harder than it should. This extra work uses more electricity. It also wears out the pump faster. Regular cleaning prevents these issues.
Signs of a Clogged Impeller
You can spot a dirty impeller by noticing changes in your pool. The most common sign is weak water flow from the return jets. If water trickles out instead of spraying, the impeller might be clogged. Your pool water may also look cloudy or green. This happens because the filter is not getting enough water to clean. You might hear strange noises from your pump too. A humming sound without water moving suggests a blockage. These signs tell you it is time to check the impeller. Ignoring these warnings can damage the pump motor.
Impact on Pool Health and Pump Lifespan
A clogged impeller directly affects your pool’s health. Poor circulation means sanitizers do not spread well. This allows bacteria and algae to thrive. It can lead to costly chemical imbalances. The filter also becomes less effective. This means you might spend more on pool chemicals.
Furthermore, a struggling pump wears out faster. The motor works harder to overcome the blockage. This generates excess heat. It can burn out the motor. Replacing a pool pump is expensive. Regular impeller cleaning saves you money in the long run. It also keeps your pool water clean and safe. Think of it as preventative care for your most important pool equipment. Just as you might clean a sand filter for an above ground pool regularly, cleaning the impeller is essential. This ensures your entire filtration system works well.
Essential Tools and Safety Precautions Before You Start
Before you start any work on your pool pump, safety is paramount. Working with electricity and water requires extreme caution. Gather all necessary tools beforehand. This saves time and makes the job smoother. Being prepared ensures you can complete the cleaning safely and efficiently. Never rush this process.
Gathering Your Tools
You will not need many specialized tools for this job. Most items are common household tools. Here is a list of what you should have ready:
- Screwdrivers: You will likely need both Phillips head and flathead screwdrivers. These help remove pump housing screws.
- Pliers or Adjustable Wrench: These are useful for loosening pipe connections or stubborn bolts.
- Small Wire or Hook Tool: A coat hanger unbent, a small piece of stiff wire, or a dental pick works well. You use this to dislodge debris from the impeller vanes.
- Bucket or Wet/Dry Vacuum: This collects any water that drains from the pump. It helps keep your work area dry.
- Old Towels or Rags: These clean up spills and wipe down parts.
- Stiff Brush: A small bottle brush or an old toothbrush can help scrub the impeller and housing.
- Flashlight or Headlamp: This helps you see into tight, dark spaces inside the pump.
- O-ring Lubricant (Silicone-based): This helps reseal O-rings. It prevents leaks after reassembly.
Having these items ready prevents interruptions. It allows you to focus on the task.
Prioritizing Safety: Crucial Steps
Safety is the first and most important step. Do not skip these precautions. Your well-being depends on it.
- Disconnect All Power: This is the absolute most critical step. Go to your circuit breaker panel. Locate the breaker for your pool pump. Flip it to the “off” position. If you are unsure, turn off the main breaker for your house. Tag the breaker to prevent accidental turn-on. You can also unplug the pump if it has a plug. Do not rely on just turning off the pump switch. Always verify the power is off before touching any part of the pump.
- Turn Off Pool Valves: Close any shut-off valves on the suction and return lines. These valves prevent water from rushing out of the pool when you disconnect the pump. If your system does not have valves, you may need to plug the skimmer and return lines inside the pool.
- Wear Protective Gear: Put on safety glasses. This protects your eyes from any splashing water or dislodged debris. Gloves can protect your hands from grime and sharp edges.
- Work in a Dry Area: Ensure the ground around the pump is dry. Avoid standing in water. Water and electricity are a dangerous combination.
- Let the Pump Cool: If the pump has been running, give it time to cool down. Motors can become very hot.
Following these safety guidelines protects you from harm. They also prevent damage to your equipment. Only proceed once you are sure the pump is completely de-energized and isolated.
Step-by-Step Guide to Disassembling Your Pool Pump
Disassembling your pool pump seems daunting. However, it is a straightforward process when you follow clear steps. This section guides you through safely taking apart your pump. You will gain access to the impeller. Remember, patience is key. Do not force any parts.
Preparing the Pump for Disassembly
Before you unscrew anything, make sure you have completed the safety steps. Power must be off. Water lines must be isolated.
- Turn Off Power and Valves: Double-check that the circuit breaker to your pool pump is off. Confirm all relevant shut-off valves for the pool’s plumbing lines are closed. These valves stop water flow to and from the pump. If you cannot close valves, use winterizing plugs in the skimmer and return jets inside the pool.
- Drain the Pump: Most pool pumps have a drain plug on the bottom or front of the pump housing. Unscrew this plug. Let all the water drain out. Use your bucket or wet/dry vacuum to catch the water. This prevents flooding your work area. Once drained, replace the plug loosely for now.
- Remove the Strainer Basket and Lid: The pump’s strainer basket is usually at the front. It has a clear lid. Twist the lid counter-clockwise to remove it. Lift out the strainer basket. Empty any debris from the basket. Inspect the O-ring on the lid. Clean it and set it aside.
These first steps get the pump ready. They ensure no water spills when you disconnect the plumbing.
Accessing the Impeller
Now you are ready to get to the impeller. This involves separating the wet end of the pump from the motor.
- Disconnect Plumbing: Use pliers or an adjustable wrench to loosen the unions or clamps. These connect the PVC pipes to the pump’s inlet and outlet ports. Be careful not to overtighten these upon reassembly. Support the pipes as you disconnect them. This prevents strain on the remaining plumbing.
- Separate the Pump Housing (Wet End) from the Motor: Most above ground pool pumps have bolts that connect the pump housing (where the water flows) to the electric motor. These bolts are usually on the back of the pump housing. Use a screwdriver or wrench to remove these bolts. Note their positions if they are different sizes. Gently pull the wet end away from the motor. It may be tight due to a shaft seal or O-rings. If it sticks, gently rock it back and forth. Do not force it apart.
- Locate the Impeller: Once the wet end is separated, you will see the impeller. It is a plastic or metal wheel with vanes. It sits inside the volute, which is the spiral-shaped part of the pump housing. The impeller may be visible through the front opening or accessible once the wet end is open. Sometimes, you need to remove the diffuser or a cover plate to fully access the impeller. This is a common step when cleaning mechanical parts, similar to how one might need to access internal components to clean a fuel filter without removing it entirely from its system.
Take photos with your phone at each step. This helps you remember how to put everything back together. Pay attention to small parts. Keep them organized in a tray or container. This prevents loss. You are now ready to clean the impeller.
Deep Cleaning Your Pool Pump Impeller and Housing
Once you have accessed the impeller, the real cleaning work begins. Debris can become tightly packed in this area. A thorough cleaning ensures optimal pump performance. This step restores the flow of water. It makes your pool system work like new.
Clearing Impeller Vanes and Volute
The impeller vanes are the blades that push the water. They are usually the main point of clogging.
- Remove Large Debris: First, use your fingers or pliers to pull out any large pieces of debris. These often include leaves, hairballs, or small sticks. Be careful not to damage the impeller blades. They are often plastic and can break.
- Clear Stubborn Clogs: Smaller debris and hair often wrap tightly around the impeller shaft and vanes. Use your small wire or hook tool to carefully dislodge these. Work the wire between the vanes. Pull out all entangled material. Spin the impeller by hand to check for resistance. If you feel resistance, more debris is present. This process is like trying to clean hair out of a bathroom sink drain. You must reach into tight spaces to remove the blockage.
- Clean the Volute: The volute is the casing around the impeller. It has a spiral shape. Debris also collects here. Use your stiff brush to scrub the inside of the volute. Remove any slime, scale, or mineral deposits. Rinse the area thoroughly with a hose. Ensure all channels are clear for water flow. For very stubborn grime, similar to cleaning baked-on grease from pans, you might need a gentle scraping tool, but be careful not to scratch the plastic.
A clean impeller spins freely. It allows water to move without resistance. This makes your pump efficient again.
Inspecting for Damage and Cleaning the Shaft Seal Area
After cleaning, take time to inspect all components. This helps catch potential problems early.
- Inspect the Impeller: Look closely at each vane on the impeller. Check for cracks, chips, or excessive wear. Damaged vanes cannot move water efficiently. If the impeller is cracked, it needs replacement. Also, check the impeller for wobble on its shaft. It should be firm.
- Examine the Shaft Seal: The shaft seal prevents water from leaking into the motor. It is usually a two-part ceramic and spring-loaded assembly. One part sits on the motor shaft, the other in the pump housing. Inspect both parts for cracks, chips, or wear. If you see damage, the seal needs replacement. Do not touch the polished ceramic faces with your bare hands. Oils from your skin can cause premature failure. If the seal needs replacing, follow the pump manufacturer’s instructions.
- Clean the Shaft and Seal Area: Wipe down the motor shaft. Ensure it is free of dirt and debris. Clean the area where the shaft seal sits in the pump housing. This ensures a proper seal upon reassembly. Any dirt here can cause leaks.
A thorough inspection now saves you future headaches. It prevents leaks and pump failures. Take your time to do this correctly.
Reassembling Your Pool Pump Correctly
Putting your pool pump back together correctly is just as important as taking it apart. Improper reassembly can lead to leaks, poor performance, or even pump damage. Take your time. Ensure every component is seated properly.
Reattaching the Wet End to the Motor
This step involves bringing the pump housing and motor back together.
- Lubricate O-rings and Gaskets: Locate all O-rings and gaskets you removed or encountered. These usually include the strainer pot lid O-ring and the O-ring between the pump housing and the motor. Apply a thin layer of silicone-based lubricant to these. This helps create a tight seal. It also makes future disassembly easier. Do not use petroleum-based lubricants. These can degrade rubber.
- Reinstall the Shaft Seal (if removed/replaced): If you removed or replaced the shaft seal, carefully reinstall it. Follow the manufacturer’s specific instructions. Ensure the ceramic faces are clean and not touched by bare hands. One part typically slides onto the motor shaft, the other presses into the pump housing.
- Align and Secure the Pump Housing: Carefully align the pump housing (wet end) with the motor. The motor shaft must slide into the impeller. Make sure the bolt holes line up. Gently push the two halves together. It should fit snugly. Insert and tighten the bolts that connect the pump housing to the motor. Tighten them evenly in a crisscross pattern. This ensures even pressure. Do not overtighten, as this can crack the housing.
A proper seal between the motor and wet end is critical. It prevents water from entering the motor.
Reconnecting Plumbing and Priming the Pump
Once the pump is physically together, you need to reconnect it to your pool system.
- Reconnect Plumbing Lines: Reattach the PVC pipes to the pump’s inlet and outlet ports. Use your adjustable wrench or pliers to tighten the union nuts or clamps. Again, do not overtighten. Ensure the connections are snug but not strained. Check that the pipes are properly supported.
- Replace Strainer Basket and Lid: Insert the cleaned strainer basket back into its housing. Ensure the lid O-ring is clean and lubricated. Place the lid on the strainer pot. Turn it clockwise until it is hand-tight. Do not use tools to tighten the lid. This can crack it.
- Prime the Pump: This is a crucial step before restarting. Priming means filling the pump housing with water. It removes air from the system. If your pump is above the water level of your pool, you must fill the strainer basket pot with water using a hose. Fill it until the water level reaches the top of the basket. Quickly replace the lid. If your pump is below the water level (a self-priming pump), simply open the suction side valve. Water will flow in and fill the pump. Listen for the sound of water entering.
- Open All Valves: Once the pump is full of water, open all the pool plumbing valves you closed earlier. Ensure water can flow freely to and from the pool.
Proper priming protects your pump. Running a pump dry (without water) can quickly damage the shaft seal and motor.
Testing the Pump
After reassembly and priming, it is time to test your work.
- Turn Power On: Go back to your circuit breaker panel. Flip the breaker for your pool pump back to the “on” position.
- Observe Pump Operation: The pump should start immediately. Listen for a steady hum. Watch for water flowing from the return jets. It may take a few minutes for all air to clear and full flow to establish.
- Check for Leaks: Carefully inspect all connections you loosened or tightened. Look for any drips or sprays of water. If you see leaks, turn off the pump immediately. Re-tighten the problematic connection or check the O-ring and reassemble. Sometimes, a slightly loose union or a pinched O-ring is the culprit.
If everything looks good, your pool pump is ready to run. You have successfully cleaned your above ground pool pump impeller. Enjoy your improved water flow and cleaner pool.
Troubleshooting Common Impeller Issues After Cleaning
Even after a thorough cleaning, sometimes issues persist. It is frustrating to complete the work only to find the problem is not fully solved. Do not despair. Many post-cleaning issues have simple fixes. Understanding common problems helps you diagnose and resolve them. This section addresses potential hiccups after cleaning your pool pump impeller.
Pump Not Priming
One of the most common issues after disassembling and reassembling a pump is that it fails to prime. This means it cannot pull water from the pool. It sounds like it is running dry or just humming.
- Check Water Level: Ensure your pool’s water level is above the skimmer opening. If it’s too low, the skimmer sucks air instead of water.
- Inspect Strainer Pot Lid O-ring: A common cause of priming issues is an air leak. The O-ring on the strainer pot lid must be clean, lubricated, and seated correctly. Any debris or twist in the O-ring lets air in. Air in the system prevents priming. Tighten the lid hand-tight.
- Check Plumbing Connections: Go over all unions and connections you loosened during disassembly. Make sure they are tight. Air can enter through loose pipe fittings on the suction side (the pipe leading from the skimmer to the pump).
- Verify Open Valves: Ensure all valves on the suction and return lines are fully open. A partially closed valve restricts water flow.
- Re-prime Manually: If the pump is still not catching, turn it off. Open the strainer pot lid. Fill the basket area completely with water again using a hose. Quickly replace the lid and turn the pump back on. You might need to do this a few times.
A pump that won’t prime needs attention. Running it dry can quickly damage the pump’s internal components and motor seal.
Still Low Flow or Noisy Pump
You cleaned the impeller, but the water flow is still weak, or the pump is making unusual noises.
- Residual Debris: Sometimes, small pieces of debris are missed during cleaning. Or, new debris enters the system right after you start it up. Turn off the pump, open it, and re-inspect the impeller. Use a flashlight and wire to look deep into the vanes.
- Damaged Impeller: If the impeller was cracked or warped before or during cleaning, it cannot create proper suction. Even small cracks reduce efficiency. Inspect the impeller thoroughly for any physical damage. If damaged, you will need to replace it.
- Air Leak on Suction Side: Beyond the strainer lid, air leaks can occur anywhere on the suction side. This includes the skimmer basket, skimmer weir, or underground pipes. Look for tiny bubbles coming out of the return jets. This indicates an air leak.
- Filter Clog: The problem might not be the impeller. Your filter could be dirty. A clogged sand filter or dirty cartridge filter significantly reduces water flow. Check your filter pressure gauge. If it is high, it is time to clean your sand filter for an above ground pool or rinse your cartridge filter.
- Motor Issues (Noisy Pump): If the pump is making a loud grinding or squealing noise, it might be the motor bearings. This is often unrelated to the impeller. Motor bearing noise means the motor likely needs professional repair or replacement.
Troubleshooting takes patience. Go through each possibility methodically.
When to Call a Professional or Replace Parts
While many issues are DIY-friendly, some problems require expert help or part replacement.
- Persistent Leaks: If you cannot stop a leak after re-tightening connections and checking O-rings, a deeper issue might exist. This could be a cracked housing or a faulty shaft seal installation.
- Motor Problems: If the motor hums but does not spin, makes loud grinding noises, or trips the breaker, it is often a motor issue. Motor repair is complex and best left to a qualified technician.
- Damaged Impeller or Housing: If you find the impeller is cracked or the pump housing is severely damaged, you must replace these parts. Often, sourcing these specific parts can be challenging, and installation might require tools or expertise you do not have.
- Electrical Issues: Any problems with wiring, switches, or circuit breakers should always be handled by a licensed electrician. Never attempt electrical repairs yourself.
Knowing when to call in help saves you time, money, and potential safety risks. Do not hesitate to seek professional assistance for complex issues.
Maintaining Peak Performance: Preventing Future Clogs
Cleaning your pool pump impeller is a key maintenance task. However, preventing future clogs is even better. Regular, proactive steps keep your pool system running smoothly. They reduce the frequency of deep cleaning. This section gives you practical tips to maintain peak performance. It helps avoid recurring impeller issues.
Regular Skimmer and Pump Basket Cleaning
The first line of defense against debris reaching your impeller is the baskets.
- Empty Skimmer Basket Daily: Your pool skimmer basket catches most large debris. Leaves, bugs, and other floating items end up here. Empty it daily, especially during high use periods or after windy weather. A full skimmer basket reduces water flow. This puts strain on the pump.
- Check Pump Strainer Basket Weekly: The pump’s internal strainer basket provides a second level of protection. It catches anything that gets past the skimmer. This basket should also be checked and emptied weekly. Turn off the pump before opening its lid. Clean any debris. Rinse the basket. Ensure the lid O-ring is clean and lubricated before replacing the lid.
Clean baskets mean less debris reaches the impeller. This is a simple habit that makes a big difference.
Proper Pool Chemistry and Water Balance
Good water chemistry goes beyond just sanitizing. It prevents issues that can indirectly affect your pump.
- Prevent Algae Growth: Algae can form slimy layers inside pipes and on pump components. Regular shocking and maintaining proper sanitizer levels prevent algae.
- Manage Calcium Hardness: High calcium hardness can lead to scale buildup. Scale is hard, crusty deposits. These can form on impeller vanes and within the pump housing. They reduce efficiency. Test your calcium hardness regularly. Keep it within recommended levels (usually 200-400 ppm for most pools). If you have high calcium, you might need to use a sequestering agent. This helps prevent scale formation.
- Maintain pH Levels: Proper pH (7.4-7.6) helps chemicals work effectively. It also prevents corrosion and scale. Imbalanced pH can lead to mineral fallout. This fallout can contribute to pump clogs.
Balanced water reduces strain on your entire pool system. It minimizes the accumulation of unwanted substances.
Using a Leaf Net and Pool Cover
Physical barriers are highly effective at keeping debris out of your pool.
- Regular Netting: Use a leaf net or skimmer net to scoop out floating debris daily. This reduces the amount of work your skimmer and pump have to do. It stops leaves and other large items from sinking and clogging drains or baskets.
- Invest in a Pool Cover: A
- pool pump maintenance
- impeller cleaning
- above ground pool
- pool circulation