· Home Maintenance · 17 min read
How To Clean Air Cooler Honeycomb Pads
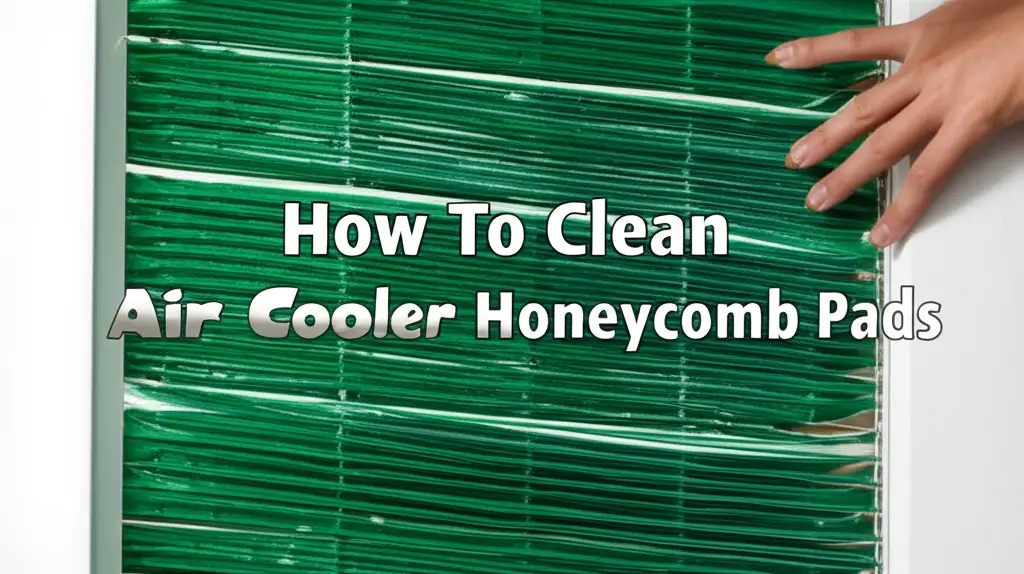
Clean Air Cooler Honeycomb Pads: A Simple Guide
An air cooler brings comfort during warm days. Its honeycomb pads work hard to cool the air. Over time, these pads collect dust, dirt, and mineral deposits. This buildup reduces cooling efficiency and affects air quality. Knowing how to clean air cooler honeycomb pads is essential for fresh, cool air. A clean cooler runs better. Regular cleaning helps prevent mold growth. Let’s explore how to maintain these important parts. I will show you simple, effective steps.
Takeaway
Cleaning your air cooler’s honeycomb pads makes your cooler work better and keeps your air fresh.
- Always unplug the cooler first.
- Remove pads carefully.
- Use a gentle rinse for light dirt.
- Soak pads in vinegar or mild detergent for tough buildup.
- Address mold with a diluted bleach solution if needed.
- Dry pads completely before putting them back.
- Clean your cooler regularly for best results.
How do you clean air cooler honeycomb pads?
To clean air cooler honeycomb pads, first unplug the cooler and remove the pads. Rinse them gently with water to remove loose debris. For stubborn dirt or mold, soak the pads in a solution of water and vinegar, or a mild detergent. Scrub gently with a soft brush. Rinse thoroughly and allow the pads to dry completely before reinstallation.
Understanding Your Air Cooler’s Honeycomb Pads
Air coolers use evaporative cooling. This process draws warm air over water-soaked pads. The water evaporates, absorbing heat from the air. This cools the air before it circulates into your space. Honeycomb pads are central to this process. They have a unique structure. This design provides a large surface area. This maximizes water absorption and evaporation.
Over time, these pads accumulate dust, pollen, and other airborne particles. Minerals from the water also build up on the pads. This mineral scale can clog the small passages. Dirty pads reduce the cooling effect. They also make the cooler work harder. This increases energy use. Unclean pads can also become breeding grounds for mold and bacteria. This degrades indoor air quality.
Regular cleaning is not just about performance. It is about your health. Breathing in mold spores from a dirty cooler can cause respiratory issues. A clean pad delivers clean, fresh air. It ensures your air cooler operates at its peak. This extends the lifespan of your appliance. I always notice a big difference in air quality after cleaning my pads.
Gathering Your Essential Cleaning Supplies
Before you start cleaning, gather all your materials. Having everything ready saves time. It makes the cleaning process smooth. You likely have most of these items at home already.
Here is a list of what you will need:
- Protective Gloves: These protect your hands. Cleaning solutions can irritate skin. They also keep your hands clean from dirt and grime.
- Safety Goggles: Splashing water or cleaning solutions can get into your eyes. Goggles shield your eyes from chemicals and debris. Eye safety is very important.
- Soft Brush or Sponge: A soft brush helps remove dirt without damaging the pads. You can use an old toothbrush for small areas. A sponge also works well for gentle scrubbing.
- Large Basin or Bathtub: You need a place to soak the pads. A basin or bathtub is perfect for this. It holds water and cleaning solutions.
- Garden Hose or Showerhead: A steady stream of water is needed for rinsing. A garden hose offers good pressure. A showerhead works well indoors.
- White Vinegar: This is a natural cleaner. Vinegar helps break down mineral deposits and kill mold. It is safe for most cooler parts.
- Mild Dish Soap or Detergent: For general dirt and grime, a few drops of dish soap work wonders. Choose a gentle, non-abrasive type.
- Bleach (Optional, for severe mold): Use bleach cautiously and only if necessary. A very dilute solution can kill tough mold. Ensure good ventilation if using bleach.
Having these items ready helps you start the job without delay. It ensures you have the right tools for effective cleaning. I always lay out my supplies beforehand.
Safety First: Preparing for the Clean
Safety is crucial before you clean any electrical appliance. Your air cooler combines water and electricity. This means you must take precautions. Ignoring safety steps can lead to electric shock or injury.
Follow these important steps:
- Unplug the Air Cooler: This is the most critical step. Locate the power cord and pull it from the wall outlet. Never work on an appliance while it is still connected to power. This prevents accidental startup. It removes any risk of electric shock.
- Move the Cooler to a Suitable Location: Cleaning honeycomb pads can be messy. It involves water and dirt. Move your cooler to an area that tolerates water. A garage, backyard, or large bathroom is ideal. Place old towels or a tarp underneath to catch spills.
- Drain the Water Tank: Air coolers hold water in a reservoir. This water may be dirty or stagnant. Most coolers have a drain plug at the bottom. Open this plug to empty the water. You can also use a bucket to scoop out the water if there is no plug. A clean tank prevents new mold growth. Cleaning the water tank is an important step in overall cooler maintenance. Learn more about how to clean a portable air conditioner water tank to ensure all water-related parts of your cooler are spotless. how to clean portable air conditioner water tank.
- Remove the Honeycomb Pads: Each air cooler model is different. Consult your owner’s manual for specific instructions. Generally, you will find clips or screws holding the back panel. Carefully remove this panel. The honeycomb pads slide out from slots. Handle them gently to avoid damage. Note their orientation. You will need to put them back the same way.
These preparatory steps protect you and your appliance. They set the stage for an effective and safe cleaning process. I always double-check these steps before I begin.
The Basic Clean: Rinsing Honeycomb Pads
For lightly soiled honeycomb pads, a simple rinse often does the trick. This method removes dust, lint, and loose debris. It is a good first step for regular maintenance. This type of cleaning helps maintain air quality and prevents dirt accumulation around air vents. Understanding how to manage dust buildup around air vents can also help in keeping your living space cleaner. how to clean black dust around air vents.
Here is how to perform a basic rinse:
- Place Pads in a Basin or Tub: Set the removed honeycomb pads into a large basin, utility sink, or bathtub. Make sure they lay flat or stand upright without bending. This position ensures full water contact.
- Rinse with Gentle Water Pressure: Use a garden hose or showerhead. Spray water over the pads. Direct the water flow from top to bottom. This helps gravity pull dirt downwards. Start with low pressure. Increase it slightly if needed. Avoid very high pressure. It can damage the delicate pad structure. You will see dirty water running off. Continue rinsing until the water runs clear. This means most loose dirt is gone.
- Inspect for Remaining Debris: After rinsing, visually inspect each pad. Look for any areas where dirt still clings. Pay attention to the corners and edges. These spots often hold more grime. If you see remaining loose dirt, repeat the rinsing process.
- Allow Excess Water to Drain: Stand the pads upright or prop them against a wall. Let gravity drain away excess water. This prevents drips when you move them.
This basic rinse is often enough for weekly or bi-weekly cleaning. It keeps your pads fresh between deeper cleans. I find this quick rinse makes a huge difference in my air quality.
Tackling Stubborn Dirt and Mineral Buildup
When simple rinsing is not enough, you need a stronger cleaning solution. Stubborn dirt, grime, and mineral deposits require a deeper approach. Minerals from hard water can leave white, crusty buildup. This clogs the pads and reduces air flow.
Here are effective methods for a deeper clean:
Vinegar Soak for Mineral Deposits: Vinegar is excellent for dissolving mineral scale.
- Prepare the Solution: In your basin or bathtub, mix equal parts white vinegar and warm water. For example, use 5 gallons of water with 5 gallons of vinegar. Ensure enough solution to submerge the pads. Vinegar is a strong acid. It breaks down mineral bonds. Many household cleaning tasks benefit from vinegar. You can learn more about how to clean with vinegar and baking soda for various applications. how to clean with vinegar and baking soda. It also works wonders for cleaning scale from water fixtures, similar to how it cleans a shower head. See how vinegar tackles mineral buildup on a shower head for related tips: how to clean shower head with vinegar.
- Submerge the Pads: Carefully place the honeycomb pads into the vinegar solution. Make sure they are fully submerged. If they float, use a heavy object to hold them down.
- Soak Time: Let the pads soak for at least 30 minutes. For very heavy buildup, you can soak them for a few hours. The vinegar needs time to work its magic.
- Gentle Scrub and Rinse: After soaking, use a soft brush or sponge to gently scrub any remaining mineral deposits. Rinse the pads thoroughly under running water. Ensure all vinegar solution is washed away.
Mild Detergent Soak for Grease and Grime: For oily residues or general tough dirt.
- Prepare the Solution: Fill your basin with warm water. Add a few drops of mild dish soap or a gentle liquid detergent. Mix until suds appear. Avoid harsh detergents. They can damage the pads.
- Submerge and Soak: Place the pads into the soapy water. Let them soak for 15-30 minutes. This helps loosen dirt and grime.
- Scrub and Rinse: Use your soft brush or sponge to gently scrub the pads. Rinse them extensively with clean water. Make sure no soap residue remains. Soap can create foam when the cooler runs.
Always wear your protective gloves and safety goggles when handling cleaning solutions. These methods restore your pads to their clean, efficient state.
Addressing Mold and Mildew on Honeycomb Pads
Mold and mildew thrive in damp environments. Air cooler pads are perfect breeding grounds if not dried properly. Mold growth causes a musty smell. It also releases spores into your air. This can trigger allergies or respiratory problems. Cleaning mold effectively is important for health. This process is similar to how you would clean mold from other air conditioning units, such as a window air conditioner. For more details on tackling mold in similar devices, refer to: how to clean mold from window air conditioner.
Here is how to tackle mold and mildew:
- Identify Mold: Mold usually appears as black, green, or white fuzzy patches. You might also notice a strong, earthy, musty odor. This smell is a tell-tale sign of mold presence.
- Prepare a Bleach Solution (Use with Caution): Bleach is effective against mold but must be used carefully.
- Ventilation: Work in a well-ventilated area. Open windows and doors.
- Solution: Mix one part household bleach with ten parts water. For example, 1 cup of bleach to 10 cups of water. Never mix bleach with vinegar or other cleaners. This creates dangerous fumes.
- Protection: Wear heavy-duty gloves and safety goggles. Protect your skin and eyes.
- Apply the Bleach Solution:
- Soaking Method: Submerge the moldy pads in the diluted bleach solution for about 10-15 minutes. Ensure the pads are fully saturated.
- Spraying Method: If soaking is not possible, spray the solution directly onto moldy areas. Let it sit for 10-15 minutes.
- Gentle Scrubbing: After soaking, use a soft brush to gently scrub the affected areas. You should see the mold disappear. Do not scrub too hard. You might damage the pads.
- Rinse Thoroughly: This step is crucial. Rinse the pads completely under clean, running water. Ensure all traces of bleach are gone. Bleach residue can cause irritation if released into the air by the cooler. Rinse until you cannot smell any bleach.
- Alternative Non-Bleach Solutions: For minor mold, or if you prefer not to use bleach:
- Hydrogen Peroxide: A 3% hydrogen peroxide solution can also kill mold. Spray it on and let it sit for 10 minutes, then scrub and rinse.
- Tea Tree Oil: Mix two teaspoons of tea tree oil with two cups of water in a spray bottle. Spray on the mold and do not rinse. Tea tree oil is a natural antifungal. However, some people might be sensitive to the scent.
Always ensure pads are completely dry after cleaning mold. This prevents new growth.
Drying and Reassembly: The Final Steps
Drying honeycomb pads thoroughly is essential. If you reassemble wet pads, mold and mildew will quickly return. Proper drying prevents future issues and ensures your air cooler works efficiently.
Here are the steps for drying and reassembly:
- Thorough Drying is Key:
- Air Dry Outdoors: The best way to dry the pads is outdoors in direct sunlight. Sunlight provides natural sterilization. Lay the pads flat on a clean, dry surface. You can also prop them up against a wall. Ensure air circulates around them.
- Air Dry Indoors: If outdoor drying is not an option, place the pads in a well-ventilated room. Use a fan to circulate air. Ensure they are in a dry spot. Do not place them on carpets or surfaces that retain moisture.
- Check for Dryness: Pads must be bone dry before reinstallation. This can take several hours, or even a full day, depending on humidity and airflow. Feel them all over. Ensure there is no dampness. Dampness encourages mold.
- Clean the Cooler Interior: While the pads dry, clean the inside of your air cooler. Wipe down the water tank, fan blades, and inner casing. Use a damp cloth with a mild disinfectant. This removes any dust, dirt, or mold spores. A clean cooler body supports clean pads.
- Reinstall Honeycomb Pads:
- Match Orientation: Remember how you removed the pads. Insert them back in the same orientation. They usually have an arrow or a specific fit.
- Secure Panels: Slide the pads into their designated slots. Replace the back panel or cover. Secure any clips or screws you removed earlier. Ensure all parts fit snugly.
- Refill Water Tank and Test:
- Fresh Water: Once the pads are secure, refill the water tank with fresh, clean water. Using distilled water can reduce mineral buildup over time.
- Power On and Test: Plug the air cooler back into the power outlet. Turn it on. Check for proper operation. You should feel cool, fresh air. Listen for any unusual noises.
These final steps complete the cleaning process. They prepare your cooler for optimal performance. I always make sure my pads are completely dry. This prevents any musty smells later.
Preventative Measures and Regular Maintenance
Cleaning your air cooler honeycomb pads is crucial. However, consistent care can minimize the need for deep cleaning. Preventative measures extend the life of your pads. They ensure continuous clean air delivery. Regular maintenance keeps your cooler efficient.
Here are some proactive steps to maintain your air cooler:
- Regular Water Changes: Stagnant water is a breeding ground for bacteria and mold. Change the water in your cooler’s tank daily or every other day. Do not just top it off. Empty the old water completely. Refill with fresh, clean water. This simple habit significantly reduces mineral and microbial buildup.
- Use Clean Water: Hard water has high mineral content. These minerals deposit on the honeycomb pads. Over time, they create scale. If possible, use filtered or distilled water. This reduces mineral buildup. If you live in an area with very hard water, consider adding a water softener. This can extend the life of your pads.
- Run the Fan Only Before Storing: Before storing your cooler for the off-season, drain all water. Then, run the cooler on “fan only” mode for an hour or two. This circulates air through the pads. It dries them completely. This crucial step prevents mold and mildew from growing during storage. It also keeps the pads fresh for the next season.
- Routine Pad Inspection: Make it a habit to check your honeycomb pads regularly. Once a week during peak use is ideal. Look for signs of dirt, mold, or mineral deposits. Early detection allows for easier cleaning. You can address issues before they become severe.
- Clean the Water Tank Regularly: The water tank can also harbor mold and algae. Clean the tank every few weeks. Use a mild soap and water solution. Scrub the tank walls and bottom. Rinse thoroughly. A clean tank helps keep the pads clean.
- Annual Deep Clean: Even with regular maintenance, an annual deep clean is beneficial. Before the cooling season starts, give your entire air cooler a thorough cleaning. This includes the water tank, pump, fan blades, and all pads. This comprehensive clean ensures your cooler is ready for optimal performance.
By following these preventative measures, you keep your air cooler honeycomb pads in top condition. This provides clean, cool air and saves you effort in the long run. I find that a little effort now saves a lot of trouble later.
Frequently Asked Questions
How often should I clean my air cooler honeycomb pads?
Clean your air cooler honeycomb pads at least once a month during regular use. If you use your cooler daily or live in a dusty area, clean them every two weeks. A light rinse is often sufficient for weekly maintenance. A deep clean is needed seasonally or if you notice reduced airflow, a musty smell, or visible dirt.
Can I use bleach on my honeycomb pads?
Yes, you can use bleach on honeycomb pads, but with extreme caution. Always dilute household bleach by mixing one part bleach with ten parts water. Use in a well-ventilated area. Wear gloves and safety goggles. Rinse the pads extremely thoroughly after bleaching. Bleach is effective for mold but can degrade materials if not fully rinsed.
What happens if I do not clean my cooler pads?
If you do not clean your cooler pads, they will accumulate dust, dirt, and mineral deposits. This reduces cooling efficiency significantly. Airflow decreases, and the cooler must work harder. Uncleaned pads also become breeding grounds for mold, mildew, and bacteria. This can release unpleasant odors and harmful spores into your indoor air.
How do I know when to replace my honeycomb pads?
Replace your honeycomb pads when they show signs of severe wear. Look for crumbling, tears, or extreme deterioration. If deep cleaning does not remove persistent odors or visible mold, replacement is necessary. Pads that are heavily calcified with mineral deposits, even after soaking, should also be replaced. Typically, pads last 2-5 years depending on water quality and usage.
Can I put honeycomb pads in a washing machine?
No, do not put honeycomb pads in a washing machine. The washing machine’s agitation and spin cycles are too harsh. They can damage the delicate structure of the pads. The materials are not designed for machine washing. Always hand-wash or soak honeycomb pads using the methods described in this guide to preserve their integrity and effectiveness.
What causes mold on cooler pads?
Mold grows on cooler pads primarily due to constant moisture and lack of proper drying. Stagnant water in the cooler’s tank, not draining the tank regularly, and not allowing pads to dry completely after use or before storage create ideal conditions for mold spores to flourish. Dust and dirt trapped in the pads also provide nutrients for mold growth.
Conclusion
Cleaning your air cooler honeycomb pads is a straightforward process. It delivers significant benefits. You restore your cooler’s efficiency. You ensure the air circulating in your home is fresh and clean. Regular maintenance prevents the buildup of dust, mineral deposits, and harmful mold. This extends the life of your appliance.
I have shown you the simple steps: preparing safely, performing basic rinses, tackling stubborn grime, and addressing mold. Remember the importance of thorough drying. It prevents future issues. By following these guidelines, you ensure your air cooler provides refreshing, healthy air for years to come. Make cleaning your air cooler honeycomb pads a routine part of your home maintenance. Your comfort and health will thank you. Ready to enjoy crisp, clean air? Start cleaning your pads today!
- air cooler
- honeycomb pads
- cleaning tips
- cooler maintenance
- evaporative cooler
- air quality
- DIY cleaning