· Hair Tool Maintenance · 18 min read
How To Clean Babyliss Pro Trimmer
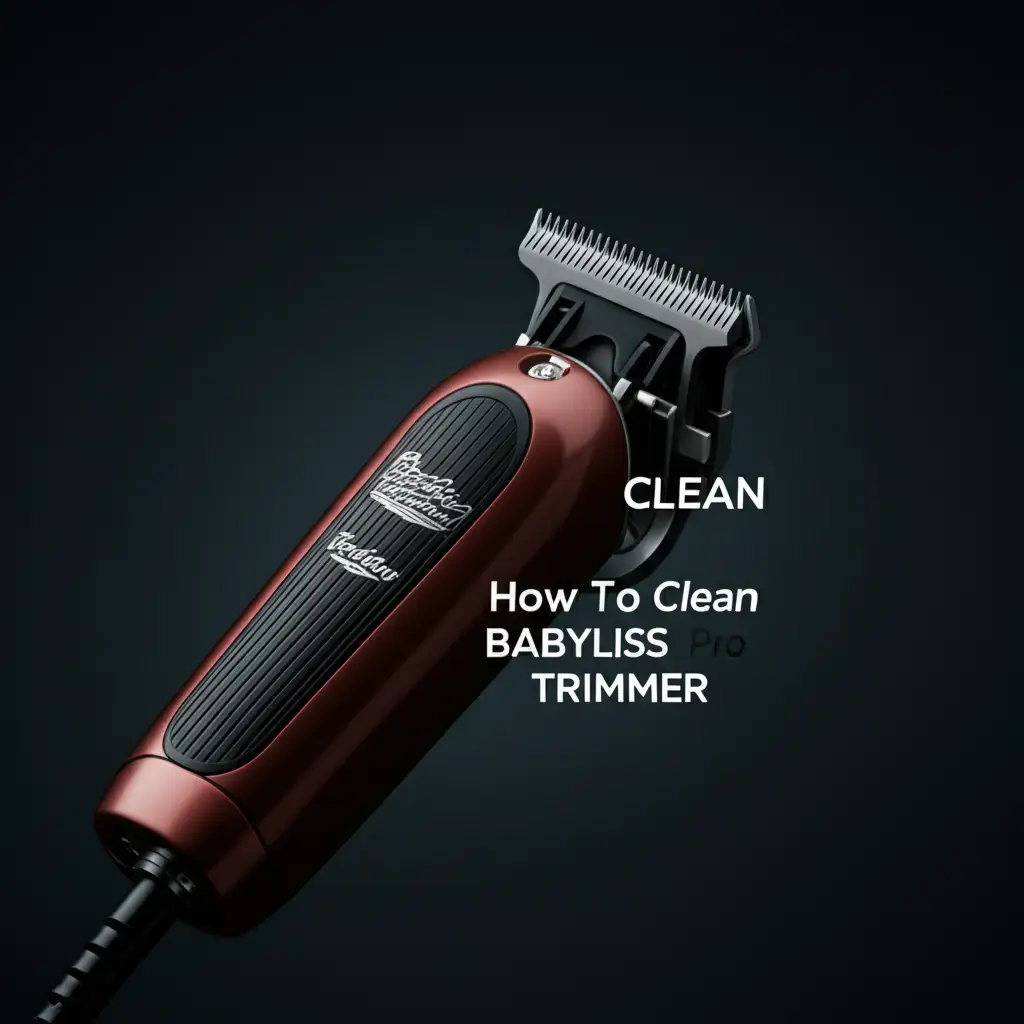
How To Clean Babyliss Pro Trimmer for Peak Performance
A Babyliss Pro Trimmer is a crucial tool for any barber or home grooming enthusiast. Keeping it clean ensures precision cuts and a long lifespan. Knowing how to clean your Babyliss Pro Trimmer is not just about hygiene; it directly impacts its performance. Without regular cleaning, hair, skin, and oil buildup can dull blades and strain the motor.
I know you want your trimmer to perform its best every single time. This detailed guide will show you everything you need to know about cleaning your Babyliss Pro Trimmer. We will cover daily upkeep, deep cleaning methods, and proper maintenance tips. By the end, you will have a clear understanding of how to keep your Babyliss Pro Trimmer in perfect working condition. This guide makes sure your grooming sessions remain smooth and efficient.
Takeaway:
- Regularly clean your Babyliss Pro Trimmer after each use to remove hair.
- Deep clean the blades and internal components periodically for optimal performance.
- Always lubricate blades after cleaning to prevent rust and ensure smooth operation.
- Store your trimmer properly to protect it from dust and damage.
Cleaning your Babyliss Pro Trimmer is simple. First, remove loose hair with a brush. Then, detach and clean the blades with a suitable cleaner or alcohol. Finally, dry and lubricate the blades before reassembling the trimmer.
Why Regular Cleaning Matters for Your Babyliss Pro Trimmer
Maintaining your grooming tools is very important, especially for a high-quality device like a Babyliss Pro Trimmer. Regular cleaning extends the life of your trimmer. It also ensures it performs at its best every time you use it. I always make sure to clean my tools because I know it saves money in the long run.
Hair and debris build up on the blades and inside the motor housing. This buildup can cause several problems. It can slow down the motor, making cuts uneven and pulling hair. This makes trimming uncomfortable for the user. Dirt and hair also create friction, which wears down the blades faster. Dirty blades become dull quickly, leading to poor cutting performance. A clean trimmer moves smoothly and cuts precisely. This gives you neat lines and sharp fades every time.
Hygiene is another critical reason for regular cleaning. Trimmers come into contact with skin and hair, making them a breeding ground for bacteria and fungi if not properly cleaned. This is especially important for professional barbers. They use trimmers on many different clients. Proper sanitation prevents the spread of skin infections. You want to protect both yourself and your clients. Cleaning ensures your Babyliss Pro Trimmer remains a safe tool. It keeps cuts sharp and hygienic.
Regular cleaning also helps you notice any potential issues early on. You might spot a loose screw or a worn blade during the cleaning process. Addressing these small problems quickly can prevent larger, more expensive repairs down the line. A well-maintained Babyliss Pro Trimmer is reliable. It works efficiently for years. This makes cleaning a small investment of time that pays off big. Always prioritize cleanliness for your Babyliss Pro Trimmer.
Essential Tools and Supplies for Babyliss Pro Trimmer Cleaning
Before you start to clean your Babyliss Pro Trimmer, gather all the necessary tools and supplies. Having everything ready makes the cleaning process smooth and efficient. You do not want to stop in the middle of cleaning to search for an item. I always prepare my cleaning station first. This ensures I have everything at hand.
Here is a list of what you will need:
- Small cleaning brush: Most Babyliss Pro Trimmers come with a small brush. This brush is perfect for sweeping away loose hair and debris from the blades. If you lost yours, a soft toothbrush works well too.
- Blade cleaner or rubbing alcohol: A specialized blade cleaner is ideal. It effectively breaks down oils and sanitizes. Rubbing alcohol (70% or higher) is a good alternative. It evaporates quickly and disinfects the blades. Make sure to choose one that is safe for metal and plastic.
- Trimmer oil or clipper oil: This oil is crucial for lubricating the blades after cleaning. It reduces friction, prevents rust, and keeps the blades moving smoothly. Never use regular household oils; they can gum up the motor.
- Soft cloth or microfiber towel: You will need this to wipe down the trimmer body and to dry the blades after cleaning. A lint-free cloth is best. It will not leave fibers behind.
- Cotton swabs: These are useful for reaching into small crevices and cleaning intricate parts. They are perfect for cleaning around screws or in tight spots where the brush cannot reach.
- Screwdriver (optional, but recommended): Some deep cleaning steps require removing the blade assembly. A small Phillips head screwdriver might be necessary for this. Refer to your trimmer’s manual for specific instructions on blade removal.
Having these items ready ensures you can perform a thorough and effective cleaning. Using the right tools protects your Babyliss Pro Trimmer from damage. It also ensures it stays in top condition. This list provides a complete setup for maintaining your trimmer.
Step-by-Step Guide to Basic Babyliss Pro Trimmer Cleaning
Performing a basic cleaning after every use is essential for your Babyliss Pro Trimmer. This simple routine prevents hair buildup and keeps your trimmer working well. I always do a quick clean right after I finish a trim. This keeps the tool ready for its next use.
Follow these steps for a basic cleaning:
- Turn off and unplug the trimmer: Safety first. Always ensure your Babyliss Pro Trimmer is powered off and unplugged from any power source. This prevents accidental activation during cleaning. It protects both you and the device.
- Brush off loose hair: Use the small cleaning brush that came with your trimmer. If you don’t have one, a soft, dry toothbrush works just as well. Brush away all visible hair from the blades and the surrounding area. Pay special attention to the gaps between the cutting teeth. You want to get rid of all loose hair.
- Detach the blade assembly (if possible): Many Babyliss Pro Trimmers allow for easy blade removal. Check your trimmer’s manual for specific instructions. Removing the blades provides better access for cleaning underneath. This step is important for thorough cleaning. It lets you clean hidden areas.
- Clean the blades: Once the blades are off (or if they are fixed), apply a small amount of blade cleaner or rubbing alcohol to the cutting edges. You can spray it directly or apply it with a cotton swab. Let it sit for a moment to dissolve any stubborn residue. This will loosen up any stuck-on hair or oil.
- Wipe and dry the blades: Use a soft, lint-free cloth to wipe the blades clean. Make sure to remove all cleaner residue and any remaining debris. Ensure the blades are completely dry before proceeding. Moisture can cause rust.
- Reattach the blades (if removed): If you detached the blades, carefully reattach them. Make sure they are aligned correctly. Blades that are not aligned can cut unevenly or even cause injury. Follow your trimmer’s instructions for reattachment.
- Oil the blades: This is a crucial step for maintaining blade health. Apply a few drops of trimmer oil evenly across the top and bottom cutting surfaces of the blades. Turn on the trimmer for about 10-15 seconds to allow the oil to distribute. This lubricates the blades, reduces friction, and prevents rust. Proper lubrication is key to long blade life, just like properly caring for hedge trimmer blades ensures their longevity.
This basic cleaning routine takes only a few minutes. It makes a big difference in the performance and lifespan of your Babyliss Pro Trimmer. Perform these steps after every use to keep your trimmer in excellent shape.
Deep Cleaning Your Babyliss Pro Trimmer Blades for Optimal Performance
Basic cleaning removes most surface hair. However, a deep clean is necessary periodically to remove embedded grime and oil. This ensures your Babyliss Pro Trimmer blades stay sharp and efficient. I usually deep clean my trimmer once a month, or more often if I use it frequently. This process is more thorough than the daily quick clean.
Here’s how to deep clean your Babyliss Pro Trimmer blades:
- Disassemble the blade set: First, turn off and unplug your trimmer. Use a small screwdriver if needed to carefully remove the blade assembly from the trimmer body. Pay attention to how the parts fit together. This will help you reassemble them correctly. Some Babyliss models have detachable blade cartridges that simply pop off. Always consult your trimmer’s manual for exact instructions. Understanding how to take apart your specific model is key to a successful deep clean.
- Separate the fixed and moving blades: Once the blade assembly is off, you might be able to separate the fixed blade from the moving blade. This allows for a more thorough cleaning of each component. Be gentle during this step. These parts are small and delicate. This separation helps you reach all surfaces.
- Soak the blades (optional, but recommended): For very stubborn buildup, you can soak the detached blades. Place them in a small dish of blade cleaner or rubbing alcohol for about 5-10 minutes. This helps to loosen dried hair, oil, and product residue. Do not soak the entire trimmer body, only the metal blades. Soaking makes cleaning easier.
- Scrub the blades thoroughly: After soaking (or directly if not soaking), use your small cleaning brush or a stiff-bristled toothbrush. Scrub both sides of each blade. Focus on the cutting edges and any grooves where hair might get stuck. This physical scrubbing action removes stubborn grime. It helps ensure your trimmer blades are spotless.
- Rinse and dry completely: Rinse the blades under cool running water to remove all cleaner and loosened debris. Make sure no residue remains. Then, meticulously dry each blade piece with a clean, lint-free cloth. Air drying is also an option, but ensure they are completely dry before reassembly. Even a tiny bit of moisture can lead to rust.
- Clean the trimmer housing: While the blades are off, take a cotton swab dipped in rubbing alcohol. Wipe down the area where the blades attach to the trimmer body. Clean around the motor shaft. This removes any hair or oil that might have seeped into these internal spaces.
- Reassemble and lubricate: Carefully reassemble the blades, ensuring they are properly aligned. Attach the blade assembly back onto the trimmer body. Apply 2-3 drops of Babyliss Pro oil or clipper oil to the front and sides of the blades. Turn the trimmer on for 10-15 seconds to distribute the oil. Proper reassembly and lubrication are vital for optimal performance and protection against wear. This deep cleaning process will rejuvenate your Babyliss Pro Trimmer.
Sanitizing and Lubricating Your Babyliss Pro Trimmer
Sanitizing and lubricating are crucial steps after cleaning your Babyliss Pro Trimmer. These steps ensure your trimmer is not only clean but also hygienic and runs smoothly. Skipping them can lead to rust, poor performance, and even skin irritation. I always make sure these steps are done right.
Sanitizing for Hygiene
Sanitization is vital, especially if you use your trimmer on multiple people. It kills bacteria, viruses, and fungi that might remain after cleaning. Here’s how to sanitize:
- Choose the right sanitizer: After cleaning and drying the blades, apply a specialized clipper disinfectant spray. Many brands offer sprays that clean, lubricate, and sanitize all in one. If you use rubbing alcohol, ensure it is at least 70% isopropyl alcohol. It effectively kills most germs.
- Apply generously: Spray the disinfectant directly onto the blades. Make sure to coat all cutting surfaces. If using rubbing alcohol, you can dampen a cotton pad or cloth and wipe down the blades thoroughly.
- Allow to air dry: Let the sanitizer air dry completely. Do not wipe it off immediately. The “dwell time” (time the sanitizer stays wet on the surface) is necessary for it to effectively kill germs. This usually takes a few minutes. Some products might require rinsing after sanitizing, so always read the product instructions. Proper sanitization helps prevent cross-contamination.
Lubricating for Performance and Longevity
Lubrication is just as important as cleaning for your Babyliss Pro Trimmer’s performance. It reduces friction between the moving blades. This prevents overheating, extends blade life, and ensures smooth, quiet operation. Think of it like oiling any other precision tool; it’s essential. Just as you might need to lubricate other tools for maintenance, ensuring your hedge trimmer blades are properly oiled prevents friction and wear.
- Use proper trimmer oil: Always use oil specifically designed for trimmers or clippers. These oils are light, non-gumming, and formulated for high-speed metal-on-metal contact. Do not use household oils, cooking oils, or WD-40. They can damage the motor or gum up the blades.
- Apply correctly: With the trimmer off, apply 2-3 small drops of oil across the top front edge of the blades. Apply one drop at each corner and one in the middle. You can also apply a drop to each side of the blade where it meets the trimmer housing.
- Distribute the oil: Turn the trimmer on for about 10-15 seconds. Let it run so the oil can spread evenly across the entire blade surface. You might see some excess oil drip off. Wipe this excess away with a clean cloth. This ensures that the blades are fully coated and ready for use.
Regular sanitizing and oiling are not optional. They are critical steps in maintaining your Babyliss Pro Trimmer. They ensure its longevity, safety, and peak performance.
Troubleshooting Common Cleaning Challenges with Babyliss Trimmers
Even with a good cleaning routine, you might encounter some common challenges with your Babyliss Pro Trimmer. Knowing how to troubleshoot these issues can save you time and frustration. I’ve faced a few of these myself, and finding the solutions made a big difference.
Here are some common cleaning-related problems and their fixes:
- Trimmer is pulling or snagging hair: This is a very common issue. It usually means the blades are either dull, dirty, or misaligned.
- Solution: First, perform a thorough deep clean. Make sure all hair and debris are removed from the blades. If the problem continues, re-oil the blades generously. If still no improvement, check the blade alignment. Refer to your Babyliss Pro manual for specific instructions on how to adjust or align your blades. Sometimes, the blades might be worn out and need replacement. Replacing worn parts on your Babyliss Pro is similar to the detailed steps involved in maintaining hedge trimmer blades; precise care extends tool life.
- Blades feel sticky or gummed up: This happens when oil or product residue builds up over time. It can also occur if you used the wrong type of oil.
- Solution: Disassemble the blades and soak them in a strong blade cleaner or rubbing alcohol for 10-15 minutes. Use a stiff brush to scrub off all sticky residue. Rinse thoroughly and dry completely. Re-oil with proper trimmer oil only.
- Trimmer makes unusual noise or vibrates excessively: This often indicates friction or a loose component.
- Solution: Clean and oil the blades well. A lack of lubrication can cause excessive noise. Check that the blade assembly is securely attached to the trimmer body. Ensure all screws are tight. If the noise persists, it might indicate a worn motor or an internal issue requiring professional service.
- Rust spots on blades: Rust occurs if blades are not dried properly after cleaning or are stored in a humid environment.
- Solution: For minor rust, try cleaning the spots with a rust remover specifically for metals or a paste made of baking soda and water. Scrub gently with a brush. For severe rust, the blades might be beyond saving and require replacement. Always dry blades completely after washing them. Store your trimmer in a dry place.
- Battery not holding a charge after cleaning: While not directly cleaning-related, sometimes water exposure can damage electronics.
- Solution: Ensure you never submerge the entire trimmer in water. If water accidentally gets into the body, turn off the trimmer immediately. Do not charge it. Let it air dry completely for several days in a dry, warm place. A desiccant pack (like silica gel) can help. If the battery is still faulty, it may need replacement or professional repair.
Addressing these issues promptly keeps your Babyliss Pro Trimmer in top working order. Regular maintenance prevents most of these problems from occurring.
Maintaining Your Babyliss Pro Trimmer Between Cleanings
Beyond the regular cleaning and deep cleaning sessions, proper daily habits and storage are key to the long-term health of your Babyliss Pro Trimmer. These small efforts ensure your trimmer always performs at its best. They help prolong its overall lifespan. I practice these habits daily to keep my own grooming tools in peak condition.
Here are important maintenance tips between full cleanings:
- Brush off hair after every use: This is the simplest and most effective daily habit. Immediately after you finish using your Babyliss Pro Trimmer, grab the small brush. Quickly sweep away all loose hair from the blades and the area around them. Hair can quickly build up and harden if left. This quick step prevents most major cleaning headaches. It keeps the blades free of obstructions.
- A quick wipe down: After brushing, give the trimmer body a quick wipe with a clean, dry cloth. This removes any skin oils or product residue. It keeps the trimmer looking professional and clean for its next use. It also prevents dirt from accumulating on the casing.
- Oil blades regularly: Even if you don’t do a full wash, apply a few drops of Babyliss Pro oil to your blades every few uses. If you use your trimmer daily, oiling every day is a good practice. This maintains lubrication, reduces friction, and keeps the blades running smoothly. Proper oiling is as important as the cleaning itself. It helps prevent wear on the delicate moving parts.
- Store properly: Where you keep your Babyliss Pro Trimmer matters. Always store it in a clean, dry place. Avoid humid environments like bathrooms, which can promote rust. Keep it in its original case or a dedicated storage pouch. This protects it from dust, accidental drops, and general wear and tear. Proper storage also keeps the blades protected.
- Charge correctly: Follow the manufacturer’s guidelines for charging your trimmer’s battery. Avoid overcharging or completely draining the battery frequently, as this can reduce battery life. Many modern trimmers use lithium-ion batteries that prefer partial charges. A well-maintained battery ensures your trimmer is always ready when you need it.
- Inspect blades periodically: Take a moment to visually inspect your blades for any signs of damage, dullness, or misalignment. Early detection of issues can prevent damage to the motor or poor cutting performance. If blades show signs of wear, consider replacing them to maintain cutting precision.
By incorporating these small maintenance habits into your routine, you will significantly extend the life and performance of your Babyliss Pro Trimmer. These practices contribute to efficient, precise, and hygienic grooming sessions every time.
Frequently Asked Questions About Cleaning Babyliss Pro Trimmers
Q1: How often should I clean my Babyliss Pro Trimmer?
You should perform a basic cleaning, including brushing and oiling, after every single use. A deep clean, involving blade disassembly and thorough washing, is recommended monthly or bi-monthly, depending on how often you use the trimmer. Regular cleaning prevents hair buildup and keeps your trimmer working well.
Q2: Can I wash my Babyliss Pro Trimmer under water?
Most Babyliss Pro Trimmers are not fully waterproof. You should never submerge the entire trimmer under water. You can usually rinse the detached blades under running water after cleaning them with a brush and cleaner. Always refer to your specific model’s manual for its water resistance rating.
Q3: What kind of oil should I use for my Babyliss Pro Trimmer?
Always use specialized clipper oil or trimmer oil for lubrication. These oils are specifically formulated to be light, non-gumming, and suitable for high-speed metal parts. Do not use household oils, cooking oils, or lubricants like WD-40, as they can damage the motor or gum up the blades over time.
Q4: My trimmer blades are pulling hair even after cleaning. What’s wrong?
If your blades are pulling hair, it might be due to several reasons. First, ensure they are thoroughly cleaned and properly oiled. Second, check if the blades are correctly aligned according to your trimmer’s manual. If these steps do not help, your blades might be dull or damaged and require replacement.
Q5: How do I store my Babyliss Pro Trimmer to keep it clean?
Store your Babyliss Pro Trimmer in a clean, dry place away from humidity. Its original case or a dedicated storage pouch is ideal. This protects it from dust, moisture, and accidental damage. Proper storage ensures your freshly cleaned trimmer remains ready for its next use.
Q6: Can I use rubbing alcohol to clean the blades?
Yes, rubbing alcohol (preferably 70% isopropyl alcohol or higher) is an effective cleaner and sanitizer for Babyliss Pro Trimmer blades. It helps break down oil and hair residue and evaporates quickly. Apply it with a cotton swab or spray it directly onto the blades. Always ensure the blades are completely dry afterward.
Conclusion
Mastering how to clean your Babyliss Pro Trimmer is an investment in its longevity and your grooming precision. We have covered every step, from daily brushing to deep cleaning the blades and important lubrication. Maintaining these high-quality tools is simpler than you might think. Regular cleaning prevents common problems like dull blades and motor strain.
By following this guide, you ensure your Babyliss Pro Trimmer delivers consistent, sharp cuts every time. Remember to always use the right tools and products for cleaning and oiling. A clean trimmer is a happy trimmer. This helps you achieve professional results whether you are a barber or grooming at home. Take the time to care for your tools, and they will serve you well for many years to come. Start your cleaning routine today for a better grooming experience!
- Babyliss Pro cleaning
- trimmer maintenance
- hair clipper cleaning
- professional grooming tools
- barber tool care