· Home Maintenance · 16 min read
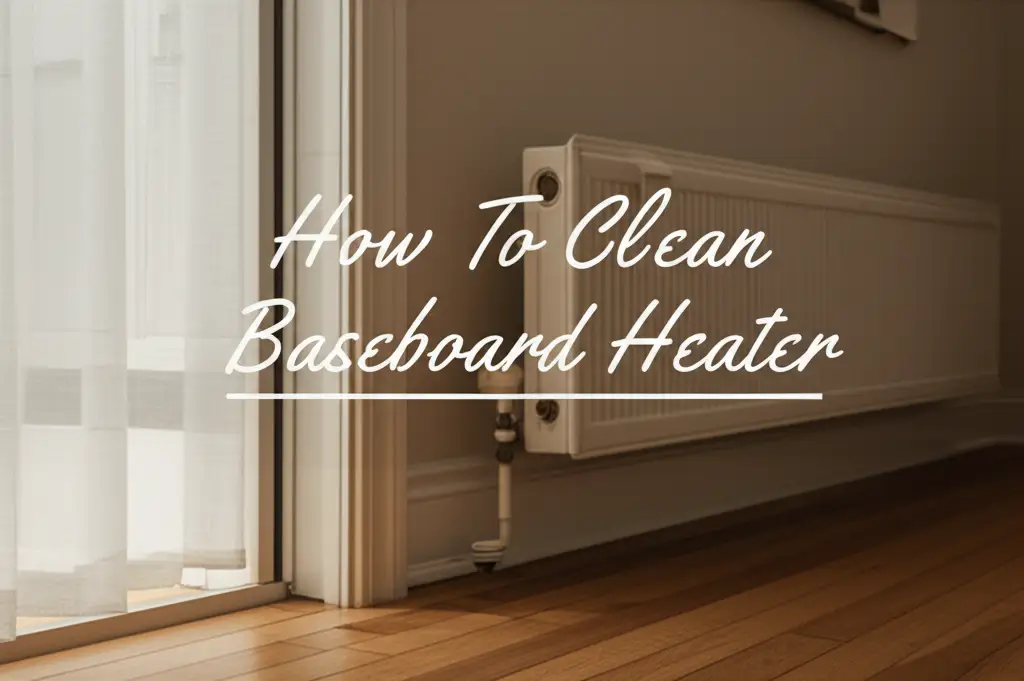
How To Clean Baseboard Heater
Unlock Optimal Heat: How to Clean Baseboard Heater
Do you notice dust gathering around your baseboard heaters? Perhaps your rooms feel cooler than they should, even with the heat on. These are clear signs your baseboard heaters need a good cleaning. Dust and debris collect inside these units over time. This buildup reduces heating efficiency and can affect your indoor air quality. I know how frustrating it is when your home does not feel warm enough during colder months. Cleaning your baseboard heaters is a simple task that offers big benefits. It helps your heating system run better. It also makes your home feel more comfortable. In this article, I will guide you through the process. We will cover the tools you need, safety measures, and step-by-step cleaning methods for both electric and hydronic units. Let’s make your heating system work its best.
Takeaway
- Always turn off power before you clean any baseboard heater.
- Gather tools like a vacuum, brushes, and mild cleaner.
- Remove covers carefully to access inner components.
- Vacuum dust and use a damp cloth for grime.
- Clean fins gently to avoid damage.
- Reassemble covers securely.
- Clean heaters at least once a year, preferably before winter.
How do you clean baseboard heaters?
You clean baseboard heaters by first turning off their power. Then, remove the covers and vacuum loose dust. Use a damp cloth with mild soap or vinegar to wipe away grime from the internal components and exterior. Clean heating fins gently with a soft brush to prevent bending.
Why Cleaning Your Baseboard Heaters Matters
Cleaning your baseboard heaters is not just about appearances. It directly impacts your home’s warmth and your family’s health. Dust and pet hair often settle into the heater fins. These particles block the heat from escaping. This means your heater works harder to warm your room. It uses more energy, which makes your electricity or heating bills go up. A clean heater distributes warmth evenly and efficiently.
Moreover, dirty heaters can lower your indoor air quality. When the heater turns on, it circulates dust and allergens throughout your home. This can be especially bad for people with allergies or asthma. I find that a clean heater significantly improves air freshness. It also reduces airborne irritants. Regular cleaning protects your investment in your heating system. It extends the life of your baseboard heaters. This simple task keeps your home comfortable, healthy, and energy-efficient.
Safety First: Essential Steps Before You Clean
Before you touch any part of your baseboard heater, safety is paramount. Ignoring these steps can lead to serious injury or damage. The first and most important step is to turn off the power. For electric baseboard heaters, locate the circuit breaker that controls the heater. Flip the breaker switch to the “OFF” position. This stops electricity flow to the unit. For hydronic (hot water) baseboard heaters, you do not need to turn off the water supply or furnace. However, ensure the heater is cool to the touch before you begin. You do not want to risk burns from hot water or components.
Always double-check that the power is off. You can use a non-contact voltage tester to confirm there is no electricity. This simple tool gives you peace of mind. Wear gloves to protect your hands from sharp edges or dust. Consider wearing a dust mask to avoid inhaling airborne particles. Good ventilation in the room is also helpful. Open a window if possible. These steps ensure your cleaning process is safe and effective.
Gathering Your Tools: What You Will Need
Having the right tools makes cleaning your baseboard heaters much easier and more effective. You likely already own most of these items. You will need a vacuum cleaner. A vacuum with a brush attachment or crevice tool works best. It helps reach tight spaces and remove loose dust. A soft-bristle brush is also important. This could be an old toothbrush, a paint brush, or a specialized fin brush. It helps dislodge dust from delicate heating fins without bending them.
You will also need some cleaning cloths. Microfiber cloths are excellent for picking up dust and wiping surfaces. A bucket of warm water and a mild dish soap solution will work for general cleaning. For tougher grime or potential mold, white vinegar is a fantastic natural cleaner. I often use a mix of equal parts white vinegar and water. This solution is effective and safe. If you encounter mold, remember that how to clean mold with vinegar is a great resource. You might also want a small flathead screwdriver. This helps remove the end caps or front cover on some heater models. Having all your tools ready before you start saves time and effort.
Step-by-Step Cleaning: Electric Baseboard Heaters
Cleaning electric baseboard heaters involves a few straightforward steps. It is important to work carefully to avoid damaging the delicate components. Follow these instructions to ensure a thorough and safe clean.
Turn Off Power and Prepare
First, find the circuit breaker that controls your baseboard heater. Flip the breaker to the “OFF” position. This is a critical safety step. I cannot stress this enough. Confirm the power is off by touching the heater; it should be cool. You can also use a non-contact voltage tester if you have one. Lay down old towels or a drop cloth on the floor below the heater. This catches any dust or debris that falls during cleaning. It also protects your flooring.
Remove Covers and End Caps
Most baseboard heaters have a front cover and end caps. These usually lift off or snap into place. Some models may have screws. Use a screwdriver if needed. Carefully set the covers aside. Pay attention to how they are attached. This will help you reassemble them correctly later. You now have access to the heating elements and fins.
Vacuum Loose Dust
Use your vacuum cleaner with a brush or crevice attachment. Gently vacuum all visible dust, dirt, and pet hair from the inside of the heater. Pay special attention to the heating fins. These are the thin metal plates where dust accumulates most. Vacuum the fan if your unit has one. Also, vacuum the inside of the removed covers. This removes the bulk of the loose debris.
Clean Heating Elements and Fins
Take your soft-bristle brush. Gently brush away any remaining dust from the heating fins. Brush in the direction of the fins to avoid bending or damaging them. Bent fins restrict airflow and reduce efficiency. If there is stubborn grime, lightly dampen a cloth with a mild soap and water solution or a vinegar solution. Wipe the metal surfaces, but avoid getting the heating element itself wet. If you notice any suspicious growth, remember that how to clean mold off walls offers useful tips that apply to surfaces near the heater. Allow components to dry completely before the next step.
Clean the Exterior and Surrounding Areas
Wipe down the outside of the baseboard heater and the removed covers. Use your damp cloth with mild soap or vinegar solution. Clean the wall area directly above and around the heater too. Dust often collects here. For general wall cleaning tips, how to clean walls with vinegar can be helpful. Ensure all surfaces are dry before reassembly. This makes your whole heater look much cleaner.
Reassemble and Restore Power
Once all parts are dry and clean, carefully reattach the front cover and end caps. Make sure they snap or screw back into place securely. Return to your circuit breaker panel. Flip the breaker switch back to the “ON” position. Your electric baseboard heater is now clean and ready to provide efficient warmth.
Step-by-Step Cleaning: Hydronic Baseboard Heaters
Hydronic baseboard heaters use hot water flowing through pipes to produce heat. The cleaning process is similar to electric units but with a few key differences. Safety remains the top priority.
Ensure Heater is Cool and Prepare
Unlike electric heaters, you do not need to turn off the power at the breaker for hydronic units. The main thing is to ensure the heater is completely cool. This prevents burns from hot water pipes. Give it plenty of time to cool down before you start. Place old towels or a drop cloth on the floor beneath the heater. This protects your flooring from dust and any cleaning solutions.
Remove Covers and End Caps
Carefully remove the front cover and end caps. Most hydronic covers simply lift off or unclip. Some might have screws. If screws are present, use the appropriate screwdriver. Keep track of how the parts fit together. This makes reassembly straightforward. Set the covers aside in a safe spot.
Vacuum Loose Dust and Debris
Using your vacuum cleaner with a brush or crevice attachment, thoroughly vacuum the inside of the heater. Focus on the heating element and the fins. These are the copper pipes with aluminum fins. Dust, pet hair, and debris often get trapped here. Also, vacuum the inside surfaces of the removed covers. This initial vacuuming removes the bulk of the buildup.
Clean Heating Fins and Pipes
Use a soft-bristle brush to gently dislodge any remaining dust from the heating fins. Brush in the direction of the fins to avoid bending them. Bent fins can restrict airflow and reduce heating efficiency. Wipe the copper pipes and aluminum fins with a damp cloth. You can use a mild soap and water solution. For tougher grime or mineral deposits, a solution of white vinegar and water can be very effective. This is similar to how you might clean other water-carrying systems. If you deal with sediment in your hot water system, learning how to clean sediment from water heater provides useful background. Ensure no excessive water pools inside the unit.
Address Stubborn Stains and Mold (If Present)
Sometimes, you might find stubborn stains or even mold. This happens if there is high humidity or a slight leak. For stains, use a slightly stronger concentration of your mild soap or vinegar solution. Apply it with a cloth. Rub gently until the stain lifts. If you spot mold, treat it seriously. Mold can affect air quality. You can use a solution of white vinegar and water. Spray it directly onto the moldy area. Let it sit for a few minutes. Then scrub with a brush. Always ensure the area dries completely. For general cleaning with vinegar, consider tips from how to clean shower with vinegar. This link gives good general advice on using vinegar as a cleaning agent.
Clean the Exterior and Reassemble
Wipe down the exterior of the baseboard heater and the removed covers. Use your damp cloth with mild cleaner. Ensure all components are dry before reassembling. Carefully reattach the front cover and end caps. Make sure they fit securely. Your hydronic baseboard heater is now ready to radiate warmth efficiently.
Dealing with Stubborn Dirt and Stains
Sometimes, regular cleaning is not enough for older or neglected baseboard heaters. You might find stubborn grime, rust spots, or even paint splatters. These issues require a bit more attention. For heavily caked-on dust or grease, a degreaser can be useful. Choose a non-abrasive, non-flammable cleaner designed for household use. Always test it on an inconspicuous area first. Apply it to a cloth, not directly to the heater, and wipe the affected area.
Rust spots can appear on older metal heaters. You can try a rust remover designed for household metal surfaces. Follow the product instructions carefully. Ensure good ventilation when using chemical cleaners. If you have paint splatters, a plastic scraper or a gentle solvent like mineral spirits can help. Be very careful not to scratch the finish or damage the heating elements. Always wipe down with clean water afterward to remove any chemical residue. This helps maintain the heater’s appearance and function.
Maintaining Your Baseboard Heaters: Frequency and Tips
Regular maintenance keeps your baseboard heaters working well for years. It also saves you money on energy bills. I recommend cleaning your baseboard heaters at least once a year. The best time is before the heating season starts, typically in the fall. This removes all the dust that has accumulated over the summer months. If you have pets or a lot of foot traffic, you might need to clean them more often. I usually do a light vacuuming every few months.
Here are some additional tips for ongoing maintenance:
- Keep Clear Space: Do not place furniture, curtains, or anything else directly in front of or on top of baseboard heaters. This blocks heat flow. It can also be a fire hazard. Maintain at least 6-12 inches of clear space.
- Check for Leaks (Hydronic): Periodically inspect hydronic baseboard heaters for any signs of water leaks. A small drip can lead to rust or mold. Address leaks quickly.
- Listen for Unusual Noises: Pay attention to any new noises coming from your heaters. Clicking, banging, or grinding could indicate a problem.
- Inspect Wiring (Electric): Visually check electric heaters for frayed wires or damaged plugs if accessible and safe to do so with power off. If you see damage, call a qualified electrician.
- Don’t Paint: Never paint your baseboard heater fins. Paint can reduce heating efficiency and create odors when heated. If the exterior needs refreshing, use high-temperature paint specifically designed for radiators.
- Consider Filters: Some newer baseboard heaters might have removable filters. Check your heater’s manual. Clean or replace these filters as recommended. This further improves air quality and efficiency.
- Professional Check-ups: For hydronic systems, consider an annual inspection by an HVAC professional. They can check the boiler or furnace. They can also ensure the system runs at peak performance. This is similar to how you might maintain your water heater. For example, understanding how to clean a gas heater burners or how hot water systems work is part of a complete maintenance approach for hydronic heat. This overall care extends the life of your entire heating system.
Troubleshooting Common Baseboard Heater Issues
Even with regular cleaning, you might encounter some common issues with your baseboard heaters. Knowing how to troubleshoot can save you time and money.
Heater Not Producing Enough Heat
If your baseboard heater is not as warm as it should be, check for blockages. Furniture or drapes often sit too close. This blocks the warm air from circulating. Make sure there is ample space around the heater. Re-check if the heater is clean inside. Dust buildup on the fins is a major cause of reduced heat output. If it is a hydronic system, check your furnace or boiler settings. Ensure the thermostat is set correctly.
Strange Odors When Heater Turns On
A burning smell when your heater first turns on is usually dust burning off the heating elements. This is very common, especially at the start of the heating season. This smell should disappear after a short while. If the smell persists, or if it smells like burning plastic or electrical wiring, turn the heater off immediately. Unplug electric units or turn off the breaker. Call a professional. This could indicate a serious electrical problem.
Clicking or Popping Noises
Baseboard heaters often make clicking or popping noises. This is usually due to the metal expanding and contracting as it heats up and cools down. This is normal. It is not usually a cause for concern. If the noises are unusually loud or constant, it could signal a loose component. In hydronic systems, air in the pipes can cause gurgling or knocking sounds. Bleeding the air from the system can often resolve this.
Heater Not Turning On At All
First, check the thermostat. Ensure it is set to a temperature higher than the room temperature. For electric heaters, check the circuit breaker. A tripped breaker is a common culprit. Flip it completely off, then back on. If the breaker trips again, there is likely an electrical issue. Call an electrician. For hydronic heaters, check your boiler or furnace. Ensure it is operating correctly and the pilot light is lit if it’s an older model. Sometimes, sediment buildup in the hot water system can affect performance. Learning about how to clean hot water heater with vinegar might give you insights into related system issues.
FAQ Section
How often should I clean my baseboard heaters?
You should clean your baseboard heaters at least once a year. The best time to clean them is before the heating season begins in the fall. If you have pets or high dust levels, you might need to clean them every few months. Regular cleaning keeps them working well.
Can I use water on electric baseboard heaters?
You should not use water directly on the electric heating elements. Always turn off the power at the circuit breaker first. Use a damp cloth to wipe metal surfaces and covers. Ensure everything is completely dry before restoring power. This prevents electrical hazards.
What if my baseboard heater smells when I turn it on?
A burning smell is common when you first turn on baseboard heaters after a long period. This is typically dust burning off the heating elements. The smell should go away quickly. If the smell persists, or smells like burning plastic, turn off the heater and call a professional.
Is professional cleaning necessary for baseboard heaters?
For most homes, DIY cleaning of baseboard heaters is sufficient. It is a simple task anyone can do. However, if you notice persistent issues, strange noises, or if you are uncomfortable doing the cleaning, a professional can help. They can also address complex problems.
How do I clean inside baseboard heaters?
To clean inside, first turn off the power. Remove the front cover and end caps. Use a vacuum cleaner with a brush attachment to remove loose dust. Then use a soft-bristle brush to gently clean the heating fins. A damp cloth can wipe down internal surfaces.
What are the benefits of cleaning baseboard heaters?
Cleaning baseboard heaters offers many benefits. It improves heating efficiency, which can lower your energy bills. It enhances indoor air quality by removing dust and allergens. Regular cleaning also extends the lifespan of your heating system. It creates a more comfortable home environment.
Conclusion
Cleaning your baseboard heaters is a simple task that yields significant benefits. By regularly cleaning these units, you ensure your home stays warm and comfortable. You also improve your indoor air quality by reducing dust and allergens. Remember, proper maintenance of your heating system is key to its longevity and efficiency. I hope this guide helps you feel confident in tackling this chore.
You now have all the information you need to effectively clean baseboard heaters. You can prevent unnecessary energy costs and breathe cleaner air. Make this part of your annual home maintenance routine. Your baseboard heaters will thank you by providing reliable, efficient warmth for years to come. Start cleaning today for a healthier, more efficient home!
- baseboard heater cleaning
- home heating
- indoor air quality
- heater maintenance
- dust removal