· Beauty, Cleaning Tips · 20 min read
How To Clean Beauty Blender Powder Puff
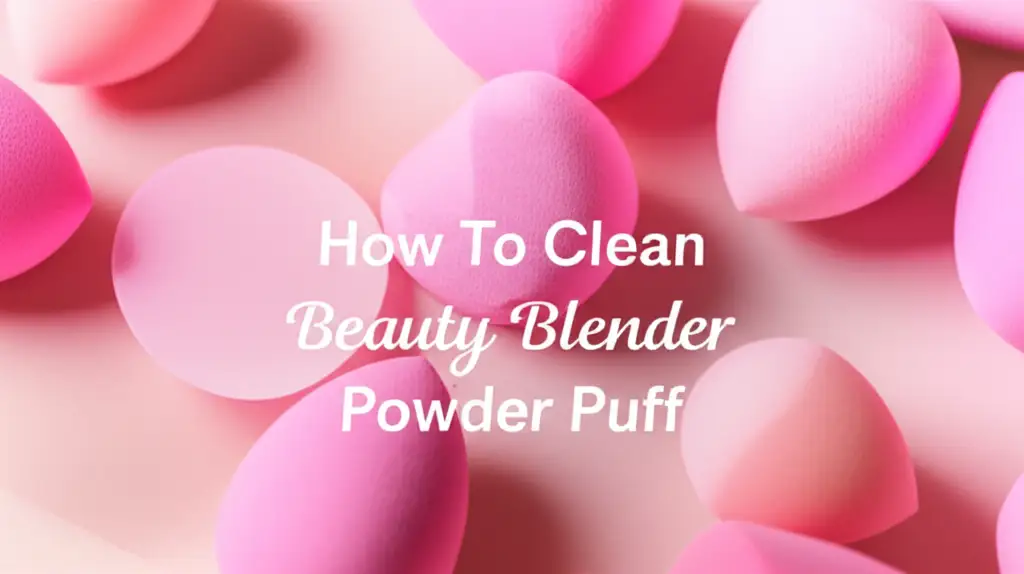
Achieve Flawless Skin: How To Clean Beauty Blender Powder Puff
Do you ever wonder why your skin breaks out, even with a consistent skincare routine? Dirty makeup tools are often the hidden culprit. Your beauty blender and powder puff touch your face daily. They pick up makeup, oil, dead skin cells, and bacteria. Over time, these tools become a breeding ground for germs. Using dirty tools can lead to breakouts, skin irritation, and even infections. This also affects your makeup application. Products do not blend smoothly when applied with a soiled sponge or puff.
Cleaning your beauty blender and powder puff is a simple step that yields big results. It protects your skin and makes your makeup look better. It also extends the life of your valuable beauty tools. I will share easy, effective methods to clean beauty blender powder puff properly. You will learn about essential cleaning products. We will cover the best drying techniques and common mistakes to avoid. Get ready to transform your makeup routine with clean tools!
Takeaway:
- Regularly clean your beauty blender and powder puff to prevent skin issues.
- Use gentle cleansers to preserve the integrity of your tools.
- Always dry tools completely to prevent mold and bacterial growth.
- Replace tools when they show signs of wear or cannot be cleaned.
To effectively clean a beauty blender or powder puff, wash it gently with a mild cleanser like baby shampoo or a dedicated makeup sponge soap. Rinse under running water until the water runs clear. Squeeze out excess water and allow the tool to air dry completely in a well-ventilated area.
Why Cleaning Your Makeup Tools Matters for Skin Health
Cleaning your beauty tools is not just a suggestion; it is a necessity. Think about what your beauty blender and powder puff absorb daily. They soak up foundation, concealer, setting powder, and blush. They also collect natural oils from your skin. Dead skin cells and sweat become trapped in their pores. This mixture creates an ideal environment for bacteria to grow. These bacteria then transfer back onto your face each time you use the tool. This cycle can lead to many skin problems.
Breakouts are a common issue from dirty tools. The bacteria clog pores and cause acne. Skin irritation and redness can also occur. Some people experience allergic reactions to the buildup of old product. In severe cases, infections can develop. Keeping tools clean supports clear, healthy skin. It reduces the risk of these common dermatological issues. You invest in good skincare and makeup; do not let dirty tools undo that effort.
Beyond skin health, clean tools perform better. A clean beauty blender absorbs less product. It applies makeup smoothly and evenly. A dirty blender can leave streaks or blotches. It wastes product by absorbing too much. A clean powder puff distributes powder without caking. It ensures a flawless finish. Dirty puffs can apply unevenly, making makeup look heavy. Regularly washing your tools maintains their original texture and elasticity. This extends their useful life. You save money by not replacing them as often. Clean tools are a cornerstone of effective and hygienic beauty.
Health Risks of Dirty Tools
Using dirty makeup tools carries significant health risks. Bacteria like Staphylococcus and Streptococcus can thrive on unwashed sponges. These can cause skin infections. Fungal infections, like ringworm, are also possible. Eyes are especially vulnerable. Pink eye or other eye infections can spread from dirty eye makeup applicators. Sharing dirty tools is even riskier. It facilitates the spread of bacteria and viruses between individuals. Keeping your tools clean protects your personal health. It also safeguards others if you share tools.
Extending Tool Lifespan
Proper cleaning helps your beauty tools last longer. Harsh chemicals and vigorous scrubbing can damage the delicate material of blenders and puffs. Using gentle cleansers and proper techniques prevents breakdown. The material stays soft and bouncy. This ensures tools perform as intended for a longer time. Air drying correctly also prevents material degradation. It stops mold growth which destroys tool integrity. A well-cared-for beauty blender or powder puff provides many months of effective use. This means less frequent purchasing and less waste.
Gathering Your Cleaning Essentials
Before you start cleaning, gather all necessary items. Having everything ready makes the process smooth and efficient. You do not need many specialized products. Most items are readily available. Choose gentle cleansers to protect your tools. Harsh chemicals can break down the delicate material of beauty blenders and powder puffs. They might also leave residues that irritate your skin. Mild solutions work best for maintaining tool integrity and hygiene.
Here are the essential supplies you will need:
- Mild Cleanser:
- Baby Shampoo: This is a popular choice. It is gentle enough for babies, so it is perfect for delicate sponges and puffs. It effectively breaks down makeup and oils.
- Dedicated Makeup Brush/Sponge Cleanser: Many beauty brands offer specific cleansers. These are formulated to remove makeup from tools. They often contain conditioning agents.
- Gentle Bar Soap: A mild, fragrance-free bar soap can also work. Opt for one with moisturizing properties.
- A Bowl or Cup: You will need this for soaking your tools.
- Lukewarm Water: Hot water can damage the material of sponges. Cold water may not break down makeup effectively. Lukewarm water is ideal.
- Clean Towel or Paper Towels: For blotting excess water.
- Drying Rack or Mesh Bag (Optional): Helpful for air drying. A clean, open space works too.
Avoid harsh dish soaps or strong detergents. These can strip the material of its softness. They can also leave irritating residues. A simple baby shampoo is often the most accessible and effective choice. It balances cleaning power with gentleness. If you prefer natural cleaning solutions, some people use a very diluted mix of vinegar and baking soda. However, for cosmetic tools, gentleness is key, and traditional soaps are often safer for the material. For tips on using natural cleaners for other items, you might find information on how to clean with vinegar and baking soda useful, though direct application here should be cautious.
Step-by-Step Guide to Cleaning Your Beauty Blender
Cleaning your beauty blender is simple. Regular cleaning prevents bacteria buildup. It keeps your sponge performing at its best. This method works for all types of makeup sponges. It ensures a deep clean without damaging the material. I find that a consistent routine makes cleaning less of a chore.
Here is how to effectively clean your beauty blender:
- Wet the Blender: Hold your beauty blender under lukewarm running water. Let it soak up water until it expands to its full size. It should feel squishy and saturated.
- Apply Cleanser: Squeeze a generous amount of your chosen mild cleanser directly onto the wet beauty blender. Focus on areas with visible makeup.
- Lather and Squeeze: Gently work the cleanser into the sponge. Squeeze and release the blender repeatedly. This helps the soap penetrate. You will see makeup and dirt leach out with the dirty water. Avoid twisting or pulling. This can tear the delicate material.
- Rinse Thoroughly: Continue squeezing and rinsing the blender under lukewarm running water. Keep doing this until the water runs completely clear. No suds or makeup residue should remain. This step is crucial. Any leftover soap can irritate your skin or damage the blender over time.
- Squeeze Out Excess Water: Once rinsed, gently squeeze out as much water as possible. Use a clean towel or paper towel to blot the blender. This speeds up drying time.
Gentle Daily Clean
For daily maintenance, a quick wash is enough. After each use, rinse your beauty blender under running water. Apply a small amount of liquid soap. Gently rub and squeeze until makeup is gone. Rinse thoroughly. Squeeze out water and let it air dry. This prevents daily buildup. It keeps your blender fresh for the next use. This quick clean helps prolong the time between deep cleaning sessions. It also helps avoid common issues like bacterial growth.
Deep Cleaning Method
Deep cleaning is essential once a week, or more often if you use your blender daily. For stubborn stains, a short soak can help. Fill a small bowl with lukewarm water and a bit of cleanser. Submerge your blender and let it soak for 10-15 minutes. Then follow the steps above. This helps break down tougher, caked-on makeup. It ensures a more thorough cleanse. Some users try putting their blenders in a mesh laundry bag and running them through a gentle machine cycle, similar to how one might machine wash delicate items. For delicate items like some shoes, people sometimes use a mesh bag for cleaning. You can learn more about how to clean shoes in the washer for similar concepts of delicate washing. However, hand washing is generally safer for beauty blenders.
The Best Way to Clean Your Powder Puff
Powder puffs are often overlooked in the cleaning routine. However, they collect just as much product, oil, and dead skin as sponges. Cleaning your powder puff regularly is vital for hygienic makeup application. The method varies slightly depending on the puff material, but the core principles remain the same: gentleness and thoroughness. Whether it is velvet, cotton, or microfiber, proper care extends its life and keeps your skin happy.
Here’s a detailed guide on how to clean your powder puff:
- Remove Excess Powder: Before wetting, gently tap the powder puff against a hard surface. This loosens and removes any loose powder. You can also use a soft brush to sweep off visible residue.
- Wet the Puff: Hold the powder puff under lukewarm running water. Let it soak up water. Ensure it is fully saturated. Lukewarm water is best to prevent damage to the puff’s material.
- Apply Cleanser: Apply a small amount of mild cleanser directly onto the puff. Focus on the most soiled areas.
- Gently Work the Cleanser: Gently rub the puff against itself or against the palm of your hand. Create a lather. You will see makeup and dirt coming off into the water. For velvet puffs, be extra gentle to avoid damaging the fibers.
- Rinse Thoroughly: Rinse the powder puff under lukewarm running water. Continue to gently squeeze the puff until the water runs clear. No suds or makeup residue should be present. This ensures the puff is completely clean and ready for drying.
- Squeeze Out Water: Gently squeeze out as much excess water as you can. Avoid twisting or wringing vigorously. This can stretch or damage the puff’s shape and material.
Spot Cleaning for Puffs
For minor touch-ups or light use, spot cleaning can suffice. Dampen a small section of the puff with a bit of cleanser. Gently rub the soiled area. Rinse just that spot. This is good for daily upkeep between full washes. It helps keep the puff clean for everyday use. Spot cleaning is quick and efficient.
Full Wash for Puffs
A full wash is recommended weekly for regular users. Some powder puffs, especially those made from durable fabrics like cotton or microfiber, might be machine washable on a delicate cycle in a mesh laundry bag. However, hand washing is generally the safest method. For more resilient puffs, consider machine washing as an option, similar to how certain delicate clothing items or accessories might be machine washed. Be sure to check the care instructions for your specific puff. For instances where you might clean items that go inside something else, like a pair of shoes, the focus is on reaching every part. You can think of it like cleaning how to clean the inside of shoes, ensuring all areas of the puff are addressed.
Drying Your Beauty Tools Properly
Drying your beauty tools correctly is as important as cleaning them. Improper drying can lead to several problems. It can cause mold and mildew growth. This makes your tools unsanitary. It also breaks down the material of your beauty blender and powder puff. Mold can transfer to your skin and cause health issues. A well-dried tool stays hygienic. It also retains its original shape and texture. This ensures it performs well for a longer time. Never store damp tools.
Here are the best practices for drying your beauty blender and powder puff:
- Squeeze Out Excess Water: After rinsing, gently squeeze out as much water as possible from both your beauty blender and powder puff. Use a clean towel or paper towel to blot them. This removes surface moisture. It significantly speeds up the drying process.
- Reshape: Gently reshape your beauty blender or powder puff if needed. This helps them dry in their original form. It prevents them from losing their ergonomic shape.
- Air Dry in a Well-Ventilated Area: This is the most crucial step. Place your tools in a spot with good air circulation.
- On a Clean Surface: A clean, dry towel placed on a countertop is a good option.
- Drying Rack: There are specialized drying racks for beauty sponges. These hold the tools in a way that allows air to circulate all around.
- Open Air: Avoid enclosed spaces like drawers or makeup bags. These trap moisture. Trapped moisture promotes mold growth.
- Avoid Direct Heat: Never use a hairdryer, direct sunlight, or a radiator to speed up drying. High heat can damage the material of both beauty blenders and powder puffs. It can make them crack, shrink, or lose their elasticity.
- Allow Complete Drying: Ensure your tools are 100% dry before storing them or using them again. This might take 12 to 24 hours, depending on humidity and tool size. Gently squeeze them to check for any dampness inside.
Air Drying Techniques
For beauty blenders, place them on their side on a clean paper towel or a dedicated drying stand. This allows all surfaces to breathe. For powder puffs, lay them flat. Some puffs have ribbons; hang them by the ribbon if possible for better airflow. Proper air circulation is the key to preventing problems. Even a little dampness can encourage mold. Mold can appear quickly in damp environments. If you ever deal with mold in other household areas, understanding prevention is key, like learning about how to clean black mold off wood. The same principles of removing moisture apply here.
What to Avoid
- Do not store damp tools: This is the biggest mistake. It is a guaranteed way to grow mold and bacteria.
- Do not use heat to dry: This damages the material.
- Do not leave them in direct sunlight for prolonged periods: While some sun can help, too much can degrade materials.
- Do not use fabric softeners or harsh chemicals: These can leave residues that are difficult to rinse out. They can also damage the tool’s structure.
Proper drying is the final step in ensuring your beauty tools are hygienic and long-lasting. It protects your skin and your investment.
How Often Should You Clean Your Beauty Tools?
The frequency of cleaning your beauty blender and powder puff directly impacts your skin health and makeup application. Using dirty tools, even for one day, can transfer bacteria. A consistent cleaning schedule prevents buildup. It keeps your tools performing optimally. I find that a routine approach makes cleaning less of a burden.
Here are general guidelines for how often you should clean your beauty tools:
Daily Maintenance
For your beauty blender, daily cleaning is highly recommended. After each use, give it a quick wash. You do not need a full deep clean every time. A quick rinse with a mild soap helps remove surface makeup. This prevents product from drying and caking deep within the sponge. It significantly reduces bacteria buildup between deep cleans. Think of it as rinsing your toothbrush after each use. For powder puffs, if used daily, a quick tap to remove excess powder and a light wipe down with a damp cloth might suffice.
Weekly Deep Clean
Both your beauty blender and powder puff need a deep clean at least once a week. This is especially true if you use them daily. A deep clean involves a thorough wash until the water runs clear. It ensures all product, oils, and bacteria are removed. If you use your tools less frequently, you might extend this to every two weeks. However, weekly deep cleaning is a good habit. It maintains peak hygiene and performance. Consider how often you wash your clothes or dishes; makeup tools need similar attention.
When to Replace Your Tools
Even with regular cleaning, beauty tools do not last forever. Knowing when to replace them is crucial for hygiene and performance.
- Beauty Blender: Replace your beauty blender every three to six months. Signs of needing replacement include:
- Tears or rips in the material.
- Permanent staining that does not come out with cleaning.
- Loss of original bounce or softness.
- A persistent odor, even after cleaning.
- Powder Puff: Replace powder puffs every one to three months. This depends on material and frequency of use. Signs include:
- Flattened or matted texture.
- Tears or holes.
- Inability to fluff up after washing.
- Persistent discoloration or smell.
Always trust your judgment. If a tool looks or smells off, it is time to replace it. Investing in fresh tools protects your skin and ensures flawless makeup application. Consistency in cleaning and timely replacement are key elements of a healthy beauty routine.
Common Mistakes to Avoid When Cleaning
Cleaning your beauty blender and powder puff seems straightforward. However, common mistakes can damage your tools. These mistakes also leave them less clean than you think. Avoiding these pitfalls ensures your tools last longer. It also guarantees they remain hygienic for your skin. I have learned these lessons over time.
Here are critical mistakes to avoid:
- Using Harsh Soaps or Detergents:
- Mistake: Using dish soap, laundry detergent, or strong chemical cleaners.
- Why it’s wrong: These products are too aggressive for delicate sponges and puffs. They can break down the material. This leads to tears, loss of softness, and a reduced lifespan. Harsh chemicals can also leave residues that irritate your skin.
- Solution: Stick to mild baby shampoo, dedicated makeup brush cleansers, or gentle bar soap.
- Twisting or Wringing Vigorously:
- Mistake: Twisting, pulling, or wringing your beauty blender or powder puff aggressively.
- Why it’s wrong: This can tear the sponge or distort the puff’s shape. Beauty blenders are delicate when wet.
- Solution: Gently squeeze and release the tools. Work the cleanser in with light pressure.
- Using Hot Water:
- Mistake: Washing with very hot water.
- Why it’s wrong: Hot water can degrade the material of sponges and puffs. It can cause them to shrink or lose elasticity.
- Solution: Always use lukewarm water. It is effective enough to break down makeup without damaging the tool.
- Improper Drying Techniques:
- Mistake: Storing tools while damp, placing them in enclosed spaces, or using heat to dry them.
- Why it’s wrong: Dampness breeds mold and bacteria. Enclosed spaces prevent air circulation, prolonging drying. Heat damages the material.
- Solution: Always air dry in a well-ventilated area. Ensure tools are completely dry before storage. Never use a hairdryer or direct sunlight for too long. Improper drying can lead to mold, which is a problem you want to prevent, just like you would clean mold from other items, as seen in tips for how to clean mold from washing machine.
- Not Rinsing Thoroughly Enough:
- Mistake: Leaving soap or makeup residue in the tools.
- Why it’s wrong: Leftover soap can irritate your skin. It also attracts more dirt and can make the tool feel sticky. Leftover makeup can still harbor bacteria.
- Solution: Rinse under running water until the water runs completely clear and no suds remain. Squeeze repeatedly during rinsing.
- Infrequent Cleaning:
- Mistake: Waiting too long between cleanings.
- Why it’s wrong: Allows excessive buildup of product, oil, dead skin, and bacteria. This leads to breakouts and shorter tool life.
- Solution: Implement a daily quick clean and a weekly deep clean for frequently used tools.
By avoiding these common mistakes, you ensure your beauty blender and powder puff stay clean, functional, and safe for your skin. This simple care extends their life and keeps your makeup application flawless.
Frequently Asked Questions About Cleaning Beauty Tools
Here are some common questions people ask about cleaning their beauty blenders and powder puffs. These answers provide quick, helpful guidance for maintaining your makeup tools.
Can I use dish soap to clean my beauty blender or powder puff?
No, I do not recommend using dish soap. Dish soap is often too harsh for the delicate materials of beauty blenders and powder puffs. It can strip the oils that keep them soft and bouncy. This can cause them to break down faster or lose their original texture. Stick to mild cleansers like baby shampoo or specific makeup brush/sponge cleansers for better results.
How do I remove stubborn makeup stains from my beauty blender?
For stubborn stains, try a slightly longer soak. Submerge your beauty blender in a bowl of lukewarm water with some mild cleanser for 10-15 minutes. Then, gently work the cleanser into the stained area with your fingers. Rinse repeatedly. Sometimes, a tiny bit of olive oil or coconut oil can help break down oil-based makeup before washing, but ensure you rinse it out completely afterward.
Can I machine wash my powder puff or beauty blender?
Most beauty blenders should not go in a washing machine, as the agitation can damage their structure. Some powder puffs, especially those made of more durable materials like cotton or microfiber, might tolerate a delicate machine wash cycle inside a mesh laundry bag. Always check the manufacturer’s instructions. Hand washing is generally the safest method for both.
How often should I replace my beauty blender and powder puff?
You should replace your beauty blender every 3 to 6 months. Powder puffs generally last 1 to 3 months, depending on use and material. Replace them sooner if they show signs of damage like tearing, loss of elasticity, permanent discoloration, or develop a persistent odor that won’t wash away. Regular replacement supports skin health and ensures effective makeup application.
Why does my beauty blender still feel sticky after washing?
If your beauty blender feels sticky, it likely means there is still product or soap residue trapped inside. This often happens from not rinsing thoroughly enough. Re-wash your blender with a mild cleanser. Pay extra attention to the rinsing step. Squeeze and rinse repeatedly under running water until the water runs completely clear and the sponge feels clean, not tacky.
Is baby shampoo effective for cleaning makeup tools?
Yes, baby shampoo is highly effective for cleaning beauty blenders and powder puffs. It is formulated to be gentle, making it perfect for delicate materials. It effectively breaks down makeup, oils, and dirt without stripping the tool’s integrity. It is also widely available and affordable, making it a great choice for regular cleaning.
Conclusion
Taking care of your beauty tools is a small step with big benefits for your skin and your makeup routine. We have covered the essential knowledge to properly clean beauty blender powder puff tools. Regular cleaning prevents bacteria growth. It keeps your skin clear and healthy. It also ensures your makeup applies smoothly and flawlessly every time. A clean tool absorbs less product, making your expensive cosmetics last longer.
Remember to gather the right gentle cleansers, like baby shampoo. Follow the step-by-step guides for both beauty blenders and powder puffs. Always prioritize thorough rinsing and proper air drying. These steps are crucial to prevent mold and extend the life of your tools. Avoid common mistakes like using harsh soaps or applying heat during drying. Make a habit of daily light cleaning and weekly deep cleaning. Replace your tools when they show signs of wear. By integrating these simple habits into your beauty regimen, you invest in healthier skin and better makeup. Keep your tools spotless; your skin will thank you! Start your cleaning routine today for a healthier, more beautiful you.
- beauty blender
- powder puff
- makeup tools
- cleaning
- hygiene
- skincare
- deep clean
- beauty tips
- cosmetic care

