· Sustainable Living · 18 min read
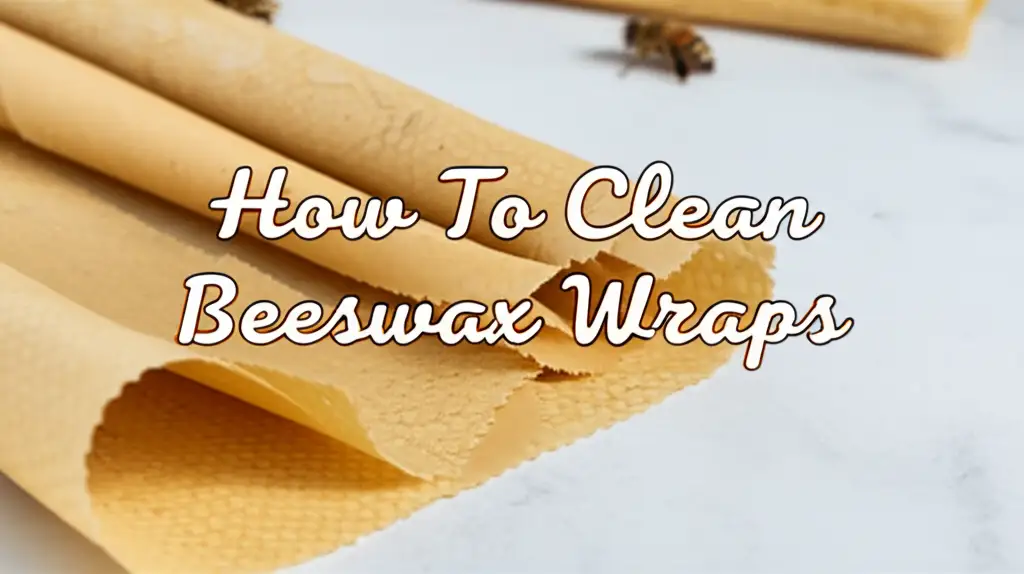
How To Clean Beeswax Wraps
Cleaning Beeswax Wraps: Simple Care for Long Life
Beeswax wraps offer a wonderful, sustainable alternative to plastic wrap. These reusable food covers keep your food fresh, reducing waste in your kitchen. Many people adopt them for their eco-friendly benefits. However, like any reusable item, beeswax wraps need proper cleaning. Understanding how to clean beeswax wraps ensures they last a long time. It also keeps them hygienic for all your food storage needs.
I will guide you through simple, effective methods to wash your beeswax wraps. This article covers the right tools and techniques. You will learn about drying and storing them properly. We will also discuss common mistakes to avoid. My goal is to help you keep your wraps fresh and functional for years.
Takeaway
- Always use cool water for washing beeswax wraps.
- Apply a gentle, mild soap only when necessary.
- Handwash wraps; never use hot water, dishwashers, or microwaves.
- Air dry wraps completely before storing them.
- Store wraps flat or rolled in a cool, dry place.
Beeswax wraps need simple handwashing with cool water and mild soap. Gently scrub to remove food bits. Rinse thoroughly with cool water. Air dry them completely to keep their natural coating intact and extend their useful life. This simple method keeps them fresh and ready for reuse.
Understanding Your Beeswax Wraps: A Gentle Approach to Care
Beeswax wraps are natural products. They typically consist of cotton fabric infused with beeswax, jojoba oil, and tree resin. These ingredients create a pliable, slightly sticky wrap. This wrap molds around food or dishes, forming a seal. Beeswax has natural antibacterial properties. Jojoba oil keeps the wrap flexible. Tree resin helps it adhere.
The unique composition makes beeswax wraps a great choice for food preservation. They let food breathe, which helps produce stay fresh longer. However, their natural coating is sensitive to heat. High temperatures melt the wax mixture. This can ruin the wrap’s effectiveness and appearance. This sensitivity means you must use a gentle cleaning approach. Understanding these basic facts helps you care for your wraps properly. It ensures you get the most out of them.
Their delicate nature sets them apart from conventional cleaning tasks. For example, when you clean a stubborn mark off stains on wood, you might use more abrasive methods. Beeswax wraps require the opposite. They need a soft touch. Harsh scrubbing or hot water will damage the wax coating. This damage makes the wrap less effective. It also shortens its lifespan. You should always prioritize gentle handling. Treat your beeswax wraps with care to maintain their special properties. This careful treatment pays off with many uses.
The natural coating on beeswax wraps is also sensitive to certain chemicals. Many household cleaners contain strong degreasers or harsh chemicals. These can strip away the wax. This is different from how you might clean hard surfaces. For instance, cleaning mold off plastic items might involve stronger solutions. Beeswax wraps cannot tolerate such cleaners. Only mild, natural soap is safe. Using the correct cleaning agents is as important as using the right temperature. This attention to detail keeps your wraps working well.
The Essential Tools for Cleaning Beeswax Wraps
Gathering the right tools before you start cleaning makes the process easy. You do not need many items. Simple household supplies work best. Your main goal is to clean without harming the wax coating. Having everything ready saves time and prevents mistakes. This preparation helps ensure a gentle and effective wash.
Here are the essential items you will need:
- Cool or Cold Water: This is the most important element. Hot water will melt the wax. Always use water that feels cool to the touch. Lukewarm water is also acceptable, but avoid anything warm or hot.
- Mild Dish Soap: Choose a gentle, eco-friendly dish soap. Avoid strong degreasers, antibacterial soaps, or harsh detergents. These can strip the wax and oils from the fabric. A small amount goes a long way. Look for soaps labeled “natural” or “plant-based.”
- Soft Sponge or Cloth: A non-abrasive sponge, a soft washcloth, or even your fingertips are perfect. Do not use scrub brushes, steel wool, or rough scouring pads. These will scratch and remove the wax.
- Drying Rack or Clothesline: Beeswax wraps need to air dry completely. A drying rack or a clothesline with clothespins works well. You need a space where air can circulate freely around the wrap.
- Paper Towel (Optional): Sometimes, a very light pat with a paper towel can absorb excess water. Do not rub or apply pressure. It is mostly for initial water removal.
You do not need fancy equipment. The key is gentle tools and gentle products. For example, when you clean your shower with vinegar, you might scrub vigorously. Beeswax wraps need a much softer touch. The right tools ensure the longevity of your wraps. They help keep your wraps in prime condition for future use.
Remember that simplicity is key here. You are not trying to disinfect with harsh chemicals. You are simply removing food residues. This low-tech approach supports the natural and sustainable ethos of using beeswax wraps. Proper tools make the cleaning process quick and effective. They protect your investment in these eco-friendly items.
Step-by-Step Guide: How to Hand Wash Beeswax Wraps
Cleaning beeswax wraps is a simple process. It does not take much time or effort. Following these steps ensures your wraps remain functional and hygienic. I clean my wraps this way after every use. It keeps them fresh for the next time I need them. This method protects the wax coating.
Prepare Your Cleaning Station
First, set up your cleaning area. Clear a space around your sink. Make sure you have cool water readily available. Gather your mild dish soap and a soft sponge. You will also want a spot ready for air drying. Having everything within reach makes the washing process smooth. Avoid any areas near heat sources.
- Fill your sink or a basin with cool water. The water should be cool to the touch.
- Get a small amount of mild dish soap ready. You will only need a drop or two.
- Have your soft sponge or cloth nearby. Make sure it is clean.
- Identify a suitable drying spot. This could be a dish rack or a clothesline.
Gentle Washing Technique
Now, wash your beeswax wraps with care. The goal is to remove food particles without rubbing off the wax. I approach this part with a light hand. Treat your wraps like delicate fabric. Do not stretch or twist them.
- Rinse Under Cool Water: Hold the wrap under cool running water. This helps remove loose crumbs or superficial dirt.
- Apply Mild Soap: If necessary, add a single drop of mild dish soap to your soft sponge or directly onto the wrap. For most uses, simple water rinsing is enough. If the wrap has oily residue or strong odors, soap helps.
- Wipe Gently: Use the soft sponge or your fingers to gently wipe the wrap. Wipe both sides. Pay attention to any sticky areas or food residue. Do not scrub hard. You are just wiping the surface.
- Avoid Hot Spots: Never use hot water during this step. Hot water will melt the wax and make the wrap sticky. This can ruin the wrap.
This gentle method is different from how you might clean other items. For instance, you might use hot water and soap to clean the bottom of a pan with burnt residue. Beeswax wraps require the opposite. Their delicate nature demands cool water and a very light touch. This difference is key for their longevity.
Rinsing Properly
Rinsing is just as important as washing. You need to remove all soap residue. Leftover soap can make the wrap feel sticky. It can also attract dirt. A good rinse leaves your wrap clean and ready to dry.
- Rinse Thoroughly: Hold the wrap under cool running water again. Make sure all soap is gone. You want the water to run clear.
- Check for Cleanliness: Feel the wrap. It should feel clean and not slippery from soap. If it still feels soapy, rinse again.
- Shake Off Excess Water: Gently shake the wrap to remove large water droplets. Do not wring it. Wringing can damage the fabric and wax coating.
Following these steps makes cleaning your beeswax wraps easy. They will stay fresh and ready for many more uses. Proper washing is the first step in extending their life.
Drying and Storing Beeswax Wraps for Longevity
Proper drying and storage are crucial for your beeswax wraps. These steps prevent mold growth and maintain the wax coating. If you do not dry them completely, they can develop unpleasant odors or even mildew. Incorrect storage can also damage their shape and effectiveness. I always make sure my wraps are completely dry before putting them away. This simple habit protects my investment.
Air Drying for Optimal Results
Air drying is the only recommended method for beeswax wraps. The natural wax blend needs to cool and set properly after washing. Any form of heat drying will melt the wax. This creates a mess and damages the wrap.
- Hang Your Wraps: After shaking off excess water, hang your wraps. You can use a clothesline, a drying rack, or even drape them over a chair back. Ensure air can circulate freely around both sides.
- Avoid Direct Sunlight or Heat: Do not place them near a window with direct sun. Keep them away from radiators, ovens, or warm appliances. Any heat source can melt the wax.
- Allow Complete Drying: Let the wraps dry completely. This usually takes a few hours. Thicker wraps might take longer. They should feel dry to the touch and slightly stiff again. If they feel damp or sticky, they need more drying time.
- Check for Dampness: Before folding, gently press all over the wrap. Make sure there are no damp spots. Even a small damp area can lead to problems later.
This air-drying method is gentle and safe. It helps maintain the integrity of the wax coating. It is similar to how you might air-dry delicate laundry items. Rushing this step can undo all your careful cleaning work.
Smart Storage Solutions
Once your beeswax wraps are completely dry, proper storage keeps them in good condition. Storing them correctly prevents creases and damage. It also keeps them ready for their next use.
- Roll Them Up: One popular method is to roll them loosely. This prevents creases. You can then stand them up in a drawer or a basket.
- Fold Them Flat: If you prefer, you can fold them flat. Fold them into squares or rectangles. Store them in a drawer or a container. Make sure they are not crammed.
- Keep Them Cool and Dry: Always store wraps in a cool, dry place. Avoid hot cupboards or humid environments. Heat and humidity can make the wax sticky or encourage mold.
- Separate from Other Items: Keep them separate from sharp objects or rough textures. These can tear the fabric or scratch the wax. A dedicated drawer or box is ideal.
By following these drying and storage tips, you significantly extend the lifespan of your beeswax wraps. They will remain flexible, fresh, and ready to use for many meals. This careful maintenance is a small effort for a big reward in sustainability.
Common Cleaning Mistakes to Avoid with Beeswax Wraps
When cleaning your beeswax wraps, certain actions can cause irreversible damage. Many people make these mistakes without realizing it. Avoiding these common errors is key to keeping your wraps in excellent condition. I learned early on what not to do. This knowledge saved my wraps from early retirement.
- Using Hot Water: This is the most common and damaging mistake. Hot water melts the beeswax coating. The wrap becomes sticky, loses its shape, and transfers wax onto your hands or food. Always use cool or cold water. Even warm water can cause problems.
- Dishwashers or Washing Machines: Never put beeswax wraps in a dishwasher or washing machine. The high heat from a dishwasher will melt the wax completely. The agitation in a washing machine will damage the fabric and strip the coating. These machines are too harsh for the delicate wraps.
- Harsh Detergents or Scouring Pads: Strong dish soaps, chemical cleaners, or abrasive scrubbers will strip the wax and oils. This leaves the fabric bare and ineffective. They can also scratch the surface. Stick to mild, gentle soaps and soft cloths. For example, while you might use a strong cleaner on stains on walls, beeswax wraps need extreme gentleness.
- Microwave or Oven Drying: Never attempt to dry your wraps in a microwave or oven. The heat will instantly melt the wax. This not only ruins the wrap but can also make a sticky mess in your appliance. Always air dry.
- Leaving Wraps Soaking: Soaking beeswax wraps for extended periods is not good. While cool water is safe, prolonged immersion can weaken the wax bond to the fabric. It might also make the wrap prone to absorbing too much water.
- Aggressive Scrubbing: Even with a soft cloth, scrubbing too hard can wear down the wax coating. The goal is a gentle wipe, not a deep scrub. Focus on lifting food residues, not removing the wax itself.
These mistakes can turn your useful beeswax wrap into a sticky, useless piece of fabric. Unlike cleaning a bottom of a shower where tough scrubbing is often needed, beeswax wraps demand a light touch. Understanding what to avoid is as important as knowing what to do. Your wraps will thank you for the gentle treatment.
By being mindful of these pitfalls, you ensure your beeswax wraps remain durable. They will continue to provide a sustainable way to store food. Proper care truly extends their lifespan.
Dealing with Stubborn Messes and Odors on Beeswax Wraps
Sometimes, even with careful use, your beeswax wraps might encounter stubborn messes or lingering odors. These situations require a little extra attention. However, remember to stick to the gentle cleaning principles. You do not want to damage the wrap while trying to fix a specific problem. I have faced these challenges myself and found simple solutions.
Tackling Stubborn Food Residue
Greasy or sticky foods can leave a tougher residue. Do not panic. There are ways to handle this.
- Scrape Gently: For dried-on food bits, use the back of a butter knife or a firm plastic scraper. Very gently scrape the food off. Do this over a trash can. Be careful not to cut or scratch the fabric.
- Mild Soap Spot Treatment: For oily or sticky spots, apply a tiny drop of mild dish soap directly onto the area. Use your fingertip or a soft damp cloth to gently rub the spot. Work the soap into the residue without spreading it too much.
- Rinse Thoroughly: Rinse the area under cool running water. Ensure all soap and residue are gone. Repeat if necessary, but remember to be gentle.
- Cold Water Flush: If the mess is fresh, a good flush with cold water can often remove it before it sets. Hold the wrap under a stream of cold water and let the force of the water carry the mess away.
It’s about targeted action. You are not cleaning the whole wrap with more force. You are focusing on the specific problem area with a soft touch. This approach preserves the overall integrity of the wrap.
Eliminating Lingering Odors
Beeswax wraps can sometimes absorb odors from strongly scented foods like onions or garlic. This is natural. It does not mean your wrap is dirty or spoiled.
- Air Out Thoroughly: The simplest and most effective method is to air out your wraps. After washing and drying, hang them in a well-ventilated area for several hours or overnight. Fresh air helps dissipate odors naturally.
- Sunlight (Indirect): A brief period in indirect sunlight can also help neutralize odors. Do not place them in direct, hot sun for long periods, as this can melt the wax. A few minutes in a sunny spot on a cool day is fine.
- Baking Soda (Caution): Some people suggest a light sprinkle of baking soda. This is a powerful odor absorber. If you choose this, sprinkle a tiny amount, let it sit for 15-30 minutes, then gently brush it off. Be very careful not to let it absorb into the wax. You should not rub it in. I personally prefer air-drying as the primary method to avoid any residue.
- Avoid Perfumed Products: Do not try to mask odors with perfumed soaps or sprays. These can transfer chemicals to your food. They also add new odors.
Remember that a slight residual food smell is normal. It does not mean your wrap is unclean. Beeswax wraps are naturally breathable. Most odors will fade with proper air drying. These methods help you keep your wraps fresh.
When to Refresh or Replace Your Beeswax Wraps
Even with the best care, beeswax wraps do not last forever. They are natural products designed to be compostable at the end of their life. Knowing when to refresh them or when to say goodbye is part of sustainable living. I keep an eye on my wraps for these signs. It helps me maximize their utility.
Signs Your Wrap Needs Refreshing
Refreshing a beeswax wrap means adding a new layer of wax mixture. This revitalizes its sticky, pliable quality. It extends its life significantly.
- Loss of Stickiness: The most obvious sign. If your wrap no longer sticks to itself or to bowls, its wax coating is worn down. It cannot form a good seal.
- Crumbly or Flaky Texture: The wax might start to feel dry, crumbly, or flaky. This shows the natural oils have dissipated over time.
- Bare Patches: You might see areas where the cotton fabric is visible without wax. This happens from frequent folding, washing, or wear.
- Stiffness or Cracking: The wrap becomes stiff and cracks when folded. This means it lacks the necessary pliability from the jojoba oil.
If you notice these signs, you can try re-waxing your wraps. Re-waxing kits are available, or you can make your own wax blend. This process usually involves melting wax chips onto the fabric in a low oven. It brings them back to life.
Knowing When to Replace Your Wrap
Sometimes, a wrap is beyond refreshing. At this point, it is time to replace it. This is where the compostable nature of beeswax wraps shines.
- Tears or Holes: If the fabric has large tears or holes, it cannot effectively seal food. These wraps are usually beyond repair.
- Persistent Mold: If mold grows on your wrap and does not come off with gentle cleaning, it is best to discard it. Mold can be tricky. It is safer to compost it. For example, if you find mold on your walls with vinegar, you can often clean it. With wraps, it’s safer to avoid.
- Strong, Unremovable Odors: If a persistent, unpleasant odor remains even after airing out and gentle cleaning, it might be time to let go. This odor could transfer to your food.
- Extensive Wax Loss: If the wrap has lost too much wax over a large area, re-waxing might not be effective. The fabric might be too thin or damaged.
- Frayed Edges: While minor fraying is normal, excessive fraying can make the wrap difficult to use or clean.
When a wrap reaches the end of its usable life, simply compost it. Beeswax wraps are biodegradable. They return to the earth without harm. This makes them truly zero-waste items. By knowing when to refresh or replace, you keep your kitchen sustainable and functional.
FAQs About Cleaning Beeswax Wraps
Can I wash beeswax wraps in hot water?
No, never wash beeswax wraps in hot water. Hot water melts the beeswax coating. This makes the wrap sticky and loses its effectiveness. Always use cool or cold water for cleaning to preserve the wax.
What kind of soap should I use for beeswax wraps?
Use a very mild dish soap, preferably an eco-friendly or plant-based one. Avoid harsh detergents, degreasers, or antibacterial soaps. A small drop is enough. For light cleaning, cool water alone is sufficient.
How do I dry beeswax wraps after washing?
Air dry your beeswax wraps completely. Hang them on a clothesline or drying rack. Ensure air circulates on both sides. Keep them away from direct sunlight or any heat sources. They must be fully dry before storing.
Can beeswax wraps get moldy?
Yes, beeswax wraps can get moldy if not dried properly. If you put them away when still damp, mold can grow. Always ensure they are bone-dry before folding or rolling them for storage. Proper drying prevents mold.
How long do beeswax wraps last?
With proper care and cleaning, beeswax wraps can last for one to two years or even longer. Their lifespan depends on how often you use and clean them. Re-waxing can also extend their life once they lose stickiness.
What if my beeswax wrap becomes sticky after washing?
If your wrap becomes sticky, it likely came into contact with warm or hot water during washing or drying. This melts the wax. It might be possible to gently re-wax it, but often, the stickiness means the wrap is compromised.
Conclusion
Caring for your beeswax wraps does not need to be complicated. By following these simple steps on how to clean beeswax wraps, you can keep them fresh and effective for a long time. Remember, the core principle is gentleness. Cool water and mild soap are your best friends. Hot water and harsh cleaners are enemies of beeswax.
- beeswax wraps
- clean wraps
- eco-friendly
- food storage
- reusable
- natural cleaning
- wrap care