· Home Maintenance · 16 min read
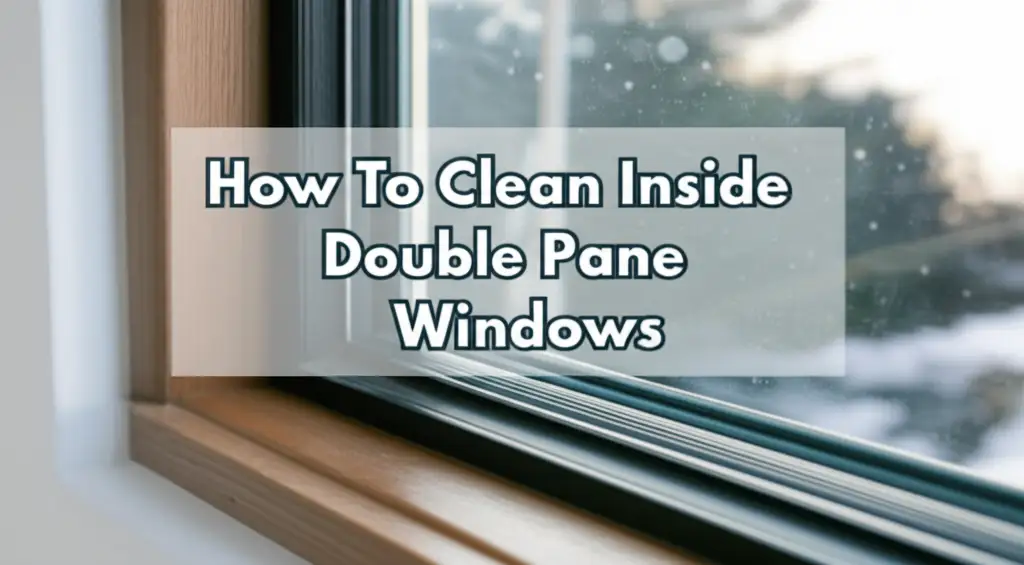
How To Clean Between Window Panes

Restore Clarity: How To Clean Between Window Panes
Have you noticed cloudy spots or persistent dirt showing up between your window panes? It is a frustrating sight. This common issue affects many double-pane windows. It dims your view and makes your home look less inviting. Knowing how to clean between window panes can save you a lot of hassle.
I understand how irritating a dirty window can be. Especially when the dirt is in a place you cannot easily reach. This guide explains why this problem happens. We will cover different methods for cleaning these tricky spots. You will learn about temporary solutions and long-term fixes. My goal is to help you make your windows clear again.
Takeaway
- Identify the cause of condensation or dirt between panes.
- Try DIY defogging kits for minor moisture issues.
- Consider professional repair or full window replacement for severe seal failure.
- Prevent future moisture by maintaining window seals.
Cleaning between window panes often points to a seal failure in double-pane windows. Direct cleaning is difficult without taking the window apart. Temporary fixes include using defogging kits. For lasting clarity, you need to address the seal issue through professional repair or replacement of the insulated glass unit.
Understanding Why Windows Get Dirty Between Panes
You might wonder why dirt or moisture appears between your window panes. This issue points to a specific problem with your window. Double-pane windows are designed with a sealed space between two glass sheets. This space typically holds an inert gas like argon or krypton. This gas provides insulation, keeping your home warmer in winter and cooler in summer.
Over time, the seal around this space can fail. This seal protects the gas and keeps moisture out. When the seal breaks, outside air can get into the space between the panes. This air often contains moisture and small dust particles. Once inside, this moisture condenses, causing a foggy appearance. Dust and dirt also settle, creating visible grime.
What is Seal Failure?
Seal failure happens when the airtight barrier of an insulated glass unit (IGU) breaks down. This seal is usually made of a special sealant material. Exposure to harsh weather conditions, direct sunlight, or even improper installation can cause the seal to degrade. Once compromised, the insulating gas can leak out. Humid air then enters the space.
The presence of moisture is a clear sign. You might see condensation that does not wipe away. This means it is inside the unit. Dirt and dust follow the same path. They collect on the inner surfaces of the glass. This makes your windows look permanently dirty.
Common Signs of Inner Pane Dirt
The most common sign is visible condensation or fogging between the panes. This fog might appear and disappear with temperature changes. This happens when the moisture inside condenses in colder weather. Another sign is visible dirt, streaks, or even mold growth inside the unit. These issues are impossible to clean from the outside.
A permanent cloudiness that never clears is another strong indicator. This suggests a significant amount of moisture or dirt has accumulated. It also means the insulating properties of your window are now reduced. This can lead to higher energy bills as your HVAC system works harder.
Gathering Your Tools: Preparing for the Task
Before you attempt to clean between window panes, you need the right tools. Your approach depends on how severe the problem is. It also depends on your comfort level with DIY projects. Safety is always important when working with glass. Make sure you wear protective gloves and safety glasses.
For basic exterior cleaning, you will need a spray bottle, glass cleaner, and microfiber cloths. If you plan a temporary fix, like a defogging kit, follow its specific instructions. For more involved tasks, like attempting to disassemble a window, you will need specialized tools. These might include a putty knife, screwdrivers, and possibly suction cups for handling glass.
Basic Cleaning Supplies
Even if you cannot clean between the panes, keeping the outside clean is important. This ensures a clear view. It also prevents dirt from collecting near potential weak points in the seal. Gather a good quality glass cleaner. You can also make a simple solution with water and a bit of vinegar.
Microfiber cloths are best for cleaning glass. They do not leave lint or streaks. Have several clean cloths ready. You might also need a bucket of warm water for rinsing. Remember, this step only addresses the outer surfaces. It does not solve the problem inside the panes.
Specialized Tools for Deeper Cleaning
If you plan to open your window unit, specific tools become essential. A sturdy putty knife or similar thin tool helps remove glazing beads. These hold the glass in place. You might need a power drill with small bits for defogging kits. Suction cups are useful if you need to remove the glass unit itself. They provide a safe grip.
Always use tools designed for the task. Improvised tools can damage your window frame or even break the glass. If you plan to work on the window frame itself, remember that different materials require different cleaning methods. For instance, you might need specific products if you are cleaning vinyl window frames. Understanding the materials will protect your window’s appearance and function. Consider exploring how to clean vinyl window frames for related insights.
Temporary Solutions for Foggy Window Panes
When your double-pane windows fog up, a full repair or replacement can be costly. For minor fogging or if you need a quick fix, temporary solutions exist. These methods do not permanently restore the seal. However, they can improve clarity for a while. They are often less intrusive than full repairs.
One common temporary solution involves using a defogging kit. These kits usually include a small drill, a drying agent, and a re-sealing compound. The process involves drilling tiny holes in the glass. This allows moisture to escape. Then, a drying agent is often injected. Finally, the holes are sealed.
Using Defogging Kits
Defogging kits are designed to remove moisture trapped between panes. You drill a tiny hole, often in an inconspicuous spot. This allows the trapped moisture to evaporate. Some kits then inject a drying agent, like silica beads, to absorb remaining humidity. After drying, the holes are sealed with a special plug or silicone.
These kits can improve visibility. However, they have drawbacks. Drilling holes compromises the original seal. This means the insulating gas escapes. Your window will lose some energy efficiency. The plugs might also be visible. This is not a long-term solution. It serves as a visual improvement only.
DIY Drying Methods (with Caution)
Some people try DIY drying methods for temporary relief. This often involves placing moisture-absorbing materials near the window. For example, you can use silica gel packets. Place them near the bottom edge of the window, if you can find a tiny opening. This method is often ineffective because the seal is very tight.
Using heat to dry out the moisture is risky. High heat can cause the glass to crack. It can also warp the window frame. I do not recommend applying direct heat to dry out foggy windows. This could lead to more damage. It is safer to consider the defogging kit or a professional solution.
Addressing Severe Dirt and Moisture: When to Disassemble
Sometimes, temporary fixes are not enough. If there is significant dirt, mold, or persistent fogging, you might need to take more drastic steps. This usually means disassembling the window unit. This is a complex task. It requires careful handling of glass. You should only attempt this if you are comfortable with such projects. Otherwise, professional help is best.
Disassembly allows direct access to the inner surfaces of the panes. This is the only way to truly clean away built-up grime or mold. Once separated, each pane can be cleaned thoroughly. However, disassembling the unit permanently breaks the original factory seal. This means the insulating gas is lost.
When Disassembly is Necessary
Disassembly becomes necessary when the moisture and dirt buildup is severe. You might see visible dirt streaks. Mold growth can also appear between the panes. These problems affect the appearance and potentially the air quality inside your home. A professional can assess if this is the best course of action.
Disassembly means taking the glass unit out of the window frame. Then, the two panes of glass are carefully separated. This process is delicate. It requires specialized tools and knowledge. You risk breaking the glass if not done correctly.
DIY Disassembly Risks and Cleaning Process
Attempting DIY disassembly carries significant risks. You could break the glass. This can cause injury. You might also damage the window frame during removal. If the frame is damaged, reassembly becomes difficult. You could end up needing a full window replacement.
If you choose to proceed, work carefully. Remove the glazing beads or strips that hold the glass unit in the frame. These are often held by small nails or screws. Gently lift the insulated glass unit from the frame. Then, you must separate the two panes. This usually involves cutting the seal around the spacer bar. Once separated, clean each inner glass surface with a glass cleaner and a lint-free cloth. I recommend using a solution you can easily make at home for effective cleaning. Many household cleaners can be made with simple ingredients. You might find a good solution by exploring guides on how to clean with vinegar and baking soda. Ensure both panes are completely dry before reassembly. Replace the spacer bar with a new one that contains fresh desiccant. Reseal the unit properly. This requires new sealant and careful application. If moisture is present, you should also check for and clean any mold that might be forming on window sills or frames. You can learn more about this process by reading how to clean mold off window sills.
Professional Help vs. DIY Replacement
Deciding whether to call a professional or attempt a DIY solution is a big choice. It depends on your skill level, the severity of the damage, and your budget. For many people, severe fogging or dirt inside double-pane windows means it is time for professional help. Professionals have the tools and expertise to handle glass safely.
They also offer more permanent solutions than temporary DIY fixes. You have two main options with a professional: replacing the insulated glass unit (IGU) or replacing the entire window. Both options restore your window’s clarity and energy efficiency. They are significant investments.
When to Call a Pro
You should call a professional if you are uncomfortable disassembling windows. If the fogging is severe or widespread across many windows, professional help is also wise. Professionals can quickly diagnose the problem. They provide a durable solution. They also ensure the new unit is properly sealed and installed.
A professional will likely recommend replacing the insulated glass unit. This means they replace only the glass part of your window. They leave the existing frame in place. This is often more cost-effective than replacing the entire window. It still restores full clarity and energy efficiency.
Options: IGU Replacement and Full Window Replacement
IGU Replacement: This involves removing your old, fogged glass unit and installing a brand new one. The existing window frame stays. This method saves money because you are not paying for a new frame. It is a very effective way to fix the problem. The new IGU will come with fresh gas and a perfect seal.
Full Window Replacement: This means replacing the entire window. This includes the frame, sashes, and glass. This option is more expensive. It is necessary if your window frame is damaged or outdated. It is also a good choice if you want to upgrade your window style or energy efficiency. A new window offers the best long-term solution.
DIY IGU Replacement Considerations
If you are very handy, you might consider DIY IGU replacement. You can order custom-sized insulated glass units from suppliers. These units come pre-sealed. You would still need to remove your old unit and install the new one. This task requires precision. Improper installation can lead to new seal failures.
This DIY path saves on labor costs. However, it requires careful measurement. Any mistake in sizing means the unit will not fit. You also need to transport the glass safely. It can be heavy and fragile. Weigh the cost savings against the risks. For most homeowners, professional installation provides peace of mind.
Preventing Future Fogging and Dirt Build-Up
Once you have dealt with the issue of dirt or moisture between your window panes, you want to keep them clear. Prevention is always easier than repair. Good maintenance practices can extend the life of your windows. They also help prevent future seal failures. This saves you money in the long run.
The key to prevention lies in maintaining the integrity of your window seals. Regular inspections can spot potential problems early. Addressing small issues quickly prevents them from becoming big ones. Proper ventilation in your home also plays a role in reducing humidity levels. High humidity can stress window seals.
Maintain Window Seals Regularly
Regularly inspect the seals around your double-pane windows. Look for any cracks, peeling, or gaps in the sealant around the glass and the frame. These are weak points where moisture can enter. If you find small cracks, you can re-caulk or re-seal them. Use a high-quality, exterior-grade sealant.
This proactive approach helps protect the internal seal of the IGU. It stops water from sitting in contact with the primary seal for long periods. Water intrusion is a major cause of seal failure. Keeping the exterior seals healthy is your first line of defense.
Proper Ventilation and Humidity Control
High humidity inside your home can contribute to window problems. When warm, moist air meets a cold window surface, condensation forms. While this usually happens on the interior surface, constant high humidity can stress the window seals. Ensure good ventilation in your home.
Use exhaust fans in bathrooms and kitchens. Open windows periodically to air out your home. Dehumidifiers can also help control indoor humidity levels, especially in basements or damp climates. Keeping indoor humidity balanced reduces the load on your window seals. It also creates a more comfortable living environment.
Regular Exterior Window Cleaning
While cleaning between the panes is hard, regular exterior cleaning is easy. Keep the outer surfaces of your windows clean. This removes dirt and grime that can accumulate near the seals. This buildup can trap moisture. It can also promote mold growth near the window frame.
Use a gentle cleaner and a soft cloth or sponge. Avoid harsh chemicals or abrasive tools. These can damage the window frame or the existing seals. A simple solution of warm water and a little dish soap works well. Rinse thoroughly with clean water. Regular cleaning helps your windows look good and might indirectly support seal longevity.
Maintaining Overall Window Health for Longevity
Beyond just cleaning, the overall health of your windows impacts their lifespan. Windows are an important part of your home’s insulation and appearance. Taking care of them means more than just wiping them down. It involves checking for drafts, lubricating moving parts, and addressing any minor issues as they arise.
My experience shows that small problems often become big, expensive ones if ignored. Investing a little time in maintenance now can save you significant repair costs later. This proactive approach keeps your windows working well. It also keeps your home comfortable and energy-efficient for many years.
Checking for Drafts
Drafts around your windows are a clear sign of air leakage. This means your windows are not sealing properly. Air leaks lead to higher energy bills. They also make your home less comfortable. Check for drafts by holding a lit candle or an incense stick near the window frame. A flickering flame or wavering smoke indicates a draft.
You can often fix minor drafts by replacing worn weatherstripping or tightening hardware. Sometimes, re-caulking around the window frame exterior is needed. Addressing drafts improves your home’s energy efficiency. It also helps protect the internal window components from moisture infiltration.
Lubricating Moving Parts
If your windows open and close, their moving parts need attention. Sash guides, hinges, and locks can become stiff or squeaky over time. Dust and dirt can accumulate in these mechanisms. Lubricating these parts ensures smooth operation. It also reduces wear and tear.
Use a silicone-based spray lubricant. Avoid oil-based lubricants, as they can attract more dirt. Apply the lubricant sparingly. Work the window sashes back and forth to distribute it. This simple step extends the life of your window hardware. It makes opening and closing your windows much easier.
Addressing Minor Issues Promptly
Do not ignore small problems with your windows. A loose screw, a tiny crack in the caulk, or a minor stickiness in the sash can escalate. Early intervention can prevent significant damage. For instance, a small leak can lead to wood rot or mold if left unaddressed.
If you notice any unusual sounds or difficulties when operating your windows, investigate them. Tighten screws, re-apply caulk, or clean tracks as needed. Many minor fixes are simple DIY tasks. Ignoring them can lead to costly repairs, including needing to replace the entire window. Remember, consistent care protects your investment.
FAQ Section
Can I really clean between my double-pane windows myself?
Yes, but it is very difficult. Most DIY methods involve using defogging kits or carefully disassembling the window unit. These methods carry risks. They can also reduce the window’s insulating properties. For serious issues, professional help is generally recommended.
What causes moisture between window panes?
Moisture between window panes is almost always due to a failed seal. Double-pane windows have a sealed space filled with inert gas. When the seal breaks, humid air enters this space. The moisture then condenses, creating a foggy appearance.
Are defogging kits effective?
Defogging kits can offer a temporary visual improvement. They remove existing moisture. However, they compromise the original seal and release the insulating gas. This reduces the window’s energy efficiency. They are not a permanent fix for seal failure.
How much does it cost to fix foggy windows?
The cost varies greatly. Defogging kits are relatively inexpensive, around $50-$100. Replacing just the insulated glass unit (IGU) can cost a few hundred dollars per window. Full window replacement is much more expensive, often $500 to over $1,000 per window, depending on type and size.
Does a foggy window mean it needs full replacement?
Not always. A foggy window indicates a failed seal. You can often replace only the insulated glass unit within the existing frame. This is more affordable than replacing the entire window. Full replacement is only necessary if the frame itself is damaged or if you desire an upgrade.
How long do double-pane windows last?
Double-pane windows typically last between 10 to 20 years. Their lifespan depends on factors like manufacturing quality, installation, and exposure to weather conditions. Seal failure is a common reason for them to need repair or replacement after this period.
Conclusion
Dealing with dirt or moisture trapped between your window panes can be challenging. We have explored various approaches to how to clean between window panes. You learned about temporary solutions like defogging kits. We also covered the risks and complexities of disassembling a window unit for cleaning. Ultimately, for severe issues, professional repair or replacement of the insulated glass unit is often the most effective and lasting solution.
Remember, prevention is key. Regular maintenance of your window seals and frames can significantly extend their lifespan. Addressing small issues quickly keeps your windows clear and your home comfortable. Take action to restore your windows. You deserve to enjoy clear views from every room in your home.
- window cleaning
- double pane windows
- foggy windows
- moisture removal
- home maintenance
- DIY cleaning