· Bathroom Cleaning · 18 min read
How To Clean Bottom Of Shower
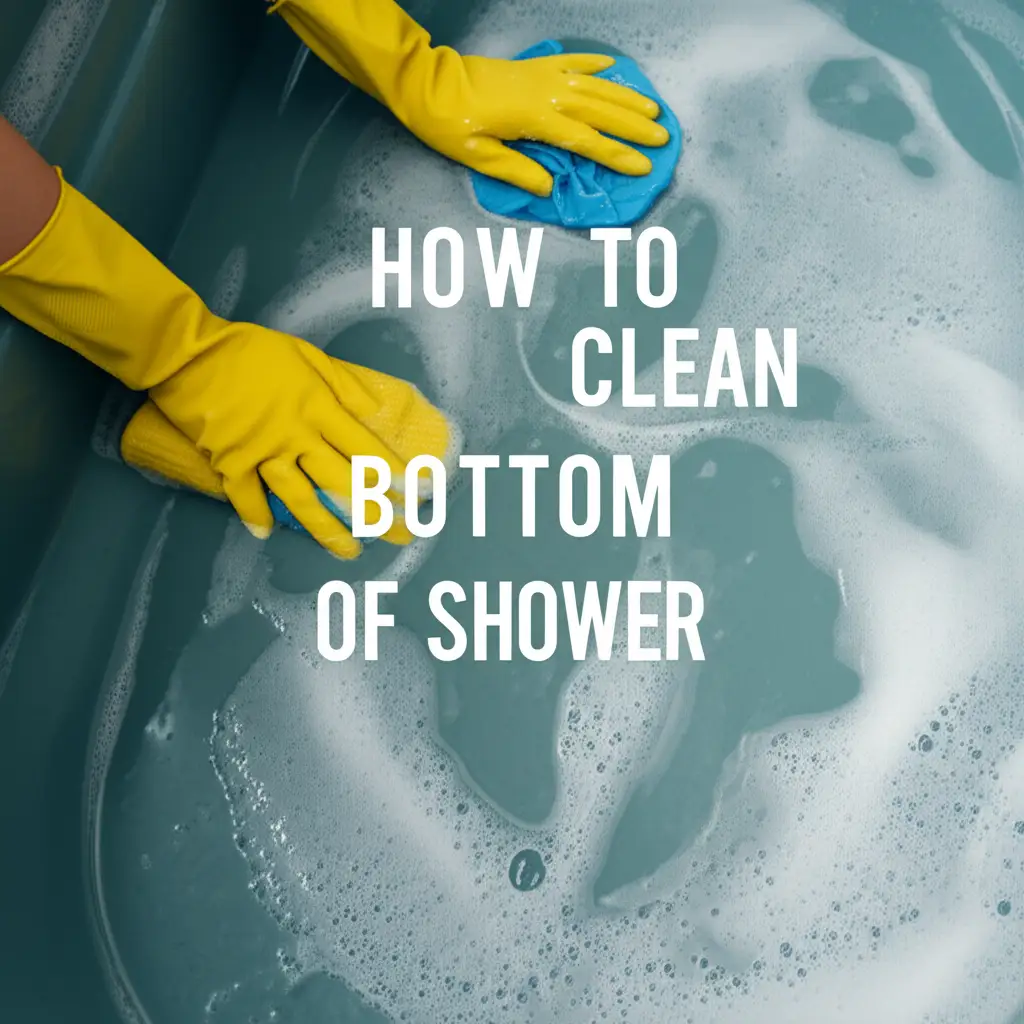
Unlock a Spotless Shower: How To Clean Bottom Of Shower Effectively
Stepping into a grimy shower can ruin your morning. The bottom of your shower often accumulates the worst of the grime, from stubborn soap scum to unsightly mold. This area sees constant water flow and collects residues from shampoo, body wash, and minerals. Cleaning the bottom of your shower is a crucial step in maintaining a hygienic bathroom. A clean shower bottom ensures a pleasant and healthy bathing experience.
Many people struggle to keep this area spotless, often missing hidden grime. This article offers a complete guide on how to clean bottom of shower. We cover common culprits, essential tools, and specific methods for different shower materials. You will learn to tackle various stains using both natural and chemical solutions. Follow our tips to keep your shower floor looking brand new.
Takeaway
- Identify specific stains like soap scum, hard water, or mold.
- Gather necessary tools: brushes, sponges, and protective gear.
- Choose the right cleaning method for your shower material.
- Use natural or chemical solutions based on stain severity.
- Implement daily habits to prevent future grime buildup.
How do I clean the bottom of my shower?
To clean the bottom of your shower, first identify the type of grime, such as soap scum, hard water, or mold. Then, select appropriate cleaners like vinegar, baking soda, or commercial products. Apply the cleaner, allow it to sit, scrub with a brush, and rinse thoroughly. Regular maintenance prevents heavy buildup.
Understanding the Common Culprits of a Dirty Shower Bottom
The bottom of your shower is a magnet for various types of grime. Understanding what causes these stains helps you choose the right cleaning method. Water, soap, and human activity combine to create a challenging cleaning environment. Knowing the source makes tackling the mess easier.
Soap Scum Buildup
Soap scum is a white, chalky residue that clings to shower surfaces. It forms when soap minerals mix with hard water. This residue is notoriously difficult to remove once it hardens. Over time, it can make your shower bottom feel rough and look dull.
Liquid body washes can also leave behind a sticky film. This film then traps dirt and other particles. Regular rinsing after each shower helps reduce initial buildup. However, a deep clean is often needed to remove existing layers.
Hard Water Stains
Hard water contains high levels of minerals like calcium and magnesium. When water evaporates, these minerals leave behind white or reddish-brown spots. These stains are particularly noticeable on darker shower bottoms. They can be very stubborn to remove.
Hard water stains can also cause a dull appearance on your shower floor. Limescale, a common form of hard water deposit, builds up over time. It can clog drains and make surfaces feel gritty. Tackling these stains often requires acidic cleaners. For more specific guidance, read our article on how to clean hard water from shower head.
Mold and Mildew
Mold and mildew thrive in warm, damp environments like showers. Mildew often appears as a fuzzy, gray, or white growth. Mold can be black, green, or even orange. These fungi can grow on grout lines, caulk, and textured shower floors.
They not only look unpleasant but also pose health risks. Mold can cause respiratory issues and allergies. Poor ventilation in the bathroom encourages their growth. Proper cleaning and ventilation are essential to keep mold at bay. If you are struggling with mold, our guide on how to clean mold in shower offers detailed solutions.
Grout Discoloration
Grout is the material between your shower tiles. It is porous and easily absorbs dirt, soap scum, and mold spores. Over time, white grout can turn brown, black, or even pink. Discolored grout makes the entire shower bottom look dirty.
Regular scrubbing helps, but deep-seated stains require more effort. Special grout cleaners penetrate the pores to lift embedded grime. Sealing your grout after cleaning can help prevent future discoloration. This protects it from moisture and stains.
Essential Tools and Supplies for a Deep Clean
Cleaning the bottom of your shower requires the right equipment. Having the correct tools makes the job easier and more effective. You do not need a vast collection of items. A few essential supplies can make a big difference.
Basic Cleaning Kit
Start with a few fundamental items. A good quality scrub brush is essential for tackling tough grime. Look for one with stiff bristles that can reach into corners and grout lines. A smaller detail brush is useful for tight spots around drains or caulk.
Microfiber cloths are great for wiping surfaces and polishing. They absorb water well and do not leave lint behind. A sturdy spray bottle is useful for mixing and applying homemade cleaning solutions. Keep a bucket handy for rinsing tools and collecting dirty water.
Specialized Tools
For tougher jobs, consider specialized tools. A grout brush has narrow, stiff bristles specifically designed to clean grout lines. This makes cleaning between tiles much more efficient. A squeegee is excellent for wiping down surfaces after cleaning. It helps remove excess water and cleaner, preventing new water spots.
A pumice stone can tackle very stubborn hard water rings in porcelain or ceramic. Use it carefully to avoid scratching surfaces. A steam cleaner uses hot steam to loosen dirt and sanitize without chemicals. This can be very effective for loosening grime on the shower floor.
Protective Gear
Safety is important when cleaning, especially with strong cleaners. Always wear rubber gloves to protect your hands from chemicals and hot water. Long gloves are best to prevent skin contact. If using strong chemical cleaners, consider wearing eye protection. Safety glasses or goggles shield your eyes from splashes.
Ensure good ventilation in the bathroom. Open a window or turn on the exhaust fan. This helps clear fumes and improves air quality. Breathing in harsh chemicals can be harmful. Proper protective gear keeps you safe while you work.
Step-by-Step Guide to Cleaning Different Shower Bottom Materials
The material of your shower bottom dictates the best cleaning approach. What works well on tile might damage fiberglass. Knowing your shower’s surface is key to effective and safe cleaning. Let us explore common materials and their cleaning needs.
Tile and Grout Showers
Tile shower bottoms are durable but their grout lines are prone to staining. Start by sweeping loose debris from the shower floor. Mix a paste of baking soda and water for general cleaning. Apply this paste to the tiles and grout. Let it sit for about 15-20 minutes.
Use a stiff-bristled brush or a dedicated grout brush to scrub the entire surface. Focus on the grout lines, as they tend to hold more grime. For stubborn grout stains, a solution of hydrogen peroxide and baking soda can be very effective. Rinse thoroughly with warm water, making sure no residue remains. For more detailed tips on grout, check out our guide on how to clean grout in shower.
Fiberglass and Acrylic Showers
Fiberglass and acrylic are common shower materials. They are lighter and more prone to scratching than tile. Avoid abrasive cleaners or harsh scrubbing pads on these surfaces. Use mild, non-abrasive cleaners. A solution of warm water and dish soap works well for regular cleaning.
For tougher stains like soap scum, try a vinegar solution. Mix equal parts white vinegar and water in a spray bottle. Spray the shower bottom and let it sit for 10-15 minutes. Use a soft sponge or cloth to wipe away the grime. Rinse thoroughly with cool water. For a full guide on fiberglass, read our article on how to clean fiberglass shower floor.
Natural Stone Showers
Natural stone like marble, granite, or travertine requires special care. Acidic cleaners like vinegar or lemon juice can etch and damage these surfaces. Always use pH-neutral cleaners specifically designed for natural stone. Test any cleaner in an inconspicuous area first.
Dampen the stone surface with water. Apply the stone cleaner according to product directions. Use a soft cloth or non-abrasive sponge to gently wipe down the surface. Rinse immediately and thoroughly with clean water. Dry the stone with a soft towel to prevent water spots. Sealing natural stone regularly is crucial to protect it from stains.
Plastic Shower Pans
Plastic shower pans, often found in prefabricated showers, are durable but can scratch. They are also prone to soap scum and hard water buildup. Use mild, non-abrasive cleaners. Dish soap and warm water are excellent for daily cleaning. For tougher stains, a paste of baking soda and water can be effective.
Apply the paste and let it sit for a few minutes. Use a soft brush or sponge to gently scrub the surface. Avoid abrasive scourers or harsh chemicals. These can dull the plastic or cause permanent scratches. Rinse the shower pan thoroughly with water after cleaning. Our article on how to clean plastic shower walls provides additional insights for plastic surfaces.
Natural Cleaning Solutions for a Sparkling Finish
Many effective cleaning solutions come from your pantry. Natural cleaners are safe for your family and the environment. They often work just as well as chemical products. These methods are excellent for routine cleaning and light stains.
Vinegar Power
White vinegar is a powerful natural cleaner. Its acidity helps break down soap scum, hard water stains, and mildew. Mix equal parts white vinegar and water in a spray bottle. Spray the entire shower bottom, focusing on stained areas. Let the solution sit for 15-30 minutes, allowing it to work its magic.
For extra tough spots, you can warm the vinegar slightly before mixing. The heat increases its cleaning power. After soaking, scrub the surface with a non-abrasive brush or sponge. Rinse thoroughly with water. The vinegar smell will dissipate as it dries. Explore more uses for vinegar in our guide on how to clean shower with vinegar.
Baking Soda Magic
Baking soda is a mild abrasive and deodorizer. It is perfect for scrubbing away grime without scratching delicate surfaces. Create a paste by mixing baking soda with a small amount of water. The paste should be thick enough to cling to surfaces. Apply this paste directly to the dirty areas of your shower bottom.
Let the paste sit for about 10-15 minutes. This allows the baking soda to loosen the grime. Use a damp sponge or soft brush to scrub the area in circular motions. The gentle abrasive action helps lift soap scum and light stains. Rinse the shower bottom thoroughly with warm water. For more baking soda tips, read our article on how to clean shower with baking soda.
Lemon Juice Brightener
Lemon juice is another natural acid with cleaning properties. It helps cut through grease and grime, leaving a fresh scent. For light stains and a refreshing clean, squeeze fresh lemon juice onto the shower bottom. You can also mix it with baking soda to create a powerful paste.
Apply the lemon juice or paste to the affected areas. Let it sit for 10-15 minutes. Use a scrub brush or sponge to clean the surface. The citric acid helps dissolve mineral deposits and brightens surfaces. Rinse thoroughly with water. This method leaves your shower smelling clean and citrusy.
Chemical Cleaning Solutions for Stubborn Stains
Sometimes, natural cleaners are not enough for very tough stains. Chemical cleaning solutions offer stronger alternatives. Always use these products with caution and proper ventilation. They can effectively remove deeply set grime and mold.
Bleach for Tough Mold
Bleach is a powerful disinfectant and stain remover. It is highly effective against stubborn mold and mildew in the shower. Mix one part bleach with ten parts water in a spray bottle. Never mix bleach with other cleaners, especially ammonia, as it creates toxic fumes. Apply the diluted bleach solution to moldy areas on your shower bottom.
Allow the solution to sit for 10-15 minutes. The bleach will kill the mold and lighten stains. Scrub with a brush, then rinse thoroughly with plenty of water. Ensure good ventilation by opening windows or turning on the exhaust fan. Wear gloves and eye protection when using bleach. For more on using bleach, refer to our article on how to clean shower with bleach.
Commercial Cleaners
Many commercial shower cleaners are available on the market. These products are formulated to tackle specific types of grime like soap scum, hard water, or mold. Read the product label carefully before use. Choose a cleaner suitable for your shower material. Some cleaners are abrasive, so avoid them on delicate surfaces like fiberglass or natural stone.
Follow the manufacturer’s instructions for application and contact time. Most involve spraying, letting it sit, and then scrubbing and rinsing. Always ensure good ventilation when using commercial cleaners. Some products come with specific applicators for easier use. These cleaners can save time and effort on tough stains.
Safety First with Chemicals
Using chemical cleaners requires strict adherence to safety guidelines. Always wear protective gear, including rubber gloves and eye protection. Chemical fumes can irritate your respiratory system. Ensure the bathroom is well-ventilated by opening windows or using an exhaust fan. If fumes are strong, consider wearing a respirator mask.
Never mix different cleaning products. Combining chemicals like bleach and ammonia can create dangerous, toxic gases. Store all chemical cleaners out of reach of children and pets. Dispose of empty containers properly according to local regulations. Read all warning labels before beginning to clean. Your safety is paramount.
Tackling Specific Bottom-of-Shower Stains
The bottom of your shower can develop unique stains beyond typical soap scum and mold. These specialized stains require targeted approaches for effective removal. Knowing what causes them helps in choosing the right cleaning agent. Let us look at some common specific stains.
Removing Orange Stains
Orange stains in the shower often come from iron in hard water or certain types of mold. These stains can be particularly stubborn. For iron stains, acidic cleaners work best. Try a mixture of lemon juice and baking soda. Apply the paste to the orange area and let it sit for 30 minutes. Scrub with a brush, then rinse.
Another effective solution is a rust remover product. Ensure it is safe for your shower’s material before applying. For mold-related orange stains (often Serratia marcescens), bleach or hydrogen peroxide solutions are effective disinfectants. Apply, let sit, then scrub and rinse thoroughly. Our detailed guide on how to clean orange stains in shower offers more in-depth solutions.
Dealing with Rust Marks
Rust marks appear as reddish-brown streaks or spots. They usually come from metal objects left in the shower, like shaving cream cans or rusty shower caddies. Rust can be tricky to remove, especially from porous surfaces. For ceramic or porcelain, a paste of cream of tartar and hydrogen peroxide can work wonders. Apply, let dry, then scrub off.
Another option is to use a rust stain remover. These products contain oxalic acid, which dissolves rust. Apply the product carefully following the instructions. Allow it to sit, then scrub and rinse. Always test a small, inconspicuous area first. If you have a rusty shower rod, our article on how to clean rust off shower rod might also offer helpful tips.
Eradicating Caulk Mildew
Caulk seals the seams around your shower bottom and can easily develop mildew. This often appears as black spots or streaks. Caulk is porous, allowing mildew to penetrate deeply. A bleach solution is often the most effective way to eradicate caulk mildew. Mix 1 part bleach with 10 parts water.
Apply the solution to the affected caulk with a cotton ball or paper towel. Let it sit for several hours or overnight. The bleach will penetrate and kill the mildew. Scrub gently with a soft brush, then rinse thoroughly. For very stubborn mildew, professional caulk cleaners are available. If the mildew is too deep, recaulking might be necessary. Learn more about caulk cleaning in our article on how to clean caulking in shower.
Preventing Future Buildup and Maintaining Cleanliness
A clean shower bottom is not just about deep cleaning; it is about ongoing maintenance. Regular habits can drastically reduce the need for intensive scrubbing. Prevention is always easier than a cure. Implement these simple steps to keep your shower looking great.
Daily Habits
A quick daily routine can prevent most grime buildup. After each shower, take a minute to rinse the shower bottom thoroughly. Use the showerhead to wash down any soap residue or hair. A quick wipe-down with a squeegee or a microfiber cloth is also highly effective. This removes standing water and prevents mineral deposits.
Keep a small squeegee or sponge in the shower for easy access. Wipe down the walls and floor after your shower. This simple step takes less than a minute. It prevents soap scum and hard water spots from forming. Good daily habits make a huge difference.
Weekly Wipes
Beyond daily rinses, a weekly wipe-down is beneficial. Once a week, spray the shower bottom with a diluted mixture of vinegar and water. Let it sit for 5-10 minutes. Then, wipe it down with a sponge or cloth. This helps dissolve any minor soap scum or mineral deposits before they harden.
This quick weekly clean prevents the need for intense scrubbing. It keeps the shower fresh and minimizes mold growth. Focus on corners and grout lines, which are common problem areas. A consistent weekly routine maintains cleanliness without much effort.
Regular Deep Cleans
Even with daily and weekly maintenance, a deeper clean every few weeks or months is advisable. This depends on your shower usage and water hardness. A deep clean targets accumulated grime that daily wipes might miss. Use stronger cleaners like baking soda paste or a mild commercial cleaner.
During a deep clean, pay attention to grout lines and caulk. Inspect for any signs of mold or stubborn stains. Address these issues promptly to prevent them from spreading. This comprehensive clean keeps your shower bottom in top condition. It ensures longevity and hygiene.
Ventilation Tips
Proper ventilation is crucial for preventing mold and mildew. These fungi thrive in damp, humid environments. Always run the exhaust fan during and after your shower. Keep it running for at least 15-20 minutes after you finish. This helps remove moisture from the air.
If you do not have an exhaust fan, open a window. This allows fresh air to circulate and reduces humidity. Leaving the shower door or curtain open after a shower also helps. It allows the shower to air dry more quickly. Reducing moisture is key to inhibiting mold and mildew growth.
FAQ Section
How often should I clean the bottom of my shower?
You should rinse the bottom of your shower daily after each use. A quick wipe-down with a squeegee or cloth is also recommended. For a more thorough clean to prevent buildup, aim for a weekly light cleaning. A deep clean is best performed every two to four weeks, depending on usage and water hardness.
Can I use a magic eraser on my shower bottom?
Yes, a Magic Eraser can be effective on many shower bottom materials, especially for soap scum and scuff marks. It works by acting as a very fine abrasive. However, use it gently on fiberglass or acrylic to avoid scratching. Always test a small, inconspicuous area first to ensure it does not damage your specific shower surface.
What causes pink/orange slime in the shower?
Pink or orange slime in the shower is typically caused by a bacteria called Serratia marcescens. This bacteria thrives in moist environments and feeds on soap residue. It is harmless for most people but looks unpleasant. Regular cleaning with a bleach solution or hydrogen peroxide can effectively kill and remove this slime.
Is it safe to mix cleaning products?
No, it is generally unsafe to mix cleaning products. Mixing certain chemicals, especially bleach and ammonia-based cleaners, can create dangerous and toxic fumes. These fumes can cause severe respiratory problems or even be fatal. Always use cleaning products separately and follow their specific instructions for safe use.
How do I clean shower grout without scrubbing?
Cleaning shower grout without intense scrubbing can be challenging for deep stains. For lighter grime, spray a solution of hydrogen peroxide and baking soda paste onto the grout. Let it sit for several hours or overnight. This allows the solution to loosen the grime. A light scrub with a soft brush or even just rinsing can then remove the loosened dirt.
Why does my shower bottom still look dirty after cleaning?
If your shower bottom still looks dirty, it might be due to several reasons. You may be using the wrong cleaner for the type of stain (e.g., using soap scum remover for hard water stains). The grime might be deeply embedded, requiring longer soaking times or stronger solutions. Also, porous materials like grout can hold onto stains even after surface cleaning, needing specialized treatments or sealing.
Conclusion
A clean shower bottom is essential for a truly refreshing bathroom experience. We have covered the main culprits behind shower grime, from everyday soap scum to stubborn mold and hard water stains. You now know the necessary tools and supplies, from simple scrub brushes to specialized grout cleaners. Choosing the right cleaning method for your specific shower material is key to success.
We explored effective natural solutions like vinegar and baking soda, perfect for regular maintenance. For tougher jobs, chemical options like bleach provide powerful results when used safely. We also addressed specific challenges like orange stains, rust marks, and caulk mildew. Remember, consistent prevention through daily and weekly habits is your best defense against buildup. Implement these tips to keep your shower bottom sparkling clean. A little effort goes a long way in maintaining a hygienic and inviting shower space.
- shower cleaning
- bathroom maintenance
- soap scum removal
- hard water stains
- mold and mildew