· Home Care · 16 min read
How To Clean Burners On Gas Stove
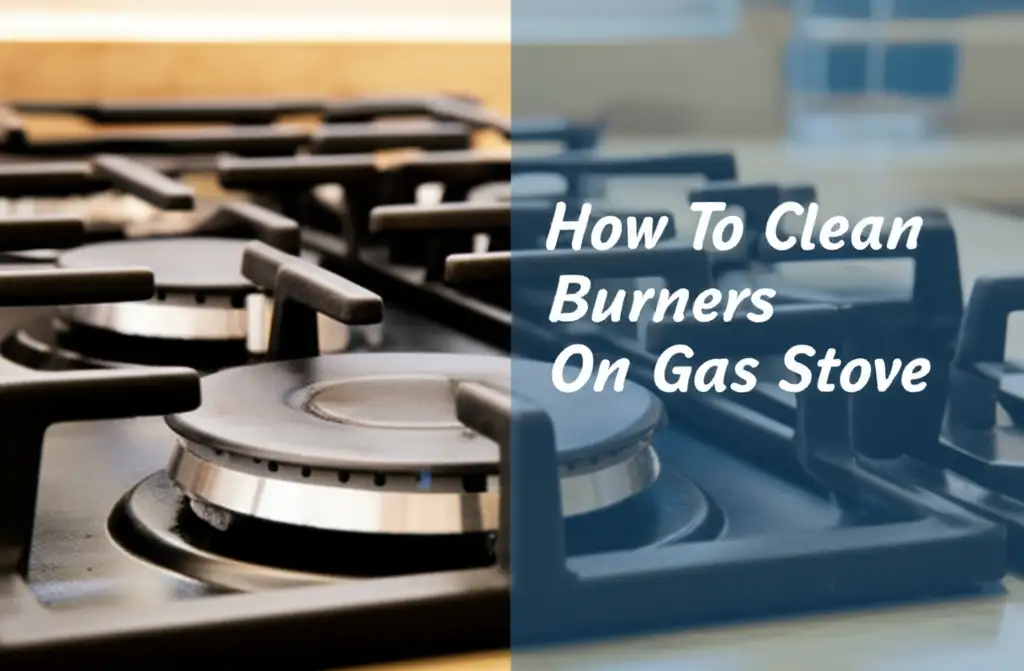
Restore Your Gas Stove: How To Clean Burners Safely
Your gas stove works hard every day. It cooks delicious meals for you and your family. Over time, spills and grease build up on its burners. This buildup can make your stove look dirty. More importantly, it can affect how your stove performs. Learning how to clean burners on gas stove is an important skill. It keeps your kitchen looking good. It also ensures your stove works efficiently and safely.
A clean burner provides a steady, blue flame. A dirty burner might give a weak or uneven flame. This guide shows you simple steps to clean your gas stove burners. We cover different types of dirt and effective cleaning solutions. You will learn to bring back your stove’s sparkle and its top performance. Let’s start cleaning those burners.
Takeaway
- Always ensure the stove is off and cool before cleaning.
- Disassemble burner parts carefully.
- Use appropriate cleaning agents for the type of grime (e.g., dish soap, baking soda, vinegar).
- Clear clogged burner holes with a small tool.
- Dry all parts completely before reassembly to prevent damage.
To clean burners on a gas stove, first make sure the stove is off and cool. Remove grates and burner caps. Soak dirty parts in warm, soapy water or a vinegar-baking soda solution. Scrub gently with a non-abrasive brush. Clear any blocked gas holes with a thin wire or needle. Rinse thoroughly and dry completely before putting parts back.
Understanding Your Gas Stove Burners
A gas stove burner has several parts. You have the burner grates on top. Below them are the burner caps. These caps sit on top of the burner heads. The burner head itself is where the gas comes out. Each part can collect food spills, grease, and grime.
Knowing these parts helps you clean them properly. Gas flows through small holes in the burner head. If these holes get clogged, the flame becomes weak or uneven. Cleaning these parts helps maintain an even flame. It also makes your stove look much better. Regular cleaning prevents stubborn buildup.
Gathering Your Cleaning Tools and Supplies
Before you start, gather everything you need. This makes the cleaning process smooth. You likely have most items in your home. You need specific tools for the job.
Here is a list of common household cleaning items:
- Dish soap (Dawn is very effective for grease)
- Baking soda
- White vinegar
- Warm water
- Soft cloths or sponges
- Microfiber towels for drying
- Old toothbrush or non-abrasive brush
- Paper clips, thin wire, or a needle (for clearing clogs)
- Rubber gloves (to protect your hands)
Make sure you have enough space to work. Lay down old newspapers or towels. This protects your countertop from spills. Having everything ready saves time.
Preparing Your Stove for Cleaning
Safety comes first when cleaning a gas stove. You must take important steps before cleaning. This prevents accidents and ensures your safety. Always prioritize safety in kitchen tasks.
Follow these critical safety measures:
- Turn off the gas supply: Locate the gas shut-off valve. This valve is usually behind or under the stove. Turn it to the “off” position. This stops gas from flowing to the burners. It removes any risk of gas leaks.
- Ensure the stove is completely cool: Hot burners can cause burns. Wait until all burner parts are cool to the touch. This might take some time after cooking.
- Remove stove grates: Lift off the metal grates that sit over the burners. These are often heavy. Set them aside in a sink or a large basin. You can clean them later. Learn how to clean gas stove grates in dishwasher if they are dishwasher safe.
- Remove burner caps and heads: These parts lift off easily. Note their positions if they are different sizes. This helps with reassembly. Some burner heads might twist off.
Once these steps are complete, your stove is ready for cleaning. You can now begin cleaning the burner parts. You will also clean the stove top surface.
Deep Cleaning Burner Caps and Grates
Burner caps and grates collect most of the spilled food and grease. They need a deep clean. This process removes baked-on residue. It helps them look new again.
You have a few effective options for cleaning these parts:
Method 1: Soaking with Dish Soap
This method works well for general grime. It is gentle and effective.
- Soak the parts: Fill a sink or large basin with very hot water. Add a generous amount of dish soap. Place the burner caps and grates into the soapy water. Let them soak for at least 30 minutes. For heavily soiled parts, soak overnight.
- Scrub away grime: After soaking, the grime loosens. Use a non-abrasive sponge or an old toothbrush. Scrub each part gently. Focus on areas with caked-on food.
- Rinse thoroughly: Rinse all parts under running water. Ensure no soap residue remains. Soap residue can affect flame performance.
- Dry completely: Use a clean towel to dry the parts. You can also let them air dry. Make sure they are fully dry before putting them back. Water can cause rust or electrical issues.
Method 2: Baking Soda and Vinegar Paste
This method tackles stubborn, baked-on grease. Baking soda is a gentle abrasive. Vinegar reacts with baking soda to lift dirt.
- Create a paste: Mix baking soda with a little water. Make a thick paste. The paste should be like toothpaste.
- Apply the paste: Spread the paste generously on all dirty areas of the grates and caps. For tough spots, really layer it on.
- Add vinegar (optional but recommended for extra power): Pour white vinegar over the baking soda paste. It will fizz and bubble. This reaction helps break down grime. Let it sit for 15-30 minutes.
- Scrub and rinse: Use a stiff brush or a scrubber. Scrub the parts to remove all loosened dirt. Rinse with clean water.
- Dry completely: Dry all parts thoroughly before reassembly. This is crucial for gas stove parts.
This method is great for tough jobs. It helps clean stubborn deposits effectively. You might also find similar methods useful if you need to clean cast iron stove grates.
Cleaning Burner Heads and Ignitors
The burner heads are vital for gas flow. The ignitors create the spark. These parts need careful cleaning. Dirty burner heads can cause uneven flames or ignition problems.
Never submerge burner heads or ignitors in water. They contain electrical components. Getting them wet can cause damage. It can also lead to hazardous situations.
Here is how to clean them safely:
Cleaning Burner Heads:
- Wipe down: Use a damp cloth with a little dish soap. Gently wipe the surface of the burner head. Remove any visible grease or food particles.
- Clear clogged holes: Gas comes out of small holes in the burner head. These can get clogged with cooked-on food. Use a paper clip, thin wire, or needle to clear each hole. Push the tool through the holes. This ensures gas flows freely. Do not use a toothpick; it can break off inside.
- Inspect for blockages: Look closely at the holes. Make sure they are clear. A clear hole means an even flame.
- Dry thoroughly: Use a clean, dry cloth to wipe the burner heads. Ensure no moisture remains. Let them air dry for a while too.
Cleaning Ignitors:
The ignitor is the small, white ceramic piece. It creates the spark that lights the gas. If it is dirty, your burner may not light.
- Gentle wipe: Use a dry cloth or a cotton swab. Gently wipe around the ignitor. Remove any food or grease.
- Avoid abrasives: Do not use abrasive cleaners or scrubbers on the ignitor. This can damage it.
- Keep it dry: Ensure the ignitor remains completely dry. Moisture can prevent it from sparking.
By cleaning these parts, you ensure safe and efficient burner operation. This helps your stove light quickly. It also provides a consistent flame for cooking.
Tackling Stubborn Stains on the Stove Top Surface
While cleaning the burners, do not forget the stove top itself. Food spills, grease, and burn marks often accumulate here. A clean stove top makes the entire kitchen look better. Cleaning your gas stove burners also includes the area around them.
Different stove top materials need specific care. Most gas stoves have enamel or stainless steel surfaces.
For Enamel or Stainless Steel Stove Tops:
- Warm soapy water: Start with a soft cloth and warm water mixed with dish soap. Wipe down the entire stove top surface. This removes fresh spills and light grease.
- Baking soda paste: For tougher spots, make a paste with baking soda and a little water. Apply the paste to the stained areas. Let it sit for 5-10 minutes.
- Gentle scrubbing: Use a soft sponge or cloth. Gently scrub the paste into the stain. The baking soda acts as a mild abrasive.
- Wipe clean: Wipe away the paste and loosened grime with a damp cloth. Rinse the cloth often.
- Dry and polish: Use a clean, dry cloth to dry the surface. For stainless steel, wipe in the direction of the grain. This prevents streaks and adds shine.
Dealing with Burnt-On Food and Stains:
Burnt food can be very stubborn. It often needs a little more effort.
- Scraper method: For hard, burnt-on spots, you can use a plastic scraper. Be careful not to scratch the surface. A razor blade can be used on glass tops, but be very gentle. For black enamel stove tops, avoid metal scrapers.
- Hot towel compress: Place a hot, damp towel over the burnt area. Let it sit for 15-20 minutes. The heat and moisture soften the burnt residue. Then, try wiping it away.
- Specialized cleaners: Some brands offer specific stove top cleaners. Read the instructions carefully. Ensure they are safe for your stove’s material. They can be very effective for specific problems like burnt milk from the stove or burn marks off the stove.
Always test any new cleaning product in an inconspicuous area first. This ensures it does not damage your stove top. A clean stove top truly finishes the look of your newly cleaned burners.
Reassembling Your Gas Stove Burners
After all parts are clean and dry, it’s time to put your stove back together. Proper reassembly is key for safe and efficient operation. Do not rush this step.
Follow these steps carefully:
- Ensure all parts are completely dry: This is crucial. Even a small amount of moisture can cause issues. It can lead to rust or problems with the ignitor. If parts are still damp, let them air dry longer.
- Place burner heads back: Carefully place each burner head onto its designated spot. Make sure it sits flat and is properly aligned. Some heads might have specific grooves or pegs.
- Attach burner caps: Put the burner caps back on top of the burner heads. Ensure they fit snugly. They should sit level. An improperly placed cap can lead to an uneven or poor flame. If you mixed them up, match sizes to their respective burner heads.
- Replace stove grates: Place the stove grates back onto the stove top. Ensure they sit firmly. They should not wobble.
- Turn gas supply back on: Once everything is in place, turn the gas shut-off valve back to the “on” position.
- Test each burner: Light each burner one by one. Observe the flame. A healthy flame is blue and even. It should light quickly. If the flame is orange, uneven, or takes time to light, turn off the burner. Check if parts are aligned correctly. Re-check for any remaining clogs in the burner holes.
Testing the burners ensures everything works correctly. It confirms your cleaning was successful. You should now have a sparkling, fully functional gas stove.
Maintaining Clean Burners for Longer
Cleaning your gas stove burners takes effort. You want that effort to last. Regular maintenance prevents heavy buildup. It keeps your stove performing well. Small habits make a big difference.
Here are some simple maintenance tips:
- Wipe spills immediately: When food spills, wipe it up right away. Fresh spills are easier to clean. They do not get baked on. Use a damp cloth to clean liquid spills.
- Daily wipe-down: After cooking, let the stove cool. Then, wipe down the stove top and visible burner parts. A quick wipe removes food crumbs and light grease. This prevents them from hardening.
- Weekly spot cleaning: Once a week, give your burners a quick check. If you see any small spots of grime, clean them. Use a sponge with warm, soapy water. This stops small issues from becoming big problems.
- Monthly deep clean (or as needed): Depending on your cooking habits, plan a more thorough cleaning. This involves removing burner caps and grates. You can soak them as described earlier. This regular deep clean keeps the burners spotless.
- Use proper cookware: Ensure your pots and pans are the right size for the burners. Overly large pans can cause spills. They can also direct heat poorly.
- Check flame color: Regularly check the color of your gas flame. A healthy flame is blue. If you see yellow or orange flames, this often means incomplete combustion. It could be due to dirty burners or poor air mixture. This signals it’s time for a cleaning or a professional check.
- Ventilation: Use your kitchen exhaust fan while cooking. This helps remove grease and steam from the air. It reduces the amount of residue that settles on your stove.
By following these maintenance tips, your gas stove burners will stay cleaner longer. This means less frequent deep cleaning. It also extends the life of your appliance. A clean stove makes cooking more enjoyable. It helps your kitchen stay fresh.
Troubleshooting Common Burner Issues After Cleaning
Sometimes, even after a thorough cleaning, a burner might not work perfectly. Do not worry. Many common issues have simple solutions. We will walk through common problems and their fixes.
Here are some issues you might face:
1. Burner Not Lighting or Clicking
- Problem: The burner clicks, but no flame appears. Or it does not click at all.
- Cause: This usually means the ignitor is dirty or wet. Gas flow might also be blocked.
- Solution:
- Check ignitor: Ensure the small ceramic ignitor is dry and clean. Wipe it gently with a dry cloth or cotton swab. Make sure no food or grease covers it.
- Re-seat burner cap/head: Lift the burner cap and head. Re-seat them properly. Ensure they sit flat and are aligned. An improperly seated part can block the spark.
- Check gas holes: Use a paper clip to clear any blocked holes in the burner head. Gas needs to flow freely.
- Check gas supply: Make sure the gas valve to your stove is fully open.
2. Uneven or Weak Flame
- Problem: The flame is small, uneven, or has yellow/orange spots.
- Cause: This usually indicates clogged burner holes. It can also be from an improperly seated burner cap.
- Solution:
- Clear clogs: Use a thin wire or paper clip. Carefully push it through each gas hole on the burner head. This removes any food debris or grease.
- Align burner cap: Ensure the burner cap is sitting perfectly centered and flat on the burner head.
- Check for water: Make sure all parts are completely dry. Any water can disrupt the flame.
3. Gas Smell
- Problem: You smell gas after reassembling.
- Cause: This is a serious issue. It means gas is escaping. It could be a loose connection or damaged part.
- Solution:
- Immediate action: Turn off the gas supply to your stove immediately.
- Ventilate: Open windows and doors to air out the kitchen.
- Do not use stove: Do not try to light the stove. Do not turn on or off any electrical switches.
- Call professional: If the smell persists, call your gas company or a qualified appliance technician. Do not attempt to fix gas leaks yourself.
4. Burner Flame is Too High or Too Low (and not adjustable)
- Problem: The flame is either too strong or too weak, regardless of knob setting.
- Cause: This can be a more complex issue. It might relate to gas pressure or control valve problems.
- Solution:
- Recheck cleaning: Ensure all parts are clean and dry. Make sure no cleaning residue blocks ports.
- Professional help: If cleaning does not fix it, this issue likely needs a professional. It could be a problem with the stove’s internal gas lines or regulator.
Most common issues after cleaning are due to incomplete drying or unblocked holes. A little patience and a careful re-check often solve them. Always prioritize safety when dealing with gas appliances.
FAQ Section
Q1: Can I clean gas stove burners in the dishwasher?
No, you cannot clean all gas stove burner parts in a dishwasher. Burner grates and caps are often dishwasher safe. Check your stove’s manual for confirmation. However, never put burner heads or ignitors in the dishwasher. These parts contain sensitive components. Water can damage them.
Q2: How often should I clean my gas stove burners?
You should wipe down the stove top and visible burner parts after each use. A quick spot clean weekly is good. A deep clean of the burner caps and grates is best monthly. For very frequent cooking, deep clean more often. Regular light cleaning prevents heavy grime buildup.
Q3: What if my gas stove burner still won’t light after cleaning?
If your gas stove burner still won’t light, check the ignitor. Make sure it is completely dry and free of debris. Ensure the burner cap and head are correctly aligned. Clear all gas holes with a paper clip. If these steps do not work, turn off the gas supply. Contact a qualified technician.
Q4: Can I use harsh chemicals like oven cleaner on my gas stove burners?
Avoid using harsh chemicals like oven cleaner on gas stove burners. These cleaners can damage the finish. They can corrode the metal. Stick to gentler solutions like dish soap, baking soda, and vinegar. These are safer and very effective for typical grime. Always read product labels before use.
Q5: Why is my gas stove flame orange or yellow after cleaning?
An orange or yellow flame often means incomplete gas combustion. This can happen if burner holes are still partially clogged. It can also happen if parts are not perfectly dry. Re-check the burner head holes. Ensure they are clear. Make sure all parts are completely dry before reassembly. If the problem persists, you may need a technician.
Q6: Can I clean gas stove burners without removing them?
You can do a light clean of gas stove burners without removing them. Wipe the surface around the burners and ignitors with a damp cloth. You can also carefully use a toothbrush for light grime. For a proper deep clean and to clear clogged holes, you must remove the burner caps and heads. This ensures thorough cleaning and safety.
Conclusion
A clean gas stove not only looks better but also performs better. You have learned how to clean burners on gas stove effectively. We covered how to disassemble parts. We showed you powerful cleaning methods. We discussed reassembly and vital maintenance tips. Taking care of your stove extends its life. It ensures safe and efficient cooking.
Remember, consistent cleaning prevents stubborn buildup. It keeps your flames blue and steady. You now have the knowledge to tackle any burner grime. Make cleaning your gas stove a regular part of your kitchen routine. You will enjoy a spotless, functional appliance for years to come. Start cleaning today for a brighter, more efficient kitchen.
- gas stove cleaning
- kitchen maintenance
- burner care