· Pool Maintenance · 19 min read
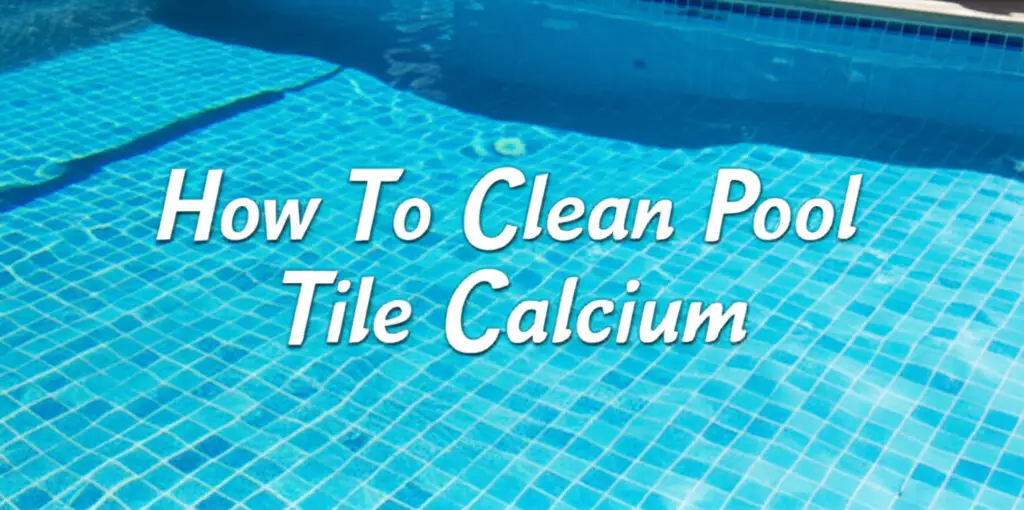
How To Clean Calcium Buildup On Pool Tile
How To Clean Calcium Buildup On Pool Tile
Effectively Clean Calcium Buildup on Pool Tile
Calcium buildup on pool tile is a common problem for many pool owners. This white, chalky deposit not only looks unsightly but also causes damage over time. It can make your beautiful pool look old and neglected. I understand the frustration of seeing those stubborn hard water stains.
Taking action quickly saves you money and keeps your pool looking its best. This guide provides comprehensive steps to clean calcium buildup on pool tile. We will explore various methods, from gentle natural remedies to stronger chemical solutions. You will also learn about essential safety measures and effective prevention strategies. My goal is to help you restore your pool’s sparkling appearance.
Takeaway
- Identify the type of calcium buildup (carbonate or silicate) to choose the right cleaning method.
- Always prioritize safety with protective gear and proper ventilation.
- Start with gentle, natural cleaning methods like vinegar or pumice stones.
- Use chemical solutions cautiously for stubborn deposits, following all instructions.
- Maintain balanced pool water chemistry to prevent future calcium buildup.
To effectively clean calcium buildup on pool tile, first identify the type of deposit. Then, choose an appropriate cleaning method. This could range from natural acids like vinegar to more aggressive chemical or mechanical solutions. Always prioritize safety and follow specific product instructions for the best results.
Understanding Calcium Buildup on Pool Tile
Calcium buildup is a common issue for pool owners. This white, crusty film forms along the waterline or on submerged tiles. It happens when hard water evaporates, leaving mineral deposits behind. Understanding what causes it helps you choose the right cleaning method.
What Causes Calcium Deposits?
The primary cause of calcium buildup is hard water. Hard water contains high levels of dissolved minerals, especially calcium and magnesium. When pool water evaporates, these minerals are left behind on surfaces. Sunlight and heat accelerate this evaporation process.
Poor water chemistry also contributes to the problem. High pH levels or high alkalinity can cause calcium to precipitate out of the water. This forms the visible deposits on your pool tiles. A pool’s water balance is important for preventing this.
Types of Calcium Buildup
There are two main types of calcium deposits you might find on your pool tile. Knowing the type helps you select the correct cleaning approach. Each type requires a different strategy.
Calcium Carbonate (Calcium Scale)
This is the more common type of calcium buildup. It appears as a white, flaky, or chalky deposit. You can often scrape it off with a fingernail or a stiff brush. Calcium carbonate forms due to high pH, high alkalinity, or high calcium hardness levels in the water.
This type of scale is relatively easier to remove. Mild acids are often effective against it. Natural cleaners like vinegar work well on calcium carbonate.
Calcium Silicate
Calcium silicate is a much harder, darker deposit. It often looks grayish-white and feels rough. This type of scale is significantly more challenging to remove. It bonds very strongly to the tile surface.
Calcium silicate forms when silica is present in the water along with high calcium levels. It usually requires stronger acidic cleaners or mechanical removal methods. Sometimes, professionals are needed for this type of buildup.
Understanding these differences helps you avoid ineffective cleaning attempts. It also prevents potential damage to your pool tiles. Proper identification is the first step in successful removal.
Essential Tools and Safety for Pool Tile Cleaning
Before you begin cleaning calcium buildup, gathering the right tools is important. Safety must also be your top priority. Working with pool chemicals and water requires careful preparation. Ignoring safety can lead to injury.
Necessary Cleaning Tools
Having the correct tools makes the job easier and more effective. Different tools are suited for different cleaning methods. Choose your tools based on the severity of the calcium buildup.
- Stiff Nylon Brush: This is good for light calcium deposits. Use it with mild cleaners. It helps scrub away the film without damaging the tiles.
- Pumice Stone: A pumice stone effectively scrapes off calcium. It works well on most pool tiles. Always keep the stone and tile wet to prevent scratching.
- Plastic Scraper or Putty Knife: Use a plastic scraper for larger, looser deposits. Metal tools can scratch your tiles.
- Wet/Dry Vacuum: This helps remove water and debris from the pool deck. It keeps your workspace clean.
- Garden Hose with Spray Nozzle: For rinsing down cleaned areas. This washes away loosened calcium and cleaning solutions.
- Bucket: For mixing solutions or holding water for rinsing. A clean bucket is always useful.
- Grout Brush: For cleaning calcium from grout lines. These lines can trap deposits.
Crucial Safety Precautions
Safety is non-negotiable when cleaning pool tiles. You will be working with water and potentially strong chemicals. Always protect yourself and your surroundings.
- Protective Eyewear: Goggles or safety glasses protect your eyes from splashes. Chemicals can cause serious eye damage.
- Chemical-Resistant Gloves: Wear gloves to protect your skin from harsh chemicals. Choose gloves made from materials like nitrile or neoprene.
- Old Clothes/Work Clothes: Wear clothing you do not mind getting stained. Some chemicals can bleach or damage fabric.
- Proper Ventilation: When using strong chemicals, ensure good airflow. Work outdoors in an open area. Avoid breathing in fumes.
- Warning Signs: Place “Wet Floor” or “Caution” signs around the pool area. This prevents accidents.
- Keep Children and Pets Away: Ensure no one accidentally walks into the cleaning area. Chemicals are harmful if ingested.
- First Aid Kit: Have a basic first aid kit nearby. Know how to use it in case of chemical exposure or injury.
- Neutralizing Agent: If using acid, have baking soda or soda ash ready. These can neutralize spills.
- Read Instructions: Always read the labels and instructions on all cleaning products. Follow them carefully for safe and effective use.
You might need to lower your pool’s water level. This exposes the waterline tiles for easier cleaning. Make sure your pool pump is off before working near the water.
Natural and DIY Methods for Removing Calcium
Before resorting to harsh chemicals, try natural and DIY methods. These options are often effective for lighter calcium buildup. They are also safer for you, your pool, and the environment. I often start with these methods myself.
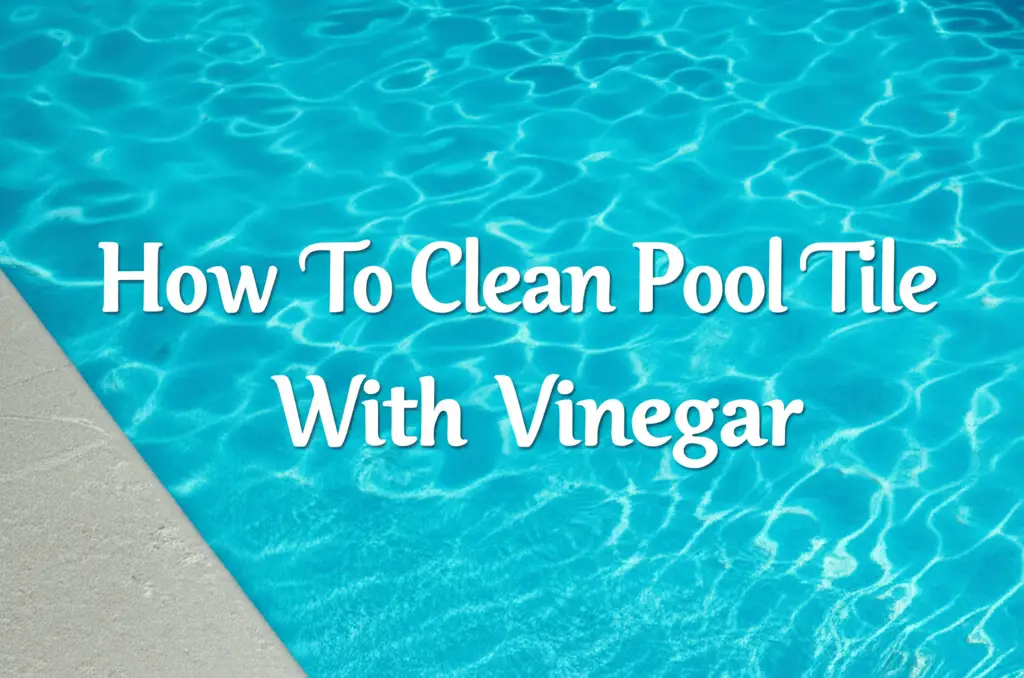
Vinegar Power
Vinegar is a weak acid that works wonders on calcium carbonate deposits. White vinegar is my go-to for many household cleaning tasks. It breaks down mineral scale effectively. This makes it a great choice for your pool tiles.
- Direct Application: For mild buildup, simply spray undiluted white vinegar directly onto the calcium. Let it sit for 15-30 minutes. The acetic acid in vinegar dissolves the scale.
- Scrubbing: After soaking, scrub the area with a stiff nylon brush or a pumice stone. The loosened calcium should come off easily. You may need to repeat this process for tougher spots.
- Vinegar and Water Solution: For maintenance or lighter deposits, mix equal parts vinegar and water. Use this solution for regular wiping down of the waterline. This helps prevent future severe buildup.
Vinegar is safe for most tile types and pool surfaces. It leaves no harmful residues. For more general cleaning with vinegar, consider how it’s used in other parts of your home, like cleaning a dishwasher. This natural cleaner offers versatility for many tasks. If you’re interested in more uses, learn how to clean with vinegar and baking soda.
Baking Soda Paste
Baking soda, while alkaline, can be effective when used as an abrasive paste. It works by gently scrubbing away the calcium. This method is especially good for delicate tiles or light films. I find it less aggressive than some other options.
- Create a Paste: Mix baking soda with a small amount of water to form a thick paste. The paste should be consistent, like toothpaste.
- Apply and Scrub: Apply the paste directly onto the calcium buildup. Use a soft cloth or a nylon brush to scrub the area gently. The abrasive action helps lift the deposits.
- Rinse: Rinse the tile thoroughly with clean water. Repeat as needed until the calcium is gone. This method is non-toxic and eco-friendly.
Borax Paste
Borax is another natural mineral that can aid in cleaning. It’s often used as a laundry booster, but its mild alkalinity and abrasive qualities make it useful for calcium. Like baking soda, it works best as a paste.
- Mix Paste: Combine borax powder with a little water to form a thick paste.
- Apply and Scrub: Spread the paste over the calcium deposits. Let it sit for 10-15 minutes. Then, scrub with a stiff brush.
- Rinse Well: Ensure you rinse all borax residue from the tiles and pool.
Pumice Stone Scrubbing
A pumice stone is a popular mechanical method for removing calcium. It is very effective for stubborn calcium carbonate. However, it requires careful use to avoid scratching tiles. Always ensure both the tile and the pumice stone are wet.
- Wet the Area: Submerge the tile and the pumice stone in pool water. This lubrication is crucial.
- Gentle Scrubbing: Gently rub the pumice stone over the calcium deposit. Apply light pressure. The stone will crumble as it removes the scale.
- Check for Scratches: Periodically lift the stone to check for any scratching on the tile. If you see scratches, stop immediately. Pumice is generally safe for ceramic and porcelain tiles but can scratch softer or glazed surfaces. For a deeper dive into tile care, understanding how to clean various tile types, such as how to clean porcelain tile floors without streaks, can be beneficial for maintaining your pool area.
- Rinse Away Debris: Rinse the area frequently to clear away calcium particles and stone residue.
These natural methods are excellent starting points. They minimize chemical exposure and are often sufficient for mild to moderate calcium issues. If these do not work, you might need to consider stronger options.
Chemical Solutions for Stubborn Calcium Deposits
When natural methods fall short, chemical solutions become necessary. These products are more powerful but also require greater caution. Always follow safety guidelines strictly. I only use these when other methods have failed.
Commercial Calcium Removers
Many specialized calcium removers are available for pool tiles. These products are formulated to dissolve mineral buildup. They often contain specific acids or chelating agents. Always choose a product designed for pool use.
- Read Instructions Carefully: Every product has unique application guidelines. Pay attention to dilution ratios, application methods, and dwell times.
- Test in an Inconspicuous Area: Before applying broadly, test the cleaner on a small, hidden tile. This checks for any discoloration or damage.
- Apply According to Directions: Use a spray bottle, brush, or cloth to apply the cleaner. Ensure even coverage on the calcium.
- Allow Dwell Time: Let the product sit for the recommended time. This allows the chemicals to break down the calcium.
- Scrub and Rinse: Scrub the treated area with a stiff brush. Then, rinse thoroughly with clean water. Ensure all chemical residue is removed.
- Ventilation: Use these products in well-ventilated areas. Fumes can be irritating or harmful.
These removers are designed to be effective. They offer a more targeted approach than general household cleaners. Always prioritize safety gear when using them.
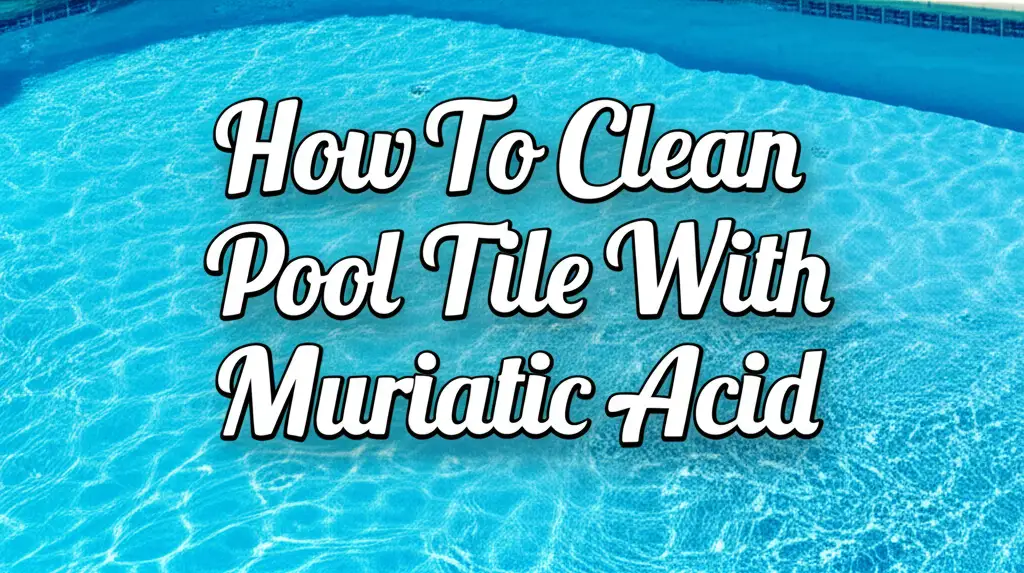
Muriatic Acid (Hydrochloric Acid) - Use with Extreme Caution
Muriatic acid is a very strong acid. It is highly effective at dissolving calcium silicate and tough calcium carbonate. However, it is also extremely corrosive and dangerous. I cannot stress enough the need for extreme caution if you choose this method. This should be a last resort, used only by experienced individuals.
- Dilution is Key: Never use muriatic acid undiluted. Always dilute it with water according to product instructions. A common ratio is 1 part acid to 10 parts water, or even weaker.
- Add Acid to Water: Always add acid to water, never water to acid. Adding water to acid can cause a violent reaction and splashes.
- Personal Protective Equipment (PPE): Wear full PPE. This includes heavy-duty chemical-resistant gloves, eye protection (goggles, not just safety glasses), a respirator, and long sleeves/pants. Consider a face shield.
- Ventilation: Work in an extremely well-ventilated area. Fumes are very dangerous to inhale.
- Apply Carefully: Use an acid-resistant brush or sponge to apply the diluted solution. Work in small sections. Avoid letting the acid drip into the pool water excessively.
- Short Dwell Time: Do not let muriatic acid sit for long. It can damage tiles and grout. A few minutes is often enough.
- Neutralize and Rinse: Immediately after scrubbing, neutralize the area. Use a baking soda and water paste or a specialized acid neutralizer. Then, rinse the area thoroughly with plenty of clean water. This step is critical to stop the acid’s action.
- Neutralize Spills: Keep baking soda or soda ash nearby to neutralize any spills instantly.
Muriatic acid can etch pool plaster and damage other pool surfaces if misused. It also impacts pool water chemistry significantly. If you are uncomfortable using muriatic acid, hire a professional. This is safer than risking injury or pool damage.
Mechanical and Specialized Techniques for Tough Calcium
When calcium buildup is severe, or has become calcium silicate, standard chemical or scrubbing methods may not be enough. In such cases, specialized mechanical techniques can remove the stubborn deposits. These methods often require professional equipment or expertise.
Pressure Washing (with caution)
Pressure washing can be effective for removing calcium scale. However, it must be used with great care. High-pressure water can damage delicate pool tiles or grout. It can also strip away the tile’s glaze.
- Low Pressure Setting: Always start with the lowest pressure setting on your washer. Gradually increase if necessary. Avoid using a concentrated jet. A fan-spray nozzle is usually best.
- Maintain Distance: Keep the spray wand at a safe distance from the tiles. Do not get too close. This prevents chipping or cracking.
- Test Small Area: Always test on an inconspicuous section first. Ensure it does not damage the tile or grout.
- Angle of Spray: Spray at an angle, not directly perpendicular to the tile. This helps lift the scale without direct impact.
- Grout Lines: Be extra careful around grout lines. High pressure can erode grout, leading to costly repairs.
- Rinse Thoroughly: After pressure washing, rinse the entire area well. This removes any loosened calcium particles.
Pressure washing is generally more suitable for very hard, non-porous tiles. Avoid it on delicate, hand-painted, or antique tiles. It’s often best for surface-level, flaky calcium carbonate.
Bead Blasting / Abrasive Blasting
Bead blasting is one of the most effective methods for severe calcium buildup, especially calcium silicate. This technique uses a specialized machine to propel fine abrasive media at the tile surface. The media abrades away the calcium without damaging the tile.
- Types of Media: Common media include glass beads, salt, or Kieserite (magnesium sulfate). Each has different abrasive qualities. Glass beads are popular because they are gentle on most tiles.
- Specialized Equipment: This requires professional blasting equipment. It is not a DIY task for most homeowners.
- Professional Service: It is highly recommended to hire a professional pool tile cleaning service for bead blasting. They have the experience and equipment to do the job safely and effectively.
- No Chemicals: This method is chemical-free, making it environmentally friendly. It removes the calcium physically.
- Water Level: Often, the pool water level needs to be lowered to expose the tiles. Some methods allow for submerged blasting.
Bead blasting can restore the original look of your pool tiles. It is particularly useful for large areas of heavy buildup. While it is an investment, it saves time and prevents potential damage from improper DIY chemical use.
Manual Scraping Tools
For very localized, thick deposits, careful manual scraping might be an option. This is suitable for spots that resist other methods. Use this with extreme caution to prevent tile damage.
- Plastic Scrapers: Always use a plastic scraper or a nylon putty knife. Metal tools will scratch the tile surface.
- Wet the Tile: Keep the tile wet to provide lubrication. This helps the scraper glide more smoothly.
- Gentle Pressure: Apply gentle, consistent pressure. Work slowly. Do not dig into the tile or grout.
- Test First: Test the scraper on an inconspicuous area. Ensure it does not leave marks.
- Combine with Solutions: Scraping is often more effective after applying a calcium-dissolving solution. The solution softens the buildup, making it easier to remove.
These mechanical methods are powerful tools for tough calcium. They offer solutions when milder options are not enough. Always weigh the effectiveness against the potential for tile damage.
Preventing Future Calcium Buildup on Pool Tile
Prevention is always easier than cure, especially with calcium buildup. By consistently managing your pool water chemistry and practicing good maintenance, you can significantly reduce the chances of future deposits. I find that regular attention saves a lot of headaches later.
Maintain Proper Water Chemistry
Balanced pool water is your best defense against calcium scale. Unbalanced water is the primary cause of mineral precipitation. Regular testing and adjustment are essential.
- Calcium Hardness (CH): This is the measure of dissolved calcium in your water. The ideal range is generally 200-400 parts per million (ppm). If your CH is too low, the water can become corrosive. If too high, calcium will precipitate out.
- Test your calcium hardness weekly, especially in areas with hard water.
- If CH is too high, you may need to partially drain and refill your pool with softer water. Calcium hardeners are available if levels are too low.
- pH Level: The pH indicates how acidic or basic your water is. The ideal range is 7.4-7.6. High pH (above 7.6) makes calcium less soluble, causing it to scale.
- Test pH daily or every other day. Adjust with pH decreaser (acid) or pH increaser (soda ash) as needed.
- Total Alkalinity (TA): TA acts as a buffer for your pH, keeping it stable. The ideal range is 80-120 ppm. High TA can lead to high pH, encouraging scale formation.
- Test TA weekly. Use an alkalinity decreaser or increaser to adjust.
- Temperature: Hot water holds less dissolved calcium. In very hot climates, calcium can precipitate more easily. Keep water chemistry perfectly balanced if your pool temperature is consistently high.
Investing in a good quality test kit or strips is crucial. Regular testing allows you to make small adjustments before problems become severe. This proactive approach saves time and money.
Regular Cleaning and Wiping
Even with perfect water chemistry, some mineral residue can accumulate. Regular physical cleaning of the waterline helps. This removes deposits before they harden.
- Daily Wiping: Get into the habit of wiping down your pool tiles at the waterline daily. A clean cloth or soft brush works well. This removes any fresh mineral film.
- Weekly Scrubbing: Once a week, give the waterline a gentle scrub. Use a stiff nylon brush or a pool cleaning mitt. This prevents light scale from building up.
- Using a Milder Solution: For weekly cleaning, use a dilute vinegar solution (1 part vinegar to 5 parts water). Spray it on the waterline, let it sit for a few minutes, then scrub and rinse. This helps dissolve any minor deposits before they become stubborn stains.
Use a Scale Inhibitor
Scale inhibitors are chemical products designed to prevent mineral buildup. They work by binding to calcium and other minerals, keeping them suspended in the water. This stops them from adhering to pool surfaces.
- Choose a Quality Product: Select a scale inhibitor specifically for swimming pools. Read reviews and product descriptions.
- Follow Dosing Instructions: Add the recommended amount of inhibitor according to your pool volume. Do not over-dose.
- Regular Application: Most inhibitors require regular addition, often monthly or bi-monthly.
- Hard Water Areas: If you live in an area with very hard water, a scale inhibitor is highly recommended. It provides an extra layer of protection.
While scale inhibitors are helpful, they are not a substitute for proper water chemistry. They work best in conjunction with balanced water.
Filtration and Circulation
Good filtration and circulation are also important. They help distribute chemicals evenly and remove suspended particles. This contributes to overall water health, reducing the likelihood of scale.
- Run Pump Regularly: Ensure your pool pump runs for enough hours each day (usually 8-12 hours). This circulates water and chemicals effectively.
- Clean Filters: Regularly clean or backwash your pool filter. A dirty filter reduces circulation and overall water quality. For sand filters, knowing how to clean a sand filter for above-ground pool is essential.
By implementing these preventive measures, you can keep your pool tiles looking clean and new. It’s an ongoing process, but the effort is worth it for a beautiful, problem-free pool.
Maintaining Your Pool Tiles for Long-Term Beauty
Once you have cleaned calcium buildup, maintaining your pool tiles is crucial. Consistent care prevents new scale from forming and keeps your pool looking its best. Think of it as an ongoing commitment to your pool’s aesthetic and longevity.
Regular Waterline Cleaning
As mentioned in prevention, routine cleaning of the waterline is key. This area is most prone to calcium deposits due to evaporation. Make it a part of your regular pool maintenance schedule.
- Daily Wipe-Down: A quick wipe with a clean cloth or soft sponge removes fresh film. Do this when you check your skimmer baskets.
- Weekly Gentle Scrub: Dedicate a few minutes each week to lightly scrub the waterline tiles. Use a non-abrasive pad or a soft brush. A dilute solution of white vinegar (1:5 vinegar to water) can be applied. This prevents buildup from hardening.
- Focus on Problem Areas: Pay extra attention to areas that tend to accumulate more scale. These might be sunny spots or areas with less water movement.
This simple, consistent effort goes a long way. It avoids the need for more intensive cleaning later.
Monitor Water Levels
Evaporation exposes pool tiles to air, leading to calcium buildup. Keeping the water level consistent helps. Aim for the middle of your skimmer opening.
- Check Daily: Quickly check your water level each day.
- Replenish as Needed: Add water to your pool to compensate for evaporation. This is especially important during hot weather or heavy use.
- Automatic Fillers: Consider an automatic pool filler if evaporation is a major issue. This keeps your water level stable with minimal effort from you.
Consistent water levels minimize the exposure of your tiles to evaporating water. This reduces the primary cause of waterline scale.
Immediate Stain Removal
Sometimes, despite your best efforts, new stains might appear. Addressing them immediately is important. Fresh stains are much easier to remove than old, hardened ones.
- Identify Early: Pay attention to any discoloration or film on your tiles during your regular checks.
- Spot Treatment: Use a targeted approach for new spots. A small amount of vinegar or a specialized tile cleaner on a brush can quickly remove them.
- Avoid Delay: Do not let small spots grow into large, stubborn patches. Quick action prevents minor issues from becoming major problems.
Professional Inspections
Even with diligent DIY maintenance, consider professional pool inspections. Professionals can spot issues you might miss. They can also offer advice tailored to your specific pool and local water conditions.
- Annual Check-ups: Schedule a professional inspection once a year. They can check water chemistry, equipment, and look for signs of early scale.
- Specialized Cleaning: If heavy scale returns despite your efforts, a professional cleaning service might be beneficial. They have specialized tools like bead blasters for tough jobs.
- Preventative Advice: Professionals can offer advice on the best preventative measures for your specific pool. This can include recommendations for scale inhibitors or water softeners.
By combining regular cleaning, vigilant water chemistry management, and occasional professional help, you can ensure your pool tiles remain beautiful. This long-term care protects your investment and enhances your pool experience.
- pool tile cleaning
- calcium removal
- hard water stains
- pool care