· Grill Maintenance · 20 min read
How To Clean Cast Iron Grill Grates
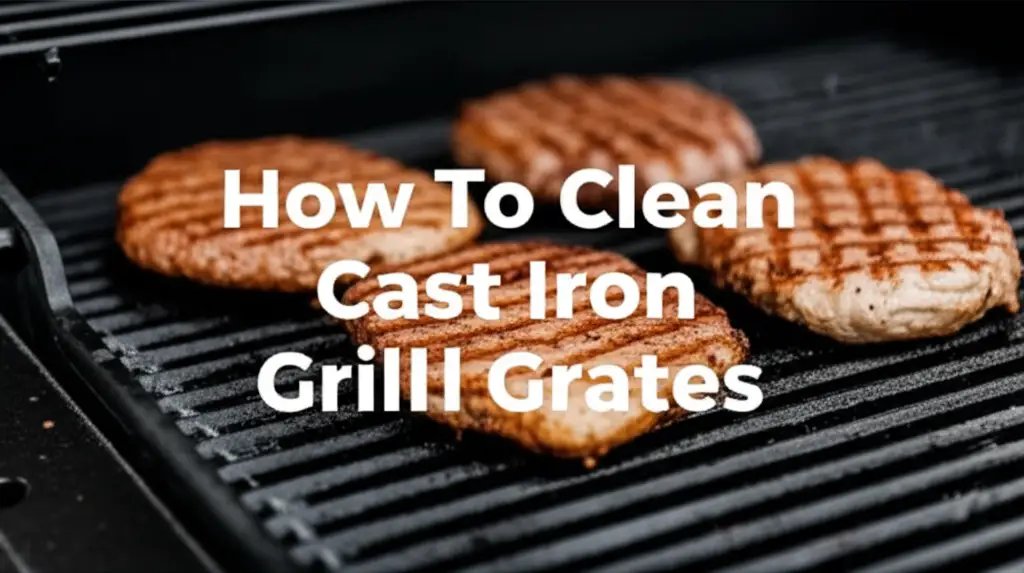
How to Clean Cast Iron Grill Grates for Peak Performance
Grilling is a favorite pastime for many people. It brings delicious flavors to food. A key part of grilling success lies with your grill grates. If you own a grill with cast iron grates, you know they offer superior heat retention and beautiful sear marks. But their special material needs specific care. Ignoring cast iron grill grates can lead to rust, stuck-on food, and poor cooking performance. This guide helps you understand how to clean cast iron grill grates. We will explore simple methods for everyday cleaning. We will also look at deeper cleaning for tough spots. You will learn about rust removal and proper re-seasoning. We will cover common mistakes to avoid. My aim is to help you keep your grill grates in excellent condition. This ensures many more years of enjoyable grilling.
Takeaway
Keeping your cast iron grill grates clean is simple with the right steps.
- Clean them after each use while still warm.
- Use a stiff brush or scraper for food residue.
- Avoid harsh detergents or dishwashers.
- Always dry them completely after cleaning.
- Re-season them regularly with cooking oil.
- Address rust quickly to prevent further damage.
To clean cast iron grill grates effectively, scrub them while warm with a stiff brush or scraper. For deeper cleaning, use hot water and mild soap, or a paste of baking soda and water. Always rinse thoroughly, dry completely to prevent rust, and then apply a thin layer of cooking oil to re-season the surface before storage.
Why Clean Your Cast Iron Grill Grates?
Keeping your cast iron grill grates clean is not just about looks. It significantly affects your grilling experience. Dirty grates lead to many problems. They can ruin the taste of your food. They can also make cooking less efficient. I always clean my grates because I know it makes a difference.
Food stuck on grates burns and forms a layer of carbon. This layer transfers bad flavors to new food. Imagine fresh burgers tasting like last week’s burnt chicken. Nobody wants that. Clean grates ensure that your food tastes pure. The flavor comes from your marinade and ingredients, not old charred bits. This is a simple truth for good cooking.
Clean grates also perform better. Cast iron needs proper heat distribution. A layer of crud blocks this. This means some parts of your food might cook faster than others. You get uneven results. A clean surface allows for direct contact between food and hot metal. This gives you those perfect sear marks. It also cooks food evenly. This makes your grilling much easier.
Furthermore, proper cleaning extends the life of your grates. Cast iron is durable. But it is prone to rust without care. Food residue and moisture create ideal conditions for rust. Once rust starts, it can quickly damage the grates. This makes them unsafe for cooking. Regular cleaning prevents rust. It protects your investment. This saves you money in the long run. My own grill grates have lasted years because I clean them.
Finally, clean grates are safer. Burnt food buildup can ignite. This creates flare-ups that are hard to control. Excess grease and carbon also attract pests. Rodents and insects can be a problem. A clean grill reduces these risks. It makes your grilling environment safer and more pleasant. So, cleaning is not just a chore. It is essential for delicious food, efficient cooking, and safety.
Essential Tools and Materials for Cleaning Cast Iron Grates
Having the right tools makes cleaning your cast iron grill grates much easier. You do not need a lot of special equipment. Most items are common household goods. I always gather my supplies before starting. This saves time and effort.
First, a good grill brush is critical. Look for a brush with stiff bristles. Stainless steel or brass bristles work well. Avoid brushes that shed bristles easily. Loose bristles can stick to your grates and transfer to food. Some brushes have a scraper edge. This is very useful for tough, stuck-on bits. A long handle keeps your hands safe from heat.
Next, you will need a scraper. A dedicated grill scraper is best. It can be metal or wood. A wooden scraper will conform to the shape of your grates over time. This makes it very effective. For really tough spots, I sometimes use a putty knife. Be careful not to scratch the seasoning too much.
Water is always necessary. Warm or hot water helps loosen grease and food. For deeper cleaning, you might use dish soap. Choose a mild dish soap. Avoid harsh detergents. Harsh soaps can strip away the seasoning on your cast iron. If you use soap, plan to re-season.
Baking soda is a powerful natural cleaner. It helps lift grime and neutralize odors. White vinegar is another useful item. It can help break down grease and even tackle minor rust. I often use a mix of baking soda and vinegar for stubborn spots. It creates a fizzy reaction that helps loosen dirt. You can learn more about how these two work together for cleaning here.
For seasoning, you need cooking oil. Vegetable oil, canola oil, or flaxseed oil are good choices. A paper towel or clean cloth helps apply the oil. You want a thin, even coat. This protects the cast iron and creates a non-stick surface.
Finally, you might want rubber gloves. They protect your hands from grease and cleaning solutions. A sturdy bucket or large basin can also be useful for soaking grates. These simple tools make maintaining your cast iron grates a straightforward task.
Pre-Cleaning Steps: Preparing Your Grill Grates
Before you start scrubbing, a few steps make the cleaning process more effective. Proper preparation prevents future problems. It also makes the actual cleaning much easier. I always follow these steps to get ready.
The first and most important step is to let your grill cool down. Never try to clean hot cast iron grates with water. The sudden temperature change can cause thermal shock. This can crack the grates. Wait until they are warm, not hot, to the touch. This usually means waiting 15-30 minutes after grilling. If they are cold, that is fine too. Warm grates make it easier to remove food bits.
Once the grates are warm, scrape off large food pieces. Use your grill scraper or a stiff-bristled brush. Push the debris into the grill’s drip pan. This removes the bulk of the mess. It prevents clogging drains later. It also gives you a better surface to work on. I find that this initial scrape makes a big difference. Many times, most of the work is done at this stage.
For a thorough pre-clean, you can burn off some residue. Turn your grill on high heat for 10-15 minutes. The high heat will carbonize food bits. This makes them brittle. They are then easier to brush away. After this, let the grates cool down again. This method is great for everyday post-grilling cleanup.
If your grates are very dirty, you might need to remove them from the grill. This allows for easier access. You can clean them on a flat surface or in a large utility sink. Wearing gloves at this stage is a good idea. This protects your hands from grease.
Make sure your work area is ready. Lay down old newspapers or towels if working indoors. This protects surfaces from drips and mess. Having a clear space helps you focus on the task. These simple preparations set the stage for a successful cleaning job.
Method 1: Hot Cleaning for Everyday Grime
Hot cleaning is the easiest and most common method for cast iron grill grates. You do this right after you finish cooking. The grates are still warm. This heat helps loosen food particles. This method is perfect for routine maintenance. It prevents buildup.
As soon as you finish grilling, turn off the heat. Let the grates cool for a few minutes. They should be warm, not scorching hot. This is important to avoid thermal shock. A warm grate is easier to clean than a cold one. The residual heat makes the food bits softer.
Take your stiff-bristled grill brush. Start brushing the grates firmly. Move the brush across the grates. Apply good pressure. The warm food residue should come off easily. Work in sections. Make sure you get into all the grooves. If your brush has a scraper, use it for any stubborn spots. Many quick cleaning methods, like using aluminum foil as a scrubber, work best when the grates are still warm.
You do not need water or soap for this method. The goal is to brush off carbonized food and grease. The heat helps do the job. This method maintains your seasoning. It also prepares the grates for the next use.
After brushing, you might see a fine layer of ash or dust. You can wipe this away with a paper towel. For best results, apply a thin layer of cooking oil. This re-seasons the grates. It protects them from moisture. It also prepares them for your next cook. A small amount of oil is enough. Wipe it evenly over the surface.
This hot cleaning method saves time. It keeps your cast iron grates in good shape. It prevents the need for more intensive cleaning later. I do this after every grilling session. My grates stay well-maintained this way. It makes the next grilling session a joy.
Method 2: Deep Cleaning for Stubborn Grime
Sometimes, hot cleaning is not enough. Stubborn grease and carbon buildup can accumulate. This requires a more thorough deep clean. This method involves water and sometimes mild soap. It is important to know how to do this without harming your cast iron. This is a powerful way to clean stuck-on cast iron.
First, remove the cast iron grates from your grill. Place them in a large utility sink or a sturdy tub. You want a place where you can work freely. Make sure you have enough space.
For very heavy buildup, start with hot water. Fill the tub or sink with hot water. Add a small amount of mild dish soap. Dish soap can strip seasoning, so use it sparingly. Submerge the grates. Let them soak for 15-30 minutes. This helps loosen the stubborn grime. Do not soak for too long. Prolonged soaking can lead to rust.
After soaking, use a stiff bristle brush or a plastic scraper. Scrub the grates vigorously. Focus on areas with heavy buildup. The loosened grime should come off. You might need to use some elbow grease here. For extra tough spots, a paste of baking soda and water works wonders. Mix equal parts baking soda and water to form a thick paste. Apply this paste to the dirty areas. Let it sit for 15-20 minutes. Then scrub with your brush. Baking soda is abrasive enough to help remove crud without scratching. It works very well on crud off a cast iron skillet.
Rinse the grates thoroughly with hot water. Make sure all soap residue is gone. Soap left behind can affect food taste. It can also prevent proper re-seasoning. After rinsing, it is crucial to dry the grates immediately and completely. Use paper towels or a clean cloth. You can also place them back on the grill over low heat for a few minutes. This ensures all moisture evaporates. Any water left on cast iron can cause rust. Once dry, proceed immediately to re-seasoning. This deep cleaning process restores your grates. It prepares them for a fresh layer of seasoning.
Method 3: Tackling Rust on Cast Iron Grates
Rust is the enemy of cast iron. It happens when moisture meets unprotected iron. If you see orange or reddish-brown spots on your grill grates, you have rust. Do not worry; it is fixable. Addressing rust quickly prevents further damage. I have had to tackle rust on my own grates.
To remove rust, you need an abrasive. Steel wool or a stiff wire brush works well. You can also use a sturdy scrub pad. Start by scrubbing the rusted areas vigorously. Apply good pressure. The goal is to remove all visible rust. This might take some effort. Make sure you remove all the powdery rust.
For stubborn rust, you can make a paste. Mix baking soda with a little water to form a thick paste. Apply the paste directly to the rusted spots. Let it sit for about 30 minutes. The baking soda helps to lift the rust. Then, scrub with steel wool or a brush. For more severe rust, a solution of half white vinegar and half water can also be used. Soak the rusted areas for a short time, perhaps 15-30 minutes, then scrub. Prolonged soaking in vinegar can damage cast iron, so watch it closely. You can find more detailed methods for how to clean rust from cast iron on our site.
After scrubbing, rinse the grates thoroughly with hot water. It is very important to remove all rust particles and cleaning solution. Pay close attention to this step. Any leftover rust can continue to cause problems.
Once rinsed, dry the grates immediately and completely. Use paper towels or a clean cloth. You can also place them back on the grill over low heat. Heat helps evaporate all moisture. Do not let them air dry. This will encourage new rust.
The rust removal process strips away any existing seasoning in those areas. Therefore, re-seasoning is absolutely essential after tackling rust. This step protects the newly cleaned metal. It prevents rust from returning. Neglecting re-seasoning means the rust will come back quickly. Always re-season your grates after rust removal.
Re-Seasoning Your Cast Iron Grill Grates After Cleaning
Re-seasoning is the most crucial step after deep cleaning or rust removal. It is also good practice after every hot clean. Seasoning is a layer of polymerized oil baked onto the cast iron. It creates a natural non-stick surface. It also protects the iron from rust. Think of it as a protective barrier. I always make sure to re-season.
First, ensure your cast iron grill grates are completely clean and dry. Any water or food particles will prevent proper seasoning. If they are damp, place them back on a low grill heat for a few minutes. This ensures they are bone dry.
Choose your oil. Vegetable oil, canola oil, flaxseed oil, or grapeseed oil are excellent choices. Avoid butter or olive oil for seasoning. They have lower smoke points and can become sticky. I usually use canola oil because it is readily available.
Apply a very thin, even layer of oil to all surfaces of the grate. Use a paper towel or a clean cloth. You want just enough oil to coat it. Too much oil will result in a sticky, gummy surface. Wipe off any excess oil. It should look barely oiled, not greasy. Think of it as polishing, not painting.
Now, you need to bake the oil onto the grates. Place the grates back into your grill. Close the lid. Heat your grill to a medium-high temperature, around 350-400°F (175-200°C). Let the grates heat for about 1 to 1.5 hours. During this time, the oil will polymerize. This means it will transform into a hard, protective layer. You might see some smoke. This is normal. It indicates the oil is bonding to the iron.
After the time is up, turn off the grill. Let the grates cool down slowly inside the grill. This helps the seasoning layer set. Once cool, they are ready for storage or immediate use. The grates should look dark and slightly glossy. This re-seasoning process restores the protective layer. It ensures your cast iron remains non-stick and rust-free. Regular re-seasoning keeps your grates in prime condition for years of grilling.
Post-Cleaning Maintenance and Storage Tips
Proper maintenance and storage are key to long-lasting cast iron grill grates. Cleaning is only half the battle. How you care for them between uses matters a lot. These habits keep your grates seasoned and rust-free. I always follow these steps for long-term care.
After every grilling session and cleaning, always apply a thin layer of cooking oil. This is a quick re-seasoning. It protects the surface from moisture in the air. This single step is the most important for rust prevention. Use a paper towel to wipe oil over all surfaces of the grates. Make sure it is a very thin, even coat.
Store your grill grates in a dry place. Moisture is the biggest enemy of cast iron. If your grill stays outside, consider covering it with a grill cover. A good cover protects the entire grill from rain and humidity. If possible, remove the grates and store them indoors during long periods of non-use. A shed or garage is better than leaving them exposed to the elements.
Avoid extreme temperature changes. Do not pour cold water on hot grates. This can cause the cast iron to crack. Let the grates cool naturally after grilling. This prevents thermal shock.
Inspect your grates regularly. Look for any signs of rust or food buildup. Addressing small issues early prevents them from becoming big problems. If you spot a small rust spot, clean it immediately. Then, re-season that area.
Do not stack other items on top of your grates during storage. This can scratch the seasoning. Store them flat if possible. If you must stack them, place a layer of cardboard or cloth between them.
Proper air circulation is also beneficial. If storing indoors, do not wrap them tightly in plastic. This can trap moisture. A breathable cover or simply placing them in a dry, open space is better.
Following these maintenance and storage tips extends the life of your cast iron grill grates significantly. It ensures they are always ready for your next barbecue. This saves you time and money. It also gives you better grilling results.
Common Mistakes to Avoid When Cleaning Cast Iron
Cleaning cast iron grill grates might seem simple, but some common mistakes can damage them. Avoiding these pitfalls is as important as knowing the right steps. I learned some of these the hard way.
First, never put cast iron grill grates in the dishwasher. Dishwashers use harsh detergents and hot water. This combination strips away the seasoning completely. It also leaves the cast iron exposed to moisture for too long. This leads to immediate and severe rust. Your grates will come out looking terrible. They will be orange and possibly ruined. Always wash cast iron by hand.
Second, do not use harsh chemicals. Bleach, oven cleaner, or very strong degreasers can also strip seasoning. They can be corrosive. They may leave residues that are unsafe for cooking. Stick to mild dish soap, baking soda, and vinegar for cleaning. These are effective and safe for cast iron.
Third, avoid air drying your grates. After washing, moisture is the enemy. Water left on cast iron will quickly cause rust. Always dry your grates immediately and completely. Use paper towels or a cloth. Heating them on the grill for a few minutes ensures they are bone dry. This is a crucial step I never skip.
Fourth, do not use metal scrubbers too aggressively, especially on seasoned areas. Steel wool is fine for rust removal. But for general cleaning, a stiff nylon brush or plastic scraper is better. Over-aggressive scrubbing can remove the hard-earned seasoning layer. This makes the grates prone to sticking and rust. Be firm, but gentle on the seasoning.
Fifth, do not forget to re-season after deep cleaning. This is perhaps the most common oversight. Every time you use soap or tackle rust, you remove some or all of the seasoning. You must replace it. Without seasoning, the grates lose their non-stick properties. They will rust quickly. Always follow cleaning with a thin coat of oil and heat.
Lastly, do not store grates wet or exposed to the elements. As mentioned, moisture causes rust. Keep them dry and protected. Following these warnings helps preserve your cast iron grill grates. They will serve you well for many years.
Frequently Asked Questions About Cleaning Cast Iron Grill Grates
1. Can I use soap on cast iron grill grates? Yes, you can use a small amount of mild dish soap for deep cleaning. Modern cast iron seasoning is more durable than old myths suggest. However, soap does remove some of the seasoning. Always plan to re-season your grates with cooking oil after using soap. Rinse them very well to remove all soap residue.
2. How often should I clean my cast iron grill grates? You should perform a light cleaning with a grill brush after every use, while the grates are still warm. This prevents food buildup. A deeper clean is needed periodically, or when you notice significant grime or rust. This might be every few weeks or months, depending on how often you grill.
3. What is the best brush for cast iron grill grates? A stiff-bristled grill brush is best. Look for stainless steel or brass bristles. Avoid brushes with loose bristles that might break off. Some brushes come with a scraper edge, which is very useful for tough spots. A wooden scraper can also be effective and molds to the grate shape over time.
4. How do I re-season cast iron grill grates? After cleaning and drying, apply a very thin, even layer of high smoke point cooking oil (like vegetable or canola oil) to all surfaces. Place the grates back in your grill. Heat the grill to 350-400°F (175-200°C) for 1 to 1.5 hours. Turn off the grill and let the grates cool inside.
5. Can I put cast iron grill grates in the dishwasher? No, absolutely not. Putting cast iron grill grates in the dishwasher will strip off all seasoning. The harsh detergents and prolonged exposure to moisture will cause severe rust. Always clean cast iron by hand to preserve its seasoning and prevent damage.
6. How do I remove rust from cast iron grill grates? Scrub the rusted areas with steel wool or a stiff wire brush. For stubborn rust, apply a paste of baking soda and water or soak briefly in a weak vinegar solution. After removing all rust, rinse thoroughly, dry immediately, and then re-season the grates with cooking oil to protect them.
Conclusion
Keeping your cast iron grill grates clean is a simple but important task. It ensures your grilling remains enjoyable and your equipment lasts for years. We have covered why cleaning matters, the tools you need, and various methods from everyday maintenance to deep cleaning and rust removal. Remember, warm brushing after each use is your first line of defense. For stubborn grime, a deeper clean with baking soda or mild soap works wonders. Always address rust quickly to prevent further damage.
The key to long-term care for cast iron grill grates lies in consistent re-seasoning and proper storage. A thin layer of oil after every clean protects the metal. Storing them dry and covered prevents rust from forming. By avoiding common mistakes like using dishwashers or harsh chemicals, you protect your valuable investment. You now have the knowledge to keep your cast iron grill grates in peak condition. Go forward and grill with confidence, knowing your grates are ready for any culinary adventure. Enjoy the delicious results of a well-maintained grill!
- cast iron
- grill cleaning
- grill grates
- rust removal
- seasoning