· Bathroom Maintenance · 19 min read
How To Clean Caulking In Shower
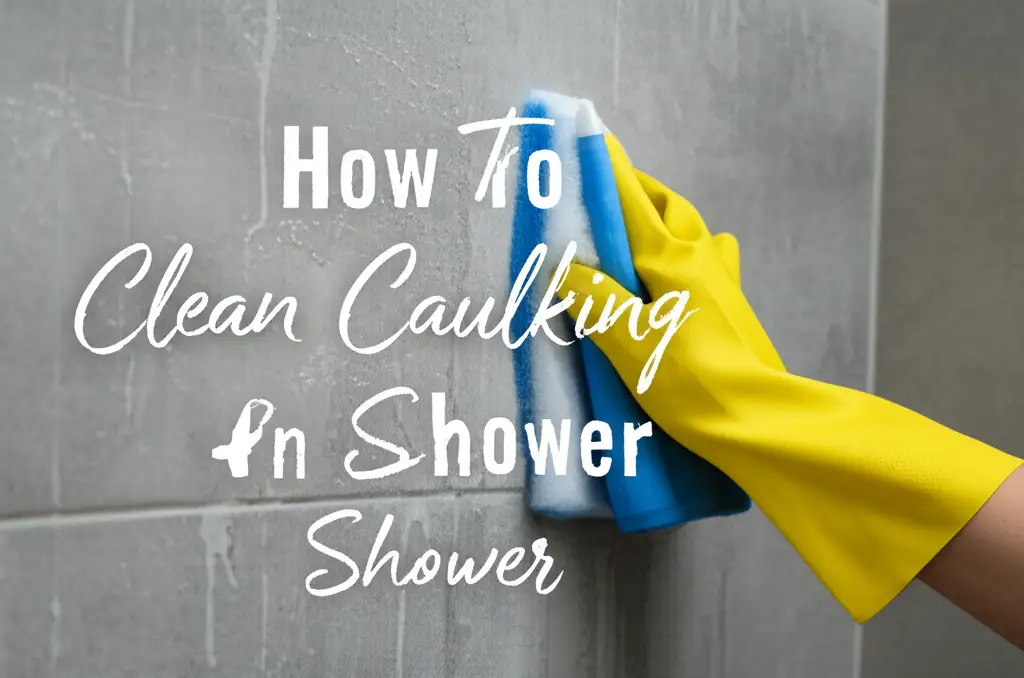
Effortlessly Clean Shower Caulking: A Complete Guide
Is the caulk in your shower looking discolored or spotted? You are not alone. Dirty shower caulking is a common issue for many homes. This discoloration often signals mold, mildew, or hard water stains.
Cleaning shower caulk not only restores its appearance but also prevents further deterioration. It maintains a healthy, hygienic bathroom environment. This article will provide a complete guide. I will walk you through various effective methods, from gentle natural solutions to stronger treatments for stubborn stains. You will learn the right tools, proper techniques, and valuable prevention tips. Get ready to make your shower sparkle again!
Takeaway
- Assess the problem: Identify if your caulk has mold, mildew, or hard water stains.
- Choose the right method: Select a cleaning solution based on stain severity and caulk type.
- Gather supplies: Have all necessary tools and cleaning agents ready before starting.
- Ensure safety: Always use protective gear, especially when handling strong chemicals.
- Maintain regularly: Implement routine cleaning to prevent future buildup and prolong caulk life.
Cleaning caulking in the shower involves using appropriate cleaning agents like bleach, vinegar, or baking soda, combined with scrubbing tools to remove mold, mildew, and grime. Proper ventilation and safety gear are essential for effective and safe stain removal, restoring a fresh, clean appearance to your shower seals.
Why Cleaning Your Shower Caulking Matters
Dirty shower caulking is more than just an eyesore. It is a sign of underlying issues. Neglected caulk can harbor harmful substances. Understanding the importance of this task helps you prioritize your bathroom’s health.
My experience shows that regular cleaning prevents many headaches. It keeps your shower looking fresh. It also protects your home and family.
Health Risks of Neglected Caulk
Caulk often develops black spots. These are usually mold and mildew. Mold spores can spread through the air. Inhaling these spores can cause respiratory problems. They can also trigger allergies or asthma attacks. People with weakened immune systems are more vulnerable.
A clean shower means healthier air for everyone. I always make sure my family breathes clean air. This starts with a clean bathroom.
Aesthetic Impact
Unsightly caulk makes your entire shower look dirty. Even if your tiles are spotless, grimy caulk ruins the effect. Clean, bright caulk transforms the shower’s appearance. It makes the whole bathroom feel fresh and inviting.
When I finish cleaning the caulk, the shower looks brand new. This small change makes a huge difference. A well-maintained shower adds to your home’s overall appeal.
Protecting Your Investment
Caulking seals gaps. It stops water from seeping into walls and floors. If caulk breaks down from mold or neglect, water can escape. This leads to costly water damage behind your shower walls. It can cause wood rot or structural issues.
Cleaning and maintaining caulk extends its lifespan. It saves you money on expensive repairs or re-caulking jobs. My goal is always to protect my home. Cleaning caulk is a simple step to achieve that.
Essential Tools and Supplies for Caulking Cleaning
Before you begin to clean caulking in shower areas, gather the right tools and supplies. Having everything ready saves time and ensures a thorough job. I always prepare my cleaning station beforehand. This makes the process much smoother.
Basic Cleaning Tools
These items are fundamental for almost any caulk cleaning task. They help you apply cleaners and scrub effectively. Using the right tools makes the job easier and more efficient.
- Protective Gloves: Always wear rubber gloves. This protects your hands from harsh chemicals. It also keeps your skin safe from mold.
- Goggles/Eye Protection: Splashes can occur. Protecting your eyes is crucial. Chemical splashes can cause serious damage.
- Scrub Brushes:
- Small Bristle Brush: An old toothbrush or a grout brush works well. Its small head reaches tight corners and grooves.
- Stiffer Brush: For tougher stains, a brush with stiffer bristles helps. Do not use metal brushes as they can damage caulk.
- Spray Bottles: For applying liquid cleaning solutions evenly. Label them clearly.
- Microfiber Cloths or Sponges: For wiping down surfaces and rinsing. They absorb well and do not scratch.
- Empty Bucket: For mixing solutions or holding rinse water.
- Ventilation Fan or Open Window: Good airflow is important. It reduces exposure to fumes.
Common Cleaning Supplies
You will likely use a combination of these cleaning agents. Some are gentle, while others are stronger. Choose based on the severity of your caulk stains.
- White Vinegar: An acidic, natural cleaner. It fights mildew, soap scum, and hard water. I use it often for general bathroom cleaning.
- Baking Soda: A mild abrasive and deodorizer. It forms a powerful paste with water or vinegar. This paste helps lift stains. You can learn more about how to use it effectively in your shower here: how to clean shower with baking soda.
- Hydrogen Peroxide (3%): A gentler alternative to bleach. It works well on mold and mildew. It is safer for colored caulk.
- Chlorine Bleach (Sodium Hypochlorite): The strongest option for tough mold. Use it only on white or light-colored caulk. Always dilute it and use with caution. For orange stains which can sometimes be mold, you might find this useful: how to clean orange stains in shower.
- Dish Soap: Good for general cleaning and removing soap scum. It helps break down greasy residue.
- Commercial Mold/Mildew Remover: Products specifically designed for severe mold. Read instructions carefully.
- Hard Water Stain Remover: For mineral deposits. These products often contain mild acids. Hard water stains on shower glass can be very stubborn, and the principles are similar for caulk: how to clean hard water stains on shower glass.
Remember to never mix bleach with vinegar or any acid. This creates dangerous chlorine gas. Always work in a well-ventilated area. Your safety is most important when cleaning.
Gentle Cleaning Methods for Light Stains and Maintenance
When your shower caulk has light discoloration or needs routine cleaning, gentle methods are ideal. These approaches use common household items. They are safe for most caulk types and less harsh on your respiratory system. I often start with these methods. They are effective for regular upkeep.
Vinegar and Baking Soda Paste
This combination is a classic for natural cleaning. Vinegar cuts through soap scum and mildew. Baking soda acts as a mild abrasive to scrub away grime. Together, they form a powerful yet safe cleaning solution.
Here is how I use it to clean my shower caulk:
- Prepare the paste: In a small bowl, mix about half a cup of baking soda with a few tablespoons of white vinegar. Add vinegar slowly until you form a thick paste. It should resemble toothpaste. The mixture will fizz. This reaction helps break down dirt.
- Apply the paste: Use an old toothbrush or a small spatula. Spread a generous layer of the paste directly onto the discolored caulk lines. Make sure the caulk is fully covered.
- Let it sit: Allow the paste to sit on the caulk for 15 to 30 minutes. For slightly tougher stains, you can leave it for an hour. This dwell time allows the ingredients to work their magic.
- Scrub gently: After the waiting period, use a scrub brush or an old toothbrush. Scrub the caulk in small, circular motions. You will see the grime lift away. The abrasive nature of baking soda helps lift stubborn spots.
- Rinse thoroughly: Rinse the area with warm water. You can use a damp cloth or a spray bottle with clean water. Make sure to remove all paste residue. Wipe dry with a clean cloth.
This method works wonders for general upkeep. It keeps your caulk looking fresh without harsh chemicals. For comprehensive shower cleaning tips using natural ingredients like baking soda, explore how to clean shower with baking soda. Many people also use vinegar for cleaning, especially for glass surfaces. You can find more tips on cleaning various parts of your shower with vinegar here: how to clean shower doors with vinegar.
Dish Soap and Warm Water
For daily cleaning or very light soap scum, dish soap is surprisingly effective. It breaks down grease and oils found in soap scum. This method is the simplest for maintaining clean caulk. I use it almost daily in my shower.
- Mix the solution: Squeeze a few drops of liquid dish soap into a spray bottle. Fill the bottle with warm water. Shake gently to mix.
- Spray and wipe: Spray the soapy water directly onto the caulk lines. Let it sit for a minute or two. Then, wipe the caulk with a sponge or a microfiber cloth.
- Light scrub (if needed): For areas with a bit more buildup, use a soft-bristled brush. Gently scrub the caulk.
- Rinse and dry: Rinse the area with clean water. Wipe it dry with a fresh cloth.
This routine cleaning prevents heavy buildup. It keeps your caulk bright between deeper cleaning sessions. Consistency is key for preventing stubborn stains.
Tackling Stubborn Mold and Mildew Stains
Sometimes, gentle methods are not enough. Stubborn black mold and mildew often cling deeply to caulk. For these more challenging situations, stronger cleaning agents are needed. Always prioritize safety when using these powerful cleaners. Ensure your bathroom is well-ventilated before you begin.
Bleach Solution for White Caulk
Chlorine bleach is highly effective against mold and mildew on white or light-colored caulk. Its powerful oxidizing properties break down fungi and spores. I only use bleach as a last resort due to its strength.
- Prepare the area: Open windows or turn on the exhaust fan. Wear rubber gloves and eye protection.
- Dilute the bleach: Mix one part chlorine bleach with two parts water in a spray bottle. For example, 1 cup of bleach to 2 cups of water. Never use undiluted bleach. Never mix bleach with vinegar or other cleaners.
- Apply the solution: Spray the diluted bleach directly onto the moldy caulk. For persistent spots, you can saturate cotton balls or paper towels with the solution. Press them firmly onto the stained areas.
- Let it work: Allow the bleach to sit on the caulk for 10 to 15 minutes. For very deep stains, you can extend this to 30 minutes. Do not let it dry out.
- Scrub and rinse: Use a stiff nylon brush or an old toothbrush to scrub the treated caulk. You will see the black stains fade. Rinse the area thoroughly with plenty of clean water. Ensure all bleach residue is removed. Wipe dry with a clean cloth.
Bleach is potent. It can lighten colored caulk. Use it only on white or very light caulk. It can also cause irritation. Always ensure good ventilation. If you have orange stains, which can sometimes be mold or mineral deposits, this guide might offer some insight: how to clean orange stains in shower.
Hydrogen Peroxide for Colored Caulk
Hydrogen peroxide (3% solution) is a great alternative to bleach. It is gentler but still effective against mold and mildew. It is safe for most colored caulk because it does not typically cause discoloration. I prefer this method when bleach is not an option.
- Prepare for safety: Ensure good ventilation. Wear gloves.
- Apply peroxide: Pour 3% hydrogen peroxide into a spray bottle. Spray directly onto the affected caulk. Alternatively, soak cotton balls in peroxide and place them on the stains.
- Allow dwell time: Let the peroxide sit for at least 30 minutes, or up to an hour for tough stains. The longer it sits, the better it penetrates.
- Scrub gently: Use a brush to scrub the caulk. You should see the stains lighten or disappear.
- Rinse and dry: Rinse the area thoroughly with water. Wipe dry to prevent water spots.
Hydrogen peroxide is a safer bet for colored caulk and less harsh fumes. It may require a bit more time than bleach but delivers good results.
Commercial Mold Removers
Many specialized products are available for mold and mildew. These often contain strong chemicals. They are formulated to cling to vertical surfaces. Use them when other methods fail.
- Read instructions carefully: Each product has specific directions. Follow them precisely.
- Ensure ventilation and safety: Always use commercial cleaners in a very well-ventilated area. Wear heavy-duty gloves, eye protection, and a mask if recommended.
- Apply the product: Apply the remover directly to the caulk. Many come in gel or spray forms that cling to the surface.
- Follow dwell time: Let the product sit for the recommended time. This can vary from minutes to hours.
- Scrub and rinse: Use a brush to work the product into the stains. Rinse the area thoroughly with clean water. Dry the surface completely.
Commercial products can be very effective. However, they often contain strong chemicals. Always prioritize safety. Test on a small, inconspicuous area first. This checks for any adverse reactions with your caulk.
Addressing Hard Water Stains on Caulk
Hard water leaves behind mineral deposits. These often appear as chalky white or reddish-brown stains. These stains can make caulk look dull and dirty. They are different from mold or mildew. They require different cleaning approaches. I find that acidic cleaners work best for these types of stains.
Lemon Juice and Salt Scrub
Lemon juice is a natural acid. It helps dissolve mineral deposits. Salt provides a gentle abrasive action. This combination is effective for light to moderate hard water stains. It is a natural and pleasant-smelling alternative.
- Create the paste: In a small bowl, mix fresh lemon juice with enough salt to form a thick paste. The paste should be easy to spread but not too runny.
- Apply to stains: Apply the lemon-salt paste directly onto the hard water-stained caulk. Ensure complete coverage.
- Let it sit: Allow the paste to sit for 15-30 minutes. For tougher stains, you can leave it for an hour. The acid needs time to break down the minerals.
- Scrub: Use a scrub brush or an old toothbrush. Gently scrub the caulk in a circular motion. The salt will help scrape away the softened minerals.
- Rinse and wipe: Rinse the area thoroughly with warm water. Wipe the caulk dry with a clean cloth. This prevents new water spots.
This method is safe for most caulk types. It leaves a fresh scent. For more severe hard water issues throughout your shower, including on glass, consider these resources: how to clean shower glass hard water and how to clean hard water stains on shower glass.
Vinegar Soak or Spray
White vinegar is a powerful natural descaler. Its acetic acid dissolves hard water minerals. It is also excellent for breaking down soap scum. I use vinegar often for hard water issues. You can even use vinegar to clean your shower head from limescale, which is a common hard water problem: how to clean shower head from limescale.
- Prepare the solution: Fill a spray bottle with undiluted white vinegar. For very stubborn stains, you can warm the vinegar slightly. This increases its effectiveness.
- Apply the vinegar: Spray the vinegar generously onto the hard water-stained caulk. Ensure the caulk is completely saturated.
- Create a soak (optional): For deep stains, saturate strips of paper towel or cotton balls with vinegar. Press these firmly onto the caulk lines. This keeps the vinegar in contact with the stain longer.
- Dwell time: Let the vinegar sit for at least 30 minutes. For severe stains, leave it for several hours or even overnight. Keep the paper towels moist by re-spraying if they start to dry.
- Scrub: After soaking, use a stiff brush or old toothbrush. Scrub the caulk vigorously. The mineral deposits should now be much softer and easier to remove.
- Rinse and dry: Rinse the area thoroughly with clean water. Wipe the caulk dry.
Vinegar is versatile. It is effective for both hard water and some mildew. It is a cost-effective solution for regular maintenance. For persistent hard water buildup, similar methods can be applied to other fixtures like your shower head: how to clean hard water from shower head.
Commercial Descalers
For extremely stubborn hard water stains, commercial descalers are available. These products are formulated with stronger acids or chelating agents. They specifically target mineral deposits.
- Read directions: Always follow the product’s instructions carefully. These chemicals can be potent.
- Ensure safety: Wear heavy-duty gloves and eye protection. Ensure excellent ventilation in the bathroom.
- Apply the descaler: Apply the product directly to the stained caulk. Some come as gels, others as sprays.
- Observe dwell time: Let the product sit for the recommended duration. This allows it to break down the minerals.
- Scrub and rinse: Use a non-abrasive scrubber. Gently scrub the treated caulk. Rinse the area thoroughly with clean water. Wipe dry.
Commercial descalers are powerful. Use them sparingly. Test on an inconspicuous area first. This ensures they do not damage or discolor your caulk. Always be cautious when working with strong chemicals.
Specialized Cleaning Techniques for Different Caulk Types
Not all caulk is the same. The type of caulk in your shower affects the best cleaning approach. Knowing your caulk material helps you choose the safest and most effective method. Common types include silicone, acrylic latex, and polyurethane. Each has specific properties.
Silicone Caulking Care
Silicone caulk is generally durable and water-resistant. It is also more resistant to mold growth than other types. However, if mold does appear, it often sits on the surface or in tiny cracks. Silicone is non-porous. This means stains do not absorb as deeply.
- Best Cleaning Method:
- Hydrogen Peroxide or Bleach (diluted): For mold on silicone, hydrogen peroxide is often preferred. It is effective and less likely to degrade the silicone. Apply it as described in the “Hydrogen Peroxide for Colored Caulk” section. For white silicone, a diluted bleach solution works well. Apply with a cotton ball or paper towel. Let it sit, then scrub gently.
- Gentle Scrubbing: Use a soft-bristled brush or a non-abrasive sponge. Silicone can be scratched by harsh scrubbing or abrasive cleaners.
- Avoid Abrasives: Do not use abrasive powders or scrub pads. They can scratch the surface of the silicone. Scratches create tiny pockets where mold can grow more easily in the future.
- Maintenance Tip: Silicone is smooth. A quick wipe-down after each shower helps prevent mildew.
Acrylic and Latex Caulk Cleaning
Acrylic latex caulk is commonly used. It is easier to apply than silicone. However, it is more porous. This means it can absorb stains and mold more deeply. It is also more susceptible to cracking.
- Best Cleaning Method:
- Baking Soda and Vinegar Paste: This is an excellent starting point for acrylic latex caulk. The paste gently cleans without being too harsh. Apply as described in the “Vinegar and Baking Soda Paste” section.
- Oxygen Bleach (Peroxide-based): For stubborn mold, an oxygen-based cleaner is safer than chlorine bleach. Mix it with water as directed. Apply it to the caulk. Let it sit for a good while. Then, scrub and rinse. Oxygen bleach is less likely to damage or discolor acrylic caulk.
- Commercial Mildew Cleaners (Non-bleach): Look for cleaners specifically labeled for “caulk and grout” that do not contain chlorine bleach. These are often formulated to be safe for a wider range of surfaces. Always test a small area first.
- Gentle Brushes: Use an old toothbrush or a soft nylon brush. Avoid stiff brushes that could abrade the caulk. Too much scrubbing can damage the caulk surface.
- Important Consideration: If acrylic caulk is heavily stained internally, cleaning might not fully restore it. Deeply embedded mold may require re-caulking.
Knowing your caulk type is key. Always test any strong cleaning solution on a small, hidden spot first. This prevents accidental damage or discoloration. If your shower has both caulk and grout, remember that grout can also be cleaned with specific methods. You can find more information about cleaning grout here: how to clean shower tiles and grout.
Preventing Future Caulking Discoloration and Mold Growth
Cleaning caulk is important, but preventing stains is even better. Regular maintenance and smart habits can keep your caulk pristine. I have found that a proactive approach saves a lot of cleaning effort. These tips help you prevent mold and hard water buildup.
Improve Ventilation
Mold and mildew thrive in moist, humid environments. Showers create a lot of steam and moisture. Poor ventilation traps this moisture. This creates a perfect breeding ground for fungi.
- Use an Exhaust Fan: Always turn on your bathroom exhaust fan during and after a shower. Let it run for at least 20-30 minutes after you finish. This pulls moist air out of the room.
- Open a Window: If you do not have an exhaust fan, open a bathroom window slightly. Do this while showering and for a while afterward. This allows fresh air to circulate.
- Dehumidifier: In very humid climates or bathrooms, consider using a small dehumidifier. It reduces overall moisture levels.
Good airflow is the simplest and most effective mold deterrent. I never skip turning on the fan.
Daily Drying Habits
Water left on caulk contributes to mold and hard water stains. Taking a few extra minutes after each shower makes a big difference. This habit significantly reduces moisture.
- Squeegee or Wipe Down: Use a squeegee on tiled walls and glass doors. Wipe down caulk lines and corners with a microfiber cloth. This removes standing water.
- Dry Shower Curtains/Doors: If you have a shower curtain, spread it out. Do not leave it bunched up. For glass doors, leave them slightly ajar. This allows air to circulate and dry surfaces faster.
This simple routine minimizes moisture. It prevents mold and mildew from taking hold. It also reduces soap scum.
Regular Maintenance Schedule
Consistent cleaning prevents small issues from becoming big problems. A little effort often avoids the need for aggressive cleaning. I include caulk cleaning in my regular bathroom routine.
- Weekly Wipe-Down: Use a gentle cleaner like diluted dish soap or vinegar spray. Wipe down the caulk lines weekly. This removes soap scum and prevents minor mildew.
- Monthly Deep Clean: Dedicate time once a month for a more thorough caulk cleaning. Use a baking soda paste or hydrogen peroxide on any developing spots. This keeps significant buildup at bay.
- Monitor for Stains: Regularly inspect your caulk for new spots. Address them immediately. Small stains are much easier to clean than entrenched mold. You can also apply similar principles to cleaning your shower tiles without extensive scrubbing by following advice found here: how to clean shower tiles without scrubbing.
Applying a Caulk Sealer
Some caulk types, especially acrylic latex, can benefit from a sealant. A sealant creates a protective barrier. It makes the caulk less porous and more resistant to water and stains.
- Choose the Right Sealer: Look for a clear, waterproof caulk sealer. Ensure it is compatible with your caulk type.
- Clean Before Sealing: The caulk must be perfectly clean and dry before applying a sealer. Any trapped mold or dirt will be sealed in.
- Apply According to Directions: Follow the product instructions for application and
- clean shower caulking
- remove mold from caulk
- shower cleaning tips
- grout and caulk cleaning
- mildew removal shower