· Mold Remediation · 14 min read
How To Clean Ceiling Mold
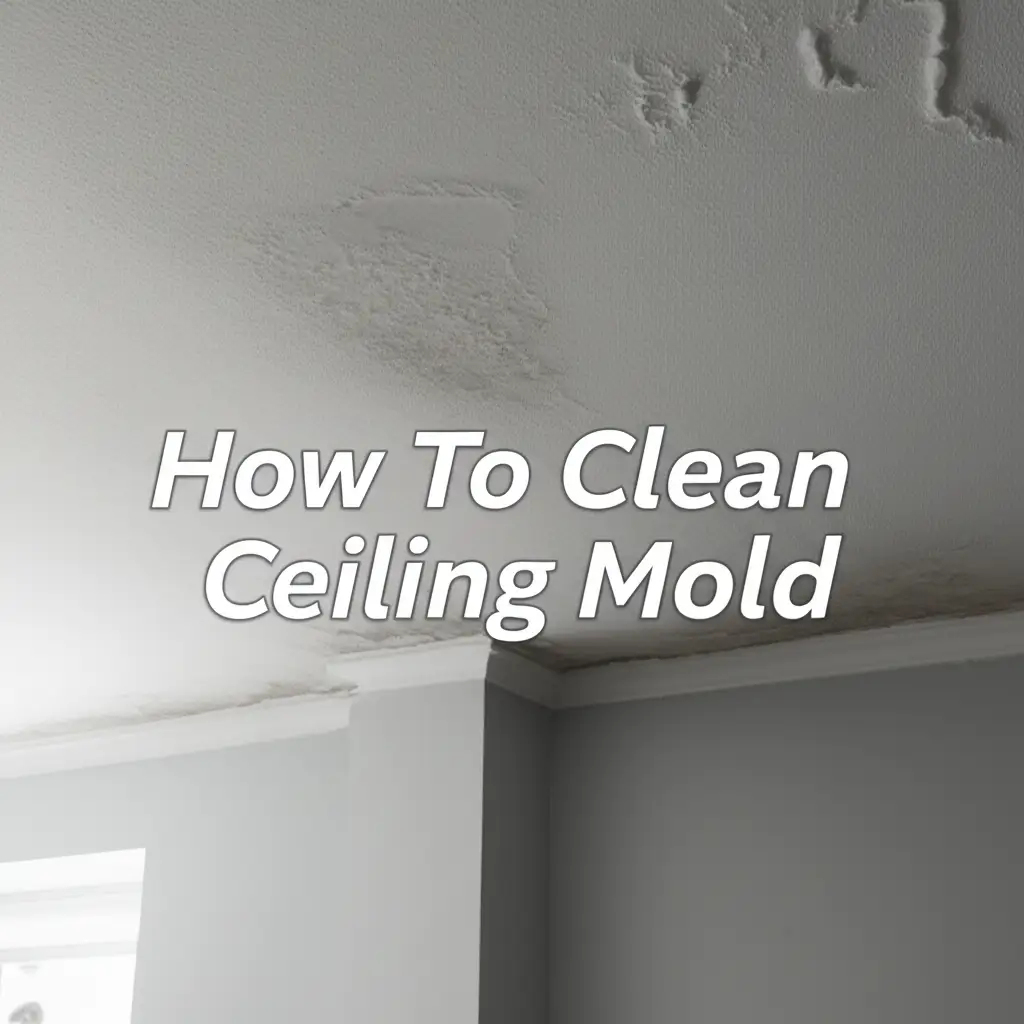
How to Clean Ceiling Mold: Your Complete Guide
Seeing mold on your ceiling can feel like a nightmare. It is unsightly, and you worry about your health. Many homeowners face this common problem. You may wonder if you can clean ceiling mold yourself. Yes, you can often remove it safely and effectively.
This guide provides simple, step-by-step instructions. We cover understanding mold, preparing for the job, and choosing the right tools. You will also find powerful cleaning methods. Learn how to prevent mold from returning. Get ready to reclaim your clean, healthy home.
Takeaway
- Identify the mold source: Find and fix water leaks or excessive moisture.
- Prioritize safety: Wear protective gear like masks, gloves, and eye protection.
- Choose the right solution: Use bleach, vinegar, or hydrogen peroxide for effective cleaning.
- Clean thoroughly: Scrub the affected area gently but firmly, then dry completely.
- Prevent recurrence: Improve ventilation and control humidity levels in your home.
You can clean ceiling mold yourself using common household products. First, prepare the area and protect yourself with gloves and a mask. Then, apply a suitable mold-killing solution like diluted bleach or vinegar. Finally, scrub the mold away gently and ensure the area dries completely.
Understanding Ceiling Mold: What It Is and Why It Grows
Mold is a type of fungus. It thrives in damp, humid places. Your ceiling often provides the perfect breeding ground. It appears as black, green, or white spots. Sometimes, it looks fuzzy or slimy.
Mold spores are always present in the air. They only become a problem when they find moisture. Common causes for ceiling mold include roof leaks. Leaky pipes in the attic or above-ceiling spaces are also culprits. High humidity in rooms, especially bathrooms or kitchens, contributes heavily. Poor ventilation traps moist air, letting mold settle and grow.
Breathing in mold spores can cause health issues. Some people experience allergic reactions. These include sneezing, runny nose, and skin rashes. Others might develop asthma symptoms. Certain molds can even lead to more severe respiratory problems. Removing mold quickly protects your family’s health. You want your home to be a safe place.
It is important to know when to handle mold yourself. Small patches, less than 10 square feet, are usually DIY friendly. This size is roughly equal to a 3-foot by 3-foot area. If the mold covers a larger area, or if you suspect it is behind walls, call a professional. They have the expertise and equipment for larger infestations. They can also test for specific mold types.
Safety First: Essential Preparations for Mold Removal
Your safety is the most important thing when you clean ceiling mold. Mold spores can become airborne during cleaning. This makes proper protection critical. Always put on protective gear before you start. You do not want to breathe in mold or touch it directly.
First, wear an N-95 respirator mask. This mask filters out mold spores from the air you breathe. Regular dust masks are not enough. Next, put on rubber gloves. These protect your skin from both mold and cleaning solutions. Eye protection, like safety goggles, is also a must. You need to keep airborne spores and cleaning chemicals out of your eyes.
Dress in old clothes that cover your arms and legs. You can wash these clothes separately after cleaning or throw them away. This prevents mold spores from spreading to other parts of your home. Cover any furniture or flooring below the affected area with plastic sheeting. Use painter’s tape to secure the edges. This protects surfaces from drips and prevents mold spores from settling.
Ensure good ventilation in the room. Open all windows and doors. Use fans to direct air outside, away from living areas. This helps clear the air of mold spores. Avoid using fans that blow directly onto the moldy area. This can spread spores further. Proper preparation makes the cleaning process safer for you and your home.
Gather Your Tools and Cleaning Solutions
Having the right tools and cleaning solutions makes a big difference. Before you start to clean ceiling mold, collect everything. This saves time and ensures a smooth process. You do not want to stop mid-task because you forgot something.
Here is a list of essential tools you will need:
- Bucket: For mixing cleaning solutions.
- Spray bottle: For easy application of liquids.
- Stiff brush or sponge: For scrubbing away mold. A long-handled brush helps reach high spots.
- Ladder or sturdy step stool: To reach the ceiling safely. Ensure it is stable.
- Drop cloths or plastic sheeting: To protect floors and furniture.
- Painter’s tape: To secure drop cloths.
- Old rags or towels: For wiping and drying surfaces.
- PPE: N-95 respirator, rubber gloves, safety goggles.
Now, let’s talk about effective cleaning solutions. You have a few strong options.
- Bleach Solution: Mix one cup of bleach with one gallon of water. This is a powerful mold killer. Bleach can discolor some surfaces. Always test it on a small, hidden spot first. Do not mix bleach with ammonia or other cleaners. This creates dangerous fumes.
- Vinegar Solution: White distilled vinegar is a natural alternative. It kills about 82% of mold species. Use undiluted white vinegar in a spray bottle. Vinegar is safe for most surfaces and does not produce harsh fumes. It leaves a mild odor that dissipates as it dries. You can learn more about this method here: how to clean mold with vinegar.
- Hydrogen Peroxide: A 3% hydrogen peroxide solution works well. Pour it into a spray bottle. It is less harsh than bleach but still effective. It helps remove stains and kill mold.
- Borax Solution: Mix one cup of borax with one gallon of water. Borax is a natural fungicide and insecticide. It does not produce harmful fumes. This solution also helps inhibit future mold growth. You do not need to rinse it off.
Choose the solution based on the type of ceiling and mold. For light mold on painted ceilings, vinegar or hydrogen peroxide works well. For tougher stains or larger areas, bleach might be necessary. Remember, the goal is to kill the mold.
Step-by-Step Guide to Cleaning Ceiling Mold
Now that you have your gear and solutions, it is time to tackle the mold. Follow these steps carefully. You will achieve the best results. This process helps remove mold and prevents its return.
Prepare the Area: Set up your ladder or step stool. Lay down drop cloths or plastic sheeting. Cover furniture and flooring. Ensure you wear all your protective gear. Open windows and doors for ventilation.
Patch Test: Apply your chosen cleaning solution to a small, inconspicuous area of the ceiling. Wait a few minutes. Check for discoloration or damage. If it looks fine, proceed. This is especially important for painted or textured ceilings. Some surfaces may react poorly to certain cleaners. For specific advice on different ceiling types, you can look into articles like how to clean a ceiling or even how to clean dust off popcorn ceiling.
Apply Cleaning Solution: Spray the moldy area with your chosen solution. Do not oversaturate the ceiling. Just make it wet enough to cover the mold. Let the solution sit for about 10-15 minutes. This allows it to penetrate and kill the mold. For larger areas, work in sections.
Scrub the Mold: Use your stiff brush or sponge. Gently scrub the mold away. Apply light pressure. Avoid scrubbing too hard, especially on delicate surfaces. For instance, if you have ceiling tiles, be extra careful not to damage them. The mold should start to lift off. Rinse your brush or sponge frequently in clean water to avoid spreading spores.
Wipe and Dry: Use clean, damp rags to wipe the area. Remove any remaining mold residue and cleaning solution. Then, use dry rags to thoroughly dry the ceiling. Mold needs moisture to grow. Ensuring the area is completely dry is crucial for prevention. You can use a fan or dehumidifier to speed up drying.
Dispose of Materials: Carefully remove the plastic sheeting and tape. Place all used rags, sponges, and disposable gloves in a heavy-duty trash bag. Tie the bag tightly. Dispose of it outside your home immediately. If you used washable clothes, wash them in hot water with detergent.
By following these steps, you can effectively clean ceiling mold. Remember, thoroughness and safety are key.
Tackling Mold in Specific Ceiling Areas
Mold often appears in specific areas of the home. These areas provide the perfect conditions for mold growth. Understanding these common spots helps you target your cleaning and prevention efforts.
Bathroom Ceilings: Bathrooms are prime locations for mold. This is due to high humidity levels. Steam from showers and baths creates a very moist environment. Poor ventilation makes the problem worse. You might see black or pink mold spots on your bathroom ceiling. To clean mold from a bathroom ceiling, use a bleach or vinegar solution. Ensure good air circulation. Run the exhaust fan during and after showers. Open a window if possible. Fix any leaky showerheads or pipes. Mold can also spread to shower areas; learn how to clean mold in shower for a complete solution.
Basement Ceilings: Basements are often damp and cool. This makes them another common spot for mold. Water seepage from foundations can lead to mold on basement ceilings. Leaky pipes from above floors also cause issues. Check for cracks in the foundation or walls. Repair any leaks promptly. Use a dehumidifier to keep humidity levels low. Ensure proper drainage around your home’s foundation.
Attic Ceilings: Mold in the attic often points to roof issues. Leaky roofs or insufficient attic ventilation are common causes. Trapped moisture and condensation lead to mold growth on the underside of the roof deck or the attic ceiling. Inspect your roof regularly for damaged shingles. Ensure your attic has proper vents. Good airflow prevents moisture buildup. If the mold is extensive, it may indicate a structural issue that needs professional assessment.
Kitchen Ceilings: Kitchens can also develop ceiling mold. Cooking generates steam and heat. This adds moisture to the air. Poor ventilation over stoves contributes to this. Grease and food particles can also provide a food source for mold. Clean your range hood regularly. Use exhaust fans while cooking. Wipe down any condensation on ceilings or walls. Addressing mold on ceilings often means addressing mold on adjacent walls, as they share similar moisture issues.
Understanding these specific scenarios helps you identify the root cause. This is vital for effective cleaning and long-term prevention.
Preventing Future Ceiling Mold Growth
Cleaning ceiling mold is only half the battle. Preventing its return is equally important. Mold needs moisture to grow. Controlling moisture is your main goal. A few simple habits and home improvements can make a big difference.
First, improve ventilation in your home. This is especially true for moisture-prone areas like bathrooms and kitchens. Use exhaust fans during and after showering or cooking. Run them for at least 15-20 minutes after you finish. This clears humid air. Open windows whenever weather permits. Fresh air circulation helps keep indoor humidity low.
Second, fix any water leaks immediately. Even small drips can lead to major mold problems. Inspect your roof for damaged shingles. Check pipes in your attic, bathroom, and kitchen for leaks. Look for water stains on ceilings or walls. These are signs of a hidden leak. Repairing these sources quickly stops moisture from reaching your ceiling.
Third, control indoor humidity levels. Aim for relative humidity between 30% and 50%. You can use a hygrometer to measure humidity. In damp climates or seasons, use a dehumidifier. Place it in areas prone to dampness, like basements or large living spaces. Empty the dehumidifier regularly. Good air conditioning also helps reduce humidity.
Consider using mold-resistant products for new construction or renovations. Mold-resistant paints contain additives that inhibit mold growth. Using mold-resistant drywall in humid areas also adds a layer of protection. Ensure proper insulation in your attic. This prevents condensation from forming on cold surfaces, which can lead to mold. Regularly clean and dry surfaces prone to moisture. A quick wipe-down of a shower wall or a kitchen counter can prevent mold from taking hold. These preventive measures save you time and effort in the long run.
When to Call the Professionals: Knowing Your Limits
While cleaning small patches of ceiling mold is a common DIY task, some situations require professional help. Knowing when to call in experts is crucial for your health and home’s integrity. Do not try to handle large or complex mold infestations yourself. Professionals have the tools and training to do the job safely and effectively.
Consider professional mold remediation if the mold covers a large area. The Environmental Protection Agency (EPA) suggests calling professionals for areas larger than 10 square feet. This is roughly a 3-foot by 3-foot patch. Large infestations often indicate a more serious moisture problem. It can also mean the mold has spread beyond the visible surface. Professionals can assess the full extent of the issue.
If mold returns quickly after cleaning, it is a sign that the root cause is not fixed. A professional can identify hidden leaks or structural moisture problems. They use specialized equipment to detect moisture behind walls or under flooring. They ensure the source of the mold is completely eliminated.
Your health is another key factor. If you or family members experience chronic health issues, call an expert. Symptoms like persistent coughing, shortness of breath, or allergic reactions can worsen with mold exposure. Individuals with compromised immune systems, respiratory conditions, or severe allergies should avoid mold exposure. Professionals take precautions to protect occupants during remediation.
If you suspect hidden mold, seek professional help. Mold often grows behind drywall, under flooring, or within insulation. You might smell a musty odor but see no visible mold. Disturbing hidden mold without proper containment can release millions of spores into your home. Professionals use specialized techniques to locate and safely remove hidden mold. They contain the area to prevent cross-contamination.
Finally, if the mold is due to contaminated water, such as sewage, call an expert. This type of water contains bacteria and viruses. It poses significant health risks. Professional remediation is necessary for safe cleanup. They follow strict protocols to handle such hazardous materials.
FAQ Section
Q1: What does ceiling mold look like?
Ceiling mold often appears as black, green, or gray spots or patches. It can also look white and fuzzy or even pink and slimy. Sometimes, it has a dusty appearance. If you notice any discoloration or texture changes on your ceiling, especially in damp areas, it could be mold. A musty smell often accompanies its presence.
Q2: Is ceiling mold dangerous?
Yes, ceiling mold can be dangerous, especially for sensitive individuals. Breathing in mold spores can cause allergic reactions like sneezing, coughing, and skin irritation. It can also trigger asthma attacks or worsen respiratory conditions. Certain types of mold, like black mold, can produce toxins that pose more serious health risks.
Q3: Can I paint over mold on my ceiling?
No, you should never paint over mold. Painting over mold will not kill it. The mold will continue to grow underneath the paint. It can damage your ceiling further and release spores into the air. Always clean and thoroughly dry the moldy area first. Then, address the moisture source before painting.
Q4: How long does it take for mold to grow on a ceiling?
Mold can start to grow on a ceiling within 24 to 48 hours. This happens if moisture is present and conditions are favorable. It needs continuous moisture, a food source (like drywall or paint), and moderate temperatures. Once it begins, mold can spread quickly if the moisture problem is not resolved.
Q5: What causes mold on bathroom ceilings?
Mold on bathroom ceilings is typically caused by high humidity and poor ventilation. Steam from showers and baths fills the air with moisture. Without an effective exhaust fan or open window, this moisture collects on cold surfaces like the ceiling. Over time, this constant dampness creates ideal conditions for mold growth.
Q6: How can I prevent mold from coming back on my ceiling?
Preventing mold recurrence involves controlling moisture. Ensure good ventilation by using exhaust fans in bathrooms and kitchens. Fix any leaks immediately, whether from the roof or pipes. Use a dehumidifier in humid climates. Keep indoor humidity levels between 30% and 50%. Regularly clean and dry surfaces.
Conclusion
Cleaning ceiling mold might seem daunting at first. With the right approach, you can effectively tackle this common household issue. We covered understanding why mold grows, preparing safely, and choosing the best cleaning solutions. You also learned step-by-step cleaning methods and important prevention tips. Remember, your home’s health and your family’s well-being depend on addressing mold promptly.
By taking proactive steps to clean ceiling mold and control moisture, you ensure a healthier living environment. Do not let mold take over your home. If the problem is too big or complex, always call a professional. Take action today to protect your home from this unwanted invader.
- ceiling mold
- mold removal
- cleaning mold
- mold prevention
- DIY mold cleaning
- black mold
- household cleaning