· Floor Care · 16 min read
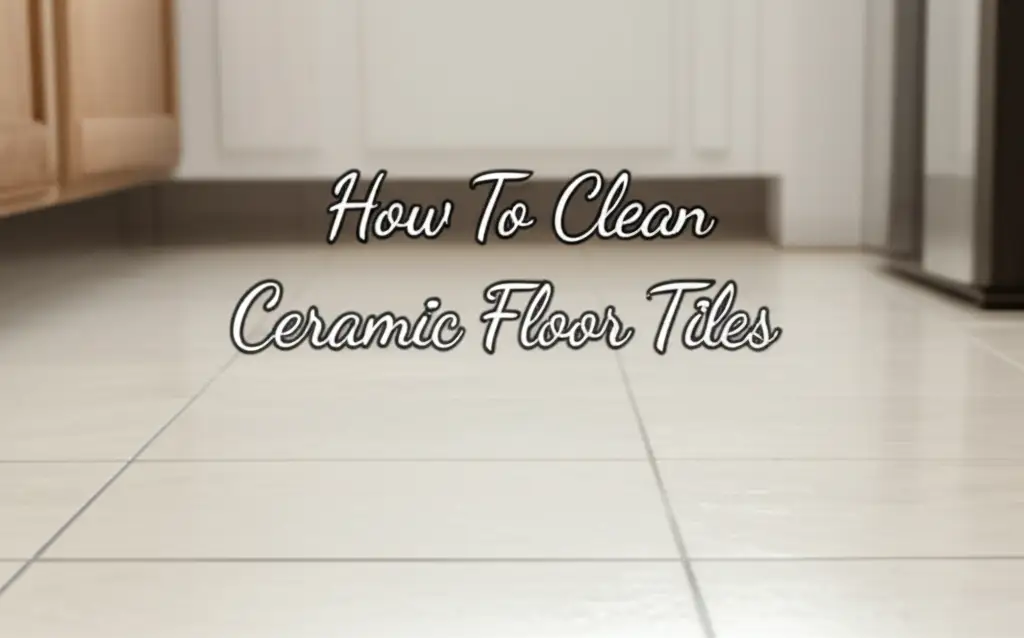
How To Clean Ceramic Floor Tiles
Unlock Spotless Floors: How To Clean Ceramic Floor Tiles Effectively
Having ceramic floor tiles brings beauty and durability to any space. These tiles are popular for kitchens, bathrooms, and entryways. They handle heavy foot traffic well. However, ceramic tiles, like all surfaces, gather dirt, spills, and grime over time. Dull, dirty tiles can make your entire home look less inviting. Cleaning ceramic floor tiles properly helps keep them looking new and extends their life. I understand the frustration of seeing a once-bright floor lose its luster.
This guide will show you how to clean ceramic floor tiles step by step. We will cover everything from daily maintenance to deep cleaning techniques. You will learn about essential tools and effective cleaning solutions. We will also discuss how to tackle stubborn stains and keep your grout lines sparkling. My goal is to help you restore the shine to your ceramic floors. You will find simple, effective methods here.
Takeaway
- Sweep or vacuum ceramic tiles often to prevent dirt buildup.
- Use mild cleaning solutions like water and vinegar for daily mopping.
- Address grout lines separately with a suitable cleaner for best results.
- Always rinse tiles well after cleaning to avoid dulling residue.
- Dry ceramic floors completely to prevent streaks and water spots.
To clean ceramic floor tiles, first sweep or vacuum to remove loose debris. Then, mop with a mild cleaner or a solution of warm water and white vinegar. For stubborn spots and grout, use a soft brush and a specialized cleaner. Always rinse well and dry the tiles to prevent streaks and mildew.
Understanding Your Ceramic Tiles
Ceramic tiles are a popular flooring choice. They offer a hard, non-porous surface that resists water and stains. Most ceramic floor tiles are glazed. This means they have a protective layer baked onto the surface. This glaze makes them smooth and easy to clean. Unglazed ceramic tiles are less common for floors. They are more porous and need sealing to prevent stains. Knowing your tile type helps you choose the right cleaning method.
Even with their durable nature, ceramic tiles can get dirty. Everyday activities bring in dust, dirt, and pet hair. Spills from food, drinks, or other substances happen. These dry onto the tile surface. Over time, a film of dirt can build up, making your once shiny tiles look dull. The grout lines between tiles are especially prone to collecting grime. Grout is porous, so it absorbs dirt and moisture easily. This can lead to discoloration and even mildew. Regular cleaning prevents this buildup and keeps your floors looking their best. I find that a little effort often saves a lot of work later.
Essential Tools and Gentle Cleaners for Ceramic Tiles
Before you start cleaning ceramic floor tiles, gather the right tools and cleaning solutions. Having everything ready makes the job easier and more efficient. Using the correct products also prevents damage to your tiles. You do not need harsh chemicals to get your floors clean. Gentle options work very well for ceramic surfaces.
Must-Have Tools
You will need a few basic items to clean your ceramic floors effectively. These tools are simple and easy to find.
- Soft-bristle broom or vacuum cleaner: This helps remove loose dirt and debris. A vacuum with a hard floor attachment is ideal.
- Mop: A microfiber mop or a sponge mop works well. Avoid string mops as they can push dirt around.
- Two buckets: One for clean cleaning solution, one for rinse water. This prevents spreading dirty water.
- Soft brush or old toothbrush: Essential for scrubbing grout lines and stubborn spots.
- Clean cloths or towels: For drying your tiles and polishing.
Gentle Cleaning Solutions
Most ceramic tiles clean up well with mild, everyday products. Avoid abrasive cleaners, strong acids, or ammonia-based solutions. These can damage the glaze on your tiles or erode your grout.
- Warm water: Often, warm water alone is enough for light cleaning.
- White vinegar: A natural cleaner and disinfectant. Mix half a cup of white vinegar with one gallon of warm water. This solution cuts through grease and grime. Do not use vinegar on unsealed grout, as it can be acidic.
- Mild dish soap: A few drops of dish soap in a bucket of warm water creates a gentle cleaner. This works well for everyday spills.
- Commercial tile cleaner: Choose a pH-neutral cleaner specifically designed for ceramic tiles. Read the product label carefully before use.
I always start with the gentlest method first. This protects your floors and saves you money. Remember, proper tools make cleaning less of a chore.
Daily Routine for Sparking Ceramic Floors
Maintaining your ceramic floor tiles does not require a lot of time. A consistent daily and weekly routine prevents dirt from building up. This keeps your floors looking clean and bright with minimal effort. I find that a quick sweep each day makes a big difference. Regular cleaning also protects your grout lines.
Sweeping and Vacuuming Tips
Loose dirt, dust, and crumbs are the first things to tackle. These can scratch your tile surface if left on the floor.
- Sweep daily: Use a soft-bristle broom to sweep up loose debris. Pay attention to corners and edges where dirt tends to gather.
- Vacuum regularly: A vacuum cleaner with a hard floor setting is even better. It picks up fine dust that brooms might miss. Make sure the vacuum does not have a beater bar that spins and could scratch the tiles. Regular vacuuming helps to clean ceramic floor tiles more thoroughly.
Mopping for Shine
Mopping removes sticky residues and surface grime. For general cleaning, a simple water and vinegar solution works wonders.
- Prepare your solution: Fill one bucket with your chosen cleaning solution (e.g., warm water and half a cup of white vinegar). Fill the second bucket with plain warm water for rinsing.
- Mop in sections: Dip your mop into the cleaning solution. Wring out excess liquid. You want the mop damp, not soaking wet. Mop a small section of your floor.
- Rinse thoroughly: Dip your mop into the clean rinse water. Wring it out well. Mop the same section again to remove all cleaning solution residue. This step is crucial. Skipping the rinse can leave a dull film on your tiles.
- Dry: Let the floor air dry or use a clean, dry cloth to speed up the process. Drying prevents water spots and streaks.
For lightly soiled grout, the vinegar solution can help lift some dirt. However, for deeper grout cleaning, you might need a more targeted approach. Sometimes, a quick pass with a grout brush can help immensely. For methods to refresh grout without intense scrubbing, you can learn more about how to clean floor grout without scrubbing. This routine ensures your ceramic floors stay presentable every day.
Deep Cleaning Stubborn Ceramic Tile Grime
Sometimes, daily cleaning is not enough. High-traffic areas or neglected floors accumulate tough grime and dirt. This heavy buildup requires a deep cleaning approach. Deep cleaning ceramic floor tiles brings back their original luster. It also addresses the deeply embedded dirt in your grout lines. I usually deep clean my tiled areas every few months.
Tackling Built-Up Grime
For floors that look dull or sticky, a stronger cleaning solution might be needed. You can use a slightly more concentrated vinegar solution or a dedicated tile cleaner.
- Pre-sweep or vacuum: Always start by removing all loose dirt and debris. This prevents grinding dirt into the tiles during the scrubbing process.
- Apply cleaning solution: Mix a solution of warm water and a good quality, pH-neutral tile cleaner. Follow the product instructions for dilution. For a natural option, mix equal parts white vinegar and warm water. Apply the solution to a small section of the floor. Let it sit for 5-10 minutes. This dwell time allows the cleaner to break down the grime.
- Scrub the tiles: Use a soft-bristle brush or a stiff nylon brush (not metal) to scrub the tiles. Apply firm pressure. Focus on areas with visible grime. The goal is to lift the embedded dirt from the tile surface.
- Rinse thoroughly: Use a mop with clean water to rinse the scrubbed area. Change your rinse water often. You want to remove all cleaning solution and lifted dirt. Any leftover residue will leave your tiles looking cloudy.
- Dry completely: Use clean, dry towels or a microfiber mop to dry the tiles. Drying prevents water spots and streaks. It also helps avoid mildew growth.
Focus on Grout Lines
Grout lines are the most challenging part of cleaning ceramic tiles. They are porous and absorb dirt, spills, and mildew. Discolored grout can make an otherwise clean floor look dirty.
- Choose a grout cleaner: For stubborn grout, use a specialized grout cleaner. Many products are available. Look for oxygenated bleach or enzyme-based cleaners. A paste made from baking soda and water also works well. Mix baking soda with a little water to form a thick paste.
- Apply and scrub: Apply the cleaner directly to the grout lines. Let it sit for 10-15 minutes. Use an old toothbrush, a small scrub brush, or a specialized grout brush to scrub the grout. Apply firm pressure. You will see the dirt lifting away.
- Rinse well: After scrubbing, rinse the grout lines thoroughly with clean water. Wipe up any residue immediately. Repeat if necessary for heavily stained areas. For areas like shower tiles, where grout can get particularly dirty, the methods are similar. You can find more detailed information on how to clean shower tiles and grout. Remember, some areas might need more attention than others.
- Consider low-scrub options: If you want to avoid heavy scrubbing, certain cleaners or techniques can help. For instance, you can explore methods for how to clean shower tiles without scrubbing which can be adapted for floor tiles too. These often involve longer dwell times for cleaners. Deep cleaning takes effort but gives rewarding results. Your ceramic floors will look vibrant again.
Targeting Specific Stains on Ceramic Tiles
Even with regular cleaning, accidents happen. Ceramic tiles are resilient, but certain spills can leave stubborn marks. Knowing how to target specific stains helps you clean ceramic floor tiles effectively. Always address stains as soon as they occur. This makes removal much easier. I always keep a few stain-fighting ingredients on hand.
Food and Drink Stains
Coffee, tea, juice, and food spills are common. These often leave dark or sticky residue.
- Fresh stains: Wipe up immediately with a damp cloth. For sticky residues, use warm water with a few drops of dish soap.
- Dried stains: For dried food or drink, moisten the stain with warm water first. This helps loosen it. Then, scrub gently with a soft brush and a mild dish soap solution. Rinse with clean water. For tougher spots, a paste of baking soda and a little water can be applied. Let it sit for 10-15 minutes, then scrub and rinse.
Grease and Oil Stains
Kitchen floors often get grease or oil splatters. These can be slippery and hard to remove.
- Absorb excess: If the stain is fresh, blot up as much excess grease or oil as possible with paper towels. Do not rub, as this can spread the stain.
- Apply absorbent: Sprinkle a generous amount of cornstarch, baking soda, or talcum powder over the stain. Let it sit for at least 15-30 minutes, or even overnight for stubborn spots. The powder absorbs the oil.
- Scrub and rinse: Sweep up the powder. Then, scrub the remaining stain with a solution of warm water and dish soap. Dish soap is excellent at cutting through grease. Rinse the area thoroughly with clean water. Repeat if necessary.
Scuff Marks and Dirt Stains
Shoe scuff marks and ground-in dirt are common, especially near entryways.
- Scuff marks: For black scuff marks, use a pencil eraser or a melamine foam eraser (like a “magic eraser”). Gently rub the mark until it disappears.
- Ground-in dirt: For general ground-in dirt, follow the deep cleaning steps. Use a pH-neutral cleaner or a vinegar solution with a stiff brush. For very tough spots, a small amount of hydrogen peroxide applied to the area can help. Let it fizz for a few minutes, then scrub and rinse. Always test hydrogen peroxide in an inconspicuous spot first. It can lighten some grout colors.
Always rinse the area thoroughly after treating a stain. This ensures no cleaning residue is left behind. Proper stain removal helps keep your ceramic floor tiles looking impeccable.
Protecting Your Ceramic Tiles for Lasting Beauty
Cleaning ceramic floor tiles is one part of maintaining their beauty. Protecting them is equally important. Proper care prevents future damage and keeps your floors looking new for longer. This involves sealing, avoiding certain products, and preventing common issues. I believe in proactive care to save time and effort.
Protecting Your Grout
While ceramic tiles themselves are largely non-porous, the grout between them is not. Grout is susceptible to staining and mildew.
- Apply a grout sealer: After deep cleaning your grout, consider applying a silicone-based grout sealer. This creates a barrier that resists water, stains, and mildew. Apply it according to the product instructions. Reapply every 1-2 years, or as recommended by the manufacturer. This step greatly reduces the amount of work needed to clean your grout in the future.
- Wipe spills immediately: Do not let spills sit on grout lines. Wipe them up quickly to prevent absorption.
Preventing Residue and Streaks
A common complaint after cleaning is a dull or streaky finish. This usually happens due to leftover cleaning solution.
- Rinse thoroughly: This is the most critical step. Always use clean, fresh water to rinse your ceramic tiles after applying any cleaner. Change your rinse water frequently. Dirty rinse water will redeposit grime.
- Dry completely: Use a clean, dry microfiber mop or towel to dry the floor after rinsing. Air drying can lead to water spots, especially if your tap water is hard. Drying ensures a streak-free shine.
- Use less cleaner: More cleaner does not mean cleaner tiles. Too much soap or cleaner can leave a sticky film. Use the recommended amount, or even less, especially for daily cleaning.
Long-Term Maintenance Tips
A few simple habits can extend the life and beauty of your ceramic floors.
- Use doormats: Place mats at all entry points to trap dirt and moisture before it reaches your tiles. This reduces the amount of dirt tracked in.
- Use furniture pads: Place felt pads under furniture legs. This prevents scratches and scuff marks when furniture is moved.
- Clean spills quickly: Any spill, whether liquid or solid, should be cleaned up immediately. This prevents staining and sticky residue.
- Avoid harsh chemicals: Stick to pH-neutral cleaners or natural options like vinegar. Harsh acids, ammonia, and abrasive powders can damage the tile glaze and erode grout. They can also leave a difficult-to-remove residue on your ceramic floor tiles.
By following these protection tips, your ceramic floors will maintain their luster and cleanliness with less effort over time.
Common Ceramic Tile Cleaning Challenges
Even with the best cleaning practices, you might encounter specific problems. Knowing how to address these common issues helps ensure your ceramic floor tiles always look their best. I have faced these challenges myself and found simple solutions.
Cloudy or Dull Tiles
This is a very common problem. Tiles look clean but lack their original shine.
- Cause: The most frequent cause is residue from cleaning products or hard water minerals. Over-applying cleaner or not rinsing properly leaves a film.
- Solution: For residue, mop the entire floor with a solution of plain warm water and a cup of white vinegar. Do not use any soap. Mop small sections, rinse the mop in clean water often, and then dry immediately with a clean, dry cloth or mop. The vinegar helps cut through the film. You may need to repeat this process several times to remove old buildup.
Streaks After Mopping
Visible lines or streaks appear on your tiles after they dry.
- Cause: This also points to cleaning solution residue or dirty rinse water. Using too much cleaner, a dirty mop, or not drying the floor can cause streaks.
- Solution: Use less cleaning solution next time. Make sure your mop is clean before you start. Change your rinse water frequently during cleaning. Always dry the floor with a clean, dry microfiber mop or cloth immediately after rinsing. Work in small sections.
Discolored Grout That Won’t Come Clean
Despite scrubbing, your grout lines still look dirty or stained.
- Cause: Grout is porous and absorbs dirt, oil, and mildew deeply. If it’s old or unsealed, stains can be very stubborn. Sometimes, mildew has grown into the grout.
- Solution: Try a stronger grout cleaner designed for deep stains, such as an oxygenated bleach cleaner. Apply it directly, let it sit for the recommended time, and scrub with a stiff brush. For mildew, a paste of baking soda and hydrogen peroxide can work. Apply, let sit, then scrub and rinse. If the grout is permanently stained, re-grouting or applying a grout stain might be the only option. After cleaning, consider sealing your grout to prevent future issues.
Addressing these common problems means your ceramic floor tiles will maintain a consistently clean and bright appearance. With the right approach, most cleaning challenges are easy to overcome.
FAQ Section
Q1: Can I use a steam cleaner on ceramic tiles? Yes, you can use a steam cleaner on ceramic tiles. Steam cleaners are effective for sanitizing and lifting dirt without chemicals. Always ensure the grout is in good condition, as strong steam can sometimes loosen old or damaged grout. Follow the steam cleaner manufacturer’s instructions for best results.
Q2: How often should I deep clean my ceramic floors? Deep clean your ceramic floors every two to four months. This frequency depends on foot traffic and how quickly dirt accumulates. High-traffic areas like kitchens and entryways may need more frequent deep cleaning. Regularly sweeping and mopping reduces the need for constant deep cleaning.
Q3: What is the best homemade cleaner for ceramic tiles? The best homemade cleaner for ceramic tiles is a simple solution of white vinegar and warm water. Mix half a cup of white vinegar with one gallon of warm water. This solution effectively cuts through grease, grime, and mildew. It leaves no sticky residue when rinsed properly.
Q4: How do I make my ceramic tiles shine? To make your ceramic tiles shine, always rinse them thoroughly after cleaning. Use fresh, clean water for rinsing. Then, dry the tiles completely with a clean, dry microfiber mop or towel. Hard water can leave spots, so immediate drying is important. Avoid using too much soap, which can leave a dull film.
Q5: Can I use bleach on ceramic tile grout? You can use bleach on ceramic tile grout for tough stains or mildew. Mix one part bleach with three parts water. Apply it carefully to the grout lines only. Let it sit for a few minutes, then scrub and rinse thoroughly. Always ventilate the area well when using bleach. Avoid using bleach on colored grout, as it can cause discoloration.
Conclusion
Cleaning ceramic floor tiles is a simple task once you know the right steps. From daily sweeps to tackling deep grime and stubborn stains, we have covered the best methods. Remember, consistency is key. Regular sweeping and mopping prevent dirt buildup. Using gentle cleaners protects your tiles and grout. Addressing grout lines separately ensures a truly clean look.
By following this guide, you can maintain the beauty and shine of your ceramic floors for years. You do not need harsh chemicals or complex tools. Simple supplies and consistent effort will keep your tiles sparkling. I hope these tips empower you to clean ceramic floor tiles with confidence. Enjoy your bright, clean home! Keep your floors looking their best by making these simple cleaning habits a part of your routine.
- ceramic tile cleaning
- grout cleaning
- tile maintenance