· Furniture Care · 15 min read
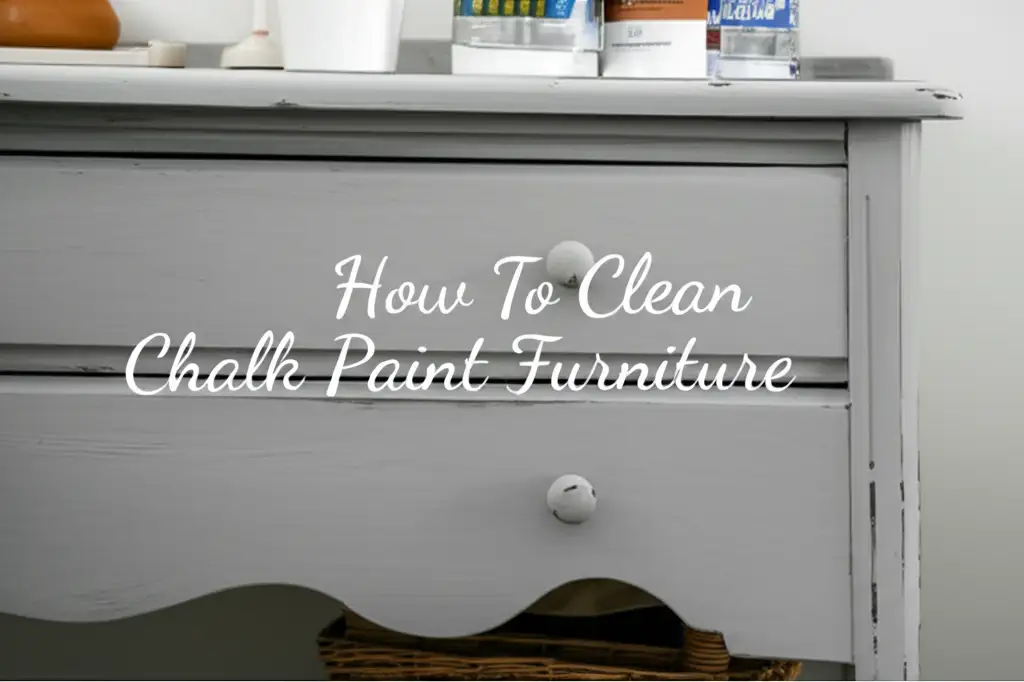
How To Clean Chalk Paint Furniture

Cleaning Chalk Paint Furniture with Ease
Chalk paint adds character to any furniture piece. Its soft, matte finish gives a charming, vintage look. Many people enjoy using chalk paint for DIY projects. However, keeping it clean needs a gentle approach. Chalk paint behaves differently from other finishes. It is often porous and can absorb liquids if not sealed. I understand the desire to keep these beautiful pieces looking their best. This article will show you how to clean chalk paint furniture without damaging its unique surface. We will cover daily cleaning, deep cleaning, and even how to handle tricky stains. You will learn the right tools and techniques. Follow these steps to maintain your chalk painted items beautifully.
Takeaway
- Dust Regularly: Use a soft, dry cloth for everyday dust.
- Wipe Gently: Use a slightly damp cloth with mild soap for light dirt.
- Blot Stains: Address spills quickly with gentle blotting, not rubbing.
- Seal for Protection: Apply wax or polycrylic to make cleaning easier.
- Avoid Harsh Cleaners: Skip abrasive sponges or strong chemicals.
How do you clean chalk paint furniture?
You clean chalk paint furniture by gently dusting with a soft cloth. For light dirt, wipe with a damp cloth and mild soap, then dry immediately. Always avoid harsh chemicals or excessive water. Blot stains quickly and use protective sealants like wax or polycrylic to make cleaning simpler and safeguard the finish.
Understanding Chalk Paint: Its Unique Surface
Chalk paint has a distinct matte finish. This finish is famous for its soft, velvety feel. Many people choose it for a rustic or distressed look. This paint is also known for its quick drying time. You often do not need to prime furniture before using it. I appreciate how it sticks well to many surfaces.
The surface of chalk paint is often porous. This means it can absorb liquids and dirt more easily than other paints. A protective layer, like wax or polycrylic, helps seal the paint. This sealing step is important for durability. It makes the surface more resistant to stains and moisture. Without a sealant, the paint is more vulnerable.
Think of chalk paint like a sponge if it is unsealed. It can soak up spills and become stained. Once sealed, it becomes more like a resistant surface. This difference affects how you clean it. Knowing your furniture’s finish helps you choose the correct cleaning method. My own experience shows that sealed chalk paint is much easier to maintain.
When you prepare to clean, first check if your furniture is sealed. Run your hand across the surface. Does it feel smooth and slightly slick, or chalky and powdery? If it feels smooth, it probably has a sealant. If it feels rough, it might be unsealed. This initial check prevents mistakes.
Understanding the nature of chalk paint is key to proper care. It is not like regular latex or oil-based paints. Its unique composition demands special attention. I always advise my friends to seal their chalk paint projects. This simple step saves a lot of cleaning trouble later.
Your Daily Routine: Keeping Chalk Paint Dust-Free
Maintaining your chalk paint furniture starts with a simple daily routine. Dust can build up quickly on any surface. Chalk paint’s matte finish can sometimes make dust more visible. A light, regular dusting keeps your furniture looking fresh. This simple step prevents dirt from settling into the porous surface.
I always recommend using a soft, dry cloth for dusting. Microfiber cloths work very well. They trap dust without scratching the paint. Gently wipe the entire surface. You do not need to press hard. Just glide the cloth over the furniture. This method removes loose dust and prevents a dull appearance.
Avoid using feather dusters. They often just move dust around. The dust does not get picked up. Instead, it might resettle on your furniture. A microfiber cloth actively collects the dust particles. This makes your dusting more effective. I find it saves time in the long run.
For hard-to-reach areas, use a soft brush. A clean, dry paintbrush can work. Gently brush away dust from carvings or crevices. You can also use a vacuum cleaner attachment. Make sure the attachment has soft bristles. Avoid strong suction on delicate areas.
This daily or weekly dusting routine is vital. It stops dust from bonding with any moisture in the air. Over time, dust can create a grimy layer. Regular dusting prevents this buildup. It also keeps your chalk paint furniture looking its best. Think of it as preventative care.
Remember, consistency is important. A quick wipe-down every few days is better than a deep clean once a month. This easy routine extends the life and beauty of your chalk paint finish. It keeps your home looking tidy too. I enjoy the process of caring for my chalk painted pieces.
Gentle Deep Cleaning: Tackling Grime on Chalk Paint
Sometimes, daily dusting is not enough. Your chalk paint furniture might develop a layer of grime. This happens from everyday use or spills. A gentle deep clean can restore its freshness. It is important to use the right solution and technique. Avoid harsh chemicals as they can damage the paint.
For deep cleaning, you will need a mild cleaning solution. Mix a small amount of dish soap with warm water. A few drops of soap in a bucket of water is enough. You want a very diluted solution. Too much soap can leave a residue. I prefer using a soap that is free of dyes and perfumes.
Next, you need a soft cloth or sponge. Microfiber cloths are excellent. Dampen the cloth with your soapy water. Wring it out very well. The cloth should be just slightly damp, not wet. Excess water can penetrate unsealed chalk paint. It might also leave water marks.
Gently wipe down the furniture surface. Work in small sections. Do not scrub hard. Use a light, even pressure. If the grime is stubborn, wipe the area a few times. You are lifting the dirt, not grinding it in. I treat my chalk paint furniture like a delicate antique.
After cleaning a section, immediately wipe it dry. Use a second, clean, dry cloth. This step is crucial. It removes any soapy residue. It also prevents water from sitting on the paint. Standing water can cause damage or discoloration. Ensure the surface is completely dry before moving on.
You can compare this method to cleaning other delicate painted surfaces. When you clean walls without removing paint, you also use gentle motions. The goal is always to clean without harming the finish. This method works well for both sealed and unsealed chalk paint. For unsealed paint, be extra cautious with water. This deep cleaning process helps maintain the beauty of your chalk paint furniture for years.
Targeted Stain Removal: Dealing with Spills
Stains on chalk paint can be alarming. Spills happen, especially in busy homes. The key is to act fast. Fresh stains are always easier to remove than old, dried ones. Different types of stains need different approaches. Always be gentle to protect the paint finish.
For most fresh spills, start with a dry, clean cloth. Blot the spill immediately. Do not rub. Rubbing can spread the stain. It also pushes the substance deeper into the paint. Gentle blotting lifts the liquid from the surface. I often keep a roll of paper towels handy for quick cleanups.
If a stain remains, try a slightly damp cloth with a tiny bit of mild soap. Use the same diluted soap solution from deep cleaning. Dampen just the corner of your cloth. Then, gently dab the stained area. Again, blot, do not rub. Work from the outside of the stain inwards. This prevents the stain from spreading.
For grease stains, cornstarch or talcum powder can help. Sprinkle a small amount directly onto the grease stain. Let it sit for 15-30 minutes. The powder will absorb the oil. Then, gently brush off the powder with a soft brush. Follow with a light wipe from a barely damp cloth. This method is surprisingly effective on oil-based marks.
Ink or marker stains are tougher. For these, a magic eraser can sometimes work. Test it first in an inconspicuous spot. Magic erasers are abrasive. They can remove paint if you scrub too hard. Lightly rub the stained area with the damp magic eraser. Use minimal pressure. Stop if you see paint coming off.
When dealing with a significant spill, remember that unsealed chalk paint is very absorbent. A dark liquid like coffee or wine might leave a mark. If the piece is sealed, you have a better chance. For stubborn marks on wood furniture, sometimes a vinegar solution is used, but for chalk paint, vinegar can be too acidic and might dull the finish. Learn more about cleaning wood furniture with vinegar for different applications.
After treating any stain, always wipe the area dry. Ensure no moisture remains. This prevents water marks or further damage. Dealing with stains needs patience and a light touch. Prompt action is always your best defense.
Protecting Your Investment: Sealing and Waxing Chalk Paint
Protecting your chalk paint furniture is just as important as cleaning it. A good sealant makes cleaning much easier. It also extends the life of your painted piece. There are two main types of sealants: wax and polycrylic. Both offer different levels of protection and finish.
Wax is a traditional sealant for chalk paint. It gives a soft, buttery feel to the surface. Wax deepens the color of the paint. It creates a durable, water-resistant barrier. I use clear wax for most of my projects. You apply wax in thin coats. Use a wax brush or a lint-free cloth. Rub it into the paint in circular motions.
After applying wax, let it cure. This can take several days or even weeks. Then, buff the surface with a clean cloth. This brings out a beautiful sheen. Wax needs reapplication every few years, depending on use. For instance, a dining table will need more frequent waxing than a decorative chest.
Polycrylic is another popular sealant. It is a water-based topcoat. Polycrylic offers a more durable finish than wax. It protects against scratches and moisture more effectively. It is a good choice for high-traffic furniture. Think of kitchen tables or dressers. Polycrylic comes in different sheens, like matte, satin, or gloss.
Apply polycrylic with a brush or roller. Use thin, even coats. Allow each coat to dry completely before applying the next. You usually need two to three coats. Polycrylic does not need buffing. It dries to a hard, protective layer. Once cured, it is very resistant to spills.
Choosing between wax and polycrylic depends on your furniture’s use. For decorative pieces, wax is perfect. For functional, heavily used items, polycrylic offers better protection. It prevents stains from setting in. This makes cleaning simpler later.
Proper sealing makes your chalk paint furniture robust. It allows you to clean it with confidence. Without a sealant, cleaning can be risky. Remember, a sealed surface is a happy surface. This protection is a small effort for a long-lasting, beautiful piece. Consider sealing your outdoor wood furniture as well for similar protection against elements; see how to clean outdoor wood furniture for tips on maintaining different finishes.
What Not To Do: Avoiding Damage When Cleaning
Knowing what to avoid is as important as knowing what to do. Chalk paint is forgiving but not indestructible. Certain cleaning practices can damage its finish. I have seen many beautiful pieces ruined by incorrect methods. Always prioritize gentle care.
First, do not use abrasive scrubbers. Steel wool, scouring pads, or even rough sponges can scratch the paint. They will remove the matte finish. They can also take off layers of paint or sealant. Stick to soft cloths and sponges. This preserves the texture and color.
Second, avoid strong chemical cleaners. Bleach, ammonia-based cleaners, or harsh detergents are harmful. They can strip the paint. They might also discolor the chalk paint. These chemicals can also dissolve your protective wax or polycrylic layer. Stick to mild dish soap and water.
Third, do not oversaturate the surface with water. Excess water is bad for unsealed chalk paint. It can absorb into the paint. This leads to water spots, bubbling, or even paint peeling. Even sealed chalk paint does not like standing water. Always wring your cleaning cloth well. Immediately dry the surface after wiping.
Fourth, do not rub aggressively. Whether you are dusting or cleaning a stain, use gentle motions. Hard rubbing can burnish the paint. This means it becomes shiny in rubbed spots. It removes the desired matte look. Rubbing also forces dirt deeper into the paint pores.
Fifth, avoid using oil-based cleaners or polishes. These products are for different types of finishes. They can leave a greasy residue on chalk paint. This residue attracts more dust. It can also make the surface appear dull or streaky. Chalk paint does not need polishing like traditional wood furniture.
Finally, do not delay cleaning spills. The longer a spill sits, the harder it is to remove. Especially with unsealed chalk paint, immediate action is key. A quick blot can prevent a permanent stain. Following these “don’ts” helps keep your chalk paint furniture beautiful for years. It protects your hard work and investment.
Reviving and Refreshing: Minor Repairs and Touch-Ups
Even with the best care, chalk paint furniture can get small nicks or scuffs. These minor damages do not mean your piece is ruined. Chalk paint is easy to touch up and revive. You can make your furniture look new again with a few simple steps. I find it very satisfying to bring a piece back to life.
For minor scuffs or scratches, start with a clean, dry cloth. Sometimes, a gentle rub can smooth out a very light mark. If the scuff is deeper, you might need a tiny bit of chalk paint. Keep a small amount of your original paint color on hand. This is helpful for future touch-ups.
Apply a very small amount of paint to a fine artist’s brush. Carefully dab the paint onto the scratched area. Use thin coats. Let each coat dry completely. Build up the color slowly. This helps the touch-up blend seamlessly. You want to match the texture and color of the surrounding paint.
If your furniture is waxed, you will need to reapply wax after the paint dries. Once the touch-up paint is fully cured, apply a thin layer of wax over the repaired spot. Buff it gently to blend it with the rest of the waxed surface. This protects the new paint.
For furniture sealed with polycrylic, the process is similar. Apply the touch-up paint. Let it dry. Then, apply a thin coat of polycrylic over the touched-up area. This helps to reseal the spot. It also provides consistent protection.
Sometimes, chalk paint can look a bit dull over time. This might happen in high-traffic areas. A light re-waxing can revive the finish. Clean the surface first. Then, apply a fresh, thin coat of clear wax. Buff it to restore the luster. This is like giving your furniture a spa treatment.
You might also consider a light sanding for very rough areas. Use fine-grit sandpaper, like 220-grit. Lightly sand the rough spot. Then, clean the dust and touch up with paint and sealant. This method is good for deeper imperfections. Remember, the goal is always to blend the repair. These small efforts keep your chalk paint furniture looking its best.
FAQ Section
Q1: Can I use multi-surface cleaner on chalk paint furniture?
A1: No, I do not recommend multi-surface cleaners. They often contain harsh chemicals or ammonia. These ingredients can damage the delicate chalk paint finish. They might strip the sealant or dull the paint. Stick to mild soap and water for safe cleaning.
Q2: How often should I clean my chalk paint furniture?
A2: Dust your chalk paint furniture weekly or bi-weekly. This prevents dust buildup. Deep cleaning depends on usage. For high-traffic pieces, clean every few months. Less used items might only need deep cleaning once or twice a year.
Q3: What if my chalk paint furniture gets water rings?
A3: Water rings often happen on unsealed or improperly sealed chalk paint. Try gently dabbing the ring with a barely damp cloth. Then, immediately dry it. For persistent rings on waxed pieces, apply a small amount of fresh wax and buff it in. This can sometimes blend the mark.
Q4: Can I use a steam cleaner on chalk paint?
A4: I strongly advise against using a steam cleaner. The high heat and moisture from steam can severely damage chalk paint. It can cause the paint to lift, bubble, or crack. Always use cold or lukewarm water and a well-wrung cloth instead.
Q5: How do I remove crayon marks from chalk paint?
A5: For crayon marks, try gently scraping off any excess crayon with a dull edge, like a credit card. Then, use a soft cloth dampened with a mild soap solution. Gently wipe the mark. For stubborn crayon, a tiny bit of mineral spirits on a cotton swab might work, but test in an hidden area first.
Q6: Is it better to wax or polycrylic chalk paint for durability?
A6: Polycrylic offers superior durability compared to wax. It creates a harder, more resistant surface. If your furniture gets heavy use, like a dining table, polycrylic provides better protection against scratches and moisture. Wax is great for a softer feel and moderate use.
Conclusion
Cleaning chalk paint furniture is simple when you know the right steps. This unique finish requires a gentle touch. My experience shows that proper care keeps these pieces beautiful for many years. We covered how to clean chalk paint furniture using soft cloths and mild solutions. Remember to prioritize dusting regularly. Address spills immediately to prevent permanent stains. Sealing your furniture with wax or polycrylic is a crucial step for protection. This makes future cleaning much easier.
Always avoid harsh chemicals and abrasive tools. These can damage the matte finish. With consistent, gentle care, your chalk paint furniture will maintain its charm. Enjoy your beautifully maintained chalk-painted pieces. Start caring for your chalk paint furniture today and see the lasting difference.
- chalk paint care
- furniture cleaning
- painted furniture
- antique furniture
- waxed furniture


