· Food Preparation & Safety · 17 min read
How To Clean Chicken Tenderloins

Master How to Clean Chicken Tenderloins Safely
Chicken tenderloins are a favorite for many home cooks. They cook fast and offer a lean protein source. Many people wonder about the best way to clean chicken tenderloins before cooking. It is a common concern. Proper handling ensures food safety and improves the taste and texture of your meal.
This guide will walk you through the correct steps to prepare chicken tenderloins. We will focus on trimming, not washing, to keep your kitchen safe. You will learn about essential tools and how to handle raw chicken properly. I will also share tips for storage and common myths about cleaning chicken. By the end, you will feel confident preparing perfect chicken tenderloins every time.
Takeaway
- Do not wash chicken tenderloins with water; this spreads bacteria.
- Proper cleaning involves inspecting and trimming away fat and the white tendon.
- Prioritize thorough hand washing and sanitizing surfaces after handling raw chicken.
- Store cleaned tenderloins properly to maintain freshness and prevent spoilage.
To clean chicken tenderloins, you simply inspect them for any loose fat or the prominent white tendon. Trim these parts away using a sharp knife or your fingers. Do not rinse the chicken under water; this can spread harmful bacteria around your kitchen. Focus on proper trimming and immediate cleaning of tools and surfaces instead.
Understanding Chicken Tenderloins and Why “Cleaning” Matters
Chicken tenderloins are often found as individual pieces, separate from the main breast. They are lean, small, and cook quickly. Many recipes call for them because of their tender texture. However, they come with a small, tough white tendon. This tendon runs through the length of the tenderloin.
Some people think “cleaning” chicken means rinsing it with water. I want to tell you, this is a big mistake. Rinsing raw chicken under the tap can splash bacteria like Salmonella around your sink and onto counters. This is called cross-contamination. This practice actually makes your kitchen less safe, not more. I avoid it completely.
The real “cleaning” for chicken tenderloins means preparing them for cooking. This involves inspecting each piece carefully. You look for any bits of fat or connective tissue. Most importantly, you identify and remove that tough white tendon. This tendon can make the cooked chicken chewy. Removing it ensures a smooth, tender bite every time. Focusing on trimming is key for both safety and quality.
Essential Tools and Preparing Your Workspace
Before you begin to clean chicken tenderloins, gather everything you need. Having your tools ready makes the process smoother. It also helps you work quickly. Quick work limits the time raw chicken stays at room temperature. I always make sure my cutting board is stable before I start.
Here is what you will need:
- A clean cutting board: I use a separate cutting board for raw meats. This helps prevent cross-contamination. Plastic or composite boards are good because you can wash them in a dishwasher. Wood boards need very thorough cleaning and sanitizing.
- Sharp knife: A small, sharp paring knife or a boning knife works best. A sharp blade makes trimming easy and safe. Dull knives can slip.
- Paper towels: Keep a roll handy for drying hands or wiping down small messes. Avoid using cloth towels, as they can spread bacteria if not washed immediately.
- Waste bowl: Have a bowl ready for discarded fat and tendons. This keeps your workspace tidy. It also makes cleanup simpler.
- Gloves (optional): Some people prefer to wear disposable gloves. This keeps their hands clean from raw chicken juices. If you use gloves, remember to change them often. Do not touch anything else in your kitchen with gloved hands that have touched raw chicken.
- Soap and water for handwashing: This is critical. You must wash your hands thoroughly before and after handling raw chicken. I cannot stress this enough.
- Sanitizer: Keep a sanitizing spray or wipes nearby. You will need to clean surfaces and tools after you finish. Learning how to clean your sink after raw chicken is vital for kitchen hygiene. This ensures all bacteria are eliminated.
Set up your workspace in an organized way. Clear your counter. Place your cutting board in the center. Put your waste bowl to one side. Have your knife within easy reach. This setup helps me stay efficient and safe.
Step-by-Step Guide to Trimming Chicken Tenderloins
Trimming chicken tenderloins is a simple process. The main goal is to remove any unwanted bits. This includes fat and the notable white tendon. I find this step makes a big difference in the final dish. It ensures every bite is tender and pleasant.
Here is how I clean chicken tenderloins:
1. Inspect Each Tenderloin
First, take one tenderloin from its package. Place it on your clean cutting board. Look closely at the chicken piece. You are looking for two main things. One is any excess fat. The other is the thick, white tendon. This tendon usually runs along one side of the tenderloin.
2. Locate the White Tendon
The white tendon is the most common part to remove. It is tough and chewy when cooked. You will see it clearly. It is a silvery-white strip. It often sticks out slightly at one end. Sometimes it is embedded within the meat.
3. Remove the Tendon (The Fork Method)
This is my favorite method for tendon removal. It is very effective.
- Hold the tenderloin firmly on the cutting board.
- Pinch the very end of the white tendon with a paper towel or your fingers. A paper towel gives you a better grip.
- Insert the tines of a fork under the tendon, right where you are gripping it. The fork should be flat against the cutting board.
- Press the fork down firmly.
- Now, pull the tenderloin away from the fork. Pull the meat against the fork’s tines. The fork will hold the tendon in place. The meat will slide right off. The tendon should come out cleanly in one piece.
This method works like magic. It leaves you with a perfectly trimmed tenderloin.
4. Trim Away Excess Fat or Loose Bits
After removing the tendon, look for any small pieces of fat. You might also find other loose connective tissue. Use your sharp knife to carefully cut these off. Be precise. You only want to remove the unwanted parts. Try not to cut too much of the lean meat.
5. Repeat for All Tenderloins
Go through each tenderloin one by one. Repeat the inspection and trimming steps. Place the cleaned tenderloins in a clean bowl. Do not let them touch the raw packaging or dirty surfaces.
Remember, the goal is to enhance your meal. Proper trimming makes for a better eating experience. It helps your tenderloins cook evenly too.
Practicing Safe Raw Chicken Handling and Preventing Cross-Contamination
Handling raw chicken requires extreme care. I always treat it as a potential source of harmful bacteria. My top priority is preventing these bacteria from spreading. Cross-contamination can lead to foodborne illness. I follow strict rules in my kitchen to keep everyone safe.
Here are the crucial steps I take:
- Dedicated Cutting Board: I always use a separate cutting board for raw meats. This means one board for chicken, fish, and other raw proteins. Another board is for vegetables, fruits, and cooked foods. This separation is simple but effective.
- Thorough Hand Washing: This is non-negotiable. I wash my hands with soap and warm water for at least 20 seconds. I do this before starting to handle chicken. I do it again immediately after I finish. I also wash my hands if I touch anything else in between.
- Clean Utensils: Use different utensils for raw and cooked chicken. Do not use the same tongs for raw chicken and then use them to serve cooked chicken. This is a common mistake. If I use a knife for trimming, I make sure to wash it before using it for anything else.
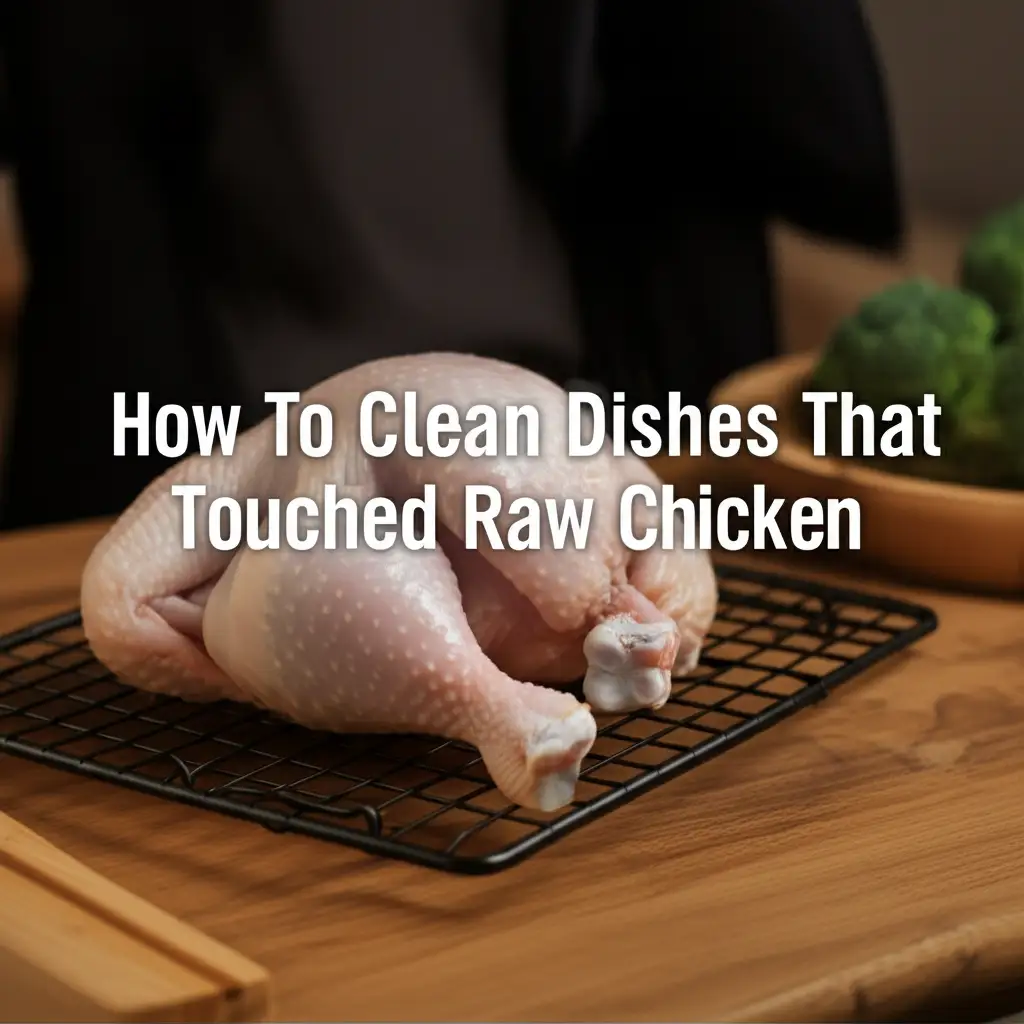
- Sanitize All Surfaces: After you finish trimming, clean everything that touched the raw chicken. This includes your cutting board, knives, and countertops. I use a sanitizing solution. A bleach solution (1 tablespoon bleach per gallon of water) works well. Or use a commercial kitchen sanitizer. Spray it on, let it sit for a few minutes, then wipe it clean. This ensures all bacteria are killed. Understanding how to clean dishes that touched raw chicken is part of a complete safety routine.
- Avoid Rinsing Chicken: I mentioned this before, but it bears repeating. Do not rinse raw chicken under the faucet. This creates aerosols. These small water droplets carry bacteria. They can spread to nearby surfaces, clean dishes, and even you. Patting dry with paper towels is fine, but do not rinse.
- Proper Waste Disposal: Place all discarded fat and tendons directly into your waste bowl. Once you are done, bag the waste securely. Dispose of it immediately. This prevents odors and keeps pests away. It also stops bacteria from lingering in your kitchen.
By following these steps, you protect yourself and your family. Food safety is a critical part of cooking. It is a habit I have built over time. It gives me peace of mind in the kitchen.
Post-Cleaning Storage and Usage Tips
After you clean chicken tenderloins, proper storage is vital. This keeps them fresh. It also prevents bacterial growth. How you store them depends on when you plan to cook them. I always plan ahead to ensure my chicken is handled safely.
Short-Term Storage (Refrigerator)
If you plan to cook the tenderloins within one or two days, store them in the refrigerator.
- Use airtight containers: Place your trimmed tenderloins in a shallow, airtight container. A resealable bag works well too. Make sure it is sealed tightly. This prevents any juices from leaking. Leaking juices can contaminate other foods in your fridge.
- Bottom shelf placement: Always store raw chicken on the lowest shelf in your refrigerator. This is a crucial food safety rule. If any juices somehow leak, they will not drip onto ready-to-eat foods below.
- Label and date: It is a good practice to label your container. Write the date you stored the chicken. This helps you keep track of its freshness. Cook it within 1-2 days for best quality and safety.
Long-Term Storage (Freezer)
For longer storage, freezing is the best option. I often clean a larger batch of tenderloins. Then I freeze what I do not plan to use immediately.
- Portion correctly: Divide the tenderloins into meal-sized portions. This makes thawing easier later. You only take out what you need.
- Freezer-safe packaging: Wrap individual portions tightly in plastic wrap or foil. Then place them in freezer-safe bags or containers. Remove as much air as possible from bags. This prevents freezer burn. Freezer burn can affect the texture and taste.
- Label and date: Label each package with the contents and the date frozen. Chicken tenderloins can stay good in the freezer for up to 9 months.
- Thawing: Thaw frozen chicken tenderloins safely. The best way is to move them to the refrigerator a day before you plan to cook them. You can also thaw them in cold water. Change the water every 30 minutes. Do not thaw chicken on the counter at room temperature.
Usage Tips
- Cook immediately after thawing: Once thawed, cook your tenderloins promptly. Do not refreeze raw chicken after it has thawed.
- Cook to safe temperature: Always cook chicken to an internal temperature of 165°F (74°C). Use a meat thermometer to check. This ensures all harmful bacteria are killed.
- Consider marinades: Clean chicken tenderloins are perfect for marinades. Marinating them before cooking adds flavor. It can also help keep them moist. If you use a marinade, discard any leftover marinade that touched raw chicken. Do not reuse it. You can cook the marinade to kill bacteria, but it is safer to just toss it.
Proper storage is as important as proper cleaning. It is the final step in ensuring safe and delicious meals.
Debunking Common Myths About Cleaning Chicken
There are many misconceptions about preparing raw chicken. I have heard them all. Many people grow up believing certain practices are necessary. However, food safety science has evolved. It shows some traditional methods are actually harmful. Let’s clear up some common myths about how to clean chicken tenderloins and other poultry.
Myth 1: You Must Wash Chicken Before Cooking It
This is the biggest myth I encounter. Many believe rinsing chicken removes bacteria or “dirt.”
- The Reality: As I discussed, rinsing chicken under the faucet spreads bacteria. These bacteria become airborne in water droplets. They can land on your countertops, utensils, and other foods. This increases your risk of foodborne illness. The heat from cooking kills bacteria. Rinsing chicken does not make it safer. In fact, it makes your kitchen less safe. For cleaning other cuts, like how to clean chicken breast, the same rule applies: no washing.
Myth 2: Lemon Juice or Vinegar Will “Clean” Chicken
Some people suggest using acids like lemon juice or vinegar to wash chicken. They think it kills bacteria or purifies the meat.
- The Reality: While acids have some antimicrobial properties, they are not effective enough. They do not kill all bacteria on raw chicken. They will not make the chicken safer to eat. Just like water, using these liquids can still spread bacteria. Focus on proper cooking temperatures and preventing cross-contamination instead. I do not recommend this method. If you are interested in using lemon for general cleaning around the house, that is a different story. For instance, how to clean with lemon might refer to using lemon to flavor chicken or clean surfaces after cooking, but not to “wash” raw chicken.
Myth 3: If Chicken Smells or Looks a Little Off, Washing Will Fix It
Sometimes chicken might have a slightly unusual smell or appearance. People might think a good wash will make it okay.
- The Reality: If chicken smells sour, slimy, or has an unusual color, it is likely spoiled. Washing will not remove spoilage bacteria. It will not make spoiled chicken safe to eat. Eating spoiled chicken can make you very sick. When in doubt, throw it out. It is better to be safe than sorry.
Myth 4: Freezing Kills All Bacteria
Many believe freezing chicken eliminates all bacteria present.
- The Reality: Freezing stops bacteria from growing. It does not kill them. Once the chicken thaws, any bacteria present before freezing can become active again. That is why safe thawing practices are so important. You must still cook the chicken to the proper internal temperature after thawing.
Understanding these myths helps you adopt safer kitchen practices. It simplifies your cooking process too. You save time by not doing unnecessary steps. More importantly, you keep your kitchen and family safe.
Advanced Tips for Tenderloin Perfection
Cleaning chicken tenderloins correctly is the first step. To truly elevate your dishes, consider these advanced tips. These suggestions go beyond basic trimming. They help you achieve perfect texture and flavor every time. I find these small extra steps make a big difference in my cooking.
1. The Art of Drying Tenderloins
After trimming, pat your chicken tenderloins very dry with paper towels.
- Why it matters: Moisture on the surface prevents browning. When you cook wet chicken, it steams instead of searing. A dry surface allows for a beautiful golden crust. This crust adds flavor and texture. This step is especially important for pan-frying or grilling.
2. Tenderizing Techniques
Chicken tenderloins are already quite tender. However, you can make them even more so. This is useful for certain recipes or if you want an extra-soft bite.
- Pounding: Place tenderloins between two sheets of plastic wrap. Use a meat mallet or rolling pin to gently pound them to an even thickness. This breaks down muscle fibers. It also ensures even cooking. This is great for cutlets or dishes where uniform thickness is needed.
- Marinating: Marinades add flavor and can tenderize. Acidic ingredients like lemon juice (not for washing, but for flavor!), vinegar, or buttermilk are common. Enzymes in ingredients like pineapple or papaya also tenderize. I often marinate tenderloins for at least 30 minutes, or up to a few hours in the fridge. Remember to discard used marinade.
3. Seasoning Strategically
Season your tenderloins generously.
- Timing: Season just before cooking. Salt draws out moisture. If you salt too early, it can dry the surface.
- Coverage: Make sure seasoning coats all sides evenly. This ensures balanced flavor in every bite.
- Flavor combinations: Experiment with different spice rubs or herbs. Tenderloins absorb flavors well. Think about the dish you are making. For example, Italian herbs for a pasta dish or smoked paprika for a barbecue flavor.
4. Avoiding Overcooking
Chicken tenderloins cook very quickly due to their small size and lean nature.
- Use a thermometer: The only sure way to avoid overcooking is to use a meat thermometer. Cook to an internal temperature of 165°F (74°C).
- Resting period: Once cooked, let the tenderloins rest for a few minutes. Cover them lightly with foil. This allows the juices to redistribute throughout the meat. The result is juicier, more flavorful chicken. I often pull them off the heat slightly before 165°F, as the temperature will rise a few degrees while resting.
These advanced tips elevate your chicken tenderloin dishes. They are simple additions to your routine. They transform a good meal into a great one. I encourage you to try them out. You will taste the difference.
FAQ Section
Q1: Do I really not need to wash chicken tenderloins?
A1: That’s right. You do not need to wash chicken tenderloins. Rinsing raw chicken spreads harmful bacteria like Salmonella around your sink and kitchen surfaces. This creates a risk of cross-contamination. Cooking chicken to the correct internal temperature of 165°F (74°C) is what kills bacteria. Focus on trimming and immediate cleanup of surfaces instead.
Q2: What is the tough white string in chicken tenderloins?
A2: The tough white string you find in chicken tenderloins is a tendon. It is a piece of connective tissue. It can be chewy and unpleasant if left in the meat. Removing it before cooking makes the tenderloin much more tender and enjoyable to eat. Using a fork to pull it out is an easy and effective method.
Q3: How do I safely dispose of raw chicken waste?
A3: Safely dispose of raw chicken waste by placing all trimmings and packaging directly into a small trash bag. Seal the bag tightly. Then, immediately place it in your main garbage can or outdoor bin. This prevents odors. It also minimizes the risk of bacteria spreading in your kitchen. Wash your hands thoroughly after handling the waste.
Q4: Can I clean a large batch of chicken tenderloins at once?
A4: Yes, you can clean a large batch of chicken tenderloins at once. This saves time. Make sure to work efficiently to keep the chicken cold. After cleaning, portion the tenderloins into meal-sized servings. Store what you won’t use immediately in airtight containers in the refrigerator for 1-2 days, or freeze for longer storage.
Q5: How do I clean my cutting board after trimming raw chicken?
A5: After trimming raw chicken, immediately clean your cutting board. For plastic or composite boards, wash them in hot, soapy water. Then, sanitize them with a bleach solution (1 tablespoon bleach per gallon of water) or a commercial kitchen sanitizer. You can also wash them in a dishwasher on a hot cycle. For wooden boards, scrub with hot soapy water, rinse, and air dry completely. Ensure you properly sanitize your sink area as well.
Q6: What if I accidentally washed my chicken tenderloins? What should I do?
A6: If you accidentally washed your chicken tenderloins, do not panic. Your main task is to immediately clean and sanitize any surfaces that might have been splashed. This includes your sink, faucet, countertops, and nearby utensils. Wash your hands thoroughly with soap and water. Then, proceed with cooking the chicken as planned, ensuring it reaches 165°F (74°C).
Conclusion
Properly cleaning chicken tenderloins is a simple but important part of cooking. It is not about washing the chicken with water. It is about careful inspection and precise trimming. You remove unwanted fat and that chewy white tendon. This ensures your tenderloins cook perfectly. They will have an amazing texture and a pure flavor. I believe mastering this skill makes a big difference in your kitchen.
Remember, food safety is paramount. Always prioritize preventing cross-contamination. Wash your hands diligently. Sanitize all surfaces and tools that touch raw meat. Store your cleaned chicken tenderloins correctly. Whether you cook them right away or freeze them for later, proper storage maintains freshness and safety.
By following these simple steps, you can confidently prepare delicious and safe meals. You will impress your family and friends with perfectly cooked chicken tenderloins every time. Start practicing these methods today. Elevate your cooking skills and enjoy the peace of mind that comes with safe food preparation.
- chicken tenderloins
- food safety
- trimming chicken
- kitchen hygiene