· Home Cleaning · 17 min read
How To Clean Citristrip From Wood
How To Clean Citristrip From Wood: A Complete Guide
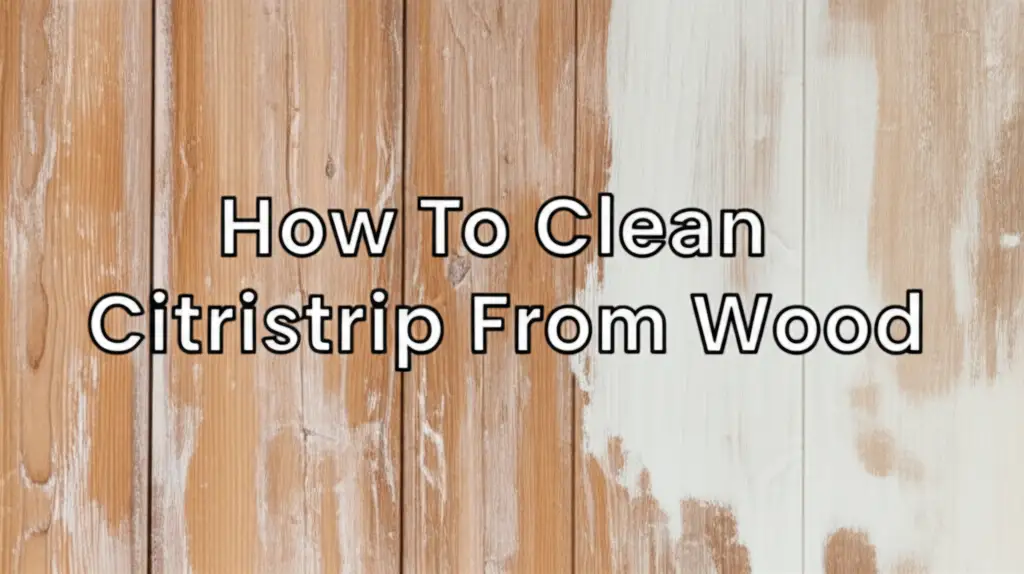
Starting a wood restoration project brings excitement. You envision smooth, beautiful wood ready for a new finish. Often, this journey begins with a paint stripper like Citristrip. It works well to remove old finishes. However, cleaning Citristrip from wood properly is critical. Residue left behind can ruin your new stain or paint.
This guide helps you master the cleanup process. We cover essential tools and materials. You will learn a step-by-step method to ensure clean wood. We also address stubborn residue and vital safety tips. My goal is to help you achieve a perfectly prepared wood surface every time. Let’s make your wood projects shine.
Takeaway
- Gather Tools: Collect scrapers, brushes, rags, and appropriate cleaning agents.
- Remove Bulk: Scrape off the main stripper and finish layers first.
- Neutralize Residue: Use mineral spirits or denatured alcohol to clean the surface.
- Rinse Properly: Wipe down with water (if safe for wood) or continue with solvent.
- Dry Thoroughly: Allow wood to dry completely before any next steps.
- Sand for Smoothness: Lightly sand to prepare the surface for new finishes.
To effectively clean Citristrip from wood, first remove the bulk of the stripped finish and product using a plastic scraper. Next, wipe the wood surface thoroughly with mineral spirits or denatured alcohol, scrubbing gently with a non-abrasive pad to lift remaining residue. Finally, wipe dry and allow the wood to air dry completely.
Understanding Citristrip and Its Cleanup Needs
Citristrip is a popular paint and finish stripper. Many people like it because it has a low odor. It also contains citrus, making it feel safer than harsh chemical strippers. Citristrip helps lift old paint, varnish, and stain from wood surfaces. You apply it, let it sit, and then scrape away the old finish.
The active ingredients in Citristrip are effective. They break down the bond between the finish and the wood. This process leaves behind a gooey mixture of old finish and stripper. You must clean this mixture completely. If you do not clean it well, it can cause problems. It prevents new finishes from sticking properly. It might also cause discoloration over time. Proper cleanup ensures a clean, ready-to-finish surface.
Why Cleanup Is Critical
Leaving Citristrip residue on wood can ruin your project. The residue can react with new stains, paints, or sealers. This reaction might stop the new finish from curing correctly. It could also lead to a patchy or sticky surface. The wood might absorb the residue, causing uneven color. Sometimes, the wood can feel greasy.
I have seen projects where the new stain did not take. This happens because of stripper residue. The finish might bubble or peel later. This means more work and frustration. A thorough cleanup saves you time and effort in the long run. It ensures your hard work pays off with a beautiful, lasting finish.
Essential Tools and Materials for Citristrip Cleanup
Gathering the right tools makes the cleanup process smoother. You do not want to stop halfway through to find something. Having everything ready saves time and reduces mess. Each item plays a key role in removing the stripper and preparing the wood. I always prepare my workspace before I start.
Your success in cleaning Citristrip from wood depends on these items. Some are for removing the bulk of the product. Others are for dissolving the stubborn film. A few are for safety. Do not skip any of these. Proper preparation is the first step to a clean finish.
Cleanup Arsenal Checklist
- Plastic Putty Knife or Scraper: Use a plastic scraper. Metal can scratch your wood. These are great for removing the thick, gooey layers of stripped finish.
- Stiff Bristle Brush (Nylon or Brass): A nylon brush works well for flat surfaces. A brass brush is good for intricate carvings or heavily textured wood. These help lift residue from wood grain.
- Mineral Spirits or Denatured Alcohol: These are the primary cleaning agents. They dissolve leftover Citristrip and old finish. Always check the wood type first.
- Clean Rags or Old Towels: You need many rags. Use them to wipe away dissolved residue. Old cotton T-shirts work perfectly for this task.
- Steel Wool (Fine Grade, #0000): This helps clean deep into the wood grain. Use it gently with mineral spirits. It is very effective for stubborn spots.
- Buckets: One bucket for dirty rags or solution. Another for fresh cleaning solution.
- Protective Gear:
- Gloves: Chemical-resistant gloves (nitrile or neoprene). Citristrip is gentle, but still a chemical.
- Eye Protection: Safety glasses or goggles are a must. Splashes can happen.
- Ventilation: Work in a well-ventilated area. Open windows or use a fan. Even low-odor strippers need good air flow.
Having these items ready prevents interruptions. It also makes the job more efficient. I always keep extra rags handy. You will use more than you think.
Step-by-Step Guide: Cleaning Citristrip Residue from Wood
Cleaning Citristrip from wood is a process. Follow these steps for the best results. Each step builds on the last one. Patience is key here. Rushing can leave residue behind. I approach this like a careful restoration. My goal is always a clean, smooth surface.
This method aims to get rid of all stripper and finish. It prepares the wood for whatever you plan next. Remember to work in small sections. This gives you better control.
The Cleanup Process
Scrape Away the Bulk:
- After the Citristrip has worked, scrape off the softened finish. Use your plastic putty knife.
- Scrape with the grain of the wood. This avoids damaging the wood fibers.
- Collect the gooey mixture in a disposable container. Do not let it sit on other parts of the wood.
- For intricate areas, use a stiff brush or a specialized scraping tool designed for crevices.
- Get as much of the thick stripper and old finish off as possible in this stage. This makes the next steps easier.
Initial Cleaning with Mineral Spirits or Denatured Alcohol:
- Dip a clean rag into mineral spirits or denatured alcohol.
- Wipe down the wood surface thoroughly. Wipe with the grain.
- This step dissolves the remaining film of Citristrip and softened finish.
- Change rags often. You want to pick up the residue, not spread it around. A dirty rag just moves the gunk.
- For stubborn spots, you can gently scrub with a fine steel wool pad (#0000) dipped in the solvent. Always work with the wood grain.
- This initial wipe helps you see what truly remains on the wood.
Address Deep Grain Residue:
- Citristrip can get deep into the wood grain.
- Use a stiff bristle brush or fine steel wool soaked in mineral spirits.
- Gently scrub with the grain. This pulls out residue from the pores of the wood.
- Wipe away the loosened material with fresh, clean rags.
- You might need to repeat this step several times for heavily grained wood. I have spent extra time on oak pieces.
Final Wipe Down:
- Once you think the wood is clean, do a final wipe.
- Use a fresh rag saturated with clean mineral spirits or denatured alcohol.
- Wipe the entire surface one last time. This ensures no invisible film remains.
- The rag should come away clean. If it still shows residue, repeat the cleaning steps.
Drying Time:
- Allow the wood to dry completely. Mineral spirits evaporate.
- This can take several hours, or even overnight, depending on humidity and how much solvent you used.
- Ensure good air circulation.
- The wood should feel dry to the touch and smell neutral before you proceed.
For cleaning wood, especially after preparing it, understanding different methods is valuable. If you are preparing wood for painting or staining, this next step is very important: how to clean wood after sanding before painting. This guide ensures no dust or lingering particles ruin your finish.
Addressing Stubborn Citristrip Stains and Residue
Sometimes, even after careful cleaning, you might find stubborn spots. These spots can be tricky. They might be old finish that did not fully lift, or deeply embedded Citristrip residue. Do not get discouraged. There are ways to handle these difficult areas. I often encounter these, especially with very old or neglected pieces.
Persistent stains or residue require a bit more effort. We will look at more focused techniques. The key is to be patient and work incrementally. Avoid aggressive methods that could damage the wood. My goal is to save the wood, not harm it.
Dealing with Difficult Spots
Reapply Citristrip Locally:
- If a spot of old finish did not come off, reapply a small amount of Citristrip.
- Focus only on the stubborn area.
- Let it sit for the recommended time, or a bit longer if needed.
- Scrape and clean again using the steps above. This often helps lift resistant layers.
Using Denatured Alcohol for Tougher Residue:
- While mineral spirits are good, denatured alcohol can sometimes cut through residue more effectively.
- Apply denatured alcohol to a clean rag.
- Rub the stubborn area firmly, going with the wood grain.
- Be mindful of how the wood reacts. Some woods might be sensitive. Test in an inconspicuous spot first.
- how to clean wood floors with vinegar and how to clean wood furniture with vinegar provide insights into using gentler, acidic cleaners for general wood maintenance, but for stripper residue, alcohol or spirits are generally more effective.
Fine Steel Wool and Solvent:
- For residue embedded in the grain, fine steel wool (#0000) becomes your best friend.
- Dampen a piece of steel wool with mineral spirits or denatured alcohol.
- Rub gently with the grain over the problem spot. The fine fibers reach into the pores.
- Wipe away loosened residue immediately with a clean rag.
- Repeat until the spot is gone.
Light Sanding as a Last Resort:
- If chemical methods fail, light sanding might be necessary.
- Use very fine-grit sandpaper (220-grit or higher).
- Sand only the affected area. Blend it into the surrounding wood.
- Sand with the wood grain. This prevents visible scratches.
- After sanding, wipe the area clean with a damp cloth to remove dust. Then, re-clean with mineral spirits to ensure all residue and dust are gone.
When dealing with deep-seated issues like these, it is good to remember broader cleaning challenges. Sometimes, you face more than just stripper residue; you might also deal with layers of grime or dirt buildup on wood. For tips on managing these situations, consider checking out this resource: how to clean dirt buildup on wood. It offers additional strategies for preparing wood surfaces.
Post-Cleanup Wood Care and Preparation
You have successfully cleaned Citristrip from your wood. The surface looks free of residue. What comes next is equally important. Proper post-cleanup care ensures your wood is ready for its new finish. This stage sets the foundation for a beautiful, long-lasting result. I consider this the reward phase after hard work.
Neglecting this step can undo all your cleaning efforts. The wood needs to be perfectly prepared. This means it must be dry and smooth. It also needs to be free of any lingering contaminants.
Essential Post-Cleanup Steps
Allow for Full Drying:
- Even if the wood feels dry, give it extra time.
- Any residual solvent or moisture can interfere with new finishes.
- Mineral spirits generally evaporate within a few hours. High humidity can slow this down.
- Wait at least 24 hours, or even 48 hours, especially if the wood felt saturated.
- Good airflow is key. Open windows or use a fan in the room.
Inspect the Wood Surface:
- Once dry, examine the wood carefully.
- Look for any remaining residue, sticky spots, or discoloration.
- Check under different lighting conditions. Sometimes, residue is only visible from certain angles.
- Run your hand over the surface. It should feel smooth and uniform.
- If you find any issues, go back to the previous cleaning steps to address them.
Light Sanding for Smoothness and Adhesion:
- Sanding is almost always necessary after stripping.
- Start with a fine-grit sandpaper, such as 180 or 220 grit.
- Sand with the wood grain. Avoid sanding across the grain.
- Sanding smooths any raised grain from the stripping process. It also creates a “tooth” for your new finish to adhere to.
- For very smooth finishes, you might progress to 320-grit sandpaper.
- After sanding, wipe the wood thoroughly with a tack cloth or a clean cloth dampened with mineral spirits to remove all dust.
Conditioning (Optional, but Recommended):
- If you plan to stain, especially on softwoods like pine, consider using a wood conditioner.
- Citristrip can sometimes open up the wood pores. This can lead to uneven stain absorption.
- A conditioner helps the stain apply more evenly.
- Follow the conditioner manufacturer’s instructions for application and drying time.
Taking these steps ensures your wood is truly ready. It will accept the new finish beautifully. I have seen the difference these final touches make. Your project will look professional and last longer.
Safety Precautions When Working with Strippers and Cleaners
Working with chemical strippers and cleaning agents requires caution. Even though Citristrip is often considered “safer” or “low-VOC,” it is still a chemical. Your health and safety should be the top priority. I always follow safety guidelines. This protects me and ensures a smooth project.
Never skip safety steps. Accidents can happen quickly. Understanding the risks helps you avoid them. Protecting yourself means wearing the right gear and working in a safe environment.
Safety First Checklist
Ventilation is Essential:
- Always work in a well-ventilated area.
- Open windows and doors. Use fans to create airflow.
- If working indoors, consider using an exhaust fan.
- Avoid working in enclosed spaces like small rooms or basements without proper air exchange.
- Good ventilation disperses fumes, protecting your respiratory system.
Protect Your Skin:
- Wear chemical-resistant gloves. Nitrile or neoprene gloves are good choices. Latex gloves may not offer enough protection from solvents.
- Long sleeves and pants are advisable to minimize skin exposure.
- If Citristrip or cleaning solvents get on your skin, wash the area immediately with soap and water.
Eye Protection:
- Wear safety glasses or goggles at all times.
- Splashes can occur during scraping or wiping.
- Eye injuries can be severe, so never skip this step.
Respiratory Protection (If Needed):
- While Citristrip is low-odor, if you are sensitive or working in a poorly ventilated area, wear a respirator.
- Choose a respirator with organic vapor cartridges.
- This protects your lungs from fumes.
Handling and Storage of Chemicals:
- Read the product labels for Citristrip, mineral spirits, and denatured alcohol.
- Follow all manufacturer’s instructions for use and safety.
- Store chemicals in their original containers, tightly sealed, in a cool, dry place.
- Keep them out of reach of children and pets.
Disposal:
- Dispose of stripper residue and solvent-soaked rags properly.
- Check local regulations for hazardous waste disposal.
- Often, you need to let solvent-soaked rags air dry completely in a well-ventilated area before discarding them. This prevents spontaneous combustion.
- Do not pour chemicals down drains.
Prioritizing safety ensures your wood project is not only beautiful but also completed without incident. I encourage everyone to be careful.
Common Mistakes to Avoid When Cleaning Citristrip
Cleaning Citristrip from wood might seem straightforward, but certain missteps can hinder your progress or even damage your wood. I have made some of these mistakes myself in the past. Learning from them helps ensure better outcomes for future projects. Avoiding these common errors saves you time, frustration, and potential wood damage.
My advice comes from experience. A little foresight can prevent big problems. Pay attention to these pitfalls. This will help you achieve a cleaner, more professional finish.
Pitfalls to Steer Clear Of
Using Metal Scrapers:
- A common mistake is using a metal putty knife or scraper.
- Metal can easily gouge, scratch, or dent the wood surface.
- Even if the wood is hard, a slip can cause damage.
- Always use a plastic scraper. They are just as effective for removing softened finishes.
Not Changing Rags Often Enough:
- Using the same dirty rag repeatedly just spreads residue around.
- The goal is to pick up the dissolved stripper and old finish.
- Use a fresh, clean rag frequently. You will use more rags than you expect.
- This ensures you are actually cleaning, not just moving the mess.
Ignoring the Wood Grain:
- Always scrape, wipe, and sand with the wood grain.
- Going against the grain can scratch the wood. These scratches can be hard to remove.
- They might also become very visible once you apply a new stain.
- Working with the grain protects the wood’s natural beauty.
Insufficient Drying Time:
- Rushing the drying process is a big mistake.
- If the wood is still damp with solvent or moisture, new finishes will not adhere properly.
- This can lead to bubbling, peeling, or a sticky surface.
- Patience is key. Allow ample time for the wood to dry completely.
Using Too Much Water:
- While some methods suggest a water rinse, excessive water can harm wood.
- Water can raise the wood grain, making it rough. It can also cause swelling or warping.
- Stick to mineral spirits or denatured alcohol for cleanup.
- If you must use water, use it sparingly and wipe dry immediately.
- For cleaning wood with mold, water is sometimes used, but that’s a different scenario. how to clean mold off of wood furniture or how to clean black mold off wood show specific techniques for moisture-related problems. But for stripper residue, solvents are preferred.
Skipping the Final Sanding:
- Even if the wood feels smooth, a light sanding is crucial.
- Strippers can leave a slightly fuzzy texture or raise the grain.
- Sanding smooths the surface and creates an ideal base for new finishes.
- It also ensures proper adhesion.
Avoiding these common errors will make your Citristrip cleanup more effective. Your wood will be perfectly prepared for its next step.
Frequently Asked Questions About Cleaning Citristrip From Wood
Here are some common questions I hear about cleaning Citristrip from wood. These answers help address specific concerns that might arise during your project.
Can Citristrip damage wood?
Citristrip is generally safer for wood than harsher chemical strippers. However, if left on too long, it can dry out and potentially absorb into the wood. This can make cleanup harder and sometimes cause a slight discoloration. Prompt and thorough cleaning prevents most issues and keeps your wood healthy.
What if Citristrip dries on wood?
If Citristrip dries on wood, it becomes much harder to remove. It turns into a hard, gummy residue. You will need to reapply a fresh layer of Citristrip over the dried area. Let it sit for a while to reactivate and soften the old, dried stripper. Then, scrape and clean as usual.
Is water good for cleaning Citristrip residue?
Using water directly to clean Citristrip is often not recommended. Water can raise the wood grain, making the surface rough. It can also cause wood to swell or warp, especially on bare wood. Mineral spirits or denatured alcohol are more effective and safer for dissolving Citristrip residue without harming the wood.
Do I need to sand after using Citristrip?
Yes, you should almost always sand after using Citristrip. Stripping can leave the wood grain raised or slightly fuzzy. A light sanding with fine-grit sandpaper (e.g., 220-grit) smooths the surface. It also creates a better bond for your new stain, paint, or finish.
Can I use dish soap to clean Citristrip from wood?
No, dish soap is not suitable for cleaning Citristrip. Dish soap is water-based and will not effectively dissolve the stripper residue. It might also introduce more moisture to the wood, which is not ideal. Stick to mineral spirits or denatured alcohol for effective and safe cleanup.
How do I dispose of Citristrip residue?
Dispose of Citristrip residue and solvent-soaked rags properly. Place rags and scraped residue in a sealed, non-flammable container. Check your local hazardous waste disposal guidelines. Often, you need to let rags air dry outside before disposal to prevent spontaneous combustion. Never pour chemicals down drains.
Conclusion
Cleaning Citristrip from wood is a crucial step in any wood restoration project. It ensures your efforts result in a truly clean and prepared surface. We explored everything from gathering your tools to the detailed steps of scraping, wiping, and drying. We also covered handling stubborn residue and prioritizing your safety. My experience tells me that patience and thoroughness here truly pay off.
By following these guidelines, you prevent issues like uneven finishes or sticky surfaces. You set your wood up for success. Remember, a clean surface is the foundation for a beautiful, lasting finish. So, go ahead. Tackle your next wood project with confidence. You now know exactly how to clean Citristrip from wood effectively. Your restored wood piece will be a source of pride.
- Citristrip removal
- wood cleaning
- stripping wood
- paint stripper cleanup
- wood restoration
- DIY wood projects

