· Cleaning Tips · 16 min read
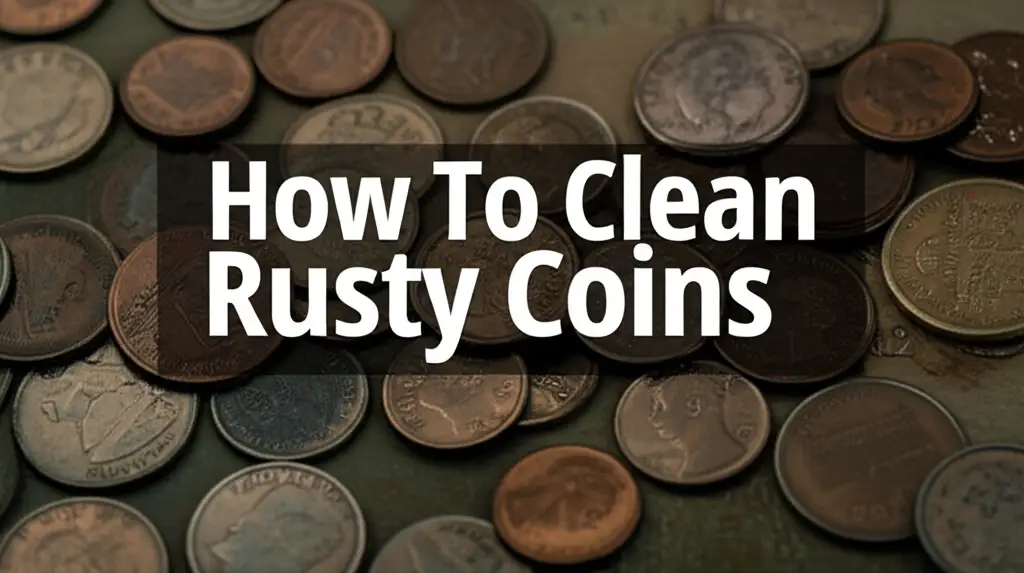
How To Clean Coins With Hydrogen Peroxide

Clean Coins with Hydrogen Peroxide: A Simple Guide
Have you ever found an old coin that looks dull and dirty? Cleaning it seems like a good idea. Many people wonder about using common household products for this task. Hydrogen peroxide is one such product. It is known for its cleaning properties. You can use it for various household cleaning needs.
Learning how to clean coins with hydrogen peroxide can bring back some of their luster. This method is often gentle on many metals. It helps remove dirt and grime without harsh scrubbing. We will explore when and how to use this solution. We will also cover important safety steps. By the end, you will know how to clean your coins safely and effectively, enhancing their appearance.
Takeaway
- Hydrogen peroxide offers a gentle way to clean many types of coins.
- Always test a small area first to prevent damage.
- Rinse coins thoroughly and dry completely after cleaning.
- Wear gloves and eye protection for safety.
How do you clean coins with hydrogen peroxide?
To clean coins with hydrogen peroxide, submerge them in a 3% solution for 15-30 minutes, or longer for heavily soiled coins, up to several hours. After soaking, gently scrub with a soft brush, then rinse thoroughly with distilled water and dry completely to prevent new damage.
Understanding Hydrogen Peroxide for Coin Cleaning
Hydrogen peroxide is a common chemical compound. Its formula is H2O2. You probably have a bottle of 3% hydrogen peroxide in your home. This solution is often used for first aid. It also works as a mild disinfectant. Its power comes from its ability to release oxygen. This oxygen helps break down organic matter and grime.
When you use hydrogen peroxide to clean coins, it works on the dirt. The oxygen bubbles lift away accumulated grime. This makes it a good option for removing surface dirt. It can loosen caked-on soil from old finds. It is generally safer than strong acids or abrasives. These stronger cleaners can damage coin surfaces.
It is important to use the right concentration. A 3% solution is standard for household use. Stronger solutions can be too harsh. They might cause discoloration or damage. Always stick to the 3% solution for coin cleaning. Hydrogen peroxide is also useful for many other cleaning tasks. For example, it can effectively clean grout with hydrogen peroxide. This shows its versatility in cleaning different materials. Understanding how it works helps you use it properly.
This method works well for many metals, but not all. It is best for copper, brass, and some bronze coins. It can also help with common silver coins. However, it is not ideal for valuable or delicate pieces. Old coins with specific patinas need careful handling. The patina itself can be valuable. Hydrogen peroxide removes this layer. Knowing how the chemical works helps you make smart cleaning choices.
When to Clean Coins (and When to Avoid It)
Cleaning coins is a topic with strong opinions. Coin collectors often advise against cleaning. Cleaning can reduce a coin’s value. This is especially true for rare or antique coins. Their original condition, including any patina, is part of their history. Removing this can be irreversible. Patina is a layer that forms on metal over time. It can protect the coin. It also shows its age.
You should consider cleaning only common coins. These are coins that have no significant numismatic value. For example, you might clean a modern coin found in the garden. Or perhaps a coin for craft projects. Cleaning can make these coins look better. It helps them shine more. This is purely for aesthetic reasons. It is not for preserving historical value.
Never clean a coin if it holds significant monetary value. Professional numismatists can assess this. They examine the coin’s grade and originality. Any alteration, including cleaning, lowers its grade. A lower grade means less value. Even gentle methods can strip away precious surface details. This is why caution is essential. It is better to leave valuable coins as they are.
If you found old coins in the ground, you might be tempted to clean them. You can learn how to clean old coins found in the ground using methods that focus on gentle dirt removal. Hydrogen peroxide might be an option for some of these, but always proceed with care. Remember that cleaning is a personal choice for common coins. Do not clean if value or historical integrity matters.
Essential Supplies for Peroxide Coin Cleaning
Before you start cleaning coins, gather all necessary items. Having everything ready makes the process smooth. It also ensures your safety. You will need a few simple things. Most of these items are easily found around your home. Proper supplies ensure effective cleaning. They also help protect both you and the coins.
Here is a list of what you will need:
- Hydrogen Peroxide (3% solution): This is the main cleaning agent. Buy a fresh bottle. Older solutions might lose effectiveness. The 3% concentration is safe for most household uses. It is strong enough for coin cleaning.
- Small Glass or Plastic Container: Use a container that can hold your coins. Glass jars or plastic cups work well. Avoid metal containers. Hydrogen peroxide can react with certain metals. This reaction could damage the container or the coins.
- Distilled Water: You will use this for rinsing. Tap water contains minerals. These minerals can leave spots on your coins. Distilled water is pure. It ensures a clean rinse. This step is crucial for preventing water spots.
- Soft Brush or Cotton Swabs: A soft-bristled toothbrush works perfectly. You can also use cotton swabs for delicate areas. These tools help dislodge stubborn dirt. They do this without scratching the coin surface.
- Microfiber Cloth or Soft Towel: You need this for drying the coins. A microfiber cloth is very absorbent. It will not scratch the coin. A soft towel also works well. Ensure it is clean and lint-free.
- Protective Gloves: Wear rubber or latex gloves. Hydrogen peroxide can irritate skin. Gloves protect your hands from contact. They also keep fingerprints off the cleaned coins.
- Eye Protection: Safety glasses are important. Splashes of hydrogen peroxide can harm your eyes. Always protect your eyes when handling chemicals.
- Tongs or Plastic Tweezers (Optional): These tools help you handle the coins. They prevent direct contact with the solution. They also help avoid leaving fingerprints.
Having these supplies ready makes the cleaning process efficient. It also helps you stay safe. Remember, preparation is key for any cleaning project. This includes cleaning items like cleaning AirPods with hydrogen peroxide or even cleaning white shoes with hydrogen peroxide. Each task requires specific preparation.
Step-by-Step Guide: Cleaning Coins with Hydrogen Peroxide
Now, let us get into the actual cleaning process. This guide provides clear steps. Follow them carefully for best results. Remember to prioritize safety throughout. This method aims to be gentle yet effective. It works well for removing common dirt from coins.
Step 1: Prepare Your Workspace and Coins
Set up your cleaning area. Choose a well-lit space. Place a towel or paper towels on your work surface. This protects your table. It also catches any spills. Sort your coins. Group similar metals together. Avoid mixing different types of coins in the same bath. This prevents unwanted reactions between metals. Lightly brush off any loose dirt from each coin. Use a dry, soft brush for this initial cleaning. This prepares the coin surface for soaking.
Step 2: Submerge Coins in Hydrogen Peroxide
Carefully place one coin into your glass or plastic container. Pour 3% hydrogen peroxide over the coin. Make sure the coin is fully submerged. Do not overcrowd the container. Give each coin enough space. For multiple coins, use separate containers or multiple batches. Watch for small bubbles forming. This indicates the peroxide is working. The bubbles lift dirt from the coin’s surface.
Step 3: Soak and Monitor
The soaking time depends on how dirty the coin is. For lightly soiled coins, 15 to 30 minutes may be enough. For very dirty coins, you might need to soak them longer. You can let them soak for several hours. Some people even soak coins overnight. Check the coins periodically. Look for visible dirt lifting away. If the solution becomes very cloudy, you can replace it. Gently agitate the container a few times. This helps dislodge loosened particles.
Step 4: Gentle Scrubbing (If Needed)
After soaking, use tongs to remove the coin. Hold it over the container. Lightly scrub the coin with a soft brush. A soft toothbrush works well. Gently brush away any remaining dirt. Focus on grooves and raised areas. Do not scrub too hard. Hard scrubbing can scratch the coin. If dirt remains, you can re-submerge the coin. Repeat the soaking and scrubbing steps. This gentle approach protects the coin’s surface.
Step 5: Rinse Thoroughly
This step is critical. Rinse the coin completely under running distilled water. Ensure all traces of hydrogen peroxide are gone. Residual peroxide can cause damage over time. Rinse both sides of the coin carefully. Use plenty of water. This removes any loosened dirt and chemical residue. Proper rinsing prevents future problems.
Step 6: Dry Completely
Pat the coin dry immediately with a clean, soft microfiber cloth. Do not rub the coin. Rubbing can scratch the surface. Ensure the coin is completely dry. Any moisture left on the coin can lead to new tarnish or water spots. You can also air dry coins on a soft towel. Make sure the area is dust-free. A completely dry coin is ready for storage or display. This careful drying prevents oxidation.
Dealing with Stubborn Stains and Patina
Sometimes, coins have more than just surface dirt. They might have stubborn stains. These stains can be from environmental exposure. Or they might be from long-term storage conditions. Hydrogen peroxide is effective against many types of grime. However, it might not remove everything. Some stains are deeply embedded. Other marks are not dirt but natural patina.
For tough stains, you can try extending the soaking time. Let the coin sit in the hydrogen peroxide for a longer period. This might be a few hours or even overnight. Always check the coin regularly. Look for any adverse reactions. If the solution becomes very murky, change it. Fresh peroxide can continue to work on the stains. A soft brush helps dislodge these stubborn bits.
Another approach for very tough spots is to use a gentle paste. You can make a paste with baking soda and distilled water. Apply this paste to the stain. Gently rub it with a cotton swab. Baking soda is a mild abrasive. It can help lift persistent grime. Always rinse thoroughly after using baking soda. Rinse with distilled water to remove all residue. This method provides extra cleaning power. You can also learn how to clean with vinegar and baking soda for other cleaning tasks. It shows these ingredients are very versatile.
It is important to know the difference between dirt and patina. Patina is a thin layer that forms on metal. It happens through oxidation over many years. Patina gives old coins their distinct look. It can be green, brown, or black. Collectors value this patina. It shows the coin’s age and authenticity. Cleaning a coin removes this patina. Removing it often lowers the coin’s value. Hydrogen peroxide can remove patina. So, avoid using it on coins where the patina is desirable. Only clean coins where value is not a concern. Always respect a coin’s natural aging process.
Safety First: Precautions for Using Hydrogen Peroxide
Working with any chemical requires caution. Hydrogen peroxide, while common, is no exception. Taking proper safety steps protects you. It also helps prevent damage to your coins. Always prioritize safety over speed when cleaning. Follow these guidelines carefully.
Wear Protective Gear:
- Gloves: Always wear rubber or latex gloves. Hydrogen peroxide can irritate your skin. It might cause dryness or a mild burning sensation. Gloves create a barrier. They also keep your fingerprints off the cleaned coins.
- Eye Protection: Use safety glasses or goggles. Splashes can happen. Hydrogen peroxide in your eyes can cause serious irritation. Eye protection shields your eyes from accidental contact.
Work in a Ventilated Area:
- Hydrogen peroxide can produce fumes. While generally mild, good air circulation is important. Work near an open window. Or use a fan. This keeps the air fresh. It prevents any buildup of vapors.
Avoid Contact with Skin and Eyes:
- If hydrogen peroxide gets on your skin, wash it immediately. Use plenty of water and soap. If it gets in your eyes, flush them with water for 15 minutes. Seek medical attention if irritation continues.
Do Not Ingest:
- Hydrogen peroxide is not for internal use. Keep it out of reach of children and pets. Store it in its original container. Make sure the cap is tightly closed.
Test a Small Area First:
- Before soaking an entire coin, test a small, inconspicuous area. Apply a drop of peroxide. Watch for any discoloration or unexpected reactions. This helps ensure the coin material reacts well. Not all metals react the same way. This test prevents unwanted damage.
Use the Correct Concentration:
- Only use 3% hydrogen peroxide for coin cleaning. Higher concentrations are much stronger. They can cause severe damage to coins. They are also more hazardous to handle. Always check the label before use.
Proper Disposal:
- After use, you can pour diluted hydrogen peroxide down the drain. It breaks down into water and oxygen. This makes it environmentally friendly. Rinse the container thoroughly before disposal or reuse.
Following these safety precautions ensures a safe cleaning experience. It protects you from chemical exposure. It also helps preserve your coins. Remember, a little caution goes a long way.
After Cleaning: Drying, Preserving, and Storing Your Coins
The cleaning process does not end when you remove the coin from the solution. Proper drying and storage are just as important. These steps prevent new damage. They help maintain the coin’s improved appearance. Rushing this part can ruin your cleaning efforts.
Thorough Drying is Key:
- After rinsing, immediately dry the coin. Use a soft, lint-free microfiber cloth. Gently pat the coin dry. Do not rub. Rubbing can scratch the coin’s surface. Ensure every part of the coin is completely dry. Pay attention to recessed areas. Even tiny drops of water can cause spots or tarnish later.
- You can also use a soft hairdryer on a cool setting. Hold it at a safe distance. Move it around to ensure even drying. This helps evaporate any lingering moisture. This is especially useful for intricate designs. A completely dry coin is less prone to oxidation.
Preserving the Coin:
- Once dry, handle the coin only by its edges. Your fingers contain oils. These oils can leave marks on the coin. These marks can become permanent over time. Wearing cotton gloves for handling is ideal.
- Some people apply a very thin layer of wax. This creates a protective barrier. Use a specialized coin wax or micro-crystalline wax. Apply sparingly with a soft cloth. Buff gently to a shine. This step is optional. It is more common for non-collectible coins used in displays. This wax helps prevent tarnish.
Proper Storage:
- Store cleaned coins in appropriate holders. Do not use PVC plastic flips. PVC contains chemicals that can damage coins. These chemicals leach out over time. They cause a green, sticky residue. This residue is called “PVC damage.”
- Use coin holders made from inert materials. Mylar flips are a good choice. They are stable and safe. Archival-safe coin slabs are also excellent. These are typically made from acrylic. They protect the coin from environmental factors.
- Store coins in a cool, dry place. Avoid areas with high humidity or extreme temperature changes. Basements or attics are often not ideal. Humidity can promote tarnish. Stable conditions help preserve the coin’s state. Keep coins away from direct sunlight. Sunlight can cause discoloration.
- For bulk storage, use coin albums with acid-free pages. Or use coin trays designed for safe storage. These methods keep coins organized. They also protect them from physical damage. Proper storage ensures your cleaning efforts last.
Following these steps protects your cleaned coins. It helps them retain their shine. It also prevents future damage or tarnish. A well-cared-for coin remains a pleasing item.
Common Questions and Troubleshooting
Even with a detailed guide, questions may arise. You might also encounter unexpected issues. This section addresses common concerns. It provides solutions for typical problems during coin cleaning. Knowing these answers helps you troubleshoot effectively.
Q1: My coin did not get clean. What should I do? A: If your coin is still dirty, try soaking it longer. Heavily soiled coins might need several hours. You can also gently scrub it again. Use a fresh hydrogen peroxide solution. If it still does not come clean, the dirt might be deeply embedded. Or it could be a different type of stain. Do not use harsher chemicals. This can damage the coin.
Q2: My coin looks duller after cleaning. Why? A: This can happen if the coin had a valuable patina. Hydrogen peroxide removes dirt, but it also removes patina. If the coin looks duller, it might be because the original surface was exposed. Sometimes, incomplete drying can also cause dullness. Ensure thorough drying. This dullness is often permanent if it is due to patina removal.
Q3: Is it safe to use stronger hydrogen peroxide? A: No, only use 3% hydrogen peroxide. Stronger concentrations are too harsh for coins. They can cause severe discoloration. They can also etch the metal surface. Higher concentrations are also more dangerous to handle. Stick to the standard household solution. This provides enough cleaning power.
Q4: Can I clean all types of metal coins with hydrogen peroxide? A: Hydrogen peroxide works well on copper, brass, and some bronze. It can also clean common silver coins. However, it is not recommended for precious metals like gold. It is also not ideal for very old or rare coins. These coins might have unique alloys. Always test a small area first. Different metals react differently.
Q5: What if my coin turns green or black after cleaning? A: Green or black spots usually indicate oxidation or new tarnish. This happens if the coin was not completely dry. Or it can happen if it was stored improperly. Re-rinse the coin with distilled water. Then dry it thoroughly again. Store it in an airtight, inert coin holder. Some metals naturally oxidize quickly after cleaning.
Q6: Can hydrogen peroxide damage the coin’s details? A: Hydrogen peroxide itself typically does not erode metal. It mainly works on surface grime. However, aggressive scrubbing during cleaning can damage fine details. Always use a very soft brush. Avoid applying too much pressure. The goal is gentle dirt removal. Preserve the coin’s intricate features.
Conclusion
Cleaning coins with hydrogen peroxide can be a useful method. It helps restore the appearance of many common coins. We explored how hydrogen peroxide works. We covered when it is appropriate to clean coins. We also outlined the essential supplies needed. A clear, step-by-step process guides you through the cleaning. We discussed handling stubborn stains. Most importantly, we emphasized safety precautions. Proper drying and storage are critical after cleaning. They prevent new damage.
Remember, this method is best for non-valuable coins. Always prioritize the coin’s historical integrity. If a coin has numismatic value, do not clean it. Its original state is often its most valuable asset. For those everyday dirty coins, hydrogen peroxide offers a gentle solution. Follow these guidelines carefully. You can safely clean coins and enhance their visual appeal. Start cleaning your common coins today. Discover the simple satisfaction of revealing their hidden shine.
- coin cleaning
- hydrogen peroxide
- old coins
- coin restoration
- metal cleaning
- collectible care