· Footwear Care · 18 min read
How To Clean Common Projects
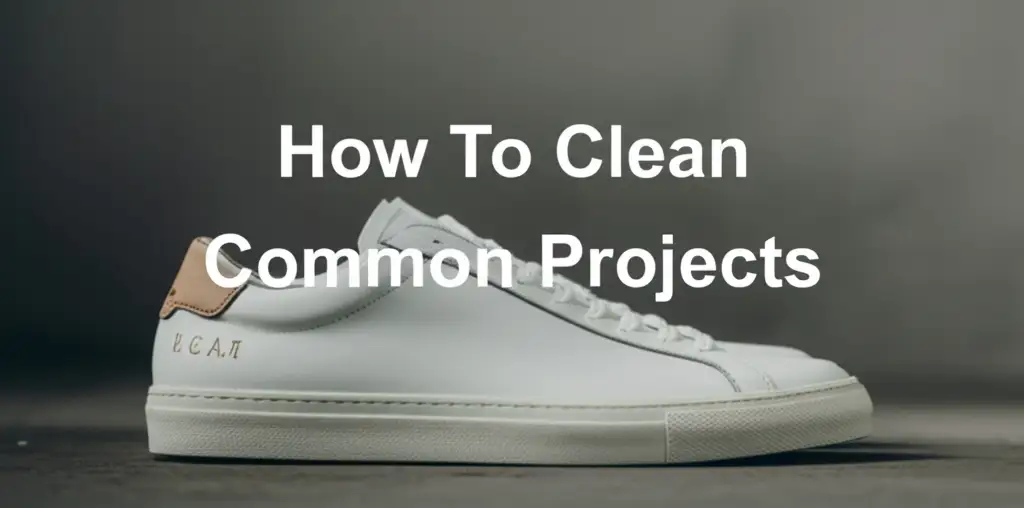
Clean Common Projects: Keep Your Luxury Sneakers Pristine
Common Projects sneakers are a symbol of understated luxury and minimalist style. Their clean lines and premium materials make them a favorite among fashion enthusiasts. However, these elegant shoes, especially the popular white leather models, show dirt easily. Proper cleaning and maintenance are essential. You want your investment to last. Learning how to clean Common Projects properly protects their appearance and extends their lifespan. This guide will walk you through everything. We cover essential tools, specific cleaning methods for different materials, and tips for ongoing care.
Takeaway:
- Use the right tools for your Common Projects’ specific material.
- Clean leather with a gentle soap and soft brush or cloth.
- Handle suede with specialized brushes and cleaners.
- Address scuffs on rubber soles with a magic eraser or mild abrasive.
- Regular care prevents deep stains and keeps shoes looking new.
To effectively clean Common Projects, first identify the material. Then, gather soft brushes, mild soap, microfiber cloths, and specialized cleaners for leather or suede. Gently wipe down surfaces, scrubbing soles with a melamine foam eraser. Allow them to air dry completely, away from direct heat.
Understanding Your Common Projects: Materials and Care Needs
Common Projects sneakers come in various materials, each requiring specific care. Most popular models feature premium Italian leather. Others use delicate suede or durable nubuck. The soles are typically rubber. Each material reacts differently to dirt and cleaning agents. Understanding these differences helps you choose the right cleaning approach. My own Common Projects sneakers are mostly white leather, so I pay close attention to keeping them spotless.
Leather is tough, but it can stain. Dirt settles into the grain. Suede and nubuck have a napped surface. This texture traps dust and dirt easily. Water can also stain these materials if not handled carefully. Rubber soles pick up scuffs and grime from the ground. Knowing what your shoes are made of guides your cleaning choices. Proper care means your shoes stay looking good for a long time.
Identifying Your Shoe’s Material
Before you start cleaning, check what your Common Projects are made from.
- Smooth Leather: This is the most common. It has a slightly glossy or matte finish. It feels smooth to the touch. White leather models are very popular.
- Suede or Nubuck: These materials have a fuzzy, soft texture. Suede is softer and has a deeper nap. Nubuck is finer and often more durable. Both are sensitive to water and harsh chemicals.
- Rubber Soles: All Common Projects feature durable rubber soles. These are often white or off-white. They are prone to scuffs and dirt marks.
Each material needs a different cleaning method. You will avoid damage by using the correct supplies. Using the wrong product on suede can ruin its texture. Harsh cleaners on leather can dry it out. Always check the material before you begin cleaning.
Why Material Matters for Cleaning
The type of material dictates the cleaning products and tools you use. For leather, you want gentle, non-abrasive cleaners that hydrate the material. Harsh soaps can strip natural oils from leather. This makes it crack over time. A soft cloth and mild soap are usually enough.
Suede and nubuck require more delicate care. Water can cause stains and stiffen the nap. You need special brushes to lift dirt without damaging the texture. Suede erasers help remove marks. A dedicated suede cleaner often comes in a spray form. This avoids oversaturation. Using water on these materials can result in irreparable damage. It is a common mistake I see people make.
Rubber soles are durable but porous. They absorb dirt and scuffs. A magic eraser works well here. You can also use a mild abrasive cleaner. These help lift stubborn marks without harming the rubber. Always focus on cleaning each part of the shoe based on its material. This protects your investment.
Essential Tools and Cleaning Products for Common Projects
Having the right tools is half the battle when cleaning your Common Projects. You do not need many items. Focus on quality and gentleness. Harsh chemicals or abrasive brushes can cause damage. I always keep a specific cleaning kit ready for my favorite sneakers. This kit ensures I have everything on hand for regular maintenance or deep cleaning.
Basic Cleaning Supplies
For everyday dirt and general cleaning, you need a few key items. These are suitable for most materials, especially leather.
- Soft-bristled brush: A dedicated shoe brush or an old toothbrush works well for gentle scrubbing. It helps dislodge dirt.
- Microfiber cloths: These are absorbent and non-abrasive. They are perfect for wiping surfaces. Use separate cloths for cleaning and drying.
- Mild soap: A small amount of dish soap diluted in water works fine. You can also use a dedicated sneaker cleaner. Look for pH-neutral options.
- Small bowl: For mixing soap and water.
- Clean water: For rinsing and diluting.
These basic supplies form the foundation of any shoe cleaning routine. They are effective for removing light dirt and maintaining cleanliness. I find that prompt action on new dirt makes the cleaning process much easier.
Specialized Products for Different Materials
Certain materials need specific products for best results. These products ensure you do not damage the delicate surfaces.
- Leather cleaner/conditioner: A dedicated leather cleaner lifts dirt. A conditioner keeps the leather supple and prevents drying. This is very important for longevity.
- Suede brush: This brush has stiff bristles or a combination of wire and nylon. It helps to restore the nap of the suede and remove dry dirt.
- Suede eraser: This small block helps rub away scuffs and stains on suede. It works like a pencil eraser.
- Suede protector spray: After cleaning, a protector spray creates a barrier. It repels water and stains. This is a must-have for suede.
- Melamine foam eraser (Magic Eraser): This is excellent for cleaning rubber soles. It removes scuffs and marks effectively. I use it all the time on the white soles of my sneakers.
Using the right tools for the right job makes a big difference. It protects the integrity of your Common Projects. It also ensures they look their best after every clean.
Additional Helpful Items
Consider these items for a complete cleaning setup.
- Shoe trees: Cedar shoe trees absorb moisture and maintain the shoe’s shape. Insert them after cleaning.
- Shoehorn: Helps you put on shoes without crushing the heel. This prevents damage over time.
- Protective spray (general): A general water and stain repellent spray can add an extra layer of defense for all materials, especially new shoes.
- Cotton swabs: Useful for cleaning small, hard-to-reach areas.
- Old newspaper or paper towels: For stuffing inside shoes to absorb moisture during drying.
Gathering these items before you start saves time. It ensures you have a smooth and effective cleaning process. A well-prepared cleaner gets the best results.
Step-by-Step Guide: Cleaning Common Projects Leather Sneakers
Cleaning leather Common Projects is straightforward. It requires patience and gentle care. The goal is to remove dirt without damaging the leather. I have found this method works best for keeping my white leather Common Projects looking sharp. This process applies to both smooth and pebbled leather finishes.
Preparing Your Leather Sneakers for Cleaning
Start by preparing the shoes. This step removes loose debris. It makes the deep cleaning easier.
- Remove laces and insoles: Take out the shoelaces and insoles. You will clean these separately. This exposes all shoe surfaces.
- Brush off loose dirt: Use a soft-bristled brush or a dry microfiber cloth. Gently brush off any loose dirt, dust, or mud from the upper and soles. This prevents scratching the leather during the wet cleaning phase.
- Stuff the shoes: Place old newspaper or shoe trees inside the sneakers. This helps them keep their shape. It also absorbs excess moisture during cleaning.
Proper preparation sets you up for success. It ensures a thorough and effective clean. Do not skip this initial step.
Cleaning the Leather Uppers
Now you can clean the main leather surface. Be gentle and work in small sections.
- Mix cleaning solution: In a small bowl, mix a few drops of mild soap with warm water. You want a slightly soapy solution, not sudsy.
- Dampen cloth: Dip a clean microfiber cloth into the solution. Wring out excess water. The cloth should be damp, not wet.
- Wipe the leather: Gently wipe the leather in small circular motions. Start with a clean section of the cloth each time. Work from top to bottom. Focus on stained areas.
- Stubborn spots: For more stubborn dirt, dampen the soft-bristled brush in the solution. Gently scrub the spot. Use very light pressure.
- Wipe clean: Use a separate, clean, damp cloth to wipe off any soap residue. Follow immediately with a dry microfiber cloth to absorb moisture. This prevents water spots.
- Apply conditioner (optional): After cleaning and drying, apply a small amount of leather conditioner. Use a clean cloth. This moisturizes the leather. It keeps it soft and supple.
This gentle approach removes dirt effectively. It also protects the leather’s integrity. I always take my time with this step.
Cleaning the Rubber Soles and Midsoles
The rubber soles are often the dirtiest part. They show scuffs easily.
- Use a melamine foam eraser: Dampen a melamine foam eraser (like a Magic Eraser). Gently rub it over scuff marks and dirt on the white rubber soles and midsoles. The eraser works by gently abrading the dirt. It usually removes most marks with ease.
- For deep grime: If the eraser does not work, use the soapy water and the soft-bristled brush. Scrub the rubber vigorously. The rubber is durable. It can handle more pressure than the leather.
- Wipe clean: Wipe off any residue with a damp cloth. Then dry with a clean cloth.
Cleaning the soles makes a big visual difference. It restores the crisp, clean look of your Common Projects. For very stubborn stains, general stain removal techniques can sometimes help. You might find some useful tips by reading about how to clean stains effectively, though remember to adapt methods for shoe materials.
Drying and Finishing
Proper drying is crucial to prevent damage.
- Air dry: Place your shoes in a well-ventilated area. Keep them away from direct sunlight or heat sources. Heat can crack leather. It can also warp the shoe’s shape.
- Allow full drying: Let them air dry completely. This can take several hours or overnight. Do not rush this step.
- Re-lace: Once dry, re-lace your shoes with clean laces.
Your leather Common Projects should now look refreshed and clean. Regular cleaning prevents dirt from setting in. This makes each cleaning session easier.
Special Care: How to Clean Common Projects Suede Sneakers
Suede Common Projects are beautiful, but they need different care than leather. Water and harsh chemicals can ruin suede. My approach to suede cleaning is always about gentleness and specialized tools. Suede requires dry cleaning methods mostly.
Preparing Suede Sneakers
Preparation for suede is similar but with extra caution.
- Remove laces and insoles: Take them out for separate cleaning.
- Use a suede brush: Gently brush off loose dirt and dust. Use a specialized suede brush. Brush in one direction to lift the nap. Do not scrub hard. This action helps to remove surface debris without pushing it deeper into the material.
Proper preparation avoids spreading dirt during cleaning. It also helps in restoring the suede’s natural texture.
Dry Cleaning Suede Uppers
Most suede cleaning should be dry. This prevents water stains.
- Suede eraser for marks: For scuff marks or dried stains, use a suede eraser. Rub the eraser gently over the mark. It will lift the dirt. Apply light pressure. Work in small areas.
- Brush again: After erasing, brush the area again with the suede brush. This removes eraser residue and lifts the nap.
- For tougher stains (last resort): If a stain persists, use a dedicated suede cleaner spray. Spray a small amount onto a clean cloth, not directly onto the shoe. Dab the stain gently. Do not rub. Follow instructions on the cleaner. Always test on an inconspicuous area first. Allow it to air dry.
Avoid water on suede if possible. Water can leave permanent marks. It can also stiffen the material. If your shoes develop mold, follow specific guidance on how to remove mold from shoes. That process is different and very important for shoe health.
Restoring the Suede Nap
After cleaning, the suede nap might look flattened.
- Brush consistently: Use the suede brush to brush the entire upper. Brush in one direction. This restores the uniform texture. It makes the suede look fresh again.
- Protect with spray: Once the shoes are completely dry, apply a suede protector spray. Hold the can at the recommended distance. Spray an even coat. Let it dry completely. This spray repels water and oil, offering future protection. I always do this after cleaning my suede shoes. It greatly extends the time between major cleanings.
Suede care needs patience. It rewards you with beautiful, well-preserved shoes. Regular gentle brushing and protection keep suede looking its best.
Tackling Tough Stains and Scuffs on Common Projects
Even with regular cleaning, tough stains and scuffs can appear. These require a bit more effort. Knowing how to handle them can save your shoes from permanent damage. I have dealt with many types of marks on my sneakers. Each one needs a targeted approach.
Removing Stubborn Marks from Leather
Leather is durable, but some stains cling tightly.
- For oil/grease stains:
- Act fast. Sprinkle cornstarch or talcum powder directly on the stain.
- Let it sit for several hours, or overnight. The powder absorbs the oil.
- Brush off the powder gently.
- Then, clean the area with a mild soap solution and a damp cloth as usual.
- For ink stains:
- Dab a cotton swab with rubbing alcohol.
- Gently blot the ink stain. Do not rub, as this can spread the ink.
- Use a fresh part of the swab each time.
- Follow with a wipe from a damp, soapy cloth. Then wipe with clean water.
- Always test alcohol on a hidden area first. It can strip color.
- Color transfer:
- Sometimes denim or other fabrics transfer color to white leather.
- Use a leather cleaner specifically designed for color transfer.
- Apply with a clean cloth. Gently rub the affected area.
- Follow with a leather conditioner.
Be patient with tough leather stains. Repeat gentle treatments are better than aggressive scrubbing. This prevents damage.
Addressing Scuffs on Rubber Soles
Scuffs are very common on rubber soles. They are usually easy to remove.
- Melamine foam eraser (Magic Eraser): This is my go-to for rubber soles. Dampen the eraser slightly. Gently rub the scuff marks. The abrasive nature of the melamine foam lifts the marks without harsh chemicals. It works like magic on white rubber.
- Toothpaste (white, non-gel): Apply a small amount of white toothpaste to a soft brush or old toothbrush. Scrub the scuffed area on the rubber. Toothpaste has mild abrasives that can help lift marks. Wipe clean with a damp cloth.
- Rubbing alcohol: For very stubborn scuffs, dampen a cotton ball with rubbing alcohol. Gently wipe the scuff. Alcohol evaporates quickly. It can dissolve some marks. Avoid getting alcohol on the leather uppers.
Always test any new cleaning agent on a small, hidden area first. This prevents accidental damage. These methods help restore the crisp look of your soles.
Dealing with Water Stains on Suede
Water stains on suede are tricky. They often leave a darker, stiffened spot.
- Dampen the whole shoe: Lightly mist the entire suede shoe with water. Do not soak it. Use a fine spray bottle. This helps to even out the moisture.
- Brush while damp: While the suede is slightly damp, use a suede brush. Brush the affected area gently. Brush in multiple directions to lift the nap and distribute the moisture.
- Stuff and dry: Stuff the shoes with paper towels to maintain shape. Let them air dry completely. Keep them away from heat.
- Re-brush: Once dry, re-brush the suede to restore the nap.
- Apply protector: Finish with a suede protector spray.
This method helps minimize the appearance of water stains. It aims to make the moisture uniform, reducing the visible line. It is not foolproof, but it often improves the look. Understanding how to use cleaning solutions for general tasks can be helpful; for instance, learning about how to clean mold with vinegar gives insight into mild acidic cleaning, though vinegar should be used with extreme caution on sensitive shoe materials like suede.
Keeping Common Projects Fresh: Laces and Insoles Care
While you focus on the shoe body, do not forget the laces and insoles. These parts absorb sweat and dirt. They can make your entire shoe look dirty if neglected. Proper care for them contributes to the overall freshness and hygiene of your Common Projects. I always clean these elements every time I clean my shoes.
Cleaning Shoelaces
Shoelaces can get surprisingly dirty. They pick up grime from the ground. They also get discolored from shoe polish or wear.
- Remove and rinse: Take the laces off the shoes. Rinse them under cool running water. This removes loose dirt.
- Soak in soapy water: Fill a small bowl with warm water and a few drops of mild laundry detergent or dish soap. Place the laces in the solution. Let them soak for at least 30 minutes. For very dirty white laces, you can add a small amount of bleach (for white laces only) or a non-chlorine bleach alternative.
- Gently scrub: After soaking, gently rub the laces between your fingers. You can also use a soft brush to scrub away stubborn dirt.
- Rinse thoroughly: Rinse the laces under clean running water until all soap residue is gone.
- Air dry: Hang the laces to air dry completely. Do not put them in a dryer. Heat can shrink or damage them.
Clean laces make a big difference in the overall appearance of your shoes. This simple step brightens the entire pair.
Refreshing Insoles
Insoles absorb sweat and odor. They are a common source of shoe smell.
- Remove insoles: Take the insoles out of the shoes.
- Wipe down: For non-removable insoles, or for the inside of the shoe:
- Dampen a cloth with a mixture of water and a small amount of mild soap.
- Wipe down the surface of the insole.
- For removable insoles, you can gently hand wash them. Do not soak them if they are made of cardboard or other delicate materials.
- Deodorize:
- Baking soda: Sprinkle a generous amount of baking soda on the insoles. Let it sit overnight. Baking soda absorbs odors.
- Vinegar spray: Mix equal parts white vinegar and water in a spray bottle. Lightly mist the insoles. Let them air dry. Vinegar helps neutralize odors. (Always ensure the insoles can handle moisture first.)
- Air dry: Allow insoles to air dry completely before putting them back into the shoes. This prevents mildew and odor.
Regular insole cleaning prevents unpleasant smells. It keeps your feet feeling fresh. Sometimes, a thorough cleaning of parts of your home can involve similar principles of odor removal. For example, methods to clean walls with vinegar also highlight vinegar’s odor-neutralizing properties, which can be applied cautiously to shoe components.
Preventing Odor Inside the Shoe
Beyond cleaning the insoles, you can do more to prevent odor.
- Allow to air out: After each wear, take your Common Projects off. Let them air out for a few hours. Do not put them straight back into a dark closet.
- Cedar shoe trees: Insert cedar shoe trees when you are not wearing the shoes. Cedar wood absorbs moisture and naturalizes odors. They also help maintain the shoe’s shape.
- Silica gel packets: If you live in a humid climate, place silica gel packets inside the shoes. These absorb moisture. This prevents bacterial growth.
Taking care of the inside of your shoes is just as important as cleaning the outside. It keeps them comfortable and fresh for longer.
Protection and Maintenance: Prolonging Your Common Projects’ Life
Cleaning is important, but preventing damage is even better. Regular protection and smart maintenance habits extend the life of your Common Projects. They keep them looking new for years. Think of it as preventative care. I have found that a little effort upfront saves a lot of cleaning trouble later.
Applying Protective Sprays
Protective sprays create an invisible barrier on your shoes. This barrier repels water and stains.
- Choose the right spray:
- For leather: Use a leather protector spray.
- For suede/nubuck: Use a specific suede/nubuck protector spray. These are often silicone-based. They do not alter the material’s texture.
- Avoid general waterproofing sprays that contain harsh chemicals.
- Clean shoes first: Always apply protector spray to clean, dry shoes. The spray works best when it can bond directly with the material.
- Apply evenly: Hold the spray can at the recommended distance (usually 6-8 inches). Apply a light, even coat over the entire shoe surface. Do not saturate the material.
- Allow to dry: Let the shoes air dry completely in a well-ventilated area. This can take several hours.
- Reapply regularly: Protective sprays wear off over time. Reapply them every few weeks or months, depending on how often you wear your shoes and the conditions. More frequent wear in wet weather means more frequent reapplication.
Protective sprays are your first line of defense. They make cleaning easier when dirt does happen.
Regular Brushing and Wiping
Consistent, light cleaning prevents dirt buildup.
- After each wear: Use a soft brush (for leather) or a suede brush (for suede) to quickly brush off any loose dirt or dust. This stops dirt from settling into the material.
- Quick wipe for leather: For leather, a quick wipe with a dry microfiber cloth removes surface grime. This prevents it from bonding with the leather.
- Wipe soles: Use a slightly damp cloth or a magic eraser to quickly wipe down the rubber soles after each wear. This removes fresh scuffs and dirt.
These small habits take minutes. They significantly reduce the need for deep cleaning.
Proper Storage
How you store your Common Projects affects their condition.
- Shoe trees: Always use cedar shoe trees when storing your shoes. They absorb moisture, prevent odor, and help maintain the shoe’s original shape. This is crucial for leather, which can crease.
- Cool, dry place: Store shoes in a cool, dry place. Avoid
- Common Projects Cleaning
- Sneaker Care
- White Sneaker Cleaning
- Leather Shoe Care