· Shell Care · 15 min read
How To Clean Conch Shells
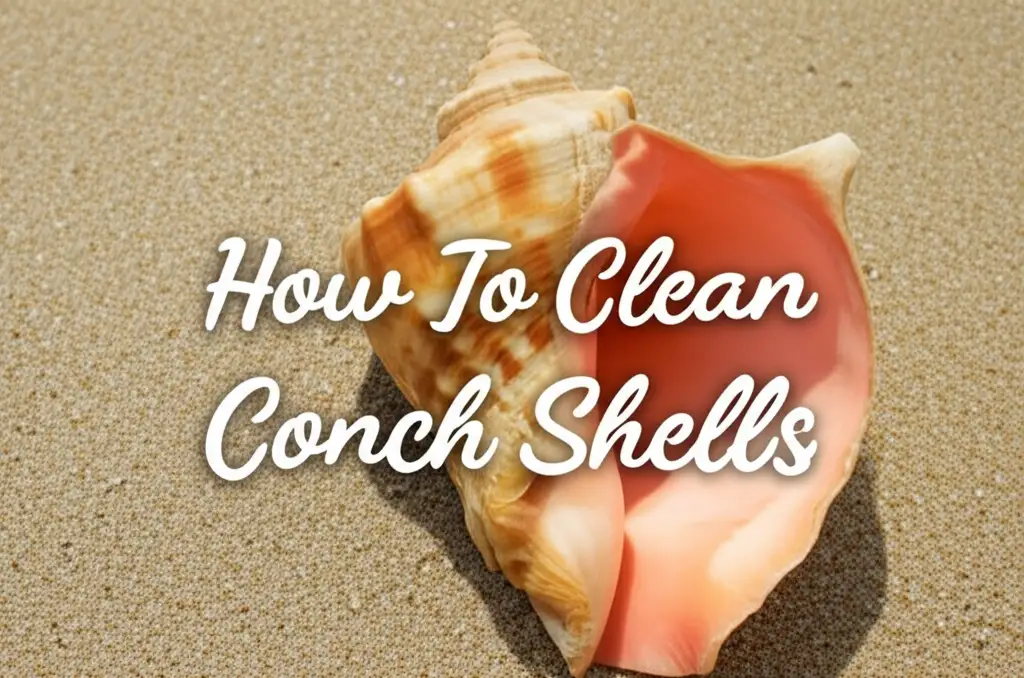
How to Clean Conch Shells for Lasting Beauty
Imagine walking along the beach. You spot a beautiful conch shell. Its spiral shape and natural colors captivate you. Bringing home such a treasure is exciting. However, these shells often carry remnants from their ocean home. They may have dirt, sand, or even living organisms inside.
Cleaning conch shells properly ensures their beauty lasts. It also removes any unpleasant smells. This article shows you how to clean conch shells thoroughly. You will learn methods for different shell conditions. We cover removing marine life, deep cleaning, and polishing. Get ready to transform your beach find into a stunning display piece.
Takeaway
Cleaning conch shells involves specific steps. You must remove any living matter first. Then, you deep clean the shell surface. Finally, you can polish and preserve it.
- Prepare your shell and gather safety gear.
- Choose a method to remove organisms: boiling, freezing, or burial.
- Soak and scrub the shell to remove dirt and odors.
- Use gentle tools for stubborn barnacles and stains.
- Dry shells completely before polishing.
- Apply mineral oil or sealant for shine and protection.
Cleaning conch shells involves removing any living matter, deep cleaning the surface to eliminate odors and residue, and then polishing them for display. This process preserves the shell’s natural beauty and ensures it remains a clean, attractive addition to any collection or home decor.
Preparing Your Conch Shells for Cleaning
Before you start cleaning conch shells, some preparation is necessary. This step ensures safety and makes the cleaning process easier. You need to assess the shell first. This helps determine the best cleaning method.
Assessing Your Found Conch Shells
First, look closely at your conch shell. Is it fresh, meaning it might have living or recently dead animals inside? Or is it an empty shell, perhaps washed up and already free of inhabitants? Empty shells are easier to clean. They only need surface cleaning. Fresh shells require more intensive methods to remove any soft tissue.
You will also notice dirt and grime on the shell. Sometimes, barnacles or algae stick to the surface. Identify these attachments. Knowing what you deal with helps pick the right tools and cleaning solutions. Different types of debris need different approaches.
Essential Safety Gear
Cleaning conch shells, especially fresh ones, can be messy. You might use strong cleaners later. Protect yourself. Always wear gloves to shield your hands from dirt, bacteria, or chemicals. Safety glasses also protect your eyes from splashes or flying debris.
Work in a well-ventilated area, especially if you plan to use bleach. This prevents breathing in fumes. Gather your tools before you begin. A sturdy bucket, a brush, and a picking tool are often helpful. Having everything ready makes the cleaning smooth and safe.
Removing Organisms from Fresh Conch Shells
When you find a conch shell with living or recently dead marine life inside, you must remove the organism. This step is crucial. It prevents bad odors and decay. Several methods exist to achieve this. Choose the one that suits your comfort level and the shell’s condition.
Boiling Method for Conch Shells
Boiling is a quick way to remove the animal. Place the conch shell in a large pot. Cover it with water. Slowly bring the water to a boil. Let it boil for 5-10 minutes. This cooks the organism. After boiling, carefully remove the shell with tongs. The animal will often slide out easily. Use a hook or a thin stick to pull out any remaining tissue.
Be careful with boiling. Too much heat can damage the shell. It might crack or lose its luster. Boiling also releases a strong smell. Do this outdoors or in a well-ventilated space. This method works well for smaller conch shells.
Freezing Method for Conch Shells
Freezing is a gentler option. It causes the animal to retract and eventually die. Place the conch shell, opening down, into a freezer bag. Seal the bag. Put it in the freezer for several days or even a week. Freezing kills the organism.
After freezing, remove the shell. Let it thaw completely. The tissue often loosens and becomes easier to extract. Use a strong stream of water from a hose to rinse out the contents. A picking tool can help. This method avoids heat damage. It is a good choice for fragile conch shells.
Burial Method for Conch Shells
The burial method is natural and requires patience. Dig a hole in your yard. Bury the conch shell in the soil. Leave it there for several weeks or even months. Natural processes, like insects and bacteria, will clean out the shell. This method is slow.
It is very effective at removing all soft tissue. It also avoids any damage from heat or chemicals. Mark the spot where you bury the shell. This ensures you can find it later. This method works best if you are not in a hurry to display your shell. It leaves the shell in a very natural state.
Deep Cleaning and Odor Removal for Conch Shells
Once the organism is out, or if you found an empty shell, deep cleaning begins. This step removes dirt, algae, and any lingering odors. You want to bring out the shell’s natural beauty. Different solutions work for various cleaning needs.
Soaking Conch Shells in Water
Start with a simple soak. Fill a bucket with fresh water. Submerge your conch shells. Let them soak for several days. Change the water daily. This helps loosen dirt and reduce any mild smells. It is a gentle first step.
Soaking also rehydrates the shell. This can make stubborn debris easier to remove. Use a stiff brush or an old toothbrush to scrub the surface. Get into all the grooves and crevices. Rinse the shell well after soaking.
Using Bleach for Conch Shells
Bleach can whiten shells and kill bacteria. Mix one part bleach with one part water in a bucket. Place the conch shells in the solution. Soak them for a few hours. Do not leave them too long. Bleach can make shells brittle. It also removes the natural protective layer.
Monitor the shell’s appearance. Take it out when it reaches your desired whiteness. Rinse the shell thoroughly under running water for a long time. This removes all bleach residue. Bleach fumes are strong. Work in a well-ventilated area. Bleach is powerful for deep cleaning and sanitation.
Vinegar Solutions for Conch Shells
Vinegar is a gentler alternative to bleach. It helps dissolve mineral deposits and algae. Mix equal parts white vinegar and water. Soak your conch shells in this solution. Leave them for a few hours. For stubborn spots, you can soak them overnight. Vinegar can safely clean many types of shells. You can learn more about how to clean shells with vinegar.
After soaking, use a brush to scrub the shell. The vinegar helps loosen grime. Rinse the shell completely with fresh water. Vinegar is good for removing light stains and freshening the shell. It is a less harsh option for deep cleaning conch shells.
Removing Algae, Barnacles, and Stains from Conch Shells
Even after deep cleaning, some shells retain stubborn algae, barnacles, or discoloration. These blemishes hide the shell’s true beauty. Specific techniques target these persistent issues. You need a bit of patience and the right tools.
Brushing and Scrubbing Techniques
A strong brush is your best friend here. Use a wire brush for very tough barnacles. For algae or softer stains, an old toothbrush or a stiff nylon brush works well. Scrub hard to dislodge the stuck-on material. Focus on the crevices and ridges where debris hides.
If the shell has delicate parts, use a softer brush. You do not want to damage the shell’s surface. A dental pick or a small flathead screwdriver can carefully pry off barnacles. Work slowly and gently. Avoid scratching the shell.
Using Mild Abrasives for Conch Shells
Sometimes, simple brushing is not enough. Mild abrasives can help. Toothpaste or a paste made from baking soda and water works well. Apply the paste to the stained areas. Rub it in with a cloth or brush. These gentle abrasives can buff away surface discoloration.
For really tough mineral deposits, a very fine-grit sandpaper (like 400-600 grit) can be used. Use it wet and with extreme care. Rub only the affected area lightly. This is a last resort. Rinse the shell well after using any abrasive.
Addressing Stubborn Stains
Some shells have deep, stubborn stains. These might be from iron, algae, or other environmental factors. A longer soak in a vinegar solution can sometimes help. As discussed, vinegar can dissolve various deposits. For detailed information on using vinegar to clean shells, refer to our guide on how to clean shells with vinegar.
If stains persist, a very diluted solution of oxalic acid can be an option. Use this with extreme caution. Wear heavy gloves and eye protection. Follow product instructions carefully. Oxalic acid is a strong cleaner. It can remove rust and mineral stains. Rinse the shell extensively after use. Always prioritize safety when using strong chemicals for cleaning conch shells.
Drying and Curing Cleaned Conch Shells
After cleaning your conch shells, proper drying is crucial. This step prevents future problems like mold or lingering odors. It also prepares the shell for any finishing treatments. Do not rush this part of the process.
Proper Air Drying
Once the shell is clean, rinse it thoroughly. Make sure no cleaning solution remains. Place the conch shell in a well-ventilated area. Lay it on a towel or a drying rack. Ensure air can circulate around it. Turn the shell occasionally. This helps all parts dry evenly.
Drying can take several days. Larger shells take longer. You want the shell to be completely dry inside and out. Any trapped moisture can lead to musty smells later. Check the inside opening. Make sure it is dry to the touch.
Sun Bleaching for Natural Whiteness
If you want a whiter shell, sunlight can help. After the initial air dry, place the conch shells in direct sunlight. The sun’s UV rays can naturally bleach the shell. This helps remove any remaining discoloration. It also helps sanitize the shell.
Sun bleaching works best on shells that are already clean. It can take several days or even weeks for a noticeable effect. Protect the shell from rain. Bring it inside if the weather turns bad. This method gives a natural, bright white finish to your cleaned conch shells.
Importance of Thorough Drying
Thorough drying prevents many problems. If a shell remains damp, mold can grow inside. This creates a bad smell. It can also damage the shell over time. A fully dry shell is stable. It is ready for display or further preservation.
Take your time with drying. Patience here saves you work later. A well-dried shell feels lighter. It will not have any lingering dampness. This step ensures your hard work cleaning conch shells pays off with a lasting, beautiful result.
Polishing and Preserving Your Cleaned Conch Shells
Once your conch shells are completely clean and dry, you might want to enhance their appearance. Polishing brings out their natural luster. Preservation techniques protect them for the long term. These steps make your shells display-ready.
Mineral Oil for Shine
Mineral oil is a popular choice for polishing conch shells. It deepens the colors and gives a beautiful shine. Apply a small amount of mineral oil to a soft cloth. Rub it evenly over the entire shell surface. Use gentle, circular motions. The shell will absorb the oil.
Wipe away any excess oil with a clean cloth. The shell will look more vibrant. This treatment also helps protect the shell from drying out. Mineral oil is safe and easy to use. It gives a natural, subtle sheen to your cleaned conch shells.
Clear Coat Sealants for Protection
For a more durable shine and protection, consider a clear sealant. Products like clear acrylic spray or marine varnish work well. These create a hard, protective layer. They guard against scratches and fading. They also give a high-gloss finish.
Apply the sealant in a well-ventilated area. Follow the product instructions. Apply thin, even coats. Allow each coat to dry completely before applying the next. Several thin coats are better than one thick one. This provides excellent protection. It keeps your shells looking their best for many years.
Natural Enhancements
You can also enhance shells naturally. Some collectors prefer a natural look. Instead of oil or sealant, simply buff the shell with a dry, soft cloth. This removes dust and brings out a soft shine. It preserves the shell’s original texture.
Another method involves simply letting the shell age naturally. Over time, sunlight and air can give a unique patina. This depends on your preference. The goal is to make your cleaned conch shells look beautiful for your display. Choose the method that best fits your style.
Common Mistakes to Avoid When Cleaning Conch Shells
Cleaning conch shells is a rewarding task. However, making certain mistakes can damage your treasured finds. Understanding these pitfalls helps ensure your shells remain beautiful. Pay attention to these common errors.
Over-bleaching Shells
Using too much bleach or soaking shells too long in bleach is a common error. Bleach is a strong chemical. While it can whiten shells, it also weakens them. Over-bleached shells become brittle. They can crack or flake easily. They might also lose their natural protective coating.
Instead, use a diluted bleach solution. Soak for short periods. Check the shell’s progress often. Rinse thoroughly to remove all bleach residue. A gentler method for cleaning shells, like using vinegar, can be safer. Balance cleanliness with shell integrity.
Boiling Shells Too Harshly
Boiling is effective for organism removal. But boiling too vigorously or for too long can harm the shell. High heat can cause shells to crack. It can also strip away their natural color and shine. The shell might look dull.
Use a gentle boil. Keep the time short, around 5-10 minutes. Remove the shell carefully. This minimizes the risk of heat damage. If you prefer to avoid heat, the freezing or burial methods are good alternatives. These methods are safer for the shell’s structure.
Neglecting Safety Precautions
Cleaning chemicals, even mild ones, require care. Ignoring safety gear is a mistake. Chemical splashes can irritate skin or eyes. Fumes from bleach can be harmful if inhaled. Always wear gloves. Use safety glasses when working with strong cleaners.
Ensure good ventilation. Work outdoors or in a well-aired room. This protects your health. Safety precautions keep you safe while you work to clean conch shells. Your well-being matters as much as the shell’s cleanliness.
Not Drying Shells Properly
Failing to dry shells completely after cleaning is a big mistake. Residual moisture causes problems. It encourages mold growth. Mold creates an unpleasant, musty odor. It can also stain the shell’s inside. A damp shell is also more susceptible to bacterial growth.
After rinsing, allow shells to air dry completely. Place them in a sunny, well-ventilated spot for several days. Turn them to ensure all parts dry. Patience here prevents future issues. A properly dried shell stays fresh and odor-free.
FAQ Section
How do I remove a dead animal from a conch shell?
You can remove a dead animal from a conch shell in a few ways. The boiling method involves briefly boiling the shell to cook the tissue. The freezing method kills the animal, making it easier to extract after thawing. You can also bury the shell in the ground for several weeks. Natural processes will clean it out completely.
Can I use bleach to clean conch shells?
Yes, you can use bleach, but with caution. Mix one part bleach with one part water. Soak the conch shell for a few hours. Do not leave it too long, as bleach can make the shell brittle or dull its natural color. Always rinse the shell thoroughly after bleaching to remove all chemical residue.
How do I get the bad smell out of a conch shell?
To get a bad smell out of a conch shell, first remove any remaining organic material using the boiling, freezing, or burial method. Then, soak the shell in a solution of fresh water, changing it daily. For persistent odors, soak the shell in a diluted bleach solution for a few hours or a vinegar solution overnight. Thorough drying is also key to preventing odors.
How do I make conch shells shiny?
To make conch shells shiny, ensure they are clean and completely dry. You can apply a thin coat of mineral oil to the shell with a soft cloth. This enhances colors and adds a natural luster. For a more durable, high-gloss finish, spray the shell with a clear acrylic sealant or marine varnish.
Is it safe to boil conch shells?
Boiling conch shells is a common way to remove organisms. It is generally safe if done carefully. Boil the shell for a short period, about 5-10 minutes. Excessive boiling can damage the shell. It might crack or lose its natural protective layer. Always use tongs to handle hot shells and be careful of the smell.
How long does it take to clean a conch shell?
The time to clean a conch shell varies. If it has a dead organism, removing it can take hours (boiling) to weeks or months (burial). Deep cleaning and soaking for empty shells usually takes 2-3 days. This includes soaking time and thorough drying. Polishing is quick, taking only minutes.
Conclusion
Cleaning conch shells properly is an important step. It lets you display your ocean treasures with pride. We covered different methods for removing marine life. We also discussed deep cleaning and odor removal. You learned how to tackle stubborn stains and barnacles. Remember to dry your shells completely. This prevents future problems.
Finally, we explored ways to polish and preserve your conch shells. You can use mineral oil or a clear sealant for protection and shine. By following these steps, you ensure your shells remain beautiful for years. You transformed a simple beach find into a lasting piece of art. Keep your conch shells clean, and they will bring ocean beauty into your home. Visit our site for more helpful cleaning guides and tips.
- Conch shell cleaning
- Shell preservation
- Beach finds care