· Cleaning · 17 min read
How To Clean Concrete Pavers
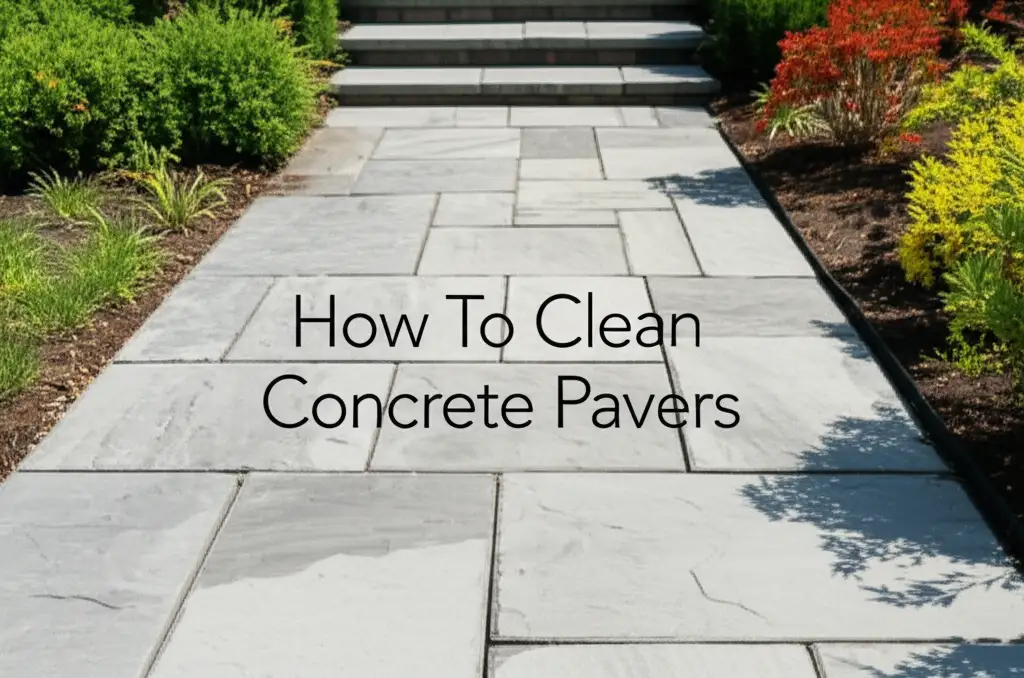
How To Clean Concrete Pavers: Your Ultimate Guide
Imagine stepping outside onto a pristine patio or a sparkling driveway. Concrete pavers make beautiful outdoor surfaces. They add charm and structure to any home. However, dirt, grime, and environmental elements often dull their natural beauty. Over time, your concrete pavers can accumulate unsightly stains. These include moss, mold, weeds, and oil spots. You might wonder how to clean concrete pavers to bring back their original look. I am here to tell you it is easier than you think. This guide will walk you through everything. We cover routine maintenance, tackling tough stains, and protecting your investment.
Takeaway:
- Assess paver condition and gather the right tools.
- Perform routine cleaning to prevent buildup.
- Use specific methods for common stains like moss, mold, oil, and rust.
- Consider pressure washing with care.
- Apply sealer for long-term protection.
To clean concrete pavers, you first remove loose debris. Then, you apply a suitable cleaning solution or pressure wash the surface. Finally, you rinse the pavers thoroughly. Specific stains require targeted treatments. Regular cleaning and sealing will maintain their appearance and extend their life.
Preparing Your Concrete Pavers for Cleaning
Before you start scrubbing, preparation is key. A clean work area helps ensure effective cleaning. It also keeps you safe. I always begin by removing all furniture, pots, and decorations from the paver area. This clears the surface completely.
Next, sweep the entire area. Use a stiff broom to get rid of loose dirt, leaves, and other debris. Make sure to sweep all corners and edges. This step prevents small particles from becoming mud when wet. It also helps cleaning solutions work better on the paver surface. Do not skip this important first step. It makes a big difference in the final result.
Finally, inspect your pavers closely. Look for any loose sand in the joints. Check for areas with significant weed growth or deep stains. Note these spots. You will give them extra attention during the cleaning process. This preparation helps you plan your attack and makes the whole job smoother.
Essential Tools and Cleaning Solutions for Paver Care
Having the right tools makes cleaning concrete pavers much easier. You do not need a lot of fancy equipment. A good set of basic tools will get the job done. I find these items essential for any paver cleaning project. They include common household items and specific cleaning agents.
First, you need a stiff-bristled broom. This is for sweeping loose debris. A garden hose with a strong nozzle is also vital. It helps you rinse off dirt and cleaning solutions. For stubborn spots, a scrub brush with stiff bristles works wonders. You might also need a bucket for mixing solutions.
Next, consider your cleaning solutions. For general cleaning, a simple mix of warm water and dish soap often works. For tougher jobs, a specialized paver cleaner is best. These products target specific types of grime. They are safe for concrete pavers. You can also use natural options like vinegar for certain stains. Learn how to clean pavers with vinegar. Always test any cleaner in a small, hidden area first. This prevents potential damage or discoloration. Safety gear is also important. Wear gloves and eye protection.
| Tool/Solution | Purpose | Notes |
|---|---|---|
| Stiff-bristled broom | Sweeping loose debris | Essential first step |
| Garden hose with nozzle | Rinsing and light cleaning | Good water pressure is helpful |
| Scrub brush | Tackling stubborn spots and stains | Manual scrubbing power |
| Bucket | Mixing cleaning solutions | Any large bucket works |
| Dish soap | General cleaning, mild stains | Safe and readily available |
| Specialized paver cleaner | Tougher dirt, grime, and specific stains | Follow manufacturer instructions |
| White Vinegar | Natural option for moss, mold, and efflorescence | Test first, especially on darker pavers |
| Safety goggles & gloves | Personal protection | Always wear when handling chemicals |
Remember, choosing the right cleaner depends on the type of dirt or stain. A mild solution is always a good starting point. You can always move to stronger cleaners if needed.
General Cleaning: The Foundation of Clean Concrete Pavers
Regular, general cleaning prevents dirt buildup on your concrete pavers. This routine maintenance keeps your outdoor space looking fresh. It also makes deeper cleaning less frequent. I recommend doing this simple process every few months. It helps maintain the pavers’ natural color.
Start by sweeping the entire area to remove all loose debris. Use a broom or leaf blower. This prevents mud from forming when you add water. Next, prepare a mild cleaning solution. Mix warm water with a squirt of dish soap in a bucket. This gentle solution works for most surface dirt. It breaks down light grime.
Now, apply the soapy water to a small section of your pavers. Use a scrub brush to work the solution into the surface. Scrub in circular motions. This helps lift the dirt from the paver’s pores. Then, rinse the section thoroughly with your garden hose. Make sure to wash away all soap residue. Soap can leave a slippery film if not rinsed well. Repeat this process section by section until you clean the entire paver area. For larger areas like driveways, you might consider this method for routine upkeep. This is useful for how to clean driveway pavers. This simple cleaning keeps your pavers looking great. It also prepares them for any special stain treatments.
Tackling Specific Stains on Concrete Pavers
Concrete pavers face various types of stains. Each stain requires a specific approach. Knowing how to treat different marks saves you time and effort. I have dealt with many kinds of stains over the years. Here are some common ones and how to remove them effectively.
Removing Moss and Algae from Pavers
Moss and algae thrive in damp, shady areas. They make pavers slippery and look unsightly. You can easily remove them. First, physically scrape off as much as possible with a stiff broom or a specialized tool. Then, mix equal parts of white vinegar and water. Apply this solution directly to the affected areas. Let it sit for 15-20 minutes. The vinegar breaks down the growth. Scrub with a stiff brush and rinse thoroughly. For persistent moss, you might consider a specific moss killer. This method also works well for how to clean moss off pavers.
Cleaning Oil and Grease Stains
Oil and grease stains are tough, especially on driveways. They can penetrate deep into the concrete. Act fast on fresh spills. Blot up as much oil as possible with old rags. Do not rub, as this spreads the stain. For dried stains, you need a stronger approach. Sprinkle an absorbent material like cat litter, sawdust, or sand over the stain. Let it sit for several hours or overnight. This helps pull the oil out. Sweep up the absorbent material. Then, apply a degreaser specifically designed for concrete. Follow the product instructions carefully. Scrub hard with a stiff brush. Rinse the area completely. Sometimes, multiple applications are necessary. You can also find more details on how to clean oil off pavers and how to clean oil from concrete.
Eliminating Mold and Mildew
Mold and mildew appear as black or green spots. They grow in damp, humid conditions. A simple bleach solution often works. Mix one part bleach with two parts water. Apply it to the moldy areas. Let it sit for 10-15 minutes. Scrub with a stiff brush. Rinse thoroughly with water. Ensure good ventilation when using bleach. For a natural alternative, a stronger vinegar solution can also be effective. This helps with how to clean mold off concrete.
Treating Rust Stains
Rust stains come from metal furniture or irrigation systems. They leave orange or reddish marks. Regular cleaners do not often work on rust. You need a rust remover specifically for concrete. These products contain oxalic acid or other rust-dissolving agents. Follow the product directions carefully. Apply, let it sit, and then rinse. Be careful, as rust removers can sometimes etch the concrete if left too long. For deeper stains, you may need to repeat the process. This is similar to how to clean rust off concrete.
Removing Efflorescence
Efflorescence looks like white, powdery deposits. It happens when water evaporates from concrete, leaving behind salt minerals. It is a common issue. You can often remove light efflorescence with a stiff brush and water. For heavier deposits, use a diluted acid-based cleaner specifically for efflorescence. Muriatic acid is powerful but must be handled with extreme care. Always dilute it properly and wear full protective gear. A safer option is a specialized efflorescence remover. Rinse thoroughly after treatment. Find more details about how to clean efflorescence off concrete.
Always test any stain remover in a small, hidden spot first. This checks for adverse reactions. Protect nearby plants and surfaces from harsh chemicals. Timely action makes stain removal much easier.
Pressure Washing Concrete Pavers: Pros, Cons, and Best Practices
Pressure washing can be a powerful tool for cleaning concrete pavers. It removes stubborn dirt, grime, and some stains quickly. However, it also carries risks if not done correctly. I have seen both great results and damaged pavers from pressure washing. Understanding how to use it safely is crucial.
Pros of Pressure Washing:
- Efficiency: It cleans large areas much faster than scrubbing by hand.
- Power: High-pressure water removes deeply embedded dirt and tough stains.
- Effectiveness: It blasts away moss, mold, and mildew effectively.
Cons of Pressure Washing:
- Damage Risk: Too much pressure can erode joint sand. It can also damage the paver surface itself. This leads to pitting or chipping.
- Sand Removal: It will remove polymeric sand or joint sand. You will need to re-sand the joints afterward.
- Uneven Cleaning: Inexperienced users might leave stripes or unevenly cleaned areas.
Best Practices for Pressure Washing:
- Choose the Right Pressure Washer: For concrete pavers, a pressure washer with 2000-3000 PSI is usually sufficient. A machine with adjustable pressure is best.
- Select the Correct Nozzle:
- 25-degree (green) or 40-degree (white) nozzle: These are good starting points. They offer a wide spray pattern. This reduces the risk of damage.
- Rotary (turbo) nozzle: This spins water in a cone. It is powerful for tough stains. Use it with extreme caution and keep it moving. Avoid using a 0-degree (red) nozzle. It creates too much concentrated pressure.
- Maintain Distance: Keep the nozzle at least 12-18 inches away from the paver surface. Closer distances increase pressure significantly.
- Use Consistent Strokes: Work in overlapping, even strokes. Do not linger in one spot. Move steadily. This prevents streaking and damage.
- Work in Sections: Clean a small area at a time. This helps you manage the work. It also ensures thorough rinsing.
- Rinse Thoroughly: After cleaning, rinse away all loosened dirt and cleaning solution.
- Re-sand Joints: If you have polymeric sand or joint sand, it will likely be removed. You must sweep new sand into the joints after the pavers dry completely. This step is vital for paver stability and weed prevention.
- Consider Cleaning Solutions: For very dirty pavers, apply a paver cleaner with the pressure washer’s detergent tank. Follow product instructions. Rinse thoroughly after cleaning.
Pressure washing can transform your pavers. Just remember to use it wisely. Always prioritize safety and caution. If you are unsure, consider hiring a professional.
Repairing and Re-sanding Paver Joints After Cleaning
After a thorough cleaning, especially with a pressure washer, paver joints often need attention. The sand or polymeric sand between pavers stabilizes them. It also prevents weed growth. If this material is washed away, your pavers can become loose. They might also shift. This step is critical for the longevity of your concrete pavers.
First, ensure your pavers are completely dry. Moisture prevents new sand from settling properly. It also activates polymeric sand prematurely. Wait at least 24-48 hours after rinsing. The sun and air help speed up this drying process.
Next, choose your jointing material.
- Regular Sand: Fine-grained sand is common. It is affordable and easy to apply. However, it offers less weed resistance. It also washes out more easily.
- Polymeric Sand: This is sand mixed with polymers. When activated with water, it hardens. This creates a strong, durable joint. It resists weeds and insect activity. It also helps prevent wash-out. Polymeric sand is often the preferred choice for a lasting result. It is especially useful for maintaining the integrity of your surface, such as for how to clean pavers around pool.
To apply the sand, spread it evenly over the dry paver surface. Use a stiff broom to sweep the sand into the joints. Work the broom back and forth. Make sure the sand fills all the gaps completely. Go over the area multiple times. You can also use a plate compactor with a protective pad. This helps vibrate the sand deep into the joints. Be careful not to damage the paver surface.
Once the joints are full, sweep away any excess sand from the surface. For polymeric sand, this step is vital. Leftover sand on the paver surface can cure. This leaves a hazy film. After sweeping, use a leaf blower on a low setting. Blow off any remaining dust or fine particles.
Finally, activate the polymeric sand with water. Use a fine mist spray from a garden hose. Do not blast it with a strong stream. Mist the entire area until the water pools slightly on the surface. This activates the polymers. Let the sand cure for 24-48 hours. Avoid walking on the pavers during this time. This crucial step restores your pavers’ stability. It also prevents future weed problems. Re-sanding makes your cleaning effort last longer.
Sealing Your Concrete Pavers for Long-Term Protection
After all that hard work cleaning and re-sanding, you want your concrete pavers to stay beautiful. Sealing is the final step in protecting your investment. It creates a barrier on the paver surface. This barrier helps repel stains, slow down wear, and prevent fading. I always recommend sealing pavers, especially after a deep clean. This is particularly important for areas like driveways or patios that see heavy use. Knowing how to clean pavers before sealing is a prerequisite for proper sealing.
Benefits of Sealing Pavers:
- Stain Resistance: A sealer makes pavers less porous. This means oil, grease, and other spills sit on the surface. They do not soak in. This makes stains much easier to clean.
- Color Enhancement: Many sealers enhance the natural color of your pavers. They can give a “wet look” or deepen the hues. This makes your outdoor space look vibrant.
- UV Protection: Sealers protect against sun damage. They prevent the color from fading over time. This keeps your pavers looking new for longer.
- Weed and Moss Inhibition: While not a complete barrier, sealers help reduce the growth of weeds and moss. They make the surface less hospitable for these growths.
- Durability: A sealer adds a layer of protection. It helps your pavers resist abrasion and general wear. This extends their lifespan.
How to Seal Your Pavers:
- Ensure Pavers are Dry and Clean: This is non-negotiable. Any moisture or dirt trapped under the sealer will cause problems. Wait at least 24-48 hours after cleaning and re-sanding. The weather should be dry with no rain expected for the next 24-48 hours.
- Choose the Right Sealer:
- Film-forming sealers: These create a visible layer on the surface. They offer strong protection and color enhancement. They come in matte, satin, or gloss finishes.
- Penetrating sealers: These soak into the paver. They offer protection without changing the surface appearance. They are good for a natural look.
- Breathable sealers: Allow moisture to escape from underneath. This prevents issues like efflorescence.
- Apply Evenly: Use a high-quality sprayer, roller, or brush. Apply the sealer in thin, even coats. Avoid puddling. Overlapping strokes slightly ensures full coverage.
- Apply Multiple Coats (if needed): Most sealers recommend two thin coats. Allow sufficient drying time between coats. Read the product instructions.
- Curing Time: Allow the sealer to cure fully before heavy foot traffic or vehicle use. This can be 24-72 hours. Check the product label.
Sealing your concrete pavers is an investment in their beauty and durability. It makes future cleaning much simpler. It keeps your outdoor living space looking its best for years to come.
Maintaining Your Clean Concrete Pavers
Cleaning your concrete pavers is a great start. Keeping them clean is an ongoing process. Regular maintenance prevents major cleaning jobs. It preserves the beauty of your outdoor space. I find that a little effort often saves a lot of work later. Here are my tips for maintaining your pristine pavers.
First, regular sweeping is your best friend. Sweep your pavers weekly or bi-weekly. This removes loose leaves, dirt, and debris. It stops organic matter from breaking down and staining the surface. A leaf blower also works well for this task. It is quick and efficient.
Second, address spills immediately. If you spill oil, grease, or food, clean it right away. The longer a spill sits, the deeper it penetrates. Blot liquid spills. Then, use a mild soap and water solution to clean the spot. Prompt action prevents stubborn stains. This is especially true for oil and grease. Fresh spills are always easier to clean.
Third, control weeds and moss. Even with sealing and proper joint sand, some growth might appear. Pull weeds as soon as you see them. This stops them from spreading and becoming established. For small moss patches, a quick scrub with a stiff brush often removes them. You can also use a diluted vinegar solution. Regular checks help catch growth early.
Fourth, inspect your pavers regularly. Look for any signs of wear, shifting pavers, or missing joint sand. Address these issues promptly. Re-sanding loose joints prevents major problems down the line. A stable paver surface is also safer.
Fifth, reapply sealer as needed. Most sealers last 2-5 years depending on traffic and weather. Watch for signs that your sealer is wearing off. Water will no longer bead on the surface. Instead, it will soak into the paver. Reapplying sealer protects your investment. It keeps your pavers looking new. It also makes future cleaning simpler. Consistent maintenance extends the life of your pavers significantly. It keeps your outdoor space inviting.
FAQ Section
How often should I clean my concrete pavers?
You should sweep concrete pavers weekly. Perform a general wash with soap and water every 3-6 months. Deep cleaning or stain removal depends on need. Areas with heavy traffic or shade may require more frequent cleaning.
Can I use bleach to clean concrete pavers?
Yes, you can use diluted bleach for mold or mildew. Mix one part bleach with two parts water. Test in an inconspicuous area first. Rinse thoroughly. Avoid using bleach on or near plants. It can cause discoloration on some pavers.
What is the best way to remove weeds from paver joints?
The best way is to pull weeds by hand or use a weeding tool. For persistent weeds, apply a weed killer designed for paved surfaces. After cleaning, re-sanding joints with polymeric sand helps prevent future weed growth.
Will pressure washing damage my concrete pavers?
Pressure washing can damage pavers if done incorrectly. Use a wide-angle nozzle (25 or 40 degrees) and keep the wand at least 12-18 inches away. Avoid high pressure directly on joints. Always test a small, hidden area first.
How do I prevent mold and moss from returning?
To prevent mold and moss, ensure good drainage. Trim surrounding vegetation to increase sunlight exposure. Apply a quality paver sealer. You can also use a periodic application of a mild moss and mold inhibitor.
Is it necessary to seal concrete pavers after cleaning?
Sealing is not always necessary but highly recommended. It protects pavers from stains, UV damage, and weathering. It also enhances their color and makes future cleaning easier. Ensure pavers are clean and dry before sealing.
Conclusion
Bringing your concrete pavers back to life is a rewarding project. You now have the knowledge and steps to achieve this. We have covered everything. This includes preparing the area and choosing the right tools. We also discussed tackling common stains. We explored the power of pressure washing and the importance of re-sanding. Finally, we learned about long-term protection through sealing.
Remember, clean concrete pavers enhance your home’s curb appeal. They also create a more enjoyable outdoor space. Regular maintenance, combined with targeted cleaning, keeps them looking their best. Do not let dirt and grime detract from your outdoor beauty. Take action today. Start your paver cleaning project. Enjoy the renewed appearance of your outdoor living area. A little effort goes a long way. You can make your concrete pavers shine.
- concrete pavers
- paver cleaning
- patio cleaning
- outdoor cleaning
- stain removal
- moss removal
- driveway cleaning