· Stain Removal · 20 min read
How To Clean Crayon Off Plastic
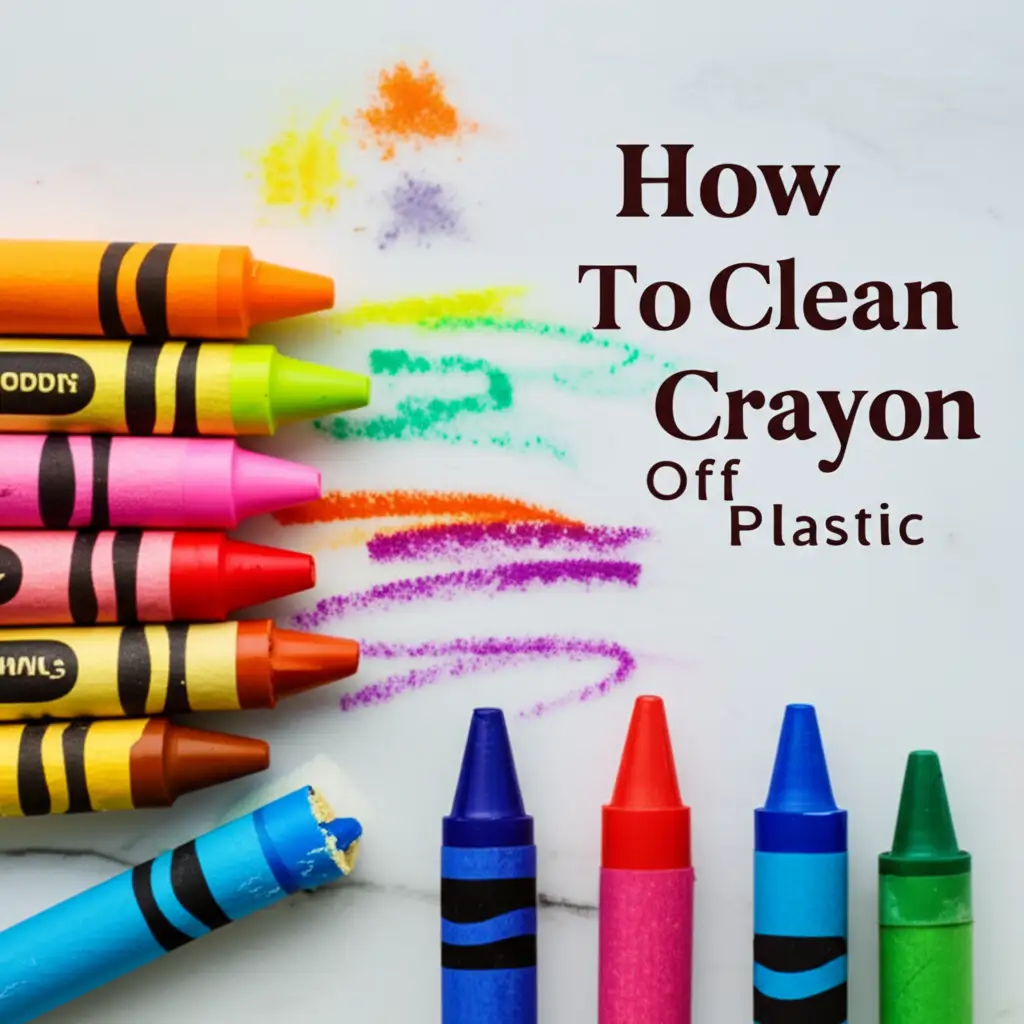
Unlock Spotless Surfaces: How To Clean Crayon Off Plastic Safely
Picture this: your child’s creative burst leaves colorful lines across your plastic surfaces. Maybe it’s a favorite toy, a patio chair, or even your car’s interior. Crayon marks on plastic are a common challenge for many of us. I know the feeling of seeing those vibrant, waxy streaks and wondering how to make them disappear without damaging the plastic.
Cleaning crayon off plastic can seem daunting, but it does not have to be. This article explores effective, safe methods to remove crayon marks from various plastic items. We will cover everything from understanding why crayon sticks to plastic to step-by-step guides for different cleaning agents. You will learn practical tips and tricks to restore your plastic surfaces. Get ready to make those plastic items look new again.
Takeaway:
- Act Quickly: Fresh crayon marks are easier to remove than old ones.
- Patch Test First: Always test any cleaning solution on an inconspicuous area.
- Gentle First: Start with the least abrasive method before trying stronger solutions.
- Use Common Household Items: Many effective crayon removers are already in your home.
- Protect Your Plastic: Avoid harsh chemicals that can damage or discolor surfaces.
To clean crayon off plastic, first gently scrape away excess wax with a dull edge. Then, apply a small amount of rubbing alcohol, baking soda paste, or a melamine foam eraser to the mark. Gently rub in small circular motions until the crayon lifts. Wipe the area clean with a damp cloth and dry thoroughly.
Understanding Crayon and Plastic Surfaces
Crayon marks seem to stick everywhere, especially to plastic. Understanding what crayons are made of and how plastic behaves helps us clean effectively. Crayons consist mostly of paraffin wax and color pigments. This waxy composition makes them stick readily to many surfaces, including smooth or textured plastic. When crayon touches plastic, the wax often melts slightly due to friction and adheres to the surface’s tiny pores. This creates a bond that requires specific cleaning methods.
Plastic, however, is not a single material. There are many types of plastic, and each can react differently to various cleaning agents. Some plastics are very durable and resistant, while others are more sensitive. Some plastics might become cloudy, brittle, or discolored if you use the wrong cleaner. For example, a hard, smooth plastic toy might handle a stronger cleaner than a softer, more porous plastic dashboard. Knowing this helps you choose the safest removal method. My advice is always to consider the type of plastic you are cleaning before applying any solution.
The Nature of Crayon Wax
Crayon wax is primarily a blend of paraffin and other waxes. It also contains pigments for color. This wax melts at relatively low temperatures. This is why it transfers easily to surfaces under pressure. Once on a surface, the wax cools and hardens. This creates a stubborn mark. The waxy residue can fill in microscopic imperfections on plastic surfaces. This makes the bond stronger.
Removing crayon means breaking this wax bond. It also means lifting the pigment without spreading it. Water alone often fails to dissolve wax. This requires specific solvents or methods that can break down the wax particles. We need to select cleaners that dissolve wax but do not harm the plastic. This balance is key to successful crayon removal.
Identifying Your Plastic Type
Knowing your plastic type is crucial for safe cleaning. Plastics vary widely in their chemical resistance. For example, polypropylene (PP) and polyethylene (PE) are common in toys and containers. They are generally robust. Polystyrene (PS) is often found in disposable items. It can be more brittle and react poorly to solvents. Acrylic and polycarbonate are clear plastics. They might scratch easily or cloud with harsh chemicals.
You can often identify plastic by its feel or texture. Hard, smooth plastics are generally more forgiving. Softer, more flexible plastics might be more sensitive. Textured plastics can trap crayon wax deeper within their grooves. This requires more careful cleaning. Always consider the item’s purpose. A child’s toy needs a non-toxic cleaning solution. A car interior plastic needs a solution that will not leave residue or damage finishes.
Essential Tools and Supplies for Crayon Removal
Cleaning crayon off plastic often starts with simple tools and supplies. You do not always need special products. Many common household items are effective crayon removers. Having these items ready saves you time and effort. I usually gather everything before starting a cleaning task. This way, I do not have to stop in the middle of the job.
Your basic kit should include soft cloths or sponges. You will also need a dull scraping tool. Think about using an old credit card or a plastic spatula. These prevent scratching the plastic surface. Paper towels are useful for absorbing excess cleaning solution. A small bowl for mixing solutions can also be helpful. Always wear gloves to protect your hands from cleaners. Gathering these items first makes the process smoother.
Gentle Cleaning Agents
For light crayon marks, gentle cleaning agents are your first line of defense. Dish soap mixed with warm water is often surprisingly effective. The soap helps emulsify the waxy crayon. This makes it easier to wipe away. Simply mix a few drops of mild dish soap into warm water. Dampen a cloth with this solution. Then gently rub the crayon mark. This method is safe for most plastic types.
Rubbing alcohol, or isopropyl alcohol, is another excellent gentle cleaner. It dissolves crayon wax without harsh chemicals. It evaporates quickly. This leaves little residue. Apply a small amount to a cotton ball or soft cloth. Gently blot and wipe the crayon mark. Test it first on an inconspicuous area. This ensures it does not harm the plastic. It often works wonders on many plastic surfaces. You can even use it to clean adhesive off plastic if you have sticky residues.
Soft Abrasives and Tools
Sometimes, gentle wiping is not enough for stubborn crayon. This is where soft abrasives or specific tools come in. A melamine foam eraser, often known as a “Magic Eraser,” is incredibly effective. It works by acting as a very fine abrasive. You simply dampen it with water. Then gently rub the crayon mark. The eraser lifts the wax and pigment. Use it with light pressure to avoid dulling glossy plastic surfaces.
Baking soda is another versatile soft abrasive. You can make a paste by mixing baking soda with a little water. Apply this paste directly to the crayon mark. Gently rub with a soft cloth or your finger. The mild abrasive action of the baking soda helps lift the wax. It is also non-toxic. This makes it safe for toys and food containers. After scrubbing, wipe the area clean with a damp cloth. This method is similar to how you might clean a plastic cutting board to remove stains.
For initial removal of thick crayon layers, a dull plastic scraper is useful. An old credit card, a plastic picnic knife, or a fingernail can work. Carefully scrape away the excess crayon wax. Do this before applying any cleaning solution. This step reduces the amount of wax the cleaner needs to dissolve. It also prevents smearing the crayon further. Always use a tool that is softer than the plastic itself. This prevents scratches.
Step-by-Step Guide: The Gentle Scrape and Wipe Method
When faced with crayon on plastic, my go-to approach is always to start gently. The “scrape and wipe” method is your first, least invasive step. It aims to remove the bulk of the crayon without harsh chemicals or excessive scrubbing. This method is excellent for fresh marks. It also works well for older, thick crayon deposits. I always recommend trying this before anything stronger.
This process involves a few simple steps. You will prepare the area first. Then you will carefully scrape off any loose crayon. Finally, you will wipe away the remaining residue. This method minimizes the risk of damage to your plastic surface. It is often all you need for minor incidents.
Preparing the Area
Before you begin, ensure the plastic surface is dry. Remove any loose dirt or debris around the crayon mark. This prevents scratching the surface during cleaning. You want a clear workspace to tackle the crayon directly. If the plastic item is small, move it to a sink or a protected surface. This makes cleanup easier.
Gather your tools: a dull plastic scraper (like an old credit card or a plastic spatula), a soft cloth, and warm water with a drop of dish soap. Lay down paper towels if you are working on a surface that needs protection. This preparation ensures you have everything at hand. It also helps contain any mess.
Initial Scraping
Now, carefully scrape away any excess crayon wax. Hold your dull plastic scraper at a low angle. Apply gentle, steady pressure. Push the scraper across the crayon mark. You should see small flakes of crayon come off. Work slowly. Do not press too hard. The goal is to remove the raised crayon wax. Avoid digging into the plastic.
For textured plastic surfaces, scraping might be less effective. The crayon embeds deeper into grooves. In such cases, you might skip this step. Or you might use a stiff brush with plastic bristles to loosen the wax. Always prioritize protecting the plastic surface. The less you scratch, the better the final result.
Wiping Away Residue
After scraping, you will have a thin layer of crayon residue left. Dampen your soft cloth with warm water and a small amount of dish soap. Gently wipe the remaining crayon mark. Use small, circular motions. The soap helps emulsify the wax. This makes it easier to lift. Rinse your cloth frequently. This prevents spreading the crayon around.
For stubborn residue, you might need to repeat the wiping process. Sometimes, a clean, dry part of the cloth can buff away faint marks. Once the crayon is gone, wipe the entire area with a clean, damp cloth. This removes any soap residue. Then dry the plastic thoroughly with a clean, dry towel. This prevents water spots.
Household Solutions for Stubborn Crayon Marks
Sometimes, the gentle scrape and wipe method isn’t quite enough. For those stubborn crayon marks on plastic, it is time to bring in some common household solutions. You probably have many of these in your pantry or medicine cabinet already. These solutions work by dissolving or breaking down the wax in crayons. Always remember to patch test any solution first. This protects your plastic from damage.
I have found these methods to be incredibly effective for various plastic items. From children’s toys to household appliances, these solutions can lift even the most set-in crayon stains. Choose the method that best suits your plastic item and the severity of the mark. Be patient and work gently for the best results.
Rubbing Alcohol (Isopropyl Alcohol)
Rubbing alcohol is a fantastic solvent for crayon wax. It works quickly and evaporates without leaving much residue. This makes it a great choice for many plastic surfaces. I keep a bottle handy for all sorts of cleaning tasks. It is especially useful for cleaning Sharpie off plastic as well.
To use rubbing alcohol:
- Dampen a cotton ball or soft cloth with a small amount of rubbing alcohol. Do not soak it.
- Gently dab the crayon mark. Let the alcohol sit for a few seconds. This allows it to dissolve the wax.
- Wipe the mark away using gentle, circular motions. The crayon should start to lift.
- Repeat if necessary, using a clean part of the cloth each time.
- Wipe the area clean with a damp cloth to remove any alcohol residue.
- Dry thoroughly.
Always test rubbing alcohol in an inconspicuous spot first. Some plastics, especially very clear or painted ones, can react negatively.
Baking Soda Paste
Baking soda is a mild abrasive and deodorizer. It is also safe for many surfaces, including most plastics. Creating a paste with water makes it effective for lifting crayon. This method is great for textured plastic where crayon might be embedded.
To use baking soda paste:
- Mix baking soda with a small amount of water to form a thick paste. It should be consistent like toothpaste.
- Apply the paste directly to the crayon mark.
- Gently rub the paste into the mark using a soft cloth, sponge, or your finger. Use small circular motions. The mild abrasive action helps loosen the wax.
- Continue rubbing until the crayon mark diminishes.
- Wipe away the paste and crayon residue with a clean, damp cloth.
- Rinse the area to ensure no baking soda remains.
- Dry completely.
This method is particularly useful for items that kids might put in their mouths. Baking soda is non-toxic.
WD-40 or Mineral Oil
Believe it or not, WD-40 or even mineral oil can work wonders on crayon marks. These products are oil-based. They help break down the wax component of crayons. This makes the wax easy to wipe away. These are usually safe for most plastics but require careful application.
To use WD-40 or mineral oil:
- Spray a small amount of WD-40 onto a clean cloth, not directly onto the plastic. If using mineral oil, put a few drops on a cloth.
- Gently blot the crayon mark. Let the product sit for a minute or two.
- Wipe the mark away with the same cloth. The crayon should transfer to the cloth.
- For WD-40, clean the oily residue immediately with a general-purpose cleaner or dish soap and water.
- For mineral oil, wipe the area thoroughly with a clean, damp cloth. You might need to use a bit of dish soap to cut the oil.
- Dry the surface.
WD-40 can leave an oily residue. It is important to clean this off completely. Otherwise, it can attract dust.
Melamine Foam Eraser (Magic Eraser)
The melamine foam eraser is a powerful tool for many stubborn stains. It works by acting as a super-fine abrasive. It gently scrapes away stains without harsh chemicals. This makes it effective for crayon marks too. I use these for many tough cleaning jobs around the house, like cleaning plastic shower walls https://beacleaner.com/how-to-clean-plastic-shower-walls.
To use a melamine foam eraser:
- Dampen the eraser with water. Squeeze out excess water.
- Gently rub the crayon mark with the damp eraser. Use light pressure. The eraser will slowly wear away, lifting the crayon.
- Continue rubbing until the mark disappears.
- Wipe the area clean with a damp cloth to remove any residue.
- Dry the surface thoroughly.
Be cautious with melamine foam erasers. While effective, they can dull glossy finishes if used too aggressively. Always test in an inconspicuous area first.
Dish Soap and Warm Water
For lighter crayon marks or as a first step, simple dish soap and warm water are often effective. This is the least aggressive method. It is safe for almost all plastic types. The soap helps to emulsify the wax, allowing it to be wiped away.
To use dish soap and warm water:
- Mix a few drops of mild dish soap into a bowl of warm water.
- Dampen a soft cloth or sponge with the soapy water. Wring out excess liquid.
- Gently rub the crayon mark in small circular motions.
- Rinse the cloth frequently as you wipe the crayon away.
- Wipe the area clean with a separate clean, damp cloth to remove soap residue.
- Dry the surface completely with a clean towel.
This method is excellent for large plastic surfaces or when you want to avoid stronger chemicals.
Tackling Crayon on Different Plastic Items
Crayon marks can appear on a variety of plastic items around your home. Each item might require a slightly different approach due to its material, texture, or location. A plastic toy, for instance, might need a non-toxic solution. A car interior requires care to protect surrounding fabrics. I have found that tailoring the method to the specific item ensures the best results without damage.
It is important to assess the plastic’s durability and finish. Some plastics are smooth and hard. Others are textured or softer. This section provides specific advice for common plastic items. Always remember the “patch test first” rule. This helps you avoid unwanted surprises.
Cleaning Plastic Toys
Plastic toys are often the most common victims of crayon art. They come in various shapes, sizes, and plastic types. The most important consideration here is safety. Many toys end up in a child’s mouth. This means using non-toxic cleaning methods is paramount.
For plastic toys:
- Start with the baking soda paste method. It is effective and completely safe. Mix baking soda with a little water. Rub the paste gently onto the crayon mark. Use an old toothbrush for textured areas.
- Alternatively, use dish soap and warm water. This is also safe and can remove lighter marks.
- For stubborn marks, a small amount of rubbing alcohol on a cotton swab can be effective. Ensure you rinse the toy thoroughly afterward.
- Avoid melamine foam erasers on painted toys. They can remove paint along with the crayon.
- Rinse the toy thoroughly with clean water after cleaning.
- Dry the toy completely before returning it to the child. Ensure no residue remains.
Removing Crayon from Plastic Furniture
Plastic outdoor furniture, like chairs or tables, can also become a canvas. These items are generally robust. They can handle a wider range of cleaning solutions. However, their texture or color can sometimes be affected by harsh chemicals.
For plastic furniture:
- Begin with WD-40 or mineral oil. These are often very effective on larger, smoother plastic surfaces. Apply to a cloth, then wipe the crayon. Remember to clean the oily residue with dish soap.
- Rubbing alcohol is another strong contender. It works well on most plastic furniture.
- A melamine foam eraser can tackle stubborn marks on durable plastic furniture. Use light pressure.
- For deeply embedded marks on textured furniture, a soft brush (like a scrub brush) with a baking soda paste can work.
- Rinse the furniture thoroughly with a hose if possible. This removes all cleaning agents.
- Dry completely to prevent water spots.
Addressing Crayon in Car Interiors
Plastic in car interiors requires special care. Dashboards, door panels, and consoles can be sensitive. They might fade or become shiny with the wrong cleaner. Additionally, you need to avoid strong fumes within an enclosed space. This is a common concern, much like how one might need to clean mold off plastic in a confined space.
For car interior plastic:
- Always patch test in a hidden area first. Car plastics vary greatly.
- Start with rubbing alcohol on a cotton swab. Apply it very sparingly. Gently dab and wipe the crayon mark.
- Petroleum jelly (Vaseline) or a small amount of mineral oil can also work. Apply to a cloth and gently rub. These help lift the wax. Then wipe clean with a microfiber cloth.
- Avoid harsh cleaners, abrasive pads, or excessive scrubbing. These can damage the finish.
- Use a clean, damp microfiber cloth to wipe away any residue.
- Dry the area immediately to prevent streaks.
- Ensure good ventilation while working inside the car.
Plastic Food Containers and Storage Bins
Plastic food containers and storage bins are frequently used. They are also prone to accidental crayon marks, especially if used by children. Since these items touch food, using food-safe or easily rinsable solutions is best.
For plastic food containers:
- Baking soda paste is my top recommendation. It is non-toxic and highly effective. Scrub gently with a sponge or brush.
- Dish soap and warm water should always be tried first for lighter marks.
- For very stubborn marks, a small amount of vegetable oil or mineral oil can help dissolve the wax. Apply to a cloth, rub the mark, then wash thoroughly with hot soapy water.
- Avoid harsh solvents or strong chemicals. These can seep into the plastic. They could then contaminate food.
- Wash the container thoroughly with hot, soapy water after cleaning.
- Rinse well and air dry or towel dry. Ensure no residue remains before storing food.
Safety Precautions and Patch Testing
Before you apply any cleaning solution to crayon-marked plastic, safety must be your priority. This means protecting yourself and the plastic item. Different cleaning agents can pose risks to your skin or respiratory system. They can also damage the plastic itself. I always take a few moments to prepare safely. This prevents accidents and ensures a successful cleaning job.
My golden rule is “test, then treat.” This applies to virtually every cleaning task. Failing to test a cleaner can lead to irreversible damage to your plastic. Imagine dulling a glossy surface or causing discoloration. These issues are often worse than the crayon mark itself. Take the extra minute to be safe.
Always Patch Test First
Patch testing is the most crucial step in safe stain removal. It involves applying a tiny amount of your chosen cleaner to a hidden area of the plastic. This area might be the underside of a toy or the back of a piece of furniture. It could also be an inside seam of a plastic container.
How to patch test:
- Choose an inconspicuous spot. This is an area not easily seen.
- Apply a tiny amount of your cleaning solution. Use a cotton swab or the corner of a cloth.
- Wait a few minutes. Observe for any adverse reactions. Look for discoloration, cloudiness, softening, or melting.
- Wipe the area clean. Check for any changes to the plastic’s texture or finish.
- If there is no damage, proceed with cleaning the crayon mark.
- If damage occurs, do not use that cleaner. Choose a different method.
This simple step saves you from potentially ruining your plastic item.
Ensuring Good Ventilation
Many cleaning agents, even common household ones, can produce fumes. Rubbing alcohol, WD-40, and some general cleaners can release volatile organic compounds (VOCs). These fumes can be irritating to your eyes, nose, and throat. Prolonged exposure can cause headaches or dizziness.
Always work in a well-ventilated area.
- Open windows and doors if cleaning indoors.
- Use a fan to circulate fresh air.
- Consider moving the item outdoors if it is portable. This is ideal for larger items like plastic furniture.
- Avoid cleaning in small, enclosed spaces without airflow. This includes car interiors. Ensure windows are down while cleaning inside a vehicle.
Good ventilation protects your respiratory health. It also helps the cleaning solution evaporate faster. This reduces the risk of residue buildup.
Protecting Your Skin
Direct contact with cleaning solutions can irritate your skin. Some chemicals can cause dryness, redness, or even chemical burns. Even mild solutions like dish soap can dry out your hands over time. My hands often feel rough after cleaning without gloves.
Always wear protective gloves when cleaning.
- Disposable nitrile or latex gloves are good choices.
- Reusable rubber gloves offer more durability for tougher jobs.
- Ensure gloves are free of holes before starting.
- Wash your hands thoroughly with soap and water after removing gloves.
Protecting your skin is a simple but important safety measure. It keeps your hands healthy and comfortable during and after cleaning tasks.
Preventing Future Crayon Incidents on Plastic
Preventing crayon marks on plastic is often easier than cleaning them. While accidents happen, especially with creative children, proactive steps can greatly reduce their occurrence. I have learned over time that a little planning goes a long way. These strategies help keep your plastic surfaces pristine. They also encourage artistic expression in appropriate places.
The key is to create clear boundaries for drawing activities. Also, consider the types of art supplies you provide. These simple changes can save you much cleaning time. They also protect your valuable plastic items.
Designated Drawing Areas
Establishing a specific area for drawing is highly effective. Children thrive on routine and clear expectations. A “creation station” makes it clear where crayons are allowed. This helps prevent stray marks on furniture or walls.
Consider these ideas for a designated drawing area:
- A child-sized table and chairs with a washable tablecloth or craft mat.
- An easel with a paper roll.
- A dedicated art corner in a room with easy-to-clean surfaces.
- A large piece of cardboard or an old shower curtain laid on the floor. This provides a clear boundary.
By providing an inviting and specified space, you direct their artistic energy. This avoids unexpected crayon marks on your plastic surfaces.
Washable Crayons
One of the simplest yet most effective prevention methods is using washable crayons. Many art supply companies now offer washable versions of crayons. These crayons are specifically designed to be easily wiped off non-porous surfaces. This includes most plastics.
Why washable crayons are a game-changer:
- Easy Cleanup: Marks often wipe away with just a damp cloth.
- Peace of Mind: You worry less about accidental drawings.
- Reduced Damage: Less need for harsh cleaners that might harm plastic.
While not completely foolproof, washable crayons significantly simplify cleanup. They reduce the risk of permanent stains. This makes them a wise investment for any household with young artists.
- Crayon Removal
- Plastic Cleaning
- Stain Removal
- Household Hacks
- Cleaning Tips

