· Home Cleaning · 15 min read
How To Clean Crayon Off Wall
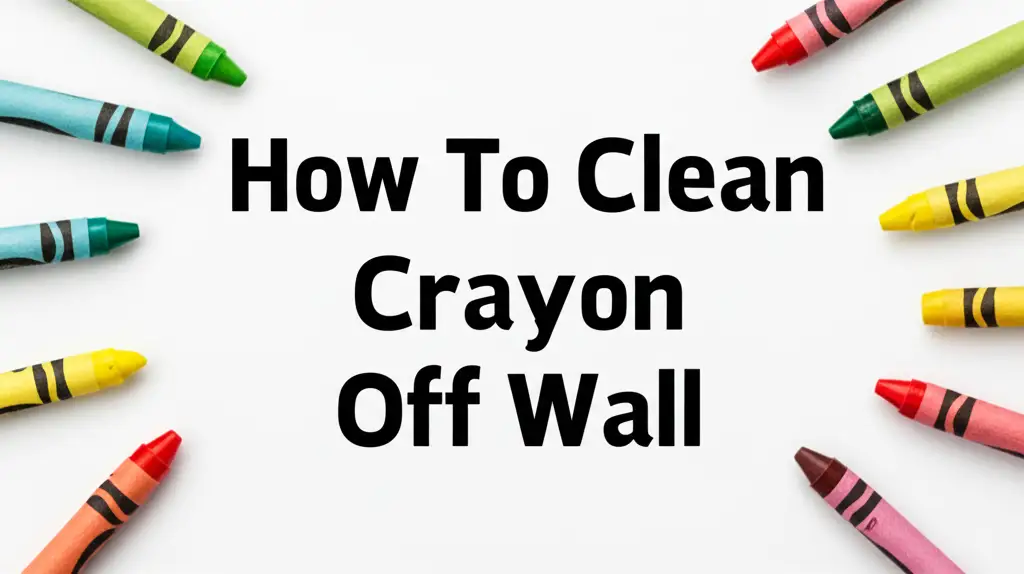
Effortless Ways to Clean Crayon Off Your Wall
Discovering crayon art on your freshly painted walls can feel like a small disaster. Children are curious artists, and sometimes, the wall becomes their canvas. I understand this frustration firsthand. The good news is that cleaning crayon off walls is often easier than you think. You do not need harsh chemicals or special tools.
This guide helps you restore your walls to their spotless state. We cover various effective methods using common household items. You will learn about surface preparation and safety precautions. This article offers step-by-step instructions for different wall types. Let’s make those crayon marks disappear together.
Takeaway
Removing crayon from walls requires patience and the right method.
- Always test any cleaning solution in a hidden spot first.
- Choose gentle methods before trying stronger ones.
- Different wall finishes react differently to cleaners.
- Act quickly for the best results.
How to Clean Crayon Off Wall
To clean crayon off a wall, identify your wall’s paint finish. Then, test a gentle cleaning agent like dish soap and water or a baby wipe in an inconspicuous area. For tougher marks, try baking soda paste, toothpaste, or a Magic Eraser carefully. Always wipe gently and rinse thoroughly.
Prepare Your Wall Surface Before Cleaning
Before you attack those colorful crayon marks, you must prepare the wall. This step prevents further damage. It also ensures the cleaning method works effectively. Identify the type of paint on your wall. Flat, matte, eggshell, satin, semi-gloss, and gloss paints react differently to cleaning agents.
Flat or matte paints are more porous. They absorb stains easily. They are also more delicate. Using abrasive cleaners can remove paint along with the crayon. Glossier finishes are more durable. They are easier to clean. Understanding your paint type saves you time and effort. It also protects your walls.
Always test your chosen cleaning method. Pick a small, hidden area. This could be behind furniture or inside a closet. Apply a tiny amount of the cleaner. Gently rub it. Wait a few minutes. Check for any discoloration or paint removal. This simple test prevents big mistakes.
Gather Your Supplies
Collect all necessary items before you start cleaning. This saves you trips back and forth. You will need a few basic things. A clean cloth or sponge is essential. You might need paper towels for drying. A bucket for water is helpful. Having everything ready makes the job smoother.
Common household cleaners work well for crayon marks. We will explore different options later. These include dish soap, baking soda, and vinegar. Other surprising items also work. Make sure you have chosen your preferred method. Then, get the right supplies. This preparation leads to better results.
Gentle Cleaning Methods for Fresh Crayon Marks
Start with the least abrasive methods when you see crayon on your wall. These gentle approaches often work well for fresh marks. They also reduce the risk of damaging your paint. My first go-to is usually a simple solution. It is effective and safe for most surfaces.
Using dish soap and water is very effective. Mix a few drops of mild dish soap with warm water. Dampen a clean cloth with this solution. Gently wipe the crayon marks. Do not scrub hard. Use light, circular motions. The soap helps break down the waxy crayon. Rinse the cloth often.
Baby wipes are another excellent option for quick cleanup. They contain mild cleaning agents. These agents are gentle on most painted surfaces. Simply take a baby wipe. Gently rub the crayon mark. The moisture and mild cleanser work together. This lifts the crayon without much effort. Baby wipes are convenient for small, new marks.
The Power of a Pencil Eraser
Yes, a regular pencil eraser can be your friend here. Choose a clean, white eraser. Avoid colored erasers as they might leave their own marks. Gently rub the eraser over the crayon. The eraser material lifts the crayon pigment. It works well on small, light marks.
Rubbing too hard can damage the paint. Use minimal pressure. The eraser creates small debris. Wipe this away with a clean, dry cloth. This method is surprisingly effective for light crayon lines. It is a dry method. This means less risk of water damage to sensitive paint types.
Harnessing Household Products for Crayon Stains
Many everyday items in your home can tackle crayon stains. These products are readily available. They also offer surprisingly powerful cleaning action. You probably have most of them already. Let’s explore these common household heroes. They can make your walls clean again.
Baking soda is a versatile cleaner. It is slightly abrasive. This helps lift crayon marks. Make a paste with baking soda and water. Mix about two tablespoons of baking soda with one teaspoon of water. This creates a thick paste. Apply the paste directly to the crayon mark.
Rub the paste gently with a soft cloth or sponge. Use light, circular motions. The mild abrasive action helps remove the wax. Do not scrub hard. This can damage your paint. After the crayon disappears, wipe away the paste. Use a clean, damp cloth. Then, dry the area.
Vinegar’s Cleaning Capabilities
Vinegar is a natural acid. It can break down many types of stains, including crayon. White vinegar is best for cleaning. Mix equal parts white vinegar and warm water in a spray bottle. Spray the solution onto a clean cloth. Do not spray directly onto the wall.
Gently blot or wipe the crayon mark. The acidity in the vinegar dissolves the waxy residue. This makes it easier to wipe away. For stubborn marks, let the vinegar sit for a minute or two. Then, wipe it again. Vinegar works well for many surfaces. You can even clean walls using vinegar for general dirt and grime. Remember to test on an inconspicuous spot first.
Toothpaste, especially the white, non-gel variety, can also help. Toothpaste contains mild abrasives. These are similar to those in baking soda. Squeeze a small amount of toothpaste onto the crayon mark. Use an old toothbrush or a clean cloth. Gently scrub the mark.
The abrasives work to lift the crayon. Be gentle. Over-scrubbing can damage your wall paint. Once the crayon is gone, wipe the area clean. Use a damp cloth to remove all toothpaste residue. Then, dry the wall completely. This method is surprisingly effective for small marks.
Mayonnaise for Stubborn Marks
This might sound strange, but mayonnaise can be surprisingly effective on crayon. The oils in mayonnaise help to break down the wax in the crayon. This makes it easier to wipe away. It’s a method I’ve used with good success on tougher marks.
Apply a small dab of mayonnaise directly onto the crayon mark. Let it sit for 5-10 minutes. The oil needs time to work its magic. After waiting, wipe away the mayonnaise with a clean, soft cloth. The crayon should come off with it. Then, clean the area with a damp cloth to remove any oily residue. This method is gentle and often surprising in its effectiveness.
Advanced Techniques for Persistent Crayon Stains
Some crayon marks are stubborn. They do not come off with gentle methods. For these, you need more advanced techniques. These methods are powerful. They also require more caution. Always test them in a hidden spot first. This prevents accidental damage to your wall.
WD-40 is a popular household lubricant. It can also dissolve crayon wax. Spray a small amount of WD-40 onto a clean cloth. Do not spray directly onto the wall. Gently wipe the crayon mark with the dampened cloth. The solvents in WD-40 break down the wax.
Once the crayon is gone, wipe the area with a clean, damp cloth. This removes the WD-40 residue. Then, dry the wall completely. WD-40 can leave an oily film. Make sure to clean it off thoroughly. This method is very effective for tough, set-in marks.
Magic Eraser: A Powerful Tool (Use with Caution)
The Magic Eraser is famous for its cleaning power. It is made of melamine foam. This material acts like super-fine sandpaper. It effectively lifts many stains, including crayon. I have found it incredibly useful for many household cleaning challenges. However, it requires careful use.
Dampen the Magic Eraser slightly with water. Gently rub the crayon mark. Use light pressure. The Magic Eraser removes a tiny layer of the wall surface. This is how it cleans. Rubbing too hard or too long will remove paint. It can also leave dull spots on your wall.
Test the Magic Eraser in an unseen area first. Use it only when other methods fail. Wipe the area with a damp cloth after cleaning. This removes any residue. The Magic Eraser is powerful. But its abrasiveness means you must use it cautiously.
Handling Crayon on Various Wall Surfaces
Different wall surfaces require different cleaning approaches. What works for painted drywall might not work for wallpaper. Understanding these differences is key. It ensures effective cleaning without damage. I always consider the wall type before choosing a method.
Painted walls are the most common. Their durability varies based on paint finish. Flat and matte paints are delicate. They show marks easily. Use only the gentlest methods on these. Start with dish soap or baby wipes. For stubborn marks, try baking soda paste very gently. Avoid harsh scrubbing.
Satin, semi-gloss, and gloss paints are more robust. They have a smoother finish. This makes them easier to clean. You can use a wider range of methods. Dish soap, vinegar, and even Magic Eraser (with caution) often work well. Always test first, even on durable paints.
Cleaning Wallpaper and Textured Walls
Wallpaper requires extreme care. Many wallpapers are delicate. Water and harsh cleaners can damage them. First, identify if your wallpaper is washable. Vinyl wallpapers are often washable. Fabric or paper-based wallpapers are not. If it is washable, use a very lightly damp cloth with mild dish soap. Blot the crayon mark gently. Do not rub.
For non-washable wallpaper, professional help might be best. You can try a dry method like a pencil eraser very carefully. Test it in an inconspicuous spot. The goal is to lift the crayon without disturbing the wallpaper. Sometimes, complete removal is not possible without damage.
Textured walls, like those with popcorn or knockdown finishes, present unique challenges. The crayon can get into the textures. This makes it harder to reach. Use a soft brush or toothbrush with your chosen cleaning solution. Gently brush the solution into the crevices. Then, wipe clean with a damp cloth.
Avoid heavy scrubbing on textured walls. This can damage the texture itself. For some textures, a light dabbing motion is better. You might need to repeat the process a few times. Patience is key when dealing with these surfaces.
Addressing Crayon on Adjacent Surfaces
Crayon drawings do not always stay on the wall. Sometimes, the art extends to nearby surfaces. This includes wood trim, baseboards, or even furniture. Cleaning crayon from these areas requires specific care. The methods differ from wall cleaning.
Wood surfaces are sensitive to moisture and certain chemicals. For crayon on painted wood trim or baseboards, start with a baby wipe or a damp cloth with mild dish soap. This is often enough for fresh marks. If the crayon is on bare wood or stained wood, be more careful. You can try to remove crayon from wood surfaces using special techniques. For example, some people find success with mayonnaise or a small amount of mineral spirits on a cloth. Always test on an hidden area first.
For crayon on upholstery or carpets, specific stain removal techniques apply. This article focuses on walls, but remember to adjust your approach for different materials. Treating crayon on wood often involves different products. It also involves different steps compared to cleaning walls. If you have other stains, you might want to learn how to remove stains from wood properly.
Quick Cleanup for Minimal Damage
Acting quickly is always the best strategy. Fresh crayon marks are easier to remove than old, set-in ones. When you spot new art, address it immediately. This prevents the crayon wax from bonding firmly with the wall surface. A quick wipe can save you from a major cleaning job later.
Keep simple cleaning supplies handy. A container of baby wipes or a spray bottle with dish soap solution can be useful. Place them in an accessible cupboard. This way, you are ready for unexpected artistic expressions. Prompt action reduces the effort needed for cleanup.
Preventing Future Crayon Art on Walls
Preventing crayon art on walls is better than cleaning it. While you cannot supervise children every second, you can take steps. These steps reduce the chances of future masterpieces appearing on your walls. I’ve learned that a proactive approach saves a lot of headaches.
Provide clear, designated drawing spaces. Offer plenty of paper, coloring books, or art easels. Make these options more appealing than the wall. Keep art supplies in specific areas. Ensure these areas are away from walls. This guides children towards appropriate creative outlets.
Consider using washable crayons. These crayons are designed for easy cleanup. They contain ingredients that dissolve with water. This makes removing marks much simpler. They are a good investment for families with young artists. They offer peace of mind.
Setting Clear Boundaries
Teach children early about what is acceptable for drawing. Explain that walls are not for coloring. Provide positive reinforcement when they draw on paper. Gently redirect them if they attempt to draw on walls. Consistency is important here.
You can also use protective barriers. Place large paper or a cheap shower curtain on the floor and wall when children draw. This acts as a shield. It catches any accidental marks or spills. This is especially helpful during active art sessions.
Safety First: Protecting Your Home and Health
Cleaning your walls should not come at the cost of safety. Protecting yourself and your home is paramount. Always consider safety before you begin any cleaning task. This prevents accidents and ensures a healthy environment.
Good ventilation is essential. When using any cleaning product, open windows. Turn on fans. This helps clear the air of fumes. Even natural cleaners like vinegar can be irritating in enclosed spaces. Fresh air makes the cleaning process safer and more pleasant.
Wear protective gear. Gloves protect your hands from chemicals. Even mild solutions can dry out skin. If you are sensitive, consider wearing a mask. This prevents inhaling dust or cleaning solution particles. Simple precautions keep you safe.
Test in an Inconspicuous Area
I cannot stress this enough: always test first. Every wall surface is unique. Different paints react differently. A cleaner that works perfectly on one wall might damage another. Choose a hidden spot. Apply a small amount of the cleaner. Observe for discoloration or paint removal.
This test prevents significant damage. It gives you confidence in your chosen method. It saves you from costly repairs. Taking a few minutes to test is always worth it. It is a critical step in any cleaning project.
Proper disposal of cleaning materials is also important. Rinse sponges and cloths thoroughly. Dispose of any leftover cleaning solutions responsibly. Never mix different cleaning products. This can create dangerous chemical reactions. Be mindful of your actions. Keep cleaning supplies out of reach of children and pets. This ensures their safety. These practices complete a safe and effective cleaning process. If you encounter different messes, remember to consult resources like tackling other wall messes to stay prepared.
FAQ Section
Can you use a Magic Eraser on any wall?
No, you cannot use a Magic Eraser on every wall. Magic Erasers work by gently abrading the surface. This means they remove a tiny layer of paint along with the stain. They are too harsh for flat or matte paints. These paints will show dull spots or paint removal. Always test in an hidden area first.
What is the best way to remove crayon from flat paint?
The best way to remove crayon from flat paint is with gentle methods. Flat paint is very porous and delicate. Start with a baby wipe or a damp cloth with mild dish soap. You can also try a baking soda paste applied very gently. Avoid scrubbing and harsh abrasives.
Does crayon permanently stain walls?
No, crayon usually does not permanently stain walls. Most crayon marks are wax-based. This means they sit on the surface of the paint. With the right cleaning method, you can remove them completely. Quick action helps prevent the wax from setting into the paint pores.
Is WD-40 safe for walls?
WD-40 can be safe for some painted walls, but use it with extreme caution. It contains solvents that can break down wax. However, it can also potentially damage certain paint finishes or leave an oily residue. Always apply WD-40 to a cloth first, not directly to the wall. Thoroughly clean the area afterward.
How to remove old crayon marks?
Removing old crayon marks might require more effort. Start with gentle methods like dish soap or baby wipes. If those fail, try baking soda paste or mayonnaise. For very stubborn old marks, a Magic Eraser or WD-40 can work. Always test these stronger methods in an unseen spot first.
What prevents crayon marks?
Preventing crayon marks involves providing alternative drawing surfaces. Offer plenty of paper, coloring books, or an easel. Consider buying washable crayons designed for easy cleanup. Setting clear boundaries and redirecting children to appropriate drawing areas also helps.
Conclusion
Cleaning crayon off your wall does not have to be a daunting task. We have explored many effective methods using items you likely already own. From gentle dish soap to surprising mayonnaise or powerful WD-40, there is a solution for every crayon mark. The key is to understand your wall surface. Also, remember to test your chosen method in an inconspicuous area first.
I know the feeling of seeing those unexpected colorful lines. Now you have the knowledge to tackle them with confidence. By following these steps, your walls can return to their original pristine condition. Don’t let a little crayon art cause undue stress. You have the tools to make your home clean again. Keep these tips handy for any future artistic surprises. Take action today and reclaim your clean walls!
- clean crayon off wall
- crayon removal
- wall stains
- house cleaning tips
- crayon marks