· Kitchen Hygiene · 13 min read
How To Clean Dish Brush
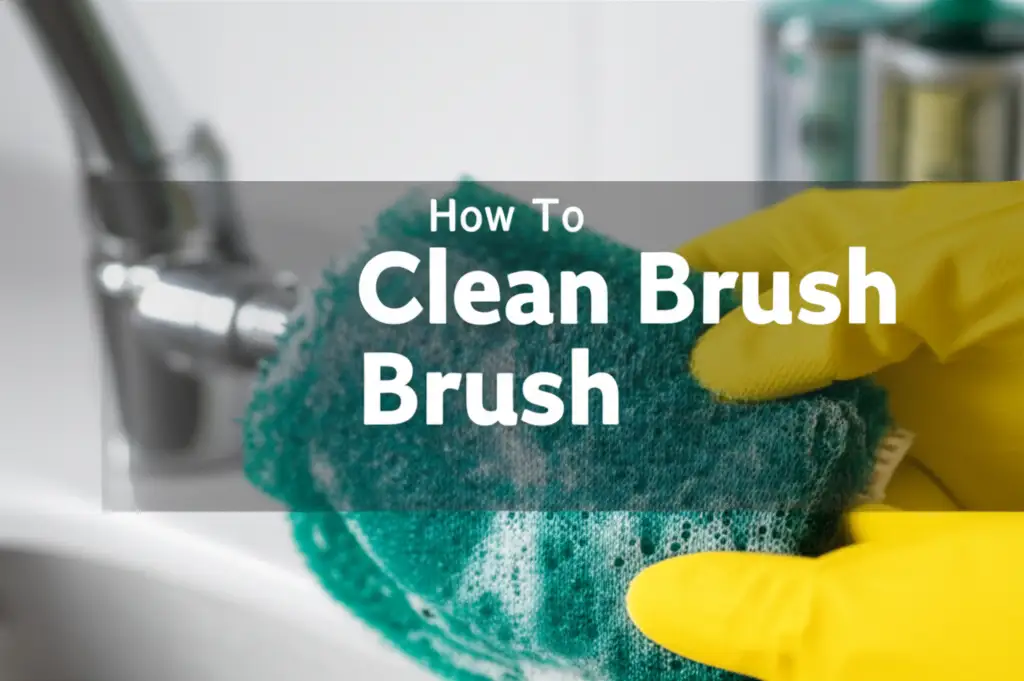
Keep Your Kitchen Sparkly: How to Clean a Dish Brush
A clean kitchen feels good. Your dish brush plays a big part in keeping your dishes clean. But have you thought about how clean your dish brush actually is? It works hard scrubbing away food bits, grease, and grime from plates and pans. Over time, these particles build up on the brush itself, making it a breeding ground for bacteria. A dirty dish brush cannot truly clean your dishes. It spreads germs instead. We will explore simple, effective ways to clean your dish brush. This guide helps you keep your kitchen tools hygienic. You will learn easy methods from quick rinses to deep disinfection.
Takeaway:
- Clean your dish brush after each use with hot water and dish soap.
- Disinfect your dish brush weekly using vinegar or a diluted bleach solution.
- Allow your dish brush to air dry completely between uses to prevent bacterial growth.
- Replace your dish brush every few weeks, or sooner if it shows signs of wear or persistent odor.
To effectively clean your dish brush, rinse it thoroughly with hot water after each use. Then, periodically deep clean it by soaking in vinegar or a diluted bleach solution, or by running it through a dishwasher cycle to remove food particles and kill bacteria.
Understanding Why Your Dish Brush Needs Cleaning
Your dish brush is a daily kitchen hero. It removes food and grease from your plates, bowls, and cookware. This constant contact with food residue makes it a hotspot for germs. Bacteria like E. coli and Salmonella can thrive on damp brush bristles. These germs then transfer back to your “clean” dishes. This creates a cycle of contamination. A dirty brush can also develop unpleasant odors. It loses its cleaning power. Regularly cleaning your dish brush ensures it remains effective. It helps maintain a hygienic kitchen environment.
The Hidden Germs in Your Kitchen
Germs are everywhere in the kitchen. Your sink, sponges, and dish brushes are common places for them to hide. When you scrub dirty dishes, food particles and bacteria cling to the brush bristles. If you do not clean the brush, these germs multiply. They then transfer to the next dish you wash. This process can make you and your family sick. It also makes your dishes less clean than you think. Proper cleaning stops this germ spread.
When to Clean Your Dish Brush
You should rinse your dish brush after every use. This removes large food particles. For a deeper clean, aim to sanitize your dish brush at least once a week. If you cook often or handle raw meats, clean it more frequently. You should also clean it if it starts to smell bad. A smelly brush means bacteria are growing. Do not wait for visible dirt to appear. Regular cleaning prevents germs from taking hold. This habit keeps your kitchen healthier.
Method 1: Hot Water and Dish Soap – The Everyday Clean
This method is for daily maintenance. It is simple and quick. It helps remove fresh food residue and light grease. This prevents buildup between deeper cleaning sessions. It keeps your brush ready for the next wash. Making this a habit extends the life of your brush. It also reduces the need for intense scrubbing later.
Step-by-Step Instructions
- Rinse Thoroughly: After washing dishes, hold your dish brush under hot running water.
- Add Soap: Apply a few drops of dish soap directly to the bristles.
- Lather and Scrub: Use your fingers to work the soap into a lather. You can also scrub the brush against a clean part of your sink or a clean scrubbing pad. This helps dislodge any stuck-on food.
- Rinse Again: Rinse the brush completely under hot water until all soap suds are gone. Ensure no food particles remain.
- Dry Properly: Shake off excess water. Place the brush in an area where it can air dry completely. Standing it upright helps water drain away. Proper drying is key to preventing mold and mildew.
This daily routine is your first line of defense. It removes most everyday grime. For more general cleaning advice, you can learn how to clean your dish drying mat which also encounters daily moisture and food particles.
Method 2: Vinegar Soaking – Natural Disinfection
Vinegar is a natural disinfectant and deodorizer. It is excellent for deep cleaning your dish brush without harsh chemicals. White vinegar is acidic. This acidity breaks down grease and kills many types of bacteria and mold. It also neutralizes odors. This method is great for regular weekly sanitization. It leaves your brush fresh and clean.
Vinegar Cleaning Process
- Prepare Solution: Find a bowl or container large enough to submerge your dish brush. Pour undiluted white vinegar into the container.
- Soak the Brush: Place your dish brush bristles-down into the vinegar. Make sure the bristles are fully covered.
- Soak Time: Let the brush soak for at least 30 minutes. For a deeper clean or to remove strong odors, you can soak it for several hours or even overnight.
- Rinse and Dry: Remove the brush from the vinegar. Rinse it thoroughly under hot running water. Make sure all vinegar smell is gone. Shake off excess water and allow it to air dry completely.
Benefits of Vinegar for Cleaning
Vinegar offers several benefits. It is non-toxic and environmentally friendly. It is safe to use in the kitchen. It effectively kills bacteria and mold without leaving harmful residues. Vinegar also helps to break down mineral deposits, which can build up on brush bristles over time. Using vinegar helps your brush last longer and stay more effective. It also removes any lingering food smells, leaving your brush smelling fresh. If you are cleaning other kitchen items like a glass baking dish, vinegar can also be a useful and safe cleaning agent for removing baked-on grease.
Method 3: Bleach Solution – Powerhouse Disinfection
Bleach is a powerful disinfectant. It kills almost all germs, including viruses and bacteria. Use this method when your dish brush needs a serious sanitize. This is especially true if someone in your household has been sick. Bleach can be harsh, so use it carefully and less frequently than other methods. Always dilute bleach before use. Never mix bleach with other cleaning products, especially ammonia or vinegar, as this can create dangerous fumes.
Bleach Cleaning Steps and Precautions
- Dilute Bleach: In a clean bucket or sink, mix 1/2 teaspoon of liquid bleach with 1 gallon of water. Use cold or lukewarm water. Hot water can make the bleach less effective.
- Submerge Brush: Carefully place your dish brush into the bleach solution. Ensure the bristles are fully submerged.
- Soak Time: Let the brush soak for 5 minutes only. Do not soak longer than this. Longer soaking can damage the bristles.
- Rinse Thoroughly: Wearing gloves, remove the brush from the solution. Rinse it very thoroughly under hot running water for several minutes. Ensure all bleach residue is removed.
- Dry: Shake off excess water and allow the brush to air dry completely.
Safety First with Bleach
Always work in a well-ventilated area when using bleach. Open windows or turn on a fan. Wear rubber gloves to protect your hands. Bleach can irritate skin and eyes. If bleach splashes on your skin or in your eyes, rinse immediately with plenty of water. Keep bleach out of reach of children and pets. Proper handling ensures your safety. Remember, bleach is strong. Use it as a last resort for deep disinfection. For other cleaning tools that require strong disinfection, like a bottle brush, similar precautions with bleach apply.
Method 4: Dishwasher Cleaning – Easy and Effective
Many modern dish brushes are dishwasher safe. This is one of the easiest ways to clean and sanitize your dish brush. The high heat of the dishwasher, combined with the detergent, effectively kills germs and removes food particles. Check your brush’s packaging or manufacturer’s website to confirm if it is dishwasher safe. If it has wooden parts, it might not be suitable for the dishwasher, as wood can warp or crack.
Loading Your Dish Brush
- Remove Large Debris: First, rinse your dish brush under running water to remove any large food pieces stuck in the bristles. This prevents them from clogging your dishwasher.
- Secure Placement: Place the dish brush on the top rack of your dishwasher. You can put it in the utensil basket or lay it flat, making sure it is secure. It should not move around during the wash cycle. Avoid placing it on the bottom rack, as the intense heat and strong spray can sometimes damage plastic bristles over time.
- Run Cycle: Run your dishwasher on a normal or sanitize cycle. The hot water and powerful detergents will do the work.
Dishwasher Settings for Brushes
Use a hot water cycle for maximum sanitization. Many dishwashers have a “sanitize” setting. This setting heats the water to a very high temperature. It ensures germs are killed. Dishwasher detergent also helps break down grease and food residue. Make sure your dishwasher detergent is effective. After the cycle finishes, remove the brush. Allow it to air dry completely if it is still damp. The heat from the dry cycle usually helps.
Beyond Cleaning: Proper Storage and Maintenance
Cleaning your dish brush is only half the battle. How you store it and when you decide to replace it are equally important. Proper maintenance prolongs the life of your brush. It also ensures it remains a hygienic tool in your kitchen. A well-maintained brush works better. It prevents the growth of mold and mildew. This saves you money in the long run.
Drying Your Dish Brush Correctly
Dampness is a breeding ground for bacteria and mold. After every use and every cleaning, ensure your dish brush dries completely.
- Shake Off Excess Water: Give the brush a good shake to remove as much water as possible.
- Upright Position: Store your dish brush bristles-down or in an upright position. A dish brush holder or a caddy that allows water to drain away is ideal. Do not let it sit in a pool of water in the sink. This traps moisture and promotes growth.
- Air Circulation: Choose a spot with good air circulation. Avoid storing it in a closed cabinet when wet. Airflow helps the bristles dry faster and more thoroughly.
When to Replace Your Dish Brush
Even with regular cleaning, dish brushes do not last forever.
- Visible Wear: Look for signs of wear. If the bristles are frayed, matted, or falling out, the brush is less effective. It cannot clean properly.
- Persistent Odor: If your brush consistently smells even after cleaning, it means bacteria are deeply ingrained. It is time for a new one.
- Discoloration: Stains or discoloration that do not wash away indicate a buildup that cannot be removed.
- General Rule: As a general guideline, replace your dish brush every 4-6 weeks. If you use it heavily, replace it more often. Regularly replacing your brush is a simple step. It ensures your kitchen stays truly clean. Knowing how to clean stains off a brush can extend its life, but replacement is key for deep issues.
Troubleshooting Common Dish Brush Issues
Sometimes, even with regular cleaning, you might encounter issues with your dish brush. These problems often stem from trapped food particles or persistent bacterial growth. Knowing how to address these specific issues can save your brush from an early trip to the trash. It keeps your cleaning tools effective and hygienic.
Dealing with Lingering Odors
A persistent bad smell usually means bacteria are thriving despite your cleaning efforts.
- Vinegar Soak: If a simple wash does not work, try a longer vinegar soak. Submerge the brush in undiluted white vinegar overnight. The strong acidity can penetrate and kill more stubborn bacteria causing the smell.
- Baking Soda Paste: Make a paste with baking soda and a little water. Apply it to the bristles. Let it sit for 15-30 minutes, then scrub and rinse thoroughly. Baking soda is excellent at absorbing odors.
- Sunlight: After cleaning, place the brush outside in direct sunlight for a few hours. UV rays from the sun are natural disinfectants and can help eliminate odors and dry the brush completely.
- Boiling Water (Carefully): For brushes with heat-resistant plastic bristles, carefully pour boiling water over the bristles. Let it sit for a minute or two. This high heat can kill bacteria. Always check the brush material first to avoid damage. This method is similar to practices for cleaning other household brushes, such as learning how to clean a toilet brush when it develops an odor.
Removing Stuck-on Food Particles
Sometimes, tough, stuck-on food or grease remains.
- Pre-Soak: Before washing, let the brush soak in hot, soapy water for 10-15 minutes. This softens the food bits.
- Use a Comb or Fork: Gently run a fine-toothed comb or the tines of a fork through the bristles. This helps dislodge embedded food particles without damaging the brush.
- Old Toothbrush: Use an old toothbrush to scrub between the bristles of your dish brush. This allows for precise cleaning in hard-to-reach areas.
- High-Pressure Rinse: If you have a spray nozzle on your kitchen sink, use the highest pressure setting to blast away remaining debris.
- Dishwasher Pre-Rinse: For dishwasher-safe brushes, a quick pre-rinse cycle can help remove large debris before a full wash.
These methods can help rescue a brush that seems beyond help. However, remember the importance of regular replacement for overall hygiene.
FAQ Section
How often should I clean my dish brush?
You should rinse your dish brush with hot water and dish soap after every use. For a deeper, sanitizing clean, aim to clean it at least once a week. If you use it heavily or after cleaning raw meat, clean it more frequently to prevent germ buildup.
Can I put all dish brushes in the dishwasher?
Not all dish brushes are dishwasher safe. Check the manufacturer’s instructions or the brush packaging. Brushes with wooden handles or natural bristles may warp or degrade in the high heat of a dishwasher. Plastic and silicone brushes are generally safe.
What if my dish brush smells after cleaning?
A persistent smell after cleaning indicates stubborn bacteria. Try a longer soak in undiluted white vinegar (several hours or overnight). You can also make a baking soda paste to scrub the bristles. Ensure the brush dries completely between uses to prevent odor-causing bacterial growth.
Is it better to use a sponge or a dish brush?
Both have pros and cons. Dish brushes tend to dry faster than sponges, reducing bacterial growth. Sponges are more absorbent and can spread germs if not cleaned properly. For hygiene, a dish brush that is regularly cleaned and dried is often a better choice.
How long does a dish brush last?
The lifespan of a dish brush depends on use and material. With regular cleaning and proper care, a good quality brush can last anywhere from 4 to 6 weeks. If bristles fray, fall out, or the brush develops a persistent odor or discoloration, it is time to replace it sooner.
Conclusion
A clean dish brush is a foundation for a truly clean kitchen. We have explored simple, effective methods to keep your scrubbing tool hygienic. From daily rinses with hot water and dish soap to deeper sanitization with vinegar or bleach, each step plays a vital role. Proper drying and timely replacement also ensure your brush remains an effective, germ-free assistant.
I know how important a sparkling kitchen feels. By regularly cleaning your dish brush, you are not just maintaining a tool. You are protecting your family’s health and ensuring your dishes are truly spotless. Make these cleaning habits a part of your routine. Keep your dish brush clean, and your kitchen will thank you for it. Start cleaning your dish brush today for a fresher, more hygienic home.
- Dish Brush Care
- Kitchen Cleaning Tips
- Home Sanitization