· Personal Care · 17 min read
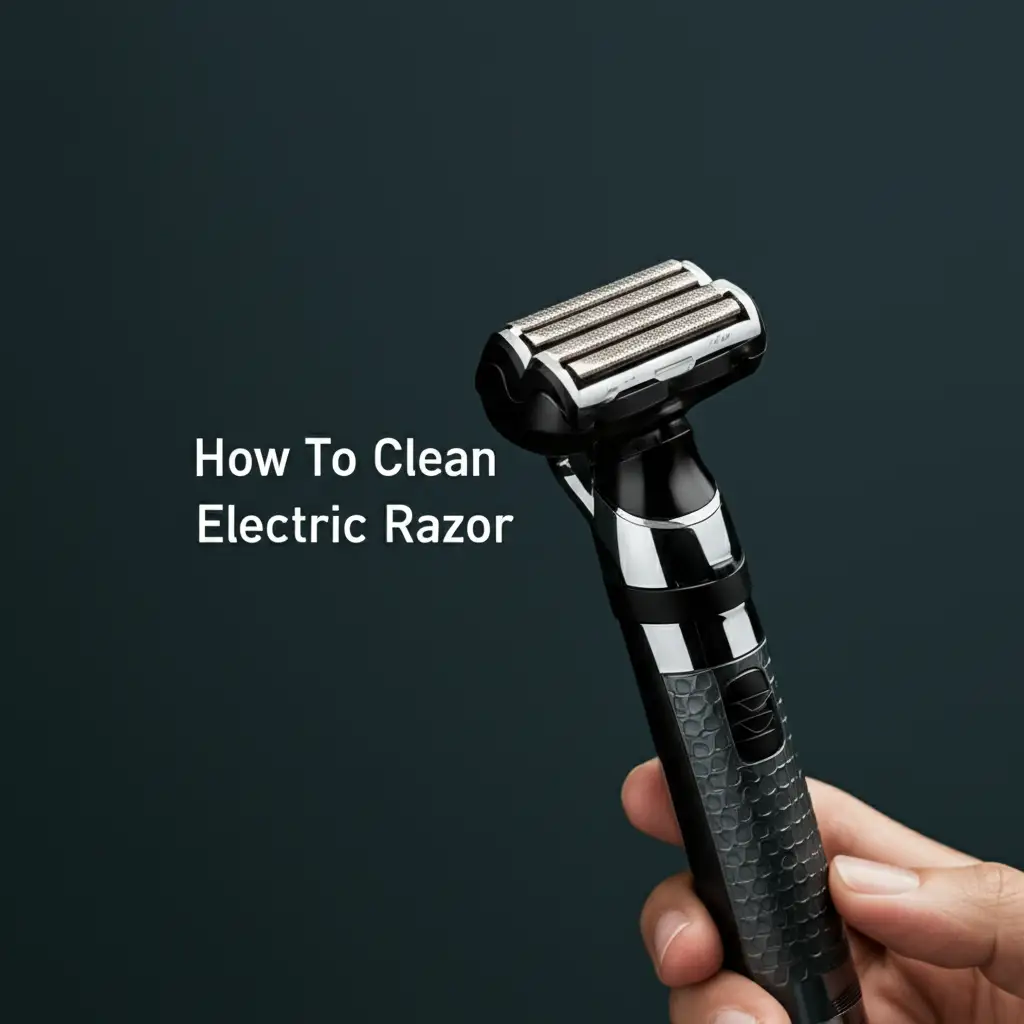
How To Clean Electric Razor

Achieve a Fresh Shave: How To Clean Electric Razor Effectively
Maintaining your personal grooming tools is important. Your electric razor works hard. It removes hair daily, trapping tiny clippings, skin cells, and oils. These residues build up inside the shaver head and blades. This buildup affects how well your razor performs. It can also create a breeding ground for bacteria. Learning how to clean electric razor parts correctly keeps your skin healthy. It also extends the life of your shaver. A clean razor ensures a close, comfortable shave every time. I will show you how to give your electric razor the care it needs. This guide will cover everything from quick daily rinses to thorough deep cleaning methods. We will explore simple steps to maintain your device. You will achieve better shaves and a longer-lasting razor.
Takeaway
- Clean your electric razor daily for hygiene and performance.
- Perform deep cleaning weekly or bi-weekly.
- Use manufacturer-recommended methods and cleaning solutions.
- Replace blades and foils regularly for optimal shaving.
To clean an electric razor, you should first disconnect it from power. Then, open the shaver head and tap out loose hair clippings. Rinse the cutting elements under warm running water if the razor is wet/dry safe. For a deeper clean, disassemble the head, brush away debris, and use a specialized cleaning solution. Allow all parts to air dry completely before reassembling.
Why Cleaning Your Electric Razor Matters
Cleaning your electric razor is not just about keeping it looking nice. It is about hygiene, performance, and the lifespan of your device. A dirty razor collects hair, skin, and oil. This creates a bad environment.
Dirty blades struggle to cut hair efficiently. They can pull hairs instead of cleanly cutting them. This leads to an uncomfortable shaving experience. It can cause skin irritation, redness, and razor burn. For example, ensuring proper cleaning of electric kettles helps them function better, similar to how cleaning your razor improves its operation.
Over time, buildup can also damage the motor and other internal components. This reduces the razor’s overall effectiveness. Regular cleaning prevents these problems. It keeps your razor sharp and working properly. This ensures a smooth shave and healthy skin.
Understanding Your Electric Razor Type
Before you clean your electric razor, you should know its type. Electric razors typically come in two main designs. Each design has its own cleaning needs. Knowing your type helps you clean it properly.
Rotary Shavers
Rotary shavers have three or more circular heads. These heads rotate independently. They often pivot to follow the contours of your face. Each head has cutters that move beneath a slotted guard. This design is good for longer, less frequent shaves. Brands like Philips Norelco often make rotary shavers.
To clean rotary shavers, you usually open the entire head assembly. You might find a single large cap or individual caps for each cutter. Hair clippings gather inside these caps. These shavers can be dry-only or wet/dry. Always check your manual for specific instructions.
Foil Shavers
Foil shavers have a straight, oscillating head. This head covers a series of vibrating blades. A thin, perforated metal foil covers the blades. Hair enters through the holes in the foil. The blades then cut the hair. Braun and Panasonic are common manufacturers of foil shavers.
Foil shavers are excellent for close shaves and daily use. Their cleaning often involves removing the foil and blade cassette. Hair collects underneath this cassette. Like rotary shavers, foil shavers can be dry-only or wet/dry. It is essential to know your model’s water resistance.
Daily Quick Cleaning for Optimal Performance
Daily quick cleaning is simple. It takes very little time. This step is crucial for maintaining hygiene. It also keeps your razor performing well. I make this part of my routine after every shave.
First, turn off your electric razor. Disconnect it from any power source. You do not want it to accidentally turn on. Open the shaver head. For most razors, this means pressing a release button.
Tap out the loose hair clippings. Hold the shaver head over a sink or trash can. Gently tap the side of the shaver body. This helps dislodge any trapped hairs. Many modern electric razors are designed for quick rinsing. If your razor is a wet/dry model, rinse the shaver head. Run it under warm tap water. Ensure the water flows through the cutting elements. This washes away smaller particles.
Do not use hot water. Hot water can warp plastic parts. It can also damage the delicate cutting foils or blades. After rinsing, shake off excess water. Leave the shaver head open to air dry completely. This prevents water spots and mineral buildup. This quick clean makes a big difference. It prevents major buildup and keeps your razor ready for the next shave.
Comprehensive Deep Cleaning Your Electric Razor
Deep cleaning is more thorough than daily rinsing. You should do it once a week or every two weeks. This process removes stubborn residue. It keeps your razor in top condition.
Disassembly of the Shaver Head
Start by turning off and unplugging your razor. Open the shaver head. Carefully remove the cutting elements. For rotary razors, you might remove the entire circular cutter assembly. For foil razors, this means detaching the foil and blade cassette. Handle these parts with care. They are delicate. Refer to your user manual if you are unsure. Some small parts might be spring-loaded. Keep track of how they fit together for reassembly.
Brushing Away Debris
Use a small cleaning brush. Most electric razors come with one. If you do not have one, a clean, soft-bristled toothbrush works. Gently brush away all remaining hair clippings. Focus on the inside of the shaver head. Clean the cutting blades and foils. Also clean the internal hair chamber. Be gentle with the foils. They are very thin and can bend easily. For instance, just as you’d use specific tools for cleaning under a refrigerator, use the correct brush for your razor.
Rinsing and Soaking Components
If your razor is fully washable, rinse all disassembled parts under warm running water. You can use a mild hand soap for a more thorough clean. Apply a tiny drop to your fingers. Gently rub it onto the cutting elements. Rinse thoroughly to remove all soap residue. For very stubborn grime, some manufacturers recommend soaking. They might suggest a specialized cleaning solution. Follow these instructions precisely. Do not use harsh chemicals. They can damage the razor.
Drying the Parts
Drying is a critical step. Water left inside can cause corrosion. It can also lead to mold or mildew growth. After rinsing, shake off as much water as possible. Lay all parts on a clean towel. Let them air dry completely. This might take several hours. Some people use a hairdryer on a cool setting. Hold it far enough away to avoid heat damage. Never reassemble your razor when parts are still damp. Patience here prevents long-term problems.
Using Electric Razor Cleaning Solutions and Sprays
Many electric razor brands offer their own cleaning solutions. These solutions provide a deeper clean. They also often lubricate the blades. This helps maintain cutting efficiency.
Manufacturer-Specific Solutions
Brands like Braun and Philips Norelco sell special cleaning cartridges. These cartridges fit into their automatic cleaning stations. These stations wash, dry, and lubricate the razor. They provide the most convenient and thorough cleaning. The solutions typically contain alcohol-based cleaners and lubricants. They are effective at sanitizing and protecting the blades. Always use the solution made for your specific razor model. Using the wrong solution can damage the device.
Isopropyl Alcohol and Lubricating Sprays
You can also use a generic cleaning spray. Many users find isopropyl alcohol effective. It helps disinfect and evaporate quickly. After brushing off hair, you can spray alcohol directly onto the blades. Turn the razor on for a few seconds. This helps distribute the alcohol. The alcohol breaks down oils and sanitizes. Let the alcohol evaporate fully.
After using alcohol or any cleaning solution, always apply a lubricating spray. Electric razor blades need lubrication. This reduces friction and wear. It also keeps them running smoothly. Silicone-based or mineral oil-based sprays work well. Apply a small amount to the blades and foil. Run the razor for a few seconds to spread it. This step is essential for longevity. Proper lubrication keeps blades sharp. It also makes your shaves more comfortable. Just as you might use specific treatments for cleaning glass with vinegar, razor care uses specific cleaning agents.
Maintaining Razor Heads and Blades
The cutting elements of your electric razor wear out over time. They are the most important parts for a good shave. Regular maintenance and timely replacement ensure top performance.
When to Replace Blades and Foils
Razor manufacturers recommend replacing blades and foils periodically. For rotary shavers, this is typically every 12 to 18 months. For foil shavers, it’s often every 12 months. This schedule depends on how often you shave. It also depends on your hair type. If you have thick, coarse hair, you might need to replace them sooner.
Signs that you need new blades include:
- The shave no longer feels as close as before.
- The razor pulls or tugs at your hair.
- You experience more skin irritation after shaving.
- Visible damage to the foil, such as dents or holes.
- The blades look dull or worn.
Replacing these parts ensures you always get a clean, comfortable shave. It also reduces skin irritation. Using dull blades can be very uncomfortable.
Proper Handling of Components
Always handle the blades and foils carefully. They are precise instruments. Drops or impacts can damage them. Avoid touching the cutting edges directly with your fingers. Your skin oils can leave residue. This residue can affect performance. It can also introduce bacteria. When removing or installing, follow your razor’s manual. Ensure proper alignment. This prevents damage during reassembly. Store spare blades in their original packaging. Keep them in a dry place. This protects them until you need them.
Lubrication Best Practices
Lubrication is a key part of maintaining cutting elements. Friction causes wear and heat. Lubrication reduces this. After cleaning, apply a drop or two of special razor oil. Some use light machine oil. Apply it to the cutting surfaces. Run the razor for a few seconds. This distributes the oil evenly. This step protects the blades. It ensures smooth operation. It also extends their life. Do this after every deep clean. Do it once a week for daily users. Regular lubrication keeps your shaver working like new.
Common Mistakes to Avoid When Cleaning
Cleaning an electric razor seems simple. However, some common mistakes can damage your device. They can also reduce its lifespan. Avoiding these errors is important for effective maintenance.
Using Harsh Chemicals or Abrasives
Never use strong cleaning agents. Products like bleach, ammonia, or abrasive cleaners are harmful. They can corrode metal parts. They can also dissolve plastic components. These chemicals can also strip away protective coatings. Always stick to mild soap and water. Use manufacturer-recommended solutions. These solutions are specifically formulated for your razor’s materials. For instance, just as you carefully choose cleaning products for your electric stove top, do the same for your razor.
Not Letting Parts Dry Completely
Reassembling a wet razor is a big mistake. Moisture trapped inside can lead to corrosion. It promotes mold and mildew growth. This causes bad odors. It also damages electronic components. Always ensure all parts are bone dry before putting them back together. Air drying is best. You can leave parts out overnight. This ensures complete evaporation of all moisture.
Over-Tapping or Dropping the Shaver Head
Tapping out hair clippings is part of the daily clean. Do not tap too hard. Excessive force can damage the delicate foil or blades. Dropping the shaver head is even worse. This can bend the foil or misalign the cutters. Always handle the shaver head gently. Place it on a soft surface when disassembled. Treat it as a precision instrument.
Ignoring Manufacturer Instructions
Every electric razor model is different. Your user manual contains specific cleaning guidelines. It tells you which parts are washable. It explains how to disassemble and reassemble. It also lists recommended cleaning solutions. Always read your manual. Following these instructions protects your warranty. It also ensures safe and effective cleaning. Ignoring them can lead to irreversible damage.
Troubleshooting Common Cleaning Issues
Even with proper cleaning, you might encounter issues. Knowing how to troubleshoot these problems helps keep your razor working well. These are simple solutions for common concerns.
Razor Still Smells Bad
A persistent bad odor usually means trapped bacteria or mildew. This happens if parts did not dry completely. It can also occur if old hair and skin cells were not fully removed. First, perform a very thorough deep clean. Disassemble all washable parts. Soak them in warm water with a small amount of mild soap. Rinse them well. Then, let them air dry completely for at least 24 hours. Ensure good air circulation. You can also try using an isopropyl alcohol spray. This helps sanitize and evaporate moisture. For some models, a specialized cleaning cartridge might be needed. This cleans and sanitizes more deeply.
Blades Feel Dull After Cleaning
If your blades feel dull, it might not be a cleaning issue. It is often a sign of natural wear and tear. Blades dull over time with use. This reduces cutting efficiency. Check your razor’s manual for recommended blade replacement intervals. Most manufacturers suggest new blades every 12-18 months. If your blades are old, replacing them will restore sharpness. Also, ensure you are lubricating the blades after cleaning. Lack of lubrication increases friction. This makes blades feel dull and wear out faster. Apply a small amount of razor oil. Run the shaver for a few seconds to spread it.
Razor Not Turning On or Charging After Cleaning
This is a serious problem. It usually means water entered the electrical components. This can happen if your razor is not fully waterproof. It can also happen if parts were not dry. Immediately stop trying to use it. Disassemble the razor if possible. Place all parts in a dry, warm place. Let them air dry for an extended period, perhaps 48 hours or more. You can place them in a bag with desiccant packets (like silica gel) to absorb moisture. Do not use heat. Do not try to charge it while it is wet. If it still does not work after thorough drying, contact the manufacturer. You might need professional repair or replacement. This emphasizes why complete drying is crucial.
When to Consider Professional Cleaning or Replacement
While home cleaning is effective, some situations call for more. You might need professional help or a new razor. Knowing when to make this decision saves you frustration.
Persistent Performance Issues
You have followed all cleaning steps. You have replaced blades and foils. Still, your razor does not perform well. It might pull hair, make strange noises, or simply not cut efficiently. This could mean internal mechanical issues. The motor might be wearing out. There could be damage to the drive shaft. In such cases, a professional might diagnose the problem. Often, the cost of professional repair approaches the cost of a new razor.
Significant Damage or Malfunction
If your razor has been dropped badly, or if it stops working entirely, professional help might be needed. Water damage is another major concern. If your non-waterproof razor got wet, internal components could be corroded. Manufacturers sometimes offer repair services. Check your warranty first. Some issues are not economically repairable. For example, if you faced similar issues with a different device, knowing how to clean your water filter might give insight into device maintenance, but for serious razor damage, professional help is best.
The Cost-Benefit of Repair vs. Replacement
Before paying for repair, compare the cost. How much does a new razor of similar quality cost? If the repair cost is more than 50% of a new razor’s price, consider buying a new one. Newer models often have improved technology. They might offer better performance or features. They might also be more energy efficient. Sometimes, replacing an old razor is simply more practical. It guarantees peak performance. It also gives you the latest innovations. You also get a new warranty.
Eco-Friendly Electric Razor Cleaning Tips
Cleaning your electric razor does not have to harm the environment. You can adopt practices that are both effective and eco-conscious. I try to be mindful of this in my routine.
Reducing Water Waste
Many people let the tap run while rinsing their razor parts. This wastes a lot of water. Instead, fill a small basin or cup with warm water. Dip and rinse your razor parts in this container. Change the water as needed. This significantly reduces water consumption. For waterproof razors, a quick rinse under a running tap is fine. But for deep cleaning, a basin is more efficient. Be conscious of your water use. Small changes add up.
Choosing Environmentally Friendly Cleaning Products
Some cleaning solutions contain harsh chemicals. These can pollute water systems. Look for cleaning products that are biodegradable. Choose those with natural ingredients. Many generic razor cleaning sprays use alcohol, which evaporates cleanly. If you use soap, select a mild, eco-friendly hand soap. Avoid products with strong synthetic fragrances or phosphates. Reading product labels helps you make informed choices. Supporting brands that prioritize environmental safety is helpful.
Proper Disposal of Old Blades and Solutions
Do not throw old blades and foils directly into the trash. They are sharp and can injure waste workers. Wrap them in thick paper or place them in a rigid container. A plastic bottle or an old metal tin works well. Check if your local recycling center accepts small metal items. Some specific programs might exist for personal care product waste. For used cleaning solutions, if they are alcohol-based, they will evaporate. If they are liquid, check local disposal guidelines. Do not pour large amounts of chemical solutions down the drain. This can harm aquatic life. Think about the entire lifecycle of your razor parts. Responsible disposal completes the cleaning cycle.
Frequently Asked Questions
How often should I deep clean my electric razor?
You should deep clean your electric razor at least once a week. If you shave every day, or have thick hair, aim for twice a week. This prevents excessive hair and oil buildup. Regular deep cleaning maintains performance. It also ensures proper hygiene.
Can I use rubbing alcohol to clean my electric razor?
Yes, you can use isopropyl rubbing alcohol. It helps sanitize and evaporates quickly. Apply it to the blades after brushing out hair. Run the razor briefly. Always follow with lubrication once the alcohol dries. Avoid getting alcohol on the plastic body of the razor for too long.
What happens if I don’t clean my electric razor?
Not cleaning your razor leads to problems. Hair and skin buildup dulls blades. This causes pulling and skin irritation. It also creates a breeding ground for bacteria. This can lead to rashes or infections. The razor’s motor and parts will also wear out faster.
How do I dry my electric razor after cleaning?
After cleaning, shake off excess water. Then, place all disassembled parts on a clean towel. Let them air dry completely. This can take several hours, or even overnight. Never reassemble or charge a wet razor. Moisture can damage electronic components and cause corrosion.
Do I need to lubricate my electric razor?
Yes, lubrication is important. It reduces friction between the blades and foils. This prevents wear and tear. It also ensures a smoother, quieter shave. Apply a small amount of special razor oil after deep cleaning. Do this once a week or every few shaves.
Can I wash my electric razor under running water?
It depends on your razor model. Many modern electric razors are “wet/dry” or “waterproof.” They can be rinsed under running water. Always check your user manual first. Never submerge or rinse a “dry-only” razor. This will cause severe damage.
Conclusion
Cleaning your electric razor is a vital step. It ensures a comfortable, hygienic shave every time. We covered why regular cleaning matters for performance and skin health. You learned about different razor types and specific cleaning methods for each. From daily quick rinses to comprehensive deep cleans, you now have the knowledge. You also know how to use specialized cleaning solutions and lubricants. Remembering to avoid common mistakes will protect your investment. Following these simple steps keeps your electric razor in top condition. This extends its life. It also ensures you always get a close, smooth shave. Take care of your razor, and it will take care of you. Make razor cleaning a regular part of your grooming routine starting today.
- electric shaver maintenance
- razor cleaning tips
- grooming hygiene


