· Home Cleaning · 15 min read
How To Clean Essential Oil Bottles
Clean Essential Oil Bottles: A Simple Guide
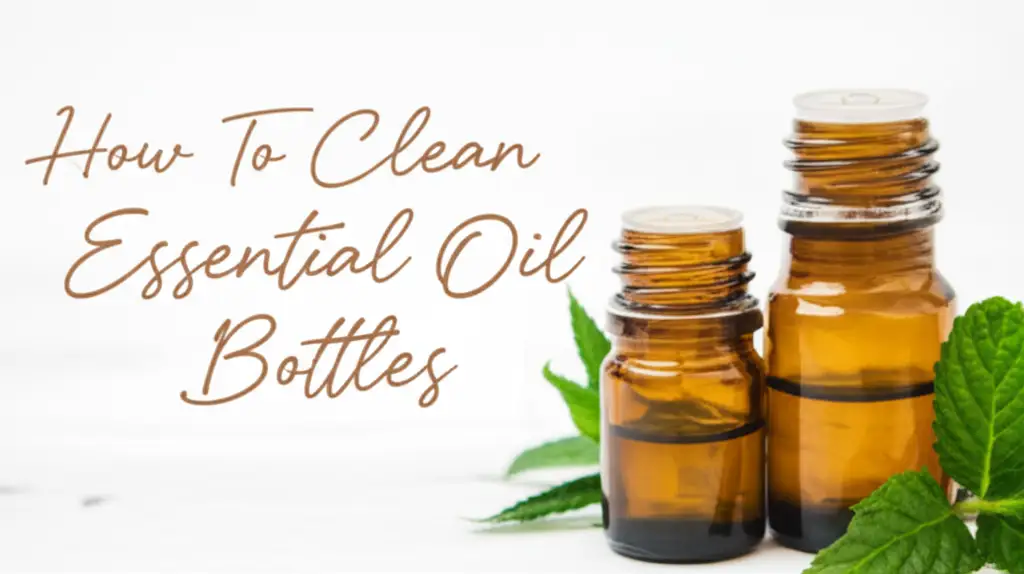
Do you have a collection of empty essential oil bottles piling up? Many people wonder what to do with them. Throwing them away feels wasteful, especially when glass is so reusable. Cleaning these small bottles might seem tricky. Essential oils can leave behind a sticky, strong-smelling residue. But with the right techniques, you can easily clean essential oil bottles. This makes them ready for repurposing or proper recycling.
I remember my first attempt at cleaning essential oil bottles. I just rinsed them with water, and the scent lingered. It taught me that essential oils need special cleaning methods. This guide will show you simple, effective ways to remove oil, labels, and smells. We will cover basic cleaning, deep cleaning for tough residue, and proper drying. By the end, you will know how to make your essential oil bottles sparkle. This helps you reduce waste and gives your old bottles new life.
Takeaway
- Prepare Bottles: Empty bottles fully and remove droppers.
- Basic Clean: Use hot soapy water to wash away light residue.
- Deep Clean: Use rubbing alcohol or vinegar for stubborn oil and scents.
- Remove Labels: Soak bottles in warm water with dish soap.
- Dry Completely: Air dry bottles upside down to avoid water spots.
- Repurpose: Reuse clean bottles for DIY projects or store new oils.
Essential oil bottles often hold onto strong scents and oily residue. To clean them effectively, first empty any remaining oil. Then, soak the bottles in hot, soapy water. Use a bottle brush for scrubbing. For stubborn residue or smells, rinse them with rubbing alcohol or white vinegar. This process removes all traces of oil and scent.
The Importance of Cleaning Your Essential Oil Bottles
Cleaning essential oil bottles is more important than you might think. It helps with several things. First, it prepares bottles for proper recycling. Most recycling centers need clean glass. Second, it allows you to reuse the bottles. This saves money and reduces waste. Many people enjoy repurposing these small, dark glass bottles.
Empty essential oil bottles can hold leftover residue. This residue might be sticky or have a strong smell. If you try to put a new oil in a bottle with old residue, it can mix. This changes the scent and purity of your new oil. For instance, cleaning a bottle that held peppermint oil before adding lavender oil is crucial. You want your new oil to smell and work as intended. Proper cleaning protects the integrity of your essential oils.
Cleaning also improves hygiene. Even though essential oils have antimicrobial properties, old residue can collect dust. It may also attract other particles over time. A truly clean bottle ensures anything you store inside stays pure. It is about being smart with your resources. It is also about keeping things clean in your home. Think of it as preparing a fresh canvas for your next creation.
Essential Tools and Supplies for Bottle Cleaning
You do not need many special items to clean essential oil bottles. Most things you probably already have at home. Having the right tools makes the process much easier. It saves you time and effort. Gathering everything before you start is a good idea. This prevents interruptions during cleaning.
Here is a list of the basic supplies you will need:
- Dish Soap: Any common dish soap works well. It helps break down the oil.
- Hot Water: Hot water helps dissolve oil and residue more effectively than cold water.
- Rubbing Alcohol (Isopropyl Alcohol): This is excellent for dissolving tough oil residue and sanitizing. It also removes strong smells.
- White Vinegar: Another great option for cutting through oil and neutralizing odors. It is a natural cleaner.
- Small Bottle Brushes: These tiny brushes fit inside the narrow necks of essential oil bottles. They help scrub the inside walls. You can often find these designed for baby bottles or straws. For similar bottle cleaning challenges, check out how to clean reusable water bottles or even how to clean straws in water bottles.
- Small Funnel: This helps pour liquids into the small bottle openings without spills.
- Drying Rack: A dish drying rack or a special bottle drying rack works best. You need something that allows air to circulate around and inside the bottles.
- Paper Towels or Lint-Free Cloths: For drying the outside of the bottles.
- Small Basin or Bowl: For soaking the bottles.
You might also want to wear gloves. Essential oils can irritate skin for some people. Cleaning agents like alcohol and vinegar can also dry out your hands. Gloves protect your skin during the cleaning process.
Step-by-Step Basic Cleaning Method
The basic cleaning method works well for bottles with light residue. It is a good first step for most essential oil bottles. This method focuses on hot water and dish soap. It helps loosen and remove the majority of the oil. This prepares the bottles for deeper cleaning if needed.
First, empty any remaining essential oil from the bottle. You can try to get every last drop out. Then, remove the dropper or orifice reducer and the cap. Essential oil bottles often come with these small plastic inserts. Sometimes they are hard to get out. You can use a small knife or a pair of tweezers to carefully pry them out. Be gentle not to break the glass.
Next, rinse the bottles, droppers, and caps under hot running water. This initial rinse helps wash away loose oil. Then, fill a basin or sink with very hot water. Add a generous amount of dish soap. Submerge all the empty bottles, droppers, and caps into the soapy water. Let them soak for at least 15-30 minutes. Soaking helps break down the oil.
After soaking, use a small bottle brush to scrub the inside of each bottle. Make sure to reach all corners. Scrub the droppers and caps too. Pay special attention to the threads on the bottle neck where the cap screws on. Residue often builds up there. Rinse everything thoroughly under hot running water again. Make sure no soap suds remain. You might notice the water running clear now, meaning most oil is gone.
Deep Cleaning for Stubborn Oil and Lingering Scents
Sometimes, basic cleaning is not enough. Certain essential oils, like vetiver or patchouli, are very thick. They can leave a sticky residue that is hard to remove. Other oils, like peppermint or tea tree, have very strong scents. These scents can linger even after washing. This is where deep cleaning comes in. You will use stronger cleaning agents.
Using Rubbing Alcohol for Tough Residue
Rubbing alcohol is a powerful solvent. It dissolves essential oils very well. It also sanitizes the bottles. I always turn to rubbing alcohol for the toughest oil stains. First, make sure your bottles are mostly free of large oil clumps. You can do a basic rinse first.
Pour a small amount of rubbing alcohol into each essential oil bottle. Fill it about one-quarter full. Put the cap back on tightly. Shake the bottle vigorously for at least a minute. The alcohol will slosh around, dissolving the oil. You might see the alcohol turn cloudy. This means it is working. Pour out the alcohol. Repeat this step if the bottle still feels oily or smells strong.
For bottles with very stubborn residue, let the alcohol sit inside for a few hours. Even overnight can work. This gives the alcohol more time to break down the oil. After soaking, scrub the inside with a bottle brush again. Rinse the bottles very well under hot water. The alcohol evaporates quickly, leaving no residue behind. This method is also great for bottles that held very greasy substances, similar to how one might clean up cooking oil spills.
Using White Vinegar for Odor Neutralization
White vinegar is an excellent natural deodorizer. It helps neutralize strong essential oil scents. If your bottles still smell like lavender or eucalyptus after alcohol, try vinegar. Vinegar is also good for breaking down mineral deposits if you have hard water.
Fill each essential oil bottle about one-quarter full with white vinegar. Add some hot water to fill it further, maybe to the halfway mark. Shake the bottle well. Let the vinegar solution sit in the bottles for several hours. For very strong odors, an overnight soak works wonders. The acetic acid in vinegar binds to odor molecules, removing them.
After soaking, pour out the vinegar solution. Rinse the bottles thoroughly with hot water. You might notice a slight vinegar smell at first. This smell usually disappears as the bottle dries. Vinegar is a safe and eco-friendly option. It leaves your bottles smelling fresh and neutral.
Removing Stubborn Essential Oil Labels
Essential oil bottles often have sticky labels. These labels can be tough to remove. You want a clean, label-free bottle for repurposing or recycling. There are several ways to tackle stubborn labels. Patience is key when dealing with adhesive.
One common method involves soaking. First, fill a basin with hot water. Add a few drops of dish soap. Submerge your essential oil bottles completely in this soapy water. Make sure the labels are fully underwater. Let the bottles soak for at least 30 minutes. Some labels will slide right off after this. For really sticky labels, you might need to soak them for a few hours or even overnight. The hot water and soap work to soften the label adhesive.
After soaking, try to peel off the label. If the label comes off but leaves sticky residue, you have a few options. Rubbing alcohol works well on many adhesives. Apply a small amount of alcohol to a paper towel. Rub it over the sticky area. The residue should start to dissolve. For very tough glue, you can use a bit of essential oil, like lemon oil. Lemon oil is a natural degreaser. Apply a drop or two to the residue, let it sit for a minute, then rub it off.
Another effective trick is using a spatula or a dull knife. Gently scrape off any remaining adhesive. Be careful not to scratch the glass. After removing all the labels and glue, wash the bottles again. A quick wash with dish soap and hot water removes any leftover residue or cleaning agents. This makes the bottle perfectly clean and ready for its next step.
Thorough Drying and Proper Storage of Clean Bottles
Drying essential oil bottles completely is crucial. Any moisture left inside can lead to mold or water spots. This defeats the purpose of cleaning them. Proper drying also ensures your bottles are ready for immediate use or storage. You do not want new oils to mix with old water droplets.
After washing and rinsing, shake each bottle vigorously. This helps remove most of the water. Then, place the bottles upside down on a drying rack. A standard dish drying rack works well. However, special bottle drying racks or even a clean cookie sheet with a wire rack on top are better. The goal is to allow maximum airflow into the bottles. You want the water to drip out completely.
Allow the bottles to air dry for at least 24 hours. Small bottles with narrow necks take longer to dry. Humidity levels in your home can also affect drying time. You might see condensation inside the bottles at first. This is normal. It means water is still evaporating. Wait until all condensation disappears. Holding the bottle up to the light helps you see any lingering moisture.
To speed up drying, you can place the drying rack near a fan. Or put it in a warm, dry spot. Avoid using paper towels or cloths to dry the inside. They can leave lint. Once completely dry, store the bottles with their caps on. This keeps dust out. Store them in a clean, dry cabinet. This way, they will be ready for your next DIY project. They are also ready for storing your favorite blends.
Repurposing and Reusing Your Clean Essential Oil Bottles
One of the best reasons to clean essential oil bottles is to reuse them. These small, dark glass bottles are perfect for many DIY projects. Reusing them is an eco-friendly choice. It extends the life of the product. It also saves you money on buying new containers. I find it very satisfying to give these tiny bottles a second life.
Here are some popular ways to repurpose your clean essential oil bottles:
- DIY Essential Oil Blends: This is the most common use. Create your own custom essential oil blends. You can make roller bottle blends for topical application. Or mix diffuser blends to store for later use. This is perfect for custom perfumes or therapeutic mixes.
- Travel-Sized Toiletries: Fill them with small amounts of shampoo, conditioner, or lotion for travel. They are leak-proof and compact.
- Sample Bottles: Share small samples of your favorite essential oils or homemade serums with friends.
- Craft Projects: Use them for miniature vases, tiny potion bottles for kids’ play, or decorative items. Their dark color protects contents from light. This makes them ideal for light-sensitive liquids.
- Homemade Room Sprays or Perfumes: Mix water, witch hazel, and essential oils for a natural room spray. Or create your own signature perfume.
- Seed Storage: Tiny seeds for gardening can be stored in these airtight bottles.
- Storing Beads or Tiny Craft Supplies: Keep small beads, glitter, or other craft items organized.
Before repurposing, always ensure the bottles are sparkling clean and completely dry. This prevents contamination or unwanted scent mixing. Consider labeling your repurposed bottles clearly. This helps you remember what is inside. It is a simple way to practice sustainability at home. You reduce waste and save resources.
When to Discard Essential Oil Bottles
While cleaning and reusing essential oil bottles is great, some bottles should just be discarded. Knowing when to throw a bottle away is important for safety and effectiveness. Not every bottle is a candidate for reuse. Sometimes, the damage is too great. Other times, the risk of contamination is too high.
First, inspect the glass for cracks or chips. Even tiny cracks can weaken the bottle. A cracked bottle might leak. It could also break completely when you pick it up or fill it. This creates a mess and could be dangerous. If you see any signs of damage to the glass, discard the bottle. Safety comes first.
Next, check the cap and dropper. Essential oil components can sometimes degrade plastic or rubber. If the dropper bulb feels sticky, brittle, or has lost its elasticity, replace it. If the cap no longer seals tightly, discard it or replace it. A poor seal allows air in, which can degrade the contents of your new oil. This also means leaks can happen.
Consider bottles that held extremely strong or staining oils. Sometimes, even with deep cleaning, a faint stain or smell remains. If you plan to put a very delicate oil in that bottle, it might not be worth the risk of contamination. For example, a bottle that held Frankincense might always carry a hint of its scent. Reusing it for a light citrus oil might affect the citrus scent. In such cases, if the smell persists after multiple cleanings, it is better to discard the bottle. This ensures purity for future uses. Also, if a bottle contained an essential oil that was expired or went rancid, it might be best to discard it. The lingering bad residue could affect fresh oils.
FAQs About Cleaning Essential Oil Bottles
Can I clean essential oil bottles in the dishwasher?
While some people try, dishwashers are not ideal for cleaning essential oil bottles. The narrow necks prevent water and soap from reaching inside properly. High heat can also degrade leftover oil residue, making it harder to remove. Hand washing with a brush ensures better cleaning. For larger bottles like how to clean 5 gallon water bottles, dishwashers are less effective too.
How do I remove the plastic orifice reducer from an essential oil bottle?
Removing the orifice reducer can be tricky. Use a small, blunt tool like a butter knife or the end of a spoon. Carefully wedge it under one edge of the reducer. Gently pry it upwards. You can also use pliers to grasp and pull. Be careful not to chip the glass.
Is it necessary to sterilize essential oil bottles after cleaning?
For most home uses, a thorough deep clean with rubbing alcohol is enough to sanitize the bottles. If you plan to use the bottles for sensitive applications, like making skincare products, you can sterilize them. Boil them in water for 10 minutes or bake them in a low oven (250°F / 120°C) for 15-20 minutes. Ensure bottles are completely dry before heating.
Can old essential oil bottles be recycled?
Yes, most essential oil bottles are made of glass and are recyclable. However, they must be clean and free of oil residue and labels. Recycling centers do not accept bottles with contents. Follow the cleaning steps in this guide to prepare them for your local recycling program.
What if I cannot get the lingering smell out of an essential oil bottle?
Some essential oils have incredibly strong, lingering scents. If rubbing alcohol and white vinegar washes do not remove the smell completely, try soaking the bottle in warm water with baking soda overnight. Baking soda is a natural odor absorber. For very strong odors, sometimes repeated treatments are needed. If the smell still bothers you, it might be best to repurpose that bottle for a similarly strong-smelling oil or discard it.
Conclusion
Cleaning essential oil bottles is a simple yet rewarding task. It extends the life of valuable glass containers. It also helps reduce waste. We have explored effective methods from basic washing to deep cleaning. You now know how to tackle stubborn residue and lingering scents. You also understand how to remove labels and dry bottles properly.
Remember, a little effort goes a long way. By taking the time to clean essential oil bottles, you open up many possibilities for reuse. You can make new essential oil blends, create travel-sized toiletries, or store tiny craft items. This practice saves money and supports a more sustainable lifestyle. Embrace the joy of repurposing. Start cleaning your empty essential oil bottles today and give them a fresh start.
- essential oil bottle cleaning
- reuse essential oil bottles
- clean oil residue
- aromatherapy
- DIY cleaning

