· Cleaning · 19 min read
How To Clean Fire Extinguisher Residue
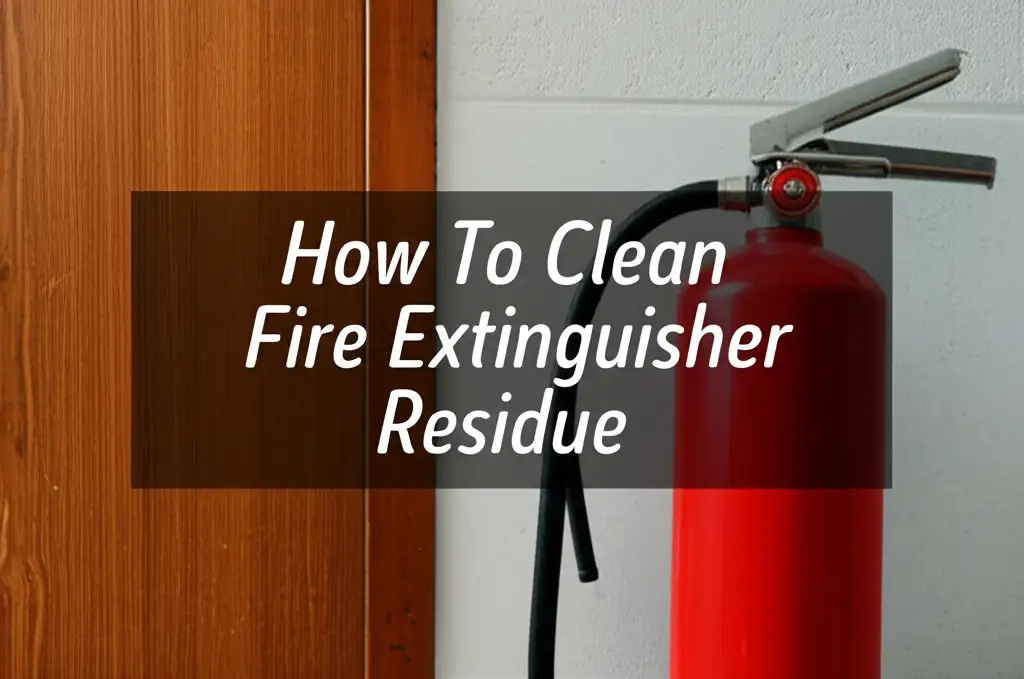
Cleaning Fire Extinguisher Residue: Your Complete Guide
Imagine the relief after putting out a small fire. You saved your home or business. Then you see the mess. A thick, powdery coating covers everything. That is fire extinguisher residue, and it needs careful cleaning.
This powder, often a dry chemical agent like monoammonium phosphate, leaves a highly corrosive and irritating mess. Cleaning it quickly protects your belongings from damage. It also keeps your living or working space safe. I know how overwhelming this can feel. This article will guide you through every step. We will cover safety, preparation, and specific cleaning methods for different surfaces. You will learn how to clean fire extinguisher residue effectively.
Takeaway
- Prioritize Safety: Wear protective gear and ventilate the area.
- Act Quickly: Remove residue fast to prevent corrosion.
- Vacuum First: Use a shop vac or HEPA filter vacuum for dry removal.
- Avoid Water Initially: Water mixes with dry chemical to form acid.
- Use Specific Cleaners: Tailor cleaning solutions to different surfaces.
Fire extinguisher residue removal requires dry vacuuming first. You need a HEPA-filtered vacuum. After removing the bulk, use a mild acidic solution like vinegar and water for remaining powder. Always test cleaning solutions on a small, hidden area before cleaning the main surface.
Understanding Fire Extinguisher Residue
Fire extinguishers save lives. Their discharge creates a significant cleaning challenge. The residue is not simple dust. It is a chemical powder.
Most common fire extinguishers use a dry chemical agent. This agent is often monoammonium phosphate or sodium bicarbonate. These powders stop fires by smothering them and interfering with the chemical reaction. When the powder disperses, it coats everything. This coating can be highly corrosive over time. It irritates skin, eyes, and lungs. You must understand what you are cleaning.
Types of Fire Extinguisher Residue
Different extinguishers leave different residues. Knowing the type helps with cleanup.
- ABC Dry Chemical: This is the most common type. It leaves a yellow, fine powder. Monoammonium phosphate is its active ingredient. This powder turns acidic when it mixes with moisture. It can corrode metal and stain fabrics.
- BC Dry Chemical: This type often uses sodium bicarbonate or potassium bicarbonate. It leaves a white powder. These are less corrosive than ABC dry chemicals. However, they still make a significant mess.
- Carbon Dioxide (CO2): CO2 extinguishers leave no residue. They work by displacing oxygen. There is no powder to clean up.
- Clean Agent (Halotron, FM-200): These also leave little to no residue. They are common in areas with sensitive electronics.
- Water or Foam: These leave water marks or a sudsy residue. They are less common for general home use fires.
I have seen the damage dry chemicals can cause. They stick to surfaces. They get into small cracks. It is important to clean them quickly. The longer the powder stays, the more damage it can do. It can pit metal surfaces. It can bleach fabrics. It can make electronics short circuit. This residue presents a health risk, too. Breathing it in can irritate your respiratory system. Your safety comes first during cleanup.
Safety First: Protecting Yourself and Your Space
Cleaning fire extinguisher residue requires careful preparation. Your safety is most important. The fine powder can irritate your lungs, eyes, and skin. It is crucial to protect yourself before you begin.
Start by gathering the right safety gear. This equipment will create a barrier between you and the chemical powder. Do not skip this step. My experience taught me that proper gear makes cleanup safer and more effective.
Essential Personal Protective Equipment (PPE)
You need specific items to protect yourself. These are non-negotiable for residue cleanup.
- Respirator or N95 Mask: This is vital. The fine powder becomes airborne easily. Breathing it in can cause respiratory issues. A good mask filters out tiny particles.
- Safety Goggles or Glasses: Protect your eyes from irritation. The powder can sting if it gets into your eyes.
- Gloves: Wear chemical-resistant gloves. Nitrile or latex gloves work well. They prevent skin contact with the irritating chemicals.
- Long-Sleeved Clothing and Pants: Cover as much skin as possible. This prevents direct skin exposure. You can also use disposable coveralls.
- Shoe Covers: These keep the powder from tracking through your home. They also protect your shoes.
Preparing the Area for Cleanup
Once you are geared up, prepare the affected space. This minimizes the spread of residue. It also makes the cleaning process more efficient.
- Ventilation: Open windows and doors. Turn on exhaust fans if available. Good airflow helps disperse airborne particles. It also reduces chemical odors.
- Containment: Close off the affected room. Use plastic sheeting or tarps to seal doorways. This prevents residue from spreading to other areas. Cover unaffected furniture. This protects items not directly hit by the spray.
- Turn Off HVAC: Shut down your heating, ventilation, and air conditioning system. This stops the powder from circulating through your home’s ductwork. You do not want residue in your air system.
- Remove Valuables: Take out any highly sensitive items if possible. This includes important documents, fine art, or small electronics. These items might need professional cleaning later.
Taking these steps saves you time and effort. It stops further contamination. It protects your health. Proper preparation sets the stage for a successful cleanup.
Initial Cleanup Steps: Tackling the Bulk
After ensuring safety and preparing the area, it is time to remove the main bulk of the residue. This initial phase is critical. Doing it correctly prevents the powder from becoming a paste. The most important rule here is: do not use water first.
Fire extinguisher dry chemicals are designed to stop fires. They often contain phosphates or bicarbonates. When these mix with water, they can form a corrosive acid or a difficult-to-remove cement-like paste. This can damage surfaces permanently. It also makes cleanup much harder. My advice is always to go dry first.
Vacuuming the Loose Powder
Vacuuming is your best friend for the initial cleanup. It removes the majority of the dry chemical. A regular household vacuum might not be enough.
- Use a HEPA-Filtered Vacuum: This is essential. Dry chemical powder is extremely fine. A standard vacuum filter may not trap it. The powder will simply pass through the filter and re-enter the air. A HEPA filter captures these microscopic particles. A shop vac with a HEPA filter attachment is an excellent choice.
- Use the Right Attachments: Use brush attachments for carpets and upholstery. Crevice tools work well for tight spaces. A wide floor attachment speeds up cleaning large areas.
- Slow, Overlapping Strokes: Move the vacuum slowly. Use overlapping strokes. This ensures thorough removal. Go over affected areas multiple times. Focus on cracks, corners, and under furniture. The powder settles everywhere.
- Empty Frequently: Empty the vacuum canister or bag often. Do this outdoors or in a well-ventilated area. Wear your respirator and gloves while emptying. Dispose of the contents in a sealed bag. This prevents the powder from becoming airborne again.
Sweeping and Brushing for Larger Debris
While vacuuming handles the fine powder, sometimes larger clumps are present. Sweeping and brushing help with these.
- Soft-Bristle Broom: Use a soft-bristle broom for hard floors. Sweep the powder into a dustpan carefully. Avoid vigorous sweeping. This kicks up more dust.
- Stiff Brush for Carpets: For carpets, a stiff, non-abrasive brush can loosen embedded powder. Brush gently to bring the powder to the surface. Then vacuum again.
- Collect and Dispose: Collect the swept powder into sealed bags. Double-bagging is a good idea. This prevents leaks and contamination.
- Do Not Use Compressed Air: Avoid using compressed air to blow away the powder. This only spreads the contamination further. It makes the cleanup area larger.
By following these initial dry steps, you remove the bulk of the hazardous material. This prepares the surfaces for more targeted wet cleaning. It also minimizes potential damage. Moving carefully and systematically makes a big difference.
Cleaning Different Surfaces: Targeted Approaches
After the initial dry vacuuming, you will still have residue embedded in surfaces. Now you can use cleaning solutions. Each surface type needs a specific approach. Using the wrong cleaner can cause more damage.
Remember, the goal is to neutralize and remove the remaining chemical. Test any cleaning solution in an inconspicuous spot first. This checks for discoloration or damage.
Cleaning Carpets and Upholstery
Carpets and fabric furniture absorb the powder. They require careful attention.
- Vacuum Again: After the initial bulk removal, vacuum one more time. Use a powerful suction with a brush attachment. This lifts more hidden particles.
- Make a Cleaning Solution: Mix a solution of one part white vinegar to two parts warm water. Vinegar is mildly acidic. It helps neutralize the alkaline components of dry chemical powder. You can also use a mixture of mild dish soap and water.
- Blotting Method: Apply the solution to a clean cloth. Lightly blot the affected area. Do not rub vigorously. Rubbing can push the powder deeper into the fibers. Work from the outside of the stain inward. This prevents spreading.
- Rinse and Dry: Use a separate clean cloth dampened with plain water to blot the area. This removes any cleaning solution residue. Pat the area dry with a clean towel. Speed up drying with a fan. Ensure the carpet is completely dry to prevent mold.
- Baking Soda for Odors: If odors persist, sprinkle baking soda over the area. Let it sit for several hours or overnight. Then vacuum it up. Baking soda absorbs odors naturally.
Cleaning Hard Surfaces (Floors, Walls, Countertops)
Hard surfaces might seem easier, but the residue can be corrosive. Be gentle and thorough.
- Initial Wipe: After vacuuming, use a dry micro fiber cloth. Wipe down all hard surfaces. This removes any remaining loose dust.
- Vinegar Solution: Mix equal parts white vinegar and warm water in a spray bottle. Spray lightly onto the surface. Wipe immediately with a clean, damp cloth. Vinegar helps break down the chemical film. For stubborn spots, you can apply the solution directly to a cloth. Then wipe the spot.
- Baking Soda Paste for Stains: For persistent marks, make a paste. Mix baking soda with a little water. Apply the paste to the stain. Let it sit for 15-20 minutes. Gently scrub with a soft brush or cloth. Wipe clean with a damp cloth. This can help lift embedded stains.
- Specialized Cleaners: For very stubborn or widespread residue, consider commercial cleaners. Choose products specifically designed for chemical residue or general degreasing. Always follow product instructions carefully. For cleaning general stains off walls, you can find more guidance here: How To Clean Stains Off Walls. If residue has reached your ceiling, information on cleaning ceilings might be helpful: How To Clean A Ceiling.
- Rinse Thoroughly: After cleaning, rinse surfaces with plain water. Use a clean, damp cloth. Dry completely to prevent water spots or new residue buildup.
Cleaning Electronics and Appliances
This is the trickiest category. Fire extinguisher powder can short out circuits. Proceed with extreme caution.
- Professional Help is Best: For valuable or complex electronics, a professional electronics cleaner is the safest option. They have specialized equipment. They know how to safely dismantle and clean delicate components.
- No Liquids: Do not spray liquids directly onto electronics. Water and cleaning solutions can cause irreversible damage.
- Compressed Air (Carefully): Use compressed air from a can. Hold it upright. Use short bursts to blow powder out of vents and crevices. Do this outdoors or in a well-ventilated space. Be careful not to force the powder deeper into components.
- Microfiber Cloths: Lightly wipe exterior surfaces with a dry microfiber cloth. For screens, use a screen-specific cleaner applied to a cloth, not directly to the screen. For general cleaning of delicate surfaces like laptops, you can also refer to tips for cleaning sticker residue off laptops, as it shares similar gentle approaches: How To Clean Sticker Residue Off Laptop.
- Alcohol Wipes: For non-screen surfaces, pre-moistened electronics cleaning wipes or isopropyl alcohol (70% or higher) on a cloth can clean exterior grime. Ensure the device is unplugged and fully off.
Cleaning Metal and Glass Surfaces
Metal and glass can show residue clearly. They also corrode if not cleaned promptly.
- Dry Wipe First: Use a dry microfiber cloth to remove loose powder.
- Vinegar and Water: Mix equal parts white vinegar and water. Spray onto a clean cloth. Wipe down metal and glass surfaces. This mixture cuts through residue effectively.
- Glass Specifics: For glass, polish with a dry, lint-free cloth after wiping. This prevents streaks. You can also get more tips specifically for cleaning glass with vinegar here: How To Clean Glass With Vinegar.
- Metal Polish: For certain metals, a mild metal polish might be needed after initial cleaning. This restores shine and protects the surface.
- Rinse and Dry: Always rinse with plain water using a clean, damp cloth. Dry thoroughly to avoid water spots.
Cleaning Wood Surfaces
Wood needs a gentle approach to prevent damage to its finish.
- Dry Wipe: First, use a dry, soft cloth to wipe away loose powder.
- Mild Wood Cleaner: Use a wood-specific cleaner. Apply it to a cloth. Then wipe the affected wood surface. Avoid harsh chemicals or excessive moisture.
- Damp Cloth: For light residue, a very slightly damp cloth (plain water) can work. Immediately dry the wood with another clean, dry cloth. Do not let water sit on wood.
- Polish: After cleaning, you may want to apply wood polish or wax. This protects the wood and restores its luster.
Taking these specific steps for each material ensures effective cleaning. It also minimizes the risk of damage. Patience and thoroughness are key here.
Dealing with Persistent Stains and Odors
Even after thorough cleaning, some fire extinguisher residue can leave behind stubborn stains or lingering chemical odors. These require additional steps. Do not get discouraged. Persistence pays off.
The challenge comes from the chemical composition of the powder. It can etch surfaces or get deep into porous materials. The smell can permeate fabrics and ventilation systems. I have found that a layered approach works best for these issues.
Tackling Stubborn Stains
Some stains simply do not lift with the first pass. This is especially true for fabrics and unsealed surfaces.
- Repeat Cleaning: The simplest solution is often to repeat the cleaning process. Apply your chosen cleaning solution again. Let it sit a bit longer (5-10 minutes). Then blot or wipe. Sometimes, it takes several applications to break down the residue completely.
- Stronger Solutions (Cautiously): For very tough spots on non-sensitive surfaces, you might need a slightly stronger cleaner.
- For Fabrics/Carpets: Consider a commercial carpet stain remover. Look for products designed for chemical stains. Always patch test in an hidden area first. Follow product directions precisely.
- For Hard Surfaces: A degreaser or an alkaline cleaner can help. Remember that fire extinguisher residue is often acidic once it reacts with moisture. An alkaline cleaner can help neutralize it. Read product labels carefully.
- Baking Soda Paste: Revisited. A thicker paste of baking soda and water can draw out more embedded residue. Leave it on for an hour or more, then gently scrub and wipe. This is a safe, natural option.
- Professional Help: If a stain remains after multiple attempts, it might be permanent damage. Or, it may require professional restoration. Some deep stains on porous materials are beyond DIY removal.
Eliminating Lingering Odors
The chemical smell can be strong and persistent. It can cling to fabrics, walls, and even air ducts.
- Ventilation is Key: Continue ventilating the affected area. Keep windows open for several days if possible. Use fans to circulate fresh air.
- Activated Charcoal: Place bowls of activated charcoal around the room. Activated charcoal is a natural odor absorber. It pulls smells from the air. Change the charcoal every few days.
- Odor Neutralizers: Use commercial odor neutralizers specifically designed for chemical smells. Do not just mask the smell. Look for products that break down odor molecules.
- Baking Soda Sprinkling: For carpets and upholstery, sprinkle liberal amounts of baking soda. Let it sit for 24-48 hours. Then vacuum it up thoroughly. This absorbs trapped odors from the fibers.
- Clean HVAC Ducts: If the fire extinguisher was discharged near a vent, the powder could be in your HVAC system. This will spread the odor throughout your home. Professional duct cleaning is highly recommended in this case.
- Wash All Fabrics: Launder all affected fabrics that can be washed. This includes curtains, bedding, and clothes. Use your regular detergent. Add a cup of white vinegar to the wash cycle for extra odor removal.
- Air Out Furniture: If possible, move affected furniture outdoors on a dry day. Let it air out in the sun for several hours. Sunlight can help break down odors.
Addressing stains and odors takes patience. It often requires more than one attempt. Be thorough with each step. Do not rush the process. A clean and fresh-smelling space is the ultimate reward.
Post-Cleanup Assessment and Prevention
You have worked hard to clean up the residue. Now, it is time to assess the situation. This final step ensures the area is safe and fully restored. It also includes thinking about future preparedness.
A thorough assessment helps identify any missed spots or lingering issues. Prevention focuses on avoiding such a mess again. I believe a complete job means looking ahead.
Assessing the Cleaned Area
Walk through the entire affected space. Look closely at every surface.
- Visual Inspection: Are there any visible traces of powder? Check corners, crevices, and underneath items. Look for any discoloration or remaining film. Use a flashlight to highlight fine dust particles.
- Tactile Check: Run your hand over surfaces. Does it feel clean? Is there any gritty residue? A sticky or slippery feel indicates remaining chemical.
- Odor Check: Is the chemical smell gone? Spend some time in the room. Does the odor return after a few hours? Lingering smells mean particles are still present. They might be deep in fabrics or within the HVAC system.
- Damage Assessment: Inspect for any corrosion, etching, or fading. Fire extinguisher chemicals can be harsh. Document any permanent damage. This helps with insurance claims if needed.
Considering Professional Help
Sometimes, despite your best efforts, professional help is the best solution.
- Extensive Contamination: If a large area was affected, or if the powder entered walls or ventilation systems, DIY cleaning might not be enough. Professionals have specialized equipment. They use industrial-strength cleaners.
- Sensitive Electronics: As mentioned before, electronics often require expert cleaning. Attempting to clean them yourself can cause irreparable damage.
- Persistent Odors or Stains: If smells or stains remain, a professional cleaning company can tackle them. They have techniques like ozone treatment for odors. They also have advanced stain removal methods.
- Health Concerns: If anyone in your household experienced respiratory irritation during the incident or cleanup, consult a professional. They ensure complete removal of hazardous particles.
- Insurance Claims: Many insurance policies cover fire extinguisher discharge cleanup. A professional cleaning service can provide documentation for your claim.
Prevention and Preparedness
A fire extinguisher discharge is usually an emergency. But you can take steps to be ready.
- Know Your Extinguishers: Understand the different types of extinguishers. Know which one to use for specific fire classes. This minimizes unnecessary discharge. CO2 or clean agent extinguishers cause less mess. Use them in areas with sensitive equipment.
- Proper Placement: Place extinguishers in easily accessible locations. Ensure they are mounted correctly. Keep them away from high-traffic areas where they might be accidentally knocked.
- Regular Maintenance: Check your fire extinguishers regularly. Ensure they are charged and in good working order. Replace or recharge them after any use.
- Educate Occupants: Teach everyone in your home or business how to use an extinguisher properly. Explain when to use it and when to evacuate. This prevents misfires or partial discharges.
- Emergency Plan: Have a clear emergency plan. Know evacuation routes. Know who to call for help. This reduces panic during an incident.
- First Aid Kit: Keep a well-stocked first aid kit nearby. It is helpful for minor irritations during cleanup.
A complete cleanup ensures your space is safe and clean again. Being prepared reduces the stress and impact of future incidents. Your effort today leads to a safer tomorrow.
FAQ Section
Is fire extinguisher residue dangerous to breathe?
Yes, fire extinguisher residue can be harmful to breathe. It often contains fine chemical particles. These particles can irritate your respiratory system. They can cause coughing, shortness of breath, or asthma attacks. Always wear a respirator or N95 mask during cleanup.
Can I use water to clean fire extinguisher powder?
No, do not use water as your first step. Fire extinguisher dry chemical powder often reacts with water. It can form a corrosive acid or a hard-to-remove paste. This makes the mess worse. Always vacuum up as much dry powder as possible first.
How do I clean fire extinguisher residue off electronics?
Cleaning electronics needs extreme care. First, unplug the device. Use compressed air in short bursts to blow powder out of crevices. Wipe exteriors gently with a dry microfiber cloth. For sensitive electronics, professional cleaning is the safest choice to avoid damage.
Will fire extinguisher residue permanently damage my carpet?
Fire extinguisher residue can stain carpets if not cleaned promptly. The chemical can also be corrosive. It can damage fibers over time. Prompt dry vacuuming and then using a mild vinegar solution can help prevent permanent damage. Professional carpet cleaning might be needed for deep stains.
How long does it take to clean up fire extinguisher residue?
Cleanup time varies depending on the affected area size and type of surfaces. A small, contained mess might take a few hours. A large discharge covering multiple rooms and electronics can take days. It might even require professional help. Be patient and thorough.
When should I call a professional for cleanup?
You should call a professional if the residue covers a large area. This includes walls, ceilings, or ventilation systems. Professional help is also wise for expensive electronics. If you experience persistent odors or cannot remove stains, professionals have specialized tools and expertise.
Conclusion
Cleaning fire extinguisher residue is a challenging task, but it is entirely manageable with the right approach. We have covered every step, from understanding the nature of the residue to protecting yourself during cleanup. Remember the crucial initial dry vacuuming. It prevents the powder from forming a corrosive paste. Then, carefully select the right cleaning methods for different surfaces like carpets, electronics, or hard floors.
Your diligence protects your property from long-term damage. It also restores the safety and comfort of your space. Do not let the initial mess overwhelm you. Take it one step at a time, prioritizing safety and thoroughness. Knowing how to clean fire extinguisher residue effectively is a valuable skill. It ensures quick recovery from an emergency. You can handle this. For any cleaning needs or further tips, BeACleaner.com is here to help you achieve a spotless and safe environment. We provide solutions for many cleaning challenges.
- fire extinguisher
- residue cleanup
- dry chemical
- emergency cleaning
- safety cleanup