· Automotive Maintenance · 14 min read
How To Clean Fuel Pressure Regulator
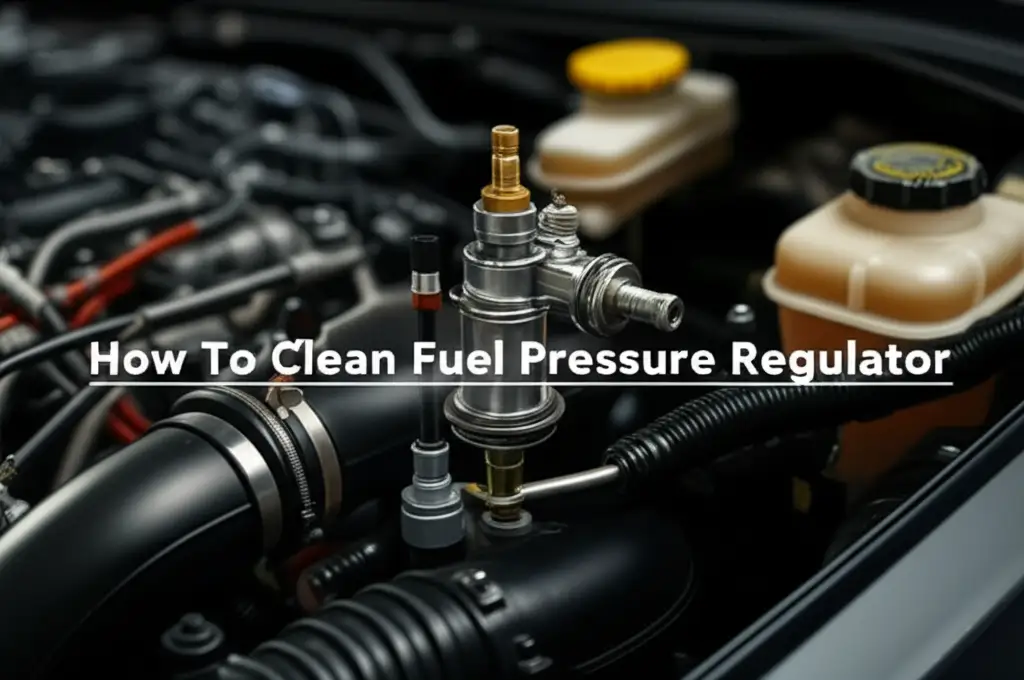
Revitalize Your Engine: How to Clean Your Fuel Pressure Regulator
Your car’s engine runs on a delicate balance of air and fuel. When something disrupts this balance, your vehicle’s performance can suffer. One often-overlooked component crucial to this balance is the fuel pressure regulator. It controls the amount of fuel delivered to your engine, ensuring optimal combustion.
A dirty or failing fuel pressure regulator causes many problems. You might notice poor fuel economy, rough idling, or even engine misfires. Taking care of this small part makes a big difference in how your car runs. I will guide you through the process of how to clean fuel pressure regulator.
This article covers everything you need to know. We will discuss its function, signs of a dirty regulator, and the tools you need. I will provide a step-by-step cleaning guide. We will also look at post-cleaning checks and when replacement is a better option.
Takeaway
- Identify Symptoms Early: Watch for rough idling, poor acceleration, or reduced fuel economy.
- Gather Proper Tools: Collect a fuel pressure gauge, wrenches, and appropriate cleaning solvents.
- Prioritize Safety: Disconnect the battery and relieve fuel system pressure before starting work.
- Clean Meticulously: Use carburetor cleaner and compressed air to remove deposits from the regulator.
- Test Performance: Reinstall the regulator and check fuel pressure and engine operation afterward.
Cleaning a fuel pressure regulator involves safely removing it from the fuel rail, inspecting it for visible debris, and then using a specialized solvent like carburetor cleaner and compressed air to clear internal passages of carbon deposits and varnish buildup, ensuring proper fuel pressure regulation.
Understanding Your Fuel Pressure Regulator
The fuel pressure regulator is a small but vital part of your car’s fuel injection system. Its main job is to maintain consistent fuel pressure in the fuel rail. This ensures that your engine gets the right amount of fuel at all times. Fuel injectors need a stable pressure to spray fuel correctly.
Without proper regulation, the engine could run too rich or too lean. Running rich means too much fuel, causing poor economy and emissions. Running lean means too little fuel, which can damage engine components over time. The regulator uses a diaphragm and spring to adjust fuel flow. It sends excess fuel back to the fuel tank. This constant circulation helps keep the fuel cool and prevents vapor lock.
The regulator typically sits on the fuel rail, close to the injectors. It connects to a vacuum line from the engine intake manifold. This vacuum line helps the regulator adjust pressure based on engine load. When engine vacuum is high (idle), fuel pressure decreases. When vacuum is low (acceleration), fuel pressure increases. This dynamic adjustment is key for efficient engine operation.
Recognizing Symptoms of a Clogged Fuel Pressure Regulator
A clogged or faulty fuel pressure regulator sends the wrong signals to your engine. This causes a range of noticeable performance issues. Spotting these symptoms early saves you from bigger problems. Pay attention to how your car drives daily.
One common symptom is rough idling. Your engine might shake or vibrate more than usual when stopped. This happens because the fuel pressure is inconsistent, making the engine struggle to maintain a steady speed. Another sign is poor acceleration or a general lack of power. You might feel your car hesitates or struggles to speed up, especially when you press the gas pedal hard.
Reduced fuel efficiency is also a major indicator. If you find yourself filling up your tank more often, a dirty regulator could be the cause. An improperly functioning regulator can cause too much fuel to be sent to the engine. This wastes fuel and harms your wallet. Strong fuel odors from the exhaust or black smoke are also signs of a rich fuel mixture. This suggests the regulator is allowing too much fuel to pass through.
Engine misfires or a check engine light can also point to a problem. The engine’s computer detects fuel system irregularities and triggers these warnings. Sometimes, the car might even stall, especially after starting. If you experience these issues, investigating your fuel pressure regulator is a good next step.
Tools and Materials for Fuel Pressure Regulator Cleaning
Before you begin the cleaning process, gather all the necessary tools and materials. Having everything ready saves time and ensures a smooth job. Working with fuel components requires specific items for safety and effectiveness.
Here is a list of what you will likely need:
- Safety Glasses and Gloves: Always protect your eyes and skin from fuel and chemicals.
- Wrench Set or Socket Set: For disconnecting fuel lines and mounting bolts.
- Flathead Screwdriver: For prying clips or vacuum lines.
- Fuel Pressure Gauge: Essential for testing pressure before and after cleaning.
- Carburetor Cleaner or Throttle Body Cleaner: A powerful solvent to dissolve carbon and varnish.
- Compressed Air Can or Air Compressor with Nozzle: For blowing out debris from internal passages.
- Shop Rags or Old Towels: For wiping up spilled fuel and cleaning parts.
- Drain Pan or Container: To catch any spilled fuel when disconnecting lines.
- New O-rings or Gaskets (Optional but Recommended): If your regulator uses them, replace them upon reinstallation.
- Fire Extinguisher: A safety precaution when working with fuel.
Make sure your cleaning solvent is safe for automotive plastic and rubber parts. Most carburetor or throttle body cleaners are suitable. Do not use brake cleaner, as it can be too harsh for some components. A good quality fuel pressure gauge is critical for diagnosis and verification. Without it, you cannot accurately assess the regulator’s performance.
Having a well-lit work area is also important. This allows you to see small components and ensure proper connections. Being prepared makes the task much easier and safer.
Safety First: Essential Precautions Before Cleaning
Working with fuel systems presents unique hazards. Safety must be your top priority. Taking simple precautions prevents accidents and protects you and your vehicle. Never skip these steps.
First, always work in a well-ventilated area. Fuel vapors are flammable and harmful if inhaled. Avoid enclosed spaces like a garage without open doors. Keep a fire extinguisher close by. This is a non-negotiable safety measure when dealing with gasoline. I always have one within arm’s reach when doing any fuel-related work.
Next, disconnect your car’s battery. Remove the negative terminal first. This prevents accidental electrical shorts and ensures the fuel pump does not activate. Wait a few minutes after disconnecting the battery. This allows the car’s electrical system to fully discharge.
Relieving fuel system pressure is also critical. Your fuel lines are pressurized, even after turning off the engine. Consult your car’s service manual for the exact procedure. It often involves finding a fuel pump fuse or relay and cranking the engine for a few seconds. Some vehicles have a schrader valve on the fuel rail, similar to a tire valve, that you can press to release pressure. Place a rag over the valve to catch any fuel spray. Always wear safety glasses and gloves when doing this. Fuel can spray out with force.
Allow the engine to cool down completely. Hot engine components can ignite spilled fuel. Ensure no open flames, sparks, or smoking near your work area. Always clean up any spilled fuel immediately. Use absorbent rags and dispose of them properly. These precautions keep you safe and prevent damage to your vehicle.
Step-by-Step Guide: How to Clean Your Fuel Pressure Regulator
Cleaning your fuel pressure regulator involves careful disassembly and thorough cleaning. Follow these steps methodically to ensure a successful job. I will guide you through each stage.
1. Locate and Access the Regulator
The fuel pressure regulator is usually on the fuel rail, near the fuel injectors. It may be small and somewhat hidden. Consult your vehicle’s service manual for its exact location. You might need to remove some plastic engine covers or air intake components to gain access. Take photos as you disassemble to help with reassembly. This helps ensure every hose and wire goes back in its correct place.
2. Disconnect the Regulator
Before disconnecting, place shop rags and a drain pan under the regulator. This catches any fuel that spills out. First, carefully disconnect the vacuum line from the top or side of the regulator. It might be a small rubber hose. Next, disconnect the fuel lines. These are usually secured with clamps or quick-disconnect fittings. Be gentle to avoid damaging the lines or fittings. Use the appropriate wrenches or tools for the fittings. Expect some fuel to dribble out, even after relieving pressure.
Finally, unbolt the regulator from the fuel rail. It is often held by one or two bolts. Once all connections and bolts are free, gently pull the regulator off the fuel rail. It may be slightly stuck due to O-rings. Be careful not to lose any small parts, like seals or spacers.
3. Inspect and Pre-Clean
Once the regulator is off, visually inspect it. Look for any visible dirt, debris, or corrosion on the exterior. Check the inlet and outlet ports. These are where fuel flows in and out. Also, inspect the vacuum port. Wipe off any loose grime with a clean rag. Examine the O-rings or gaskets that seal the regulator to the fuel rail. If they look cracked, flattened, or damaged, plan to replace them. Using new seals prevents fuel leaks after reinstallation.
4. Deep Cleaning the Regulator
Now comes the actual cleaning. Take your carburetor cleaner or throttle body cleaner. Spray generous amounts into all ports of the regulator: the fuel inlet, the fuel outlet, and the vacuum port. You want to flush out any internal carbon deposits, varnish, or gum. Let the cleaner sit for a few minutes to dissolve the gunk. You can gently shake the regulator to help the cleaner move inside.
After letting it soak, use compressed air to blow out all the ports. Direct the air into one port and watch as debris and cleaner spray out of the others. Repeat this process several times until no more dirt or dark liquid comes out. You want the air to flow freely through the regulator. Ensure no cleaner remains inside. It must be completely dry before reinstallation. This step is similar to cleaning other fuel components, like when you clean fuel injectors with Seafoam.
5. Reassembly and Reinstallation
Before reinstalling, put new O-rings or gaskets on the regulator if you decided to replace them. A light coat of clean engine oil or petroleum jelly on new O-rings helps them slide into place without pinching. Carefully position the regulator back onto the fuel rail. Secure it with its mounting bolts. Tighten them to the manufacturer’s specified torque, if known. Do not overtighten, as this can strip threads or crack components.
Reconnect the fuel lines. Ensure they are seated correctly and their clamps or quick-disconnects are secure. A loose fuel line will cause a dangerous leak. Finally, reattach the vacuum line. Double-check all connections to make sure they are snug and proper. Just as you would ensure proper connections after you clean fuel lines that are gummed up, ensure this system is sealed correctly.
6. Post-Cleaning Checks and Testing
Once everything is reassembled, it is time to check your work. Reconnect your car’s battery, positive terminal first. Before starting the engine, turn the ignition key to the “ON” position for a few seconds, then turn it off. Repeat this two or three times. This primes the fuel system, building pressure in the lines. Listen for the fuel pump hum. This ensures fuel is flowing back through the system.
While priming, carefully check for any fuel leaks around the regulator and fuel lines. Look and smell for gasoline. If you see or smell leaks, turn off the ignition immediately and fix the connections. Once confident there are no leaks, start the engine. Let it idle for a few minutes. Listen for smooth operation and check for any warning lights.
Finally, connect your fuel pressure gauge to the schrader valve on the fuel rail. Test the fuel pressure according to your car’s specifications. Compare the readings to your car’s service manual. The pressure should be stable and within the specified range. Take readings at idle and with the vacuum line disconnected from the regulator (to simulate full engine load). If the pressure is now stable and correct, your cleaning was successful. If not, the regulator may be faulty and need replacement. This is also a good time to check other fuel system components, like learning how to clean fuel filter without removing it to ensure overall fuel system health.
When to Replace Your Fuel Pressure Regulator Instead of Clean
While cleaning a fuel pressure regulator can often fix performance issues, it is not always the solution. There are times when replacement is the only viable option. Knowing when to replace saves you time, effort, and potential frustration.
One clear sign is if the regulator is physically damaged. Look for cracks in the housing or obvious deformities. A bent or punctured diaphragm inside means the part cannot hold pressure. You cannot repair internal mechanical failures with cleaning. If the vacuum port is broken or corroded, it will not allow proper pressure regulation.
If you have thoroughly cleaned the regulator and tested the fuel pressure, but it remains inconsistent or outside specifications, replacement is necessary. This means the internal components are worn out or stuck. The springs or diaphragm may have lost their integrity. Cleaning only removes deposits; it does not repair mechanical wear.
Sometimes, a regulator is simply too clogged for effective cleaning. If persistent carbon buildup or varnish is deeply embedded in the tiny passages, solvent and compressed air might not clear it. This is more common in older vehicles with neglected fuel system maintenance. In such cases, trying to clean it further might be futile. Similarly, if your fuel injectors are not easily cleaned without removing them, they might also need replacement.
Consider the age and mileage of your vehicle. Fuel pressure regulators, like other car parts, have a lifespan. If your car has high mileage, replacing the regulator as part of preventative maintenance might be wise. This avoids unexpected breakdowns. A new regulator ensures reliable fuel pressure and optimal engine performance for miles to come.
Frequently Asked Questions About Cleaning Fuel Pressure Regulators
Can a fuel pressure regulator be cleaned?
Yes, a fuel pressure regulator can often be cleaned. Removing carbon deposits, varnish, and debris from its internal passages helps restore proper function. Use a strong automotive cleaner like carburetor cleaner and compressed air. This process often resolves issues like inconsistent fuel pressure caused by buildup.
What are the symptoms of a bad fuel pressure regulator?
Symptoms of a bad fuel pressure regulator include rough idling, poor acceleration, and decreased fuel efficiency. You might also notice engine misfires, a strong fuel smell, or black smoke from the exhaust. In some cases, the engine may stall, especially after starting, or the check engine light might illuminate.
How do I test my fuel pressure regulator?
You test a fuel pressure regulator using a fuel pressure gauge connected to the fuel rail. Start the engine and observe the pressure at idle; it should be within your vehicle’s specified range. Then, disconnect the vacuum line from the regulator and check the pressure again; it should increase. Inconsistent or incorrect readings indicate a faulty regulator.
What causes a fuel pressure regulator to go bad?
A fuel pressure regulator often goes bad due to internal contamination from fuel system debris, varnish, and carbon deposits. These buildups restrict fuel flow and prevent the diaphragm from operating correctly. General wear and tear, age, and exposure to varying fuel quality can also degrade its internal components over time.
How often should I clean my fuel pressure regulator?
There is no set schedule for cleaning a fuel pressure regulator. You should clean it when you notice symptoms of malfunction, such as rough idling or poor fuel efficiency. Regular fuel system maintenance, like using fuel system cleaners in your tank, can help prevent buildup and extend the life of the regulator.
Conclusion
Taking the time to understand and maintain your car’s fuel system is a rewarding effort. Knowing how to clean fuel pressure regulator empowers you to tackle common engine issues. We have covered the critical role of this small part. We discussed recognizing problems and preparing for the job.
I walked you through the step-by-step cleaning process. You now have the knowledge to perform this task safely and effectively. Remember, regular maintenance extends the life of your vehicle. It keeps your engine running smoothly. A clean fuel pressure regulator ensures optimal fuel delivery. This translates to better engine performance and improved fuel efficiency.
Do not let a dirty fuel pressure regulator hold your car back. With the right tools and a little patience, you can restore this component. You can get your vehicle back to its peak performance. Keep an eye on your car’s symptoms. Take action when needed. This proactive approach saves you money and headaches down the road. Embrace the satisfaction of DIY car care and enjoy a smoother ride.
- fuel pressure regulator cleaning
- engine performance
- fuel system maintenance