· Home Care · 20 min read
How To Clean Furniture Hardware
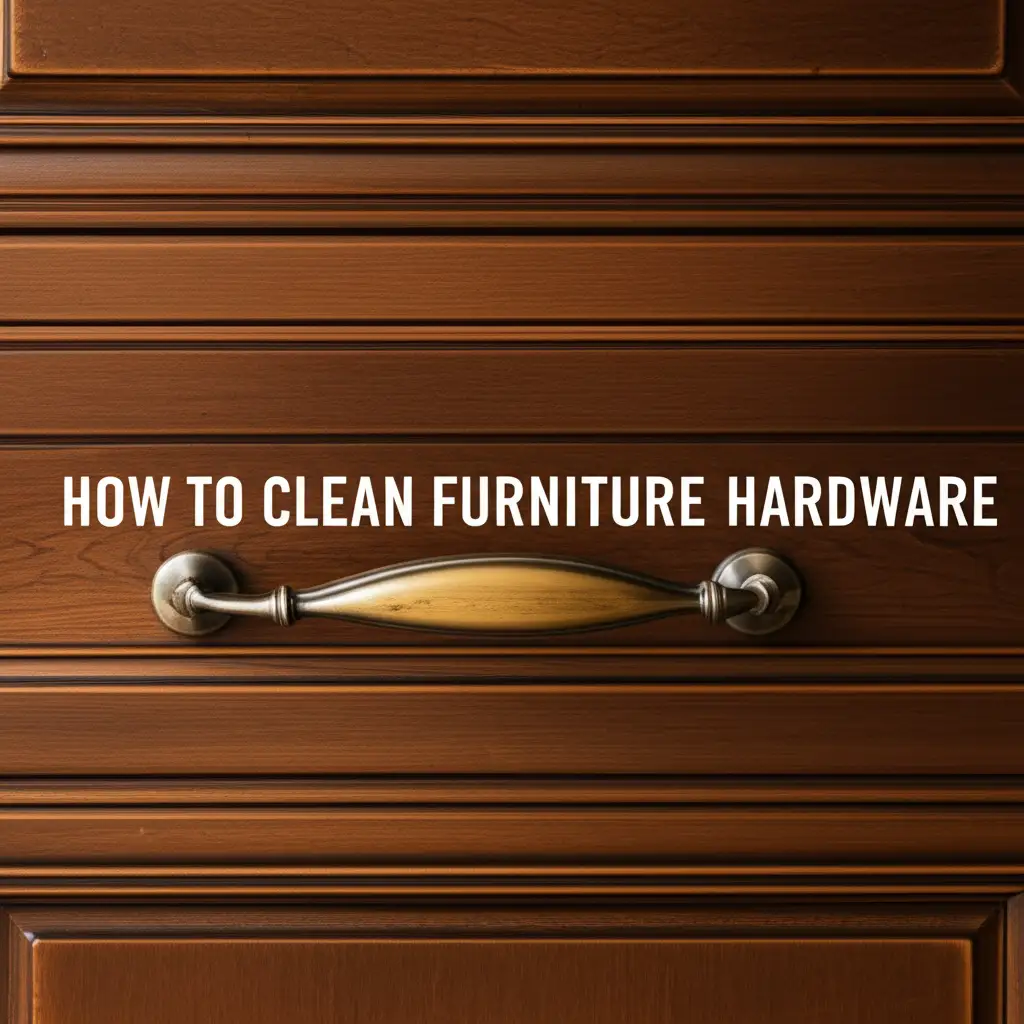
Bring Back the Shine: How To Clean Furniture Hardware Effectively
Have you ever looked at your furniture and noticed the handles, knobs, or hinges look dull? Over time, dirt, grime, and tarnish build up on these small but important pieces. Knowing how to clean furniture hardware makes a big difference. It can transform the look of an old dresser or a beloved cabinet. I find joy in restoring these small details. This article helps you understand the right way to clean furniture hardware. We will discuss various materials and common problems you might face.
Takeaway
- Identify your hardware’s material before cleaning.
- Always test cleaning solutions on a hidden spot.
- Use gentle methods first to avoid damage.
- Remove hardware for the best and safest cleaning.
- Protect your furniture during the cleaning process.
Clear, Concise Answer
To effectively clean furniture hardware, first identify its material (brass, steel, iron). Then, choose a suitable gentle cleaning agent like mild soap and water for general dirt, or specialized cleaners for tarnish or rust. Always test a small, hidden area first to avoid damage.
Understanding Your Hardware: The First Step in Cleaning Furniture Hardware
Before you start scrubbing, you must know what your furniture hardware is made of. Different materials react differently to cleaning products. Using the wrong solution can cause damage, dullness, or even permanent discoloration. I always check the material first to ensure a safe and effective clean. This step saves a lot of trouble later on.
Most furniture hardware consists of metal. Common materials include brass, bronze, copper, steel, iron, and sometimes plated metals. Plated items have a thin layer of one metal over another, such as nickel-plated brass. If you scratch the plating, the base metal shows through. This ruins the finish. Antique pieces often feature unique alloys or finishes that need special care. Knowing the material guides your cleaning method.
You can often identify the material by its look and weight. Brass has a golden shine, while bronze is darker and more reddish-brown. Copper is a distinct reddish-orange. Steel is silver and magnetic. Iron is dark, heavy, and often rustic. If you are unsure, a small magnet can help. Steel and iron are magnetic. Brass, bronze, and copper are not. This simple test gives me a good starting point.
Sometimes, hardware might have a protective lacquer coating. This coating prevents tarnish but can chip or wear off. If the lacquer is intact, you only need gentle cleaning. If it is chipped, you might need to remove all the lacquer before polishing. This allows for a uniform finish. I always look closely at the hardware’s surface condition.
Essential Tools and Supplies for Cleaning Furniture Hardware
Having the right tools makes any cleaning job easier and more effective. Cleaning furniture hardware requires specific items to protect both the hardware and the furniture itself. I keep these supplies ready for every project. They ensure a smooth process and good results.
Here is a list of what you will need:
- Screwdrivers: Various sizes for removing screws.
- Gloves: Protect your hands from cleaners.
- Soft cloths: Microfiber cloths are ideal for cleaning and polishing.
- Soft brushes: An old toothbrush or small brush helps clean crevices.
- Mild dish soap: A gentle, all-purpose cleaner.
- Warm water: For diluting soap and rinsing.
- White vinegar: Useful for some metal cleaning and mild tarnish. You can learn more about how to clean wood furniture with vinegar to keep your surrounding furniture safe during this process.
- Baking soda: A gentle abrasive for polishing.
- Metal polish: Specific polish for brass, copper, or silver.
- Rust remover: For iron or steel hardware with rust.
- Protective mat or towel: To protect your work surface.
- Small containers: For soaking hardware or keeping screws organized.
Safety gear is important. Always wear gloves to protect your skin from cleaning solutions. If you use stronger chemicals, consider eye protection. Good ventilation is also a must. I open windows or work in a well-aired space. This prevents inhaling fumes.
Proper organization helps prevent lost pieces. When I remove hardware, I place all screws and small parts into a labeled container. This prevents them from rolling away or getting mixed up. A magnetic dish works great for holding screws securely. These small habits make a big difference in the cleaning process.
Remember, preparation is key. Gathering your tools beforehand saves time and frustration. It allows you to focus on the cleaning task at hand. This also reduces the risk of damaging anything while you search for a tool.
Step-by-Step Guide to Removing and Preparing Hardware for Cleaning
Removing furniture hardware before cleaning is usually the best approach. It allows you to clean all surfaces thoroughly without damaging the furniture’s finish. It also prevents water or cleaning solutions from seeping into the wood, which can cause swelling or stains. I always take the time to remove hardware when possible. This extra step leads to a superior clean.
Follow these steps for safe removal:
- Protect Your Furniture: Place a soft cloth or pad under the hardware you plan to remove. This catches any dropped screws or tools. It also protects the furniture surface from scratches. I always put down a towel first.
- Use the Right Screwdriver: Choose a screwdriver that fits the screw head perfectly. A mismatched screwdriver can strip the screw head, making removal difficult or impossible. Apply steady pressure as you turn.
- Loosen Screws Carefully: Turn screws counter-clockwise to loosen them. Some old screws might be stuck. Apply a small amount of penetrating oil or rust remover if they are stubborn. Let it sit for a few minutes before trying again. Be gentle to avoid stripping the screws or damaging the wood.
- Organize Hardware and Screws: As you remove each piece of hardware, immediately place its screws into a small, labeled container or bag. If you are cleaning multiple pieces of hardware from different locations on the furniture, label each container clearly. For example, “Top Drawer Pulls” or “Cabinet Door Hinges.” This ensures you put the right hardware back in the right place.
- Assess Hardware Condition: Once removed, inspect each piece of hardware closely. Look for any loose parts, deep scratches, or significant corrosion. This assessment helps you decide on the best cleaning method. It also tells you if any repairs are needed.
- Brush Off Loose Debris: Before wet cleaning, use a dry brush or old toothbrush to remove any loose dust, dirt, or spiderwebs. This makes the wet cleaning step more effective. It also prevents scratching the surface during washing.
This methodical approach ensures that your hardware is removed safely. It also helps you keep everything organized. This prevents headaches when it is time to put the furniture back together. For tips on preparing the furniture itself, see how to clean furniture before painting.
Cleaning Different Types of Metal Furniture Hardware
Cleaning furniture hardware means tailoring your approach to the specific metal. Each material has unique properties. A method perfect for brass might harm steel. I always confirm the metal type before selecting a cleaner. This prevents accidental damage and ensures the best shine.
Cleaning Brass, Bronze, and Copper Hardware
These metals often develop a patina or tarnish over time. Some people like the aged look of a patina. If you prefer a shiny finish, you can remove it.
- Gentle Cleaning: For light dirt, mix a few drops of mild dish soap with warm water. Dip a soft cloth into the solution. Gently wipe down the hardware. Rinse with clean water and dry thoroughly with a clean, soft cloth.
- Removing Tarnish (Natural Method): Create a paste using equal parts white vinegar and baking soda. For antique brass, this can be especially effective. You can get more specific tips by checking out how to clean antique brass hardware. Apply the paste to the hardware. Let it sit for 10-15 minutes. Use a soft brush or cloth to gently scrub away the tarnish. Rinse well and dry immediately. Lemon juice and salt also work similarly.
- Commercial Polish: For stubborn tarnish, use a commercial brass or copper polish. Follow the product instructions carefully. Apply with a soft cloth, polish, and then buff to a shine. Always test on a small, hidden area first.
Cleaning Steel and Chrome Hardware
Steel and chrome are generally easier to clean. They resist tarnish better than brass. Their main enemies are fingerprints, water spots, and rust.
- General Cleaning: Use a mixture of warm water and a few drops of mild dish soap. Wipe the hardware with a soft cloth. Dry immediately to prevent water spots. A dry microfiber cloth buffs out any remaining streaks.
- Stubborn Stains/Fingerprints: A cloth dampened with white vinegar can remove fingerprints and water spots effectively. Wipe, then buff dry. You can also use a glass cleaner for chrome, but spray it onto a cloth first, not directly onto the hardware.
- Rust (for Steel): Light rust on steel can often be removed with a crumpled piece of aluminum foil dipped in water. Rub the foil over the rusted area gently. The aluminum is softer than the steel and helps lift the rust. For heavier rust, a rust-specific cleaner or a fine steel wool (used very gently and sparingly) might be needed. Always test in an inconspicuous area.
Cleaning Iron Hardware
Iron hardware often has a rustic, dark finish. Its main issue is rust.
- Removing Rust: For surface rust, use a wire brush or fine steel wool. Be gentle, as you can scratch the finish. A mixture of equal parts white vinegar and water can also help loosen rust. Soak the iron hardware for several hours or overnight. Then scrub with a stiff brush. For severe rust, consider a commercial rust remover designed for iron. After cleaning, dry iron hardware immediately and completely.
- Protecting Iron: Once cleaned, iron hardware benefits from a protective coating. A light coat of mineral oil or wax helps prevent future rust. This is crucial, as iron rusts easily.
Remember to dry all hardware thoroughly after cleaning. Any leftover moisture encourages new tarnish or rust. This final step is as important as the cleaning itself.
Advanced Techniques for Restoring Damaged Furniture Hardware
Sometimes, cleaning alone is not enough. Furniture hardware can suffer from deep scratches, heavy rust, or missing parts. Restoring these pieces takes a bit more effort. However, the results can be very rewarding. I enjoy bringing old hardware back to life. It adds character to any piece of furniture.
Removing Stubborn Rust and Corrosion
Heavy rust on steel or iron hardware requires a stronger approach. Simple cleaning methods will not work.
- Electrolysis: This is an effective method for removing rust from iron and steel. It involves using an electric current to convert rust back into iron. You need a battery charger, a plastic container, some washing soda (sodium carbonate), and a piece of sacrificial steel. This method requires caution and proper setup. It thoroughly cleans rust without scrubbing.
- Oxalic Acid: For severe rust, oxalic acid can be used. It is available as a powder. Mix it with water to create a solution. Soak the rusty hardware in the solution for several hours. Always wear gloves and eye protection when handling oxalic acid. Rinse thoroughly afterward. This chemical solution strips rust effectively.
- Mechanical Removal: For very thick rust, a Dremel tool with a wire brush attachment or a bench grinder can remove it. Use extreme caution to avoid damaging the hardware or yourself. This is a last resort method for very robust pieces.
Polishing and Buffing for a High Shine
Once cleaned, you might want to achieve a high polish. This brings out the true beauty of brass, copper, or plated metals.
- Hand Polishing: Use a quality metal polish specific to your hardware type. Apply a small amount to a soft cloth. Rub the hardware in small, circular motions. Use a clean part of the cloth to buff the hardware to a shine. Repeat until you reach the desired luster.
- Rotary Tool with Buffing Wheels: For a faster, more uniform shine, a rotary tool (like a Dremel) with various buffing wheels can be used. Apply a small amount of polishing compound to the wheel. Gently buff the hardware. Use different wheels for initial polishing and final buffing. Be careful not to overheat the metal.
- Lacquering: If your brass or copper hardware tarnishes quickly, consider applying a clear lacquer. This creates a protective barrier. Clean and polish the hardware perfectly first. Then apply a thin, even coat of spray lacquer designed for metal. This prevents future tarnish but means you cannot polish the metal directly until the lacquer wears off.
Dealing with Pitted or Damaged Surfaces
Pitting occurs when corrosion eats away at the metal surface. Deep scratches also mar the appearance.
- Filling Pits: For minor pitting on solid metals like brass, you might carefully use a very fine-grit sandpaper (e.g., 2000-grit) or steel wool to smooth the surface. Then polish heavily. For deeper pitting, professional restoration might be needed. Sometimes, the damage is too severe to fix perfectly at home.
- Re-plating: If the original plating is gone or severely damaged, re-plating is an option. This is usually done by a professional. It involves stripping the old finish and applying a new layer of metal (e.g., nickel, chrome). This brings the hardware back to its original condition. For antique or valuable pieces, this can be a worthwhile investment. You can consider similar approaches for old door hardware that has seen significant wear.
Restoring hardware requires patience and the right techniques. It can give your furniture a renewed life.
Protecting Your Cleaned Furniture Hardware
After spending time and effort cleaning your furniture hardware, you want that shine to last. Protecting the hardware from future tarnish, rust, and dirt is just as important as the cleaning itself. I always take steps to seal and maintain the hardware. This keeps it looking good for longer periods.
Here are ways to protect your cleaned furniture hardware:
- Apply a Protective Wax: For most metal hardware, a clear wax provides an excellent barrier. Carnauba wax or a good quality furniture wax works well. Apply a thin coat with a soft cloth. Let it dry for a few minutes, then buff gently to a soft sheen. This wax layer repels moisture and fingerprints. It also makes future cleaning easier.
- Use Mineral Oil for Iron: Iron hardware, prone to rust, benefits greatly from a light coat of mineral oil. After cleaning and thoroughly drying the iron, wipe it down with a cloth lightly dampened with mineral oil. This creates a barrier against moisture. Reapply every few months.
- Consider Lacquer or Clear Coat: For brass and copper that you want to keep shiny indefinitely, a clear lacquer spray designed for metals is an option. Make sure the hardware is perfectly clean and polished before applying. Apply several thin, even coats in a well-ventilated area. This forms a hard, clear barrier that prevents tarnish. However, remember that once lacquered, you cannot polish the metal directly unless the lacquer is removed.
- Regular Dusting and Wiping: Simple, regular maintenance goes a long way. Dust your furniture hardware with a soft, dry cloth. This removes surface dirt and prevents build-up. Wipe away fingerprints or smudges as soon as you see them. This prevents them from setting into the finish.
- Control Environmental Factors: High humidity speeds up tarnishing and rust. If your furniture is in a very humid environment, consider using a dehumidifier. Keep furniture away from direct sunlight and extreme temperature changes, which can also affect finishes.
- Handle with Care: When using furniture, try to grasp the hardware by the body rather than touching the polished surfaces. The oils from your hands can accelerate tarnish, especially on brass and copper. This small habit makes a big difference in maintaining the finish.
- Store Spare Hardware Properly: If you remove hardware for storage, clean it first. Then, wrap it in acid-free tissue paper or soft cloth. Store it in an airtight container or zip-top bag. This protects it from air exposure, which causes tarnish and oxidation.
By implementing these protective measures, you extend the life and beauty of your furniture hardware. It ensures your cleaning efforts pay off for a long time. These steps are easy to integrate into your regular home maintenance routine.
Common Mistakes to Avoid When Cleaning Furniture Hardware
Cleaning furniture hardware seems simple. However, many common mistakes can lead to damage. Avoiding these pitfalls ensures your hardware remains beautiful and intact. I have learned these lessons through experience. Now, I always warn others about them.
Here are crucial mistakes to avoid:
- Using Abrasive Cleaners or Tools: Never use steel wool, abrasive scrubbers, or harsh scouring powders on any hardware, especially plated or polished pieces. These will scratch the surface, remove plating, and destroy the finish. Always opt for soft cloths and brushes.
- Not Identifying the Metal First: This is the most critical mistake. Using an acidic cleaner on iron or a strong ammonia-based cleaner on brass can cause irreversible damage. Always identify the material before choosing a cleaning method.
- Soaking Hardware with Non-Removable Parts: Some hardware has delicate inserts, springs, or even small wood pieces. Soaking these can cause swelling, rust in hidden areas, or damage to delicate mechanisms. Clean such hardware by wiping.
- Leaving Hardware Wet: Any moisture left on metal hardware can lead to water spots, tarnish, or rust. This is especially true for iron and steel. Always dry hardware immediately and thoroughly after cleaning. Use a soft, clean cloth.
- Using Too Much Product: More cleaner does not mean better results. Excessive amounts can leave residue or even harm the finish. Use cleaning solutions sparingly. Apply a small amount to a cloth, not directly to the hardware.
- Mixing Cleaning Chemicals: Never combine different cleaning chemicals. This can create dangerous fumes or ineffective solutions. Stick to one cleaner at a time.
- Ignoring Lacquer Coatings: If hardware has an intact lacquer coating, harsh cleaners or polishes will damage it. You only need mild soap and water for lacquered pieces. If the lacquer is peeling, remove it completely before polishing.
- Not Protecting the Furniture: Cleaning hardware while it is still attached to furniture risks spills, drips, or scratches. Always remove hardware when possible. If you must clean it in place, protect the surrounding furniture with plastic sheeting or towels. This also applies when you’re doing other furniture-related tasks like how to clean mold off of wood furniture, where protecting the hardware is equally important.
- Over-Polishing Antique Pieces: For antique hardware, some collectors prefer a natural patina. Over-polishing can reduce its antique value. Decide if you want a shiny look or a preserved aged appearance. If unsure, start with a gentle clean and avoid harsh polishes.
By avoiding these common mistakes, you can clean your furniture hardware safely and effectively. This preserves its beauty and extends its lifespan.
Maintaining Your Furniture Hardware for Long-Term Beauty
Cleaning furniture hardware is a periodic task. However, regular maintenance keeps your hardware in top condition between deep cleans. Consistent care prevents heavy build-up and damage. This saves time and effort in the long run. I incorporate these small habits into my routine. They make a big difference.
Here are key tips for long-term maintenance:
- Regular Dusting: Dust settles on everything, including hardware. Use a soft, dry microfiber cloth to dust your furniture hardware weekly. This simple action removes loose dirt and prevents it from adhering to the surface. It stops grime from building up.
- Prompt Spot Cleaning: If you notice a fingerprint, a water spot, or a minor smudge, wipe it away immediately. A slightly damp cloth followed by a dry buffing cloth works wonders. Addressing spots quickly prevents them from becoming harder to remove later.
- Avoid Harsh Chemicals on Furniture: When cleaning the furniture itself, be mindful of the hardware. Many furniture polishes or cleaners contain chemicals that can harm metal finishes. If cleaning the wood around hardware, use appropriate products like those discussed in how to clean outdoor wood furniture, and wipe down the hardware immediately if it gets any residue on it.
- Check for Looseness: Over time, screws holding hardware can loosen. Periodically check handles, knobs, and hinges. Gently tighten any loose screws. This prevents hardware from wobbling or falling off. It also reduces wear on the hardware and the furniture.
- Lubricate Moving Parts: For hinges or sliding mechanisms, a small amount of non-staining lubricant can ensure smooth operation. Use a silicone-based spray or a tiny drop of mineral oil. Wipe away any excess to prevent attracting dust. This extends the life of moving hardware parts.
- Assess Environmental Conditions: Extreme humidity or dryness can affect hardware. High humidity encourages tarnish and rust. Very dry conditions might cause wood to shrink, loosening hardware. Try to maintain consistent room temperature and humidity levels.
- Protect from Scratches: If you move furniture, be careful not to drag or bump the hardware against walls or other objects. Small bumps can cause scratches or dents. Use furniture movers or lift furniture when relocating it.
- Educate Family Members: If others use the furniture, share basic care tips. Explain why touching polished brass with oily hands can cause tarnish. Simple awareness helps in collective maintenance.
By following these maintenance tips, your furniture hardware will stay cleaner and look better for longer. This routine care protects your investment and preserves the beauty of your furniture pieces. It is about consistent, gentle attention.
When to Seek Professional Help for Furniture Hardware
While many furniture hardware cleaning tasks are DIY-friendly, some situations call for professional help. Attempting to fix severe damage or clean delicate antique pieces yourself can cause irreversible harm. Knowing when to call an expert saves your valuable hardware. I have learned to recognize my limits. It protects the integrity of the piece.
Here are scenarios where professional intervention is wise:
- Valuable Antiques: If your hardware is genuinely antique, rare, or has significant monetary or sentimental value, a professional restorer is the best choice. They understand historical finishes and preservation techniques. They can clean and restore without reducing the piece’s value. They know how to treat things like truly old door hardware or very specific antique brass pieces.
- Severe Corrosion or Pitting: When hardware has deep rust, extensive pitting, or signs of metal loss, it may need specialized treatment. Professionals have access to tools and methods like controlled electrolysis or specific chemical baths that are not safe or practical for home use. They can often restore integrity to severely corroded pieces.
- Missing or Broken Components: If a part of your hardware is missing or broken (e.g., a snapped keyhole cover, a missing handle screw), a professional can often fabricate a replacement. They can match the material, style, and finish of the original piece. This ensures a seamless repair.
- Plating Damage: When the original plating (e.g., nickel over brass) is significantly worn, flaking, or missing in large areas, replating is usually the solution. This is a specialized process involving electroplating. A professional replating service can restore the hardware to its original plated appearance.
- Delicate or Complex Mechanisms: Some hardware, like intricate locks, clock mechanisms, or sliding components, are very complex. Disassembling them for cleaning can be difficult. Reassembling them without proper knowledge can lead to permanent malfunction. A professional locksmith or restorer can clean and repair these delicate parts.
- Unidentifiable Material: If you cannot determine the type of metal your hardware is made from, it is safer to consult an expert. They can identify the material and recommend the safest cleaning approach. This prevents using a damaging solution.
- Preservation of Patina: For some antique hardware, the natural patina is highly valued. If you want to clean the hardware without removing this patina, a professional conservator can do it safely. They can stabilize the surface without stripping its historical character.
Remember, a professional assessment can often clarify the best course of action. It is better to seek advice than to risk damaging a cherished piece of furniture hardware through amateur attempts. They have the expertise and tools to handle challenges beyond typical DIY cleaning.
FAQ Section
Q1: How often should I clean my furniture hardware? A1: General dusting should be weekly. A deeper clean depends on use and environmental factors. For frequently touched hardware or those in humid areas, a thorough cleaning every 6-12 months is good. Less-used pieces might only need cleaning every few years. Pay attention to visible dirt or tarnish.
Q2: Can I use household items like toothpaste to clean hardware? A2: While toothpaste can sometimes polish certain metals like brass, it often contains mild abrasives. It can scratch delicate finishes or plated hardware. Stick to methods specifically recommended for hardware cleaning, such as mild soap and water, or dedicated metal polishes to avoid damage.
**Q3: Is it okay to clean hardware while
- hardware cleaning
- furniture restoration
- antique hardware