· Gaming Maintenance · 18 min read
How To Clean Gamecube Disc
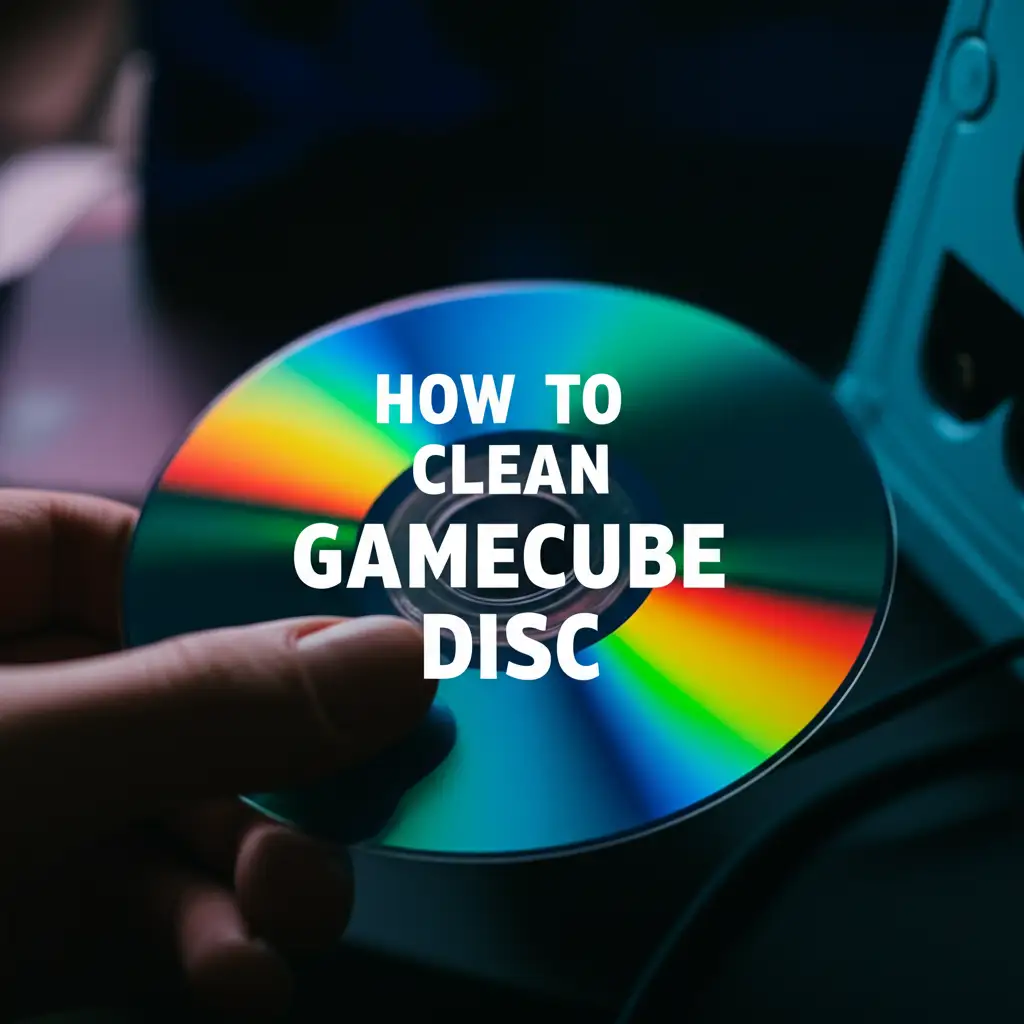
How To Clean Gamecube Disc: Restore Your Games
Remember the thrill of popping in your favorite GameCube game? Maybe it was a fierce Mario Kart Double Dash race or an epic adventure in The Legend of Zelda: The Wind Waker. Over time, those treasured GameCube discs can collect dust, dirt, and even minor scratches. When your beloved console starts struggling to read a game, a dirty disc is often the reason. Knowing how to clean GameCube disc surfaces correctly saves your games and keeps the retro fun alive.
This guide helps you understand why discs fail and provides simple, effective steps to bring them back to life. We will cover the best tools to use and mistakes to avoid. I will share my trusted methods for basic cleaning and even tackling minor scratches. Get ready to give your GameCube games the care they deserve and enjoy seamless gameplay once again.
Takeaway: Restore Your GameCube Discs Easily
- Use a soft microfiber cloth and distilled water for gentle cleaning.
- Wipe from the center outwards in a straight line.
- Avoid harsh chemicals or abrasive materials that can cause damage.
- For minor scratches, specialized repair kits offer a solution.
How do you clean a GameCube disc?
You clean a GameCube disc by gently wiping the data side with a soft, lint-free microfiber cloth moistened with distilled water. Always wipe in a straight line from the disc’s center towards its outer edge. This method removes dust, fingerprints, and smudges without causing further damage to the disc surface.
Understanding GameCube Discs and Their Vulnerabilities
GameCube discs are unique; they are smaller than standard DVDs but use similar optical technology. These mini-DVDs hold game data that the GameCube console reads with a laser. The bottom, shiny side of the disc is where all the vital information sits. This surface is also very sensitive to damage. Dust, dirt, fingerprints, and scratches on this side can block the laser from reading the data correctly.
When a GameCube disc does not read, it often means the laser cannot see the data. This can cause games to freeze, load slowly, or not start at all. Over time, discs naturally collect grime from handling or improper storage. Even microscopic dust particles can disrupt the laser’s path. Therefore, understanding the disc’s delicate nature is the first step in successful cleaning and preservation. A clean disc surface ensures the GameCube console works as intended.
The Difference Between Dirt and Scratches
It is important to know the difference between dirt and scratches. Dirt is a foreign substance resting on the disc surface. This includes dust, fingerprints, smudges, or sticky residues. Dirt can be removed with careful cleaning. Scratches are actual physical grooves or cuts in the disc’s protective layer.
Minor scratches might not affect gameplay much, but deep scratches can permanently damage the data. You can often see scratches as thin lines, while dirt appears as smudges or patches. Our cleaning methods primarily address dirt and superficial smudges. Addressing scratches requires different techniques, which we will discuss later. Always try cleaning before assuming a disc is scratched beyond repair.
Essential Tools for Cleaning GameCube Discs
Cleaning your GameCube discs requires the right tools to avoid damage. Using household items not designed for disc cleaning can cause more harm than good. I always recommend having a few specific items on hand before you start. These tools ensure a safe and effective cleaning process. They are easy to find and are not expensive.
The most important tool is a high-quality microfiber cloth. This cloth is soft, lint-free, and designed to pick up dust and oils without scratching delicate surfaces. Do not use paper towels, tissues, or rough cloths. These materials can leave tiny scratches or fibers behind. You also need a cleaning solution; distilled water is usually the best and safest option. It contains no minerals or impurities that could leave residue. Sometimes, a gentle, diluted isopropyl alcohol solution is helpful for stubborn grime.
Recommended Cleaning Materials
- Microfiber Cloth: Get several clean, soft cloths. Ensure they are specifically for electronics or optical lenses.
- Distilled Water: This is your primary cleaning solution. It is pure and leaves no residue.
- Isopropyl Alcohol (90% or higher): Use this sparingly for tough grime. Dilute it with distilled water (50/50 mixture).
- Cotton Swabs: These are good for cleaning disc edges or hard-to-reach spots, but use them gently.
- Soft Brush (optional): A soft, anti-static brush can remove loose dust before wiping.
Using these tools properly protects your GameCube disc. You prevent introducing new damage while removing existing contaminants. Always start with the least abrasive method first. This approach minimizes any risk to your cherished games. Remember, patience and gentle movements are key to success.
Step-by-Step Guide: Cleaning Dirty GameCube Discs
Cleaning a dirty GameCube disc is a straightforward process. Follow these steps carefully to ensure you do not cause any new damage. I always start with the simplest method first. This approach is usually enough for most dust and fingerprint issues. The goal is to remove grime without affecting the disc’s data layer.
Basic Cleaning Method
- Inspect the Disc: Hold the disc up to a light source. Look for dust, fingerprints, smudges, or any visible dirt on the shiny side. Note the areas that need attention.
- Remove Loose Debris: Gently blow on the disc surface to remove loose dust particles. You can also use a soft, anti-static brush if you have one. Do not wipe yet, as this could drag particles and cause scratches.
- Dampen the Cloth: Lightly dampen a clean microfiber cloth with distilled water. Do not soak the cloth; it should be just moist, not dripping. Too much water can get into the disc’s center hole or label side.
- Wipe the Disc: Hold the disc by its edges, avoiding touching the data surface. Place the damp microfiber cloth on the disc. Wipe from the center hole straight outwards to the edge. Use light to medium pressure. Do not wipe in circles; circular motions can create patterns of scratches that affect readability.
- Dry the Disc: Use a second, dry microfiber cloth to gently wipe the disc dry using the same center-to-edge motion. Ensure the disc is completely dry before placing it back in its case or console. Any moisture left behind can attract more dust or even cause mold over time.
- Re-Test the Disc: Insert the cleaned disc into your GameCube and test if it plays correctly. If the issue persists, you might need to repeat the process or consider other methods for stubborn marks or scratches.
This basic cleaning method is effective for most common disc issues. It is gentle enough for regular maintenance. I find that most discs simply need a good, careful wipe.
Tackling Stubborn Stains
For more stubborn marks, like sticky residue or dried-on spills, you might need a slightly stronger solution. I use a diluted isopropyl alcohol mixture for these situations. Remember to test any new cleaning method on a less valuable disc first if you are unsure. This precaution helps prevent accidental damage.
- Prepare Solution: Mix 50% distilled water with 50% isopropyl alcohol (90% or higher concentration). Put this mixture into a small spray bottle or dampen a cotton swab with it.
- Apply Sparingly: If using a spray bottle, lightly mist the stained area on the disc. If using a cotton swab, dampen the swab and apply it directly to the stain. Do not oversaturate the disc.
- Gentle Scrub: With a clean microfiber cloth or the dampened cotton swab, gently rub the stubborn stain in a straight line, from the center outwards. Use minimal pressure.
- Rinse (Optional): If you used alcohol, a quick, light wipe with a new, distilled water-dampened microfiber cloth can help remove any alcohol residue. This step is not always necessary but can be a good precaution.
- Dry Thoroughly: Use a dry microfiber cloth to completely dry the disc, wiping from the center to the edge. Ensure no moisture remains.
Remember, alcohol can be harsh if used too often or in high concentrations. Use it only when necessary and always dilute it. This ensures you clean the disc without damaging its delicate surface. You can also apply similar principles when you need to clean a DVD disc or even a Blu-ray disc, as the core mechanics of optical media are quite similar.
Addressing Minor Scratches on GameCube Discs
Sometimes, a GameCube disc has more than just dirt; it has scratches. Minor scratches can often be buffed out or filled, allowing the laser to read the disc again. However, this process is more delicate than simple cleaning. It involves resurfacing the disc’s protective layer. I always approach this with caution and realistic expectations. Deep scratches that cut into the data layer are usually beyond home repair.
For minor surface scratches, various products and methods aim to smooth out the plastic. These methods work by gently abrading the disc’s surface or filling the tiny grooves. The goal is to create a more uniform surface. This allows the GameCube’s laser to pass over the area without being deflected. It requires patience and precision to avoid making the damage worse. Always remember that these are last-resort efforts before considering a disc replacement.
Using Disc Repair Kits
Specialized disc repair kits are available. These kits usually contain an abrasive compound and a buffing tool or cloth. They are designed for optical discs. These kits work by removing a thin layer of plastic from the disc surface around the scratch. This smooths out the area. You can find these kits online or at electronics stores.
- Read Instructions: Every kit has specific instructions. Read them carefully before you start.
- Apply Compound: Apply a tiny amount of the abrasive compound to the scratched area.
- Buff Gently: Use the kit’s applicator or a soft cloth to gently rub the compound into the scratch. Work in straight lines from the center outwards. Do not press too hard.
- Wipe Clean: After buffing, wipe away the compound with a clean microfiber cloth. Ensure no residue remains.
- Inspect and Test: Check the disc under light. If the scratch appears less prominent, test the disc in your GameCube. You might need to repeat the process a few times for best results.
For more detailed information on handling disc imperfections, you can learn how to clean disc scratches. This resource provides broader techniques applicable to various types of optical media, including your GameCube games.
Household Alternatives for Minor Scratches (Use with Extreme Caution)
Some people try household products like toothpaste or car wax for scratches. I advise extreme caution with these methods. They are not designed for delicate disc surfaces. These methods can often cause more harm than good. They work by either very gently abrading the surface or filling tiny gaps.
- Toothpaste (Non-Gel, Non-Abrasive): Use a tiny dab of plain white toothpaste (not gel, no whitening particles). Rub it gently on the scratch with a cotton swab or microfiber cloth, moving from the center outwards. The mild abrasive in toothpaste can buff out superficial marks. Rinse thoroughly with distilled water and dry completely.
- Car Wax/Polish: Some car waxes or polishes can fill very fine scratches. Apply a tiny amount with a soft cloth. Buff it in gently, then wipe off any excess. This creates a smoother surface for the laser.
I cannot stress enough: these household methods carry risks. They might contain chemicals or abrasives that are too harsh. They could also leave residue that makes the disc unreadable. Use them as a last resort only. If a disc is very valuable, professional resurfacing is a safer option. Always prioritize disc repair kits designed specifically for optical media.
Common Mistakes to Avoid When Cleaning GameCube Discs
Cleaning GameCube discs seems simple, but many common mistakes can actually harm your games. Avoiding these pitfalls is crucial for success. I have seen many discs damaged by improper cleaning methods. My goal is to help you avoid these mistakes and keep your games safe. A little knowledge goes a long way in disc care.
One major mistake is using the wrong wiping motion. Many people instinctively wipe discs in circles. This is harmful because it creates circular scratch patterns. A laser reads data in a spiral path from the center outwards. Circular scratches can consistently disrupt the laser’s path. Wiping in straight lines from the center to the edge is vital. This way, if you create any new marks, they run parallel to the laser’s reading path, making them less disruptive.
Harmful Cleaning Agents and Materials
- Harsh Chemicals: Never use window cleaner, kitchen cleaners, or strong solvents like nail polish remover. These chemicals can dissolve or damage the disc’s protective layer. They often contain ammonia or other compounds that are too aggressive for plastic. Stick to distilled water or very diluted isopropyl alcohol.
- Abrasive Materials: Avoid paper towels, tissues, rough cloths, or even your shirt. These materials feel soft to us but are abrasive to a disc’s surface. They can leave micro-scratches that hinder readability. Always use a clean, soft microfiber cloth specifically designed for electronics or optical lenses.
- Dirty Cloths: Using a dirty or linty cloth defeats the purpose of cleaning. It can re-deposit grime or introduce new scratches. Always ensure your microfiber cloths are clean and free of debris before use. Wash them regularly without fabric softener, which can leave residue.
Incorrect Handling and Storage
- Touching the Data Surface: Always hold the disc by its edges or by inserting your finger into the center hole. Touching the shiny data side leaves fingerprints and oils. These substances can attract dust and make the disc difficult to read.
- Improper Drying: Leaving a disc wet can lead to water spots or even mold growth. Always ensure the disc is completely dry before returning it to its case or the console. Air drying is an option, but a clean, dry microfiber cloth is faster and safer.
- Storing Discs Loosely: Never leave discs lying around unprotected. Dust and dirt accumulate quickly. Always store your GameCube discs in their original cases or in dedicated disc binders. This protects them from physical damage and environmental contaminants. Avoid stacking discs without protection, as this can cause scratching.
By being mindful of these common mistakes, you dramatically increase the chances of successfully cleaning your GameCube discs without causing further damage. Proper care ensures your games remain playable for many years.
Preventative Measures: Keeping Your GameCube Discs Clean
Prevention is always better than cure, especially when it comes to delicate GameCube discs. Taking proactive steps to protect your discs saves you time and effort later. It also extends the life of your games. My goal is to keep my discs in pristine condition so I rarely need to clean them. This involves proper handling and storage habits.
One simple yet highly effective preventative measure is consistent proper handling. Always pick up and hold your GameCube discs by their edges. Never touch the shiny data side. Our fingers carry oils and dirt that transfer easily to the disc surface. These fingerprints then attract more dust and smudges, leading to read errors. Developing this habit ensures the disc surface stays clean from the start.
Proper Storage Techniques
- Original Cases: The best place for a GameCube disc is its original case. These cases are designed to hold the disc securely without putting pressure on the data surface. They protect against dust, scratches, and light exposure. Always return a disc to its case immediately after playing.
- Disc Binders/Sleeves: If you no longer have the original cases, use high-quality disc binders or individual soft sleeves. Choose sleeves that are non-abrasive and anti-static. Avoid cheap paper sleeves, which can scratch discs over time. Ensure the sleeves protect both sides of the disc.
- Controlled Environment: Store your disc collection in a cool, dry place. Avoid direct sunlight, extreme temperatures, or high humidity. Heat can warp discs, and humidity can encourage mold growth. A stable environment helps preserve the plastic and data integrity.
- Organize Your Collection: A well-organized collection means less handling and searching. When discs are easy to find, you spend less time fumbling through them. This reduces the risk of accidental drops or scratches.
Regular Maintenance and Inspection
- Gentle Dusting: Even with proper storage, dust can settle. Occasionally, use a soft, dry microfiber cloth to gently wipe down the outside of disc cases. This prevents dust from accumulating and entering the cases.
- Pre-Play Check: Before inserting a disc into your GameCube, quickly inspect its surface. Look for any visible dust or smudges. A quick, gentle wipe with a dry microfiber cloth before playing can prevent issues. This proactive step helps maintain a clean disc reader as well. If your console’s disc reader itself is having issues, you might need to look into how to clean a Wii disc reader for related console maintenance tips, though the GameCube has its own specific reader.
By implementing these preventative measures, you minimize the need for intensive cleaning. Your GameCube discs will remain in excellent condition. This ensures they provide many more years of gaming enjoyment.
When to Seek Professional Help or Replace a Disc
Despite your best cleaning and repair efforts, some GameCube discs might still refuse to work. There comes a point where home methods are no longer sufficient. Knowing when to stop trying to fix a disc and consider professional help or replacement is important. You want to avoid causing more damage to a valuable game. My rule is to try the basic cleaning and minor scratch repair once or twice. If it does not work, I move to other options.
Deep scratches are the primary reason a disc might be beyond home repair. These scratches often look like white lines that penetrate the disc’s protective layer. If the laser cannot read the data, the game will not play. Another issue is disc rot. This is a rare condition where the disc’s layers begin to separate or degrade, often appearing as discoloration or bubbling. Disc rot is usually irreversible.
Professional Disc Resurfacing
If your disc has deep scratches but is not exhibiting disc rot, professional resurfacing is an option. Many video game stores or electronics repair shops offer this service. They use specialized machines that buff away a very thin layer of the disc’s surface. These machines can remove deeper scratches than home kits. They then polish the disc to a smooth finish.
- Cost-Benefit Analysis: Consider the cost of professional resurfacing versus the value of the game. For common games, buying a replacement disc might be cheaper. For rare or sentimental titles, resurfacing is a worthwhile investment.
- Reputable Service: Choose a repair service with good reviews and experience with optical media. Ask about their process and success rates. A good service uses proper equipment and techniques.
Replacing the Disc
If a disc is severely damaged, warped, or suffering from disc rot, replacement is likely the only viable solution. This can be disappointing, especially for rare titles. However, it is often the most practical choice.
- Check Online Marketplaces: Websites like eBay, Amazon, or dedicated retro gaming stores often have replacement discs available. Look for listings that clearly show the disc’s condition.
- Local Game Stores: Your local retro game store might have a used copy in better condition. You can often inspect the disc before buying.
- Community Forums: Retro gaming communities are great places to find or trade games. Someone in the community might have a spare copy or know where to find one.
Ultimately, the decision to seek professional help or replace a disc depends on the extent of the damage and your personal value of the game. Sometimes, letting go of a damaged disc and acquiring a new one is the best path forward for continued gaming enjoyment.
FAQ Section
Can I use toothpaste to clean GameCube discs?
Yes, you can use a small amount of non-gel, non-abrasive white toothpaste for very minor scratches. Rub it gently from the center outwards with a soft cloth. Then, rinse the disc thoroughly with distilled water and dry it completely. Use this method with extreme caution, as it can potentially cause more harm if not done correctly.
What if my GameCube disc still does not work after cleaning?
If your GameCube disc still does not work, the issue might be deeper than surface dirt. The disc could have deep scratches, disc rot, or your GameCube console’s laser might need cleaning or calibration. Consider trying a specialized disc repair kit for scratches or seeking professional disc resurfacing.
How often should I clean my GameCube discs?
You should clean your GameCube discs only when necessary, typically when they show visible dirt, fingerprints, or cause reading errors. Regular preventative measures, like proper handling and storage, reduce the need for frequent cleaning. Over-cleaning can cause wear and tear on the disc surface.
Are GameCube discs different from DVDs for cleaning purposes?
GameCube discs are mini-DVDs, meaning their data layer and protective coating are similar to standard DVDs. Therefore, the cleaning methods—using a microfiber cloth, distilled water, and wiping from center to edge—are largely the same. However, their smaller size means you handle them a bit differently.
What is the best cleaning solution for GameCube discs?
The best and safest cleaning solution for GameCube discs is distilled water. It is pure and leaves no residue. For stubborn grime, a diluted solution of 50% distilled water and 50% isopropyl alcohol (90% or higher) can be used sparingly. Avoid harsh household cleaners or chemicals, as they can damage the disc.
Conclusion
Bringing your cherished GameCube games back to life is often a simple task. Knowing how to clean GameCube disc surfaces effectively means more hours of classic gaming fun. We have covered everything from understanding disc vulnerabilities to using the right tools and avoiding common mistakes. Remember, patience and gentle care are your best allies in disc maintenance.
Always start with the simplest cleaning methods, like a soft microfiber cloth and distilled water. For persistent issues, cautiously explore disc repair kits for minor scratches. Most importantly, practice good habits like proper handling and storage. This preventative care keeps your discs in prime condition. With these tips, you can ensure your GameCube console continues to deliver unforgettable gaming experiences for years to come. Do not let a dirty disc stop your fun!
- GameCube disc repair
- clean video game disc
- scratched GameCube game
- disc cleaning tips
- retro gaming care