· Cleaning · 14 min read
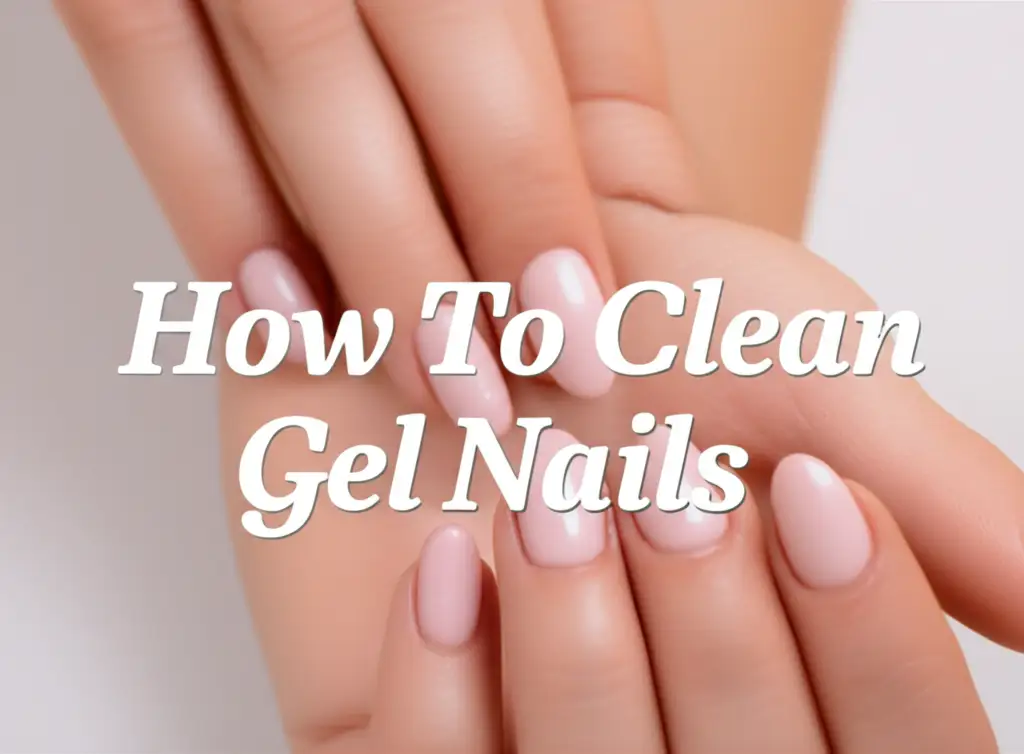
How To Clean Gel Nails
Mastering the Art: How To Clean Gel Nails Effectively
You love your gel nails. They look amazing and last for weeks. However, even these durable manicures need proper care. Learning how to clean gel nails keeps them looking fresh and extends their life. It also helps prevent common issues like dullness or lifting.
This guide provides simple, effective steps for cleaning gel nails. We will cover daily maintenance routines. You will also learn about deep cleaning techniques for stubborn marks. We discuss the right tools and products to use. Furthermore, we explore ways to protect your manicure and avoid common mistakes. Proper gel nail care ensures your nails always look salon-fresh.
Takeaway
- Daily Wipe-Down: Gently clean nails daily with mild soap and water to remove surface dirt.
- Target Stains: Use rubbing alcohol or non-acetone polish remover for stubborn marks.
- Proper Tools: Utilize a soft brush and lint-free wipes for effective cleaning.
- Moisturize Regularly: Keep cuticles and skin hydrated to prevent dryness and maintain nail health.
- Prevent Damage: Wear gloves for chores and avoid harsh chemicals.
How do you clean gel nails?
To clean gel nails, gently wipe them daily with a soft cloth dampened with mild soap and water. For deeper cleaning or to remove stains, use rubbing alcohol or a non-acetone nail polish remover on a lint-free wipe. Always follow up with cuticle oil and hand cream to maintain nail health and shine.
Daily Care: Keeping Your Gel Nails Pristine
Maintaining the beauty of your gel nails starts with a simple daily routine. Regular cleaning prevents dirt and grime from building up. This keeps your manicure looking fresh and vibrant for longer. I find that a quick wipe-down each day makes a big difference.
The Gentle Wash Routine
Your hands go through a lot each day. Dirt, oils, and residues can settle on your gel nails. A gentle wash helps remove these surface impurities. Use a mild soap and warm water for this process.
Simply wash your hands as you normally would. Focus on gently scrubbing the surface of your gel nails. You can use a soft nail brush for this. This helps remove any trapped dirt without scratching the gel. Rinse your hands thoroughly afterward.
Moisturizing for Shine and Health
After washing, always moisturize your hands and nails. Dryness can make your gel nails appear dull. It also affects the surrounding skin and cuticles. A good hand cream or lotion is essential here.
Apply a small amount of moisturizer. Gently massage it into your hands, nails, and cuticles. This keeps your skin hydrated. It also helps maintain the natural shine of your gel manicure. Consistent moisturizing makes your gel nails look healthy.
Deep Cleaning Techniques for Stubborn Stains
Sometimes, daily cleaning is not enough. Gel nails can pick up stubborn stains from various sources. Things like food dyes, makeup, or even certain fabrics can leave marks. Do not worry; you can safely remove these marks.
Tackling Surface Stains
For many surface stains, you do not need harsh chemicals. A common household item often works wonders. Try rubbing alcohol on a cotton pad. Gently wipe the stained area. The alcohol helps lift the stain without damaging the gel.
Another option is a non-acetone nail polish remover. Acetone can damage gel polish, so avoid it. Apply a small amount of non-acetone remover to a lint-free wipe. Lightly rub the stained spot. This method is effective for tougher marks.
Addressing Discoloration Under the Nail
Sometimes, discoloration appears underneath the gel. This often happens from dirt getting trapped. A simple method involves using a nail brush and mild soap. Gently scrub under the free edge of your nail. This helps dislodge the trapped particles.
For more persistent discoloration, a mixture of baking soda and water can help. Make a paste and apply it under the nail. Let it sit for a few minutes. Then, gently scrub and rinse well. This can brighten the area. For generalized nail stains, you might find more tips on how to clean nails with toothpaste, which can also be gentle on gel surfaces for minor discoloration. This method focuses on lifting surface stains without harsh abrasion. clean nails with toothpaste
Essential Tools and Products for Gel Nail Care
Having the right tools makes cleaning your gel nails much easier. Using incorrect items can damage your manicure. I always keep a few specific things handy for my gel nail routine. These items help protect your nails while keeping them clean.
Soft Brushes and Lint-Free Wipes
A soft nail brush is a must-have. It helps remove dirt and debris from around and under your nails. Choose one with soft bristles. Hard bristles can scratch the gel surface. Gently brush your nails with soap and water daily. This prevents grime buildup.
Lint-free wipes are another essential. Regular cotton balls can leave fibers stuck to your gel. These fibers are hard to remove and can dull the shine. Lint-free wipes ensure a streak-free clean. Use them with alcohol or non-acetone remover. They pick up dirt without leaving any residue.
Nail Cleansers and Cuticle Oils
A dedicated gel nail cleanser can be very useful. These cleansers often contain isopropyl alcohol. They are specifically formulated to clean the sticky inhibition layer after curing. You can also use them for general surface cleaning. Always check the product label for specific instructions.
Cuticle oil is crucial for nail health. Gel polish can sometimes dry out your cuticles. Applying cuticle oil daily keeps them hydrated. Healthy cuticles mean healthier nails. This also helps prevent lifting of the gel. Strong, healthy nails better support your gel manicure. When you clean your nails, remember to also clean your gel nail brushes properly to keep your tools hygienic and effective for future use.
Addressing Common Issues: Lifting, Chipping, and Discoloration
Gel nails are strong, but they can still face issues. Understanding how to address these problems helps maintain your manicure. Sometimes, issues arise even with proper cleaning. Knowing what to do can save your manicure.
What Causes Lifting and Chipping?
Lifting occurs when the gel separates from your natural nail. This can happen for several reasons. Poor application is a common cause. Hitting your nails or excessive water exposure also plays a role. When lifting happens, dirt can get underneath. This makes cleaning harder.
Chipping often results from impact. It can also happen if the gel is applied too thinly on the free edge. Once a chip appears, it can grow. This compromises the integrity of your manicure. It is important to address these issues promptly. Ignoring them can lead to further damage.
How to Handle Minor Issues Safely
If you notice minor lifting, do not pick at it. Picking can damage your natural nail. For a small lift, you might apply a small amount of nail glue. Press the lifted area down firmly. This can seal the lift temporarily. This prevents dirt from entering.
For small chips, you might gently file the sharp edge. This prevents the chip from snagging on things. It also makes the chip less noticeable. If a chip is large, it is best to remove the gel. Then, reapply or get a new manicure. Trying to patch large chips often looks messy. You want to maintain the overall look of your nails. Caring for different nail types like matte nails also requires specific techniques to maintain their unique finish without damaging the polish.
Preventing Discoloration and Stains
Discoloration on gel nails is usually from external sources. Smoking, certain foods, or dyes can stain your nails. Wearing gloves for household chores helps prevent this. Using harsh cleaning products without protection can also stain.
If discoloration happens, try the deep cleaning methods mentioned earlier. Rubbing alcohol often works well. For persistent stains, a gentle buffing block might help. Be very careful with buffing. Over-buffing can thin your gel. It can also remove the top coat. Preventative measures are always best.
Protecting Your Gel Nails: Prevention is Key
Preventative care is the best way to keep your gel nails looking great. Avoiding damage means less time spent on cleaning and repairs. I have learned that a few simple habits can make my gel manicure last much longer. These steps protect your investment and keep your nails looking fresh.
The Power of Protective Gloves
Wearing gloves is a small habit with a big impact. When you do chores around the house, put on rubber gloves. This includes washing dishes, cleaning bathrooms, or gardening. Water exposure can weaken the bond of your gel polish. Harsh chemicals found in many cleaners are especially damaging. They can dull your gel’s shine or cause it to chip.
Gloves create a physical barrier. They protect your gel from direct contact with water and chemicals. This simple step significantly extends the life of your manicure. It also keeps your nails cleaner by preventing dirt from getting lodged under the edges. Make it a routine to grab your gloves. Your gel nails will thank you.
Avoiding Harsh Chemicals and Tools
Beyond cleaning products, watch out for other chemicals. Hair dyes, certain lotions, and even some sunscreens can affect gel polish. Always check labels if you are unsure. If you use a product that might be questionable, wash your hands immediately afterward. This minimizes exposure time.
Avoid using your gel nails as tools. Do not pick at labels, open cans, or scratch surfaces with your nails. This puts extreme stress on the gel. It can lead to chips, cracks, or lifting. Your nails are decorative, not functional tools. Treat them gently. This extends their beauty and integrity. Remember, press-on nails also benefit from similar gentle handling and cleaning to ensure their longevity.
Regular Moisturizing and Cuticle Care
Moisturizing is a protective measure. Dry nails and cuticles are more prone to damage. Use cuticle oil daily. Apply it to the skin around your nail plate. This keeps your cuticles soft and healthy. Healthy cuticles mean better nail growth.
Hand cream also helps. It keeps your skin supple. Dry skin can crack and pull at the edges of your gel. This can cause lifting. Moisturizing creates a protective layer. It helps your gel manicure adhere better. It also maintains a polished look overall.
Safe Gel Nail Removal: A Gentle Approach
While this article focuses on cleaning gel nails, safe removal is part of their overall care. Improper removal can severely damage your natural nails. Damaged nails make applying future gel manicures difficult. They also look unhealthy. I learned the hard way that patience is key when taking off gel.
The Acetone Soak Method
Acetone is the most common solvent for gel polish. It dissolves the gel effectively. However, it can be very drying to your skin and nails. Protect your surrounding skin before you start. Apply a generous amount of petroleum jelly or thick cream to your cuticles and fingertips. This creates a barrier against the acetone.
Next, soak cotton balls in pure acetone. Place one cotton ball directly on each gel nail. Wrap each finger tightly with aluminum foil. This keeps the acetone in contact with the gel. It also prevents the acetone from evaporating too quickly. Let your nails soak for 10-15 minutes. Resist the urge to peek too soon.
Gentle Gel Removal After Soaking
After the soaking time, gently check your nails. The gel should appear flaky or lifted. Use an orange wood stick or a cuticle pusher. Gently push the gel away from your nail plate. It should come off easily. If it resists, soak your nails for a few more minutes. Never force the gel off. Forcing causes damage to your natural nail layers. This makes your nails weak and thin.
Once all the gel is removed, wash your hands thoroughly. This removes any remaining acetone residue. Your nails may feel dry. Immediately apply a nourishing nail oil. Follow with a rich hand cream. This helps rehydrate your nails and skin. Proper removal sets the stage for your next healthy manicure. It ensures your nails remain strong and beautiful.
Common Mistakes to Avoid When Cleaning Gel Nails
Cleaning gel nails properly helps them last. However, some common mistakes can actually harm your manicure. I have made a few of these errors myself. Learning what to avoid saves you time and protects your nails. It keeps your gel looking its best.
Using Harsh Chemicals or Abrasives
One of the biggest mistakes is using harsh cleaning products. Standard household cleaners often contain strong chemicals. These chemicals can react badly with gel polish. They might dull the shine. They can also cause the gel to crack or lift. Always wear gloves if you must use such products.
Avoid abrasive scrubbers too. Steel wool or rough sponges will scratch your gel nails. This ruins the smooth finish. Even harsh nail files used on the gel surface can cause damage. Stick to soft brushes and lint-free wipes. These are gentle yet effective. They clean without scratching.
Over-Soaking or Forcing Removal
Leaving your hands in water for too long can weaken gel adhesion. While washing hands is fine, prolonged soaking is not. Extended baths or dishwashing without gloves can cause lifting. Water can seep under the edges. This breaks the bond between the gel and your natural nail.
When removing gel, never force it. If the gel does not lift easily after soaking, soak longer. Scraping or peeling stubborn gel layers can rip off your natural nail layers. This leaves your nails weak, thin, and brittle. Patience is key for safe gel removal. Damaged nails take a long time to recover.
Ignoring Early Signs of Trouble
Do not ignore minor issues with your gel nails. A small chip can turn into a large crack. A tiny lift can become a major one. Address problems quickly. If you see a tiny lift, try to seal it with nail glue. This prevents dirt from getting trapped underneath. It also stops the lift from growing.
Regularly inspect your nails. Look for any dull spots, discoloration, or lifting. Catching these issues early means you can fix them easily. This prevents more severe damage. It also keeps your manicure looking its best for longer. Proactive care is always better than reactive repairs.
FAQ Section
Can I use regular nail polish remover on gel nails?
No, you should not use regular nail polish remover on gel nails. Most regular removers contain acetone, which is suitable for traditional polish. However, pure acetone is too strong for typical gel polish and can be very drying. Non-acetone removers are safer for light surface cleaning, but pure acetone is needed for full gel removal.
How often should I clean my gel nails?
You should clean your gel nails daily with mild soap and water to remove surface dirt and oils. For deeper cleaning or to address specific stains, you can use rubbing alcohol or non-acetone remover as needed. Regular moisturizing of cuticles and nails should be a daily practice to maintain health and shine.
Why do my gel nails get dirty easily?
Gel nails can get dirty easily due to their sticky inhibition layer during application, which must be wiped off. Once cured, their smooth, non-porous surface attracts dirt, dust, and residues from daily activities. Stains from food, makeup, or dyes can also adhere to the top coat, making them appear dirty.
Can water damage gel nails?
While brief water exposure is fine, prolonged or excessive water exposure can damage gel nails. Water can seep under the edges of the gel, especially if there’s any lifting, weakening the adhesive bond. This can lead to the gel lifting further, chipping, or losing its shine. Always wear gloves for wet tasks.
What’s the best way to remove stains from gel nails?
The best way to remove stains from gel nails is to use rubbing alcohol or a non-acetone nail polish remover on a lint-free wipe. Gently rub the stained area until the mark disappears. For stubborn stains, a paste of baking soda and water can be applied. Always rinse thoroughly afterward and moisturize your hands.
How do I clean under my gel nails?
To clean under your gel nails, use a soft nail brush with mild soap and water. Gently scrub underneath the free edge of your nails to remove any trapped dirt or debris. You can also use the tip of an orange wood stick very gently to dislodge any larger particles. Be careful not to lift the gel.
Conclusion
Keeping your gel nails clean is essential for their beauty and longevity. We have explored simple yet effective methods for daily maintenance. You now know how to clean gel nails properly. From gentle washing to tackling stubborn stains, these steps help you maintain a flawless manicure. Remember to use the right tools and products. Protect your nails from harsh chemicals and physical damage.
Your gel manicure is an investment. Proper care extends its life and keeps your nails healthy. By following these guidelines, you ensure your gel nails always look salon-fresh. Embrace these habits and enjoy beautiful, clean gel nails every day.
- gel nails
- nail care
- clean nails
- DIY nail cleaning
- nail hygiene
- gel polish care
- healthy nails