· Home Cleaning · 22 min read
How To Clean Glue Off Plastic
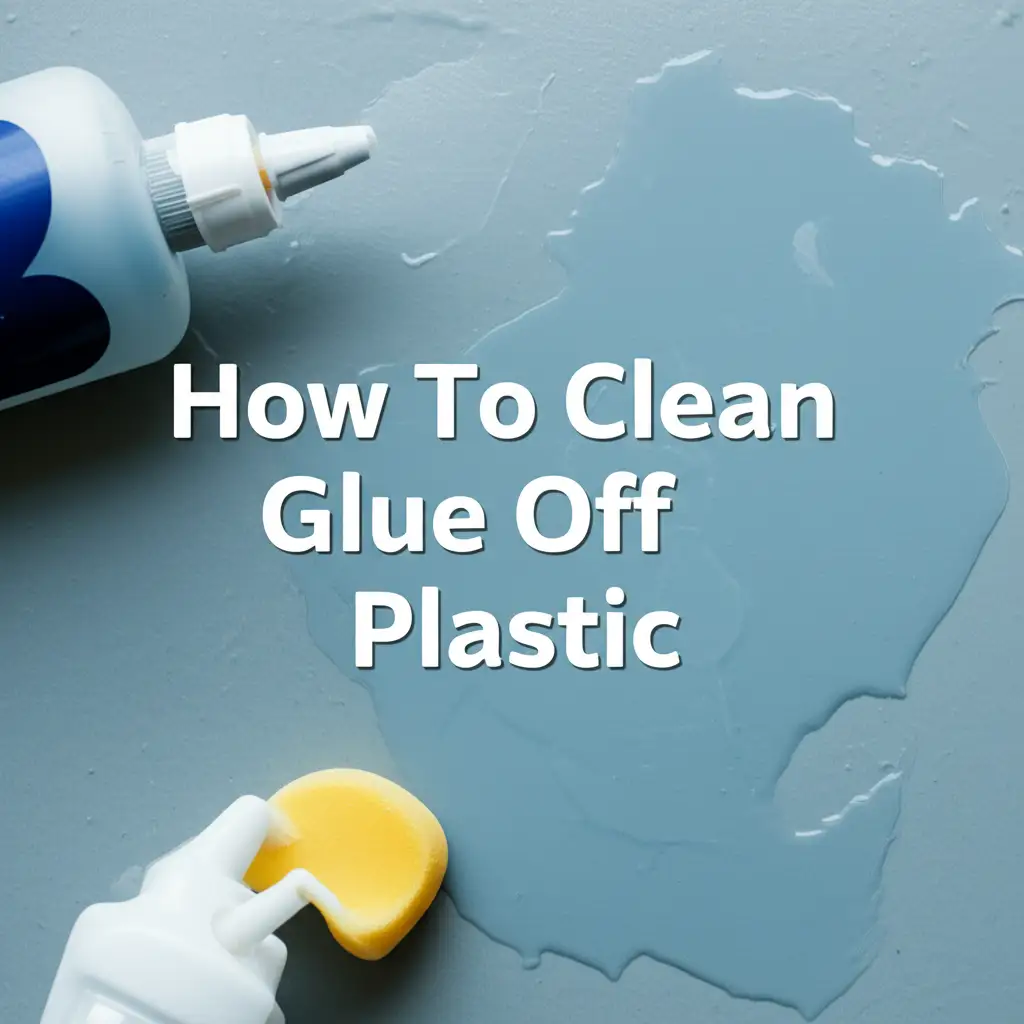
Effortless Ways to Clean Glue Off Plastic Surfaces
It happens to all of us. A stray drop of super glue, stubborn sticker residue, or a blob of hot glue lands where it does not belong. When that spot is on plastic, the challenge becomes even greater. Plastic items are everywhere in our homes. From electronics to toys, and kitchenware to furniture, plastic is common. Knowing how to clean glue off plastic correctly saves your items from permanent damage or discoloration.
I know how frustrating it is to find a sticky mess on a beloved item. My own experience cleaning a child’s toy that had encountered a craft project gone wrong taught me valuable lessons. This guide shares proven methods for removing various types of glue from different plastic surfaces. We will cover gentle techniques using household items. We also discuss stronger solutions for tougher glue challenges. You will learn safety tips and tricks to prevent damage while cleaning. Prepare to restore your plastic items to their original, glue-free state.
Takeaway:
- Identify the type of glue and plastic before starting.
- Always test cleaning solutions on a hidden area first.
- Start with the gentlest method and increase strength as needed.
- Patience and persistence are key to successful glue removal.
To clean glue off plastic, identify the glue type and plastic material. Start with gentle methods like warm soapy water or oil-based products. For stubborn glue, use rubbing alcohol or specialized removers, always testing on an inconspicuous area first to prevent damage.
Understanding Plastic Types and Glue Varieties
Cleaning glue from plastic requires understanding both the plastic and the glue. Different plastics react differently to cleaning agents. Some plastics are very sensitive. Strong solvents can melt, cloud, or permanently damage them. You must know what you are cleaning.
Glues also vary widely in composition. Some glues are water-soluble. Others are solvent-based. Knowing the glue type helps you choose the most effective and safest removal method. A mismatch can make the problem worse. This section details common plastic types and glue varieties you might encounter.
Common Plastic Types and Their Sensitivities
Plastic is a broad term. There are many kinds of plastic. Each has unique properties. Knowing your plastic helps prevent damage.
- Acrylic (Plexiglass): This plastic is clear and often used for displays or windows. Acrylic scratches easily. It is sensitive to strong solvents like acetone. Use mild, non-abrasive cleaners.
- Polycarbonate: This plastic is strong and durable. It is common in phone cases or water bottles. Polycarbonate is generally resistant to impact. However, it can still react badly to some chemicals.
- Polyethylene (PE) and Polypropylene (PP): These plastics are common in containers and everyday items. They are generally resistant to many chemicals. Still, always test.
- PVC (Polyvinyl Chloride): PVC is common in pipes and some outdoor furniture. It is rigid. It can sometimes be more tolerant to certain cleaners than softer plastics.
- ABS (Acrylonitrile Butadiene Styrene): This plastic is common in toys, like LEGO bricks, and some appliance parts. ABS is relatively durable. Some strong solvents can still cause damage.
I always recommend finding out the plastic type if possible. Look for recycling symbols or product information. When in doubt, assume it is sensitive. Test carefully.
Common Glue Types and Their Characteristics
The type of glue dictates the removal strategy. Each glue has specific properties. These properties make it bond and unbond in different ways.
- Super Glue (Cyanoacrylate): This glue bonds very quickly. It creates a strong bond. Super glue hardens into a rigid, clear or cloudy mass. It is tough to remove without the right solvent.
- Hot Glue (Thermoplastic Adhesive): This glue is applied hot and dries as it cools. It forms a flexible, solid mass. Hot glue is easy to remove if you can get it to peel off. It softens with heat.
- Sticker Residue/Adhesives: This is the sticky leftover from tape or labels. It is often gummy or tacky. These residues are usually less aggressive than super glue.
- Craft Glue (PVA Glue): Common glues like Elmer’s glue are water-based. They are easy to clean with water while wet. Once dry, they become more resistant but still often respond to water.
- Epoxy Adhesives: These are two-part glues that mix before use. They create very strong, rigid bonds. Epoxy is one of the hardest glues to remove once cured.
Knowing the glue type helps me pick the right attack plan. For instance, you would not use the same method for hot glue as for super glue. Each requires a different approach to ensure effective removal without harming the plastic.
Gentle Approaches for Fresh and Light Glue Stains
When dealing with glue on plastic, my first rule is always to start gentle. Many times, you do not need harsh chemicals. This is especially true for fresh glue or light residue. Gentle methods are safer for the plastic. They are also safer for you. I prefer to use common household items for these initial attempts. These items are readily available. They are also less likely to cause damage.
These methods work well for new spills or light, non-aggressive adhesives. Always test a small, hidden area of the plastic first. This check ensures the plastic will not react negatively. Even gentle cleaners can sometimes cause issues on sensitive surfaces.
Warm Soapy Water and Soft Cloth Method
This is the simplest and often most effective first step. It works particularly well for water-soluble glues. It also works for fresh spills of many common adhesives. I always start here.
- Prepare a Solution: Mix warm water with a few drops of mild dish soap. Do not use very hot water. Excess heat can warp or damage some plastics.
- Soak (if possible): If the plastic item is small, you can submerge the glued area. Let it soak for 10-15 minutes. This helps soften the glue.
- Wipe and Scrub: Dip a soft cloth or sponge into the soapy water. Gently rub the glue stain. For stubborn spots, you can use an old toothbrush. Apply light pressure. Work in small circular motions.
- Rinse and Dry: Rinse the area with clean water. Then, dry it thoroughly with a clean, dry cloth.
This method is surprisingly effective for craft glues, some sticker residues, and even fresh hot glue that has not fully hardened. I have had great success with this on children’s toys.
Oil-Based Solutions: Vegetable Oil, Olive Oil, or Peanut Butter
Oil is an excellent solvent for many sticky residues. It helps break down the adhesive bond. This method is surprisingly effective. It works well for sticker residue, tape residue, and some types of craft glue. I find it very safe for most plastics.
- Apply Oil: Dab a small amount of vegetable oil, olive oil, or even peanut butter directly onto the glue. Ensure the glue is fully covered.
- Let it Sit: Allow the oil to sit on the glue for several minutes. For tougher residue, you can leave it for 15-30 minutes. The oil needs time to penetrate the glue.
- Rub and Remove: Use a soft cloth to rub the glue away. The oil helps the glue lift. You might need to rub firmly but gently.
- Clean Up: After the glue is gone, clean the oily residue. Use warm soapy water. Then, rinse and dry the plastic surface.
I once used peanut butter to remove a large sticker residue from a plastic storage bin. The oils worked wonders. It left the plastic perfectly clean.
Using Erasers for Light Residue
A common pencil eraser can work wonders on light, thin glue films. This method is very gentle. It relies on friction to roll up the adhesive. I use it for the last bits of stickiness.
- Select an Eraser: Choose a clean, white eraser. Colored erasers might leave marks.
- Gently Rub: Rub the eraser over the glue residue. Use steady, firm pressure. The eraser will start to crumble. It will lift the glue in small bits.
- Brush Away: Brush away the eraser crumbs and glue bits as they accumulate.
This method is ideal for those annoying, thin layers of stickiness that remain after removing a label. It works best on hard, smooth plastic surfaces.
Advanced Techniques for Stubborn Adhesives
Sometimes, gentle methods are not enough. For cured super glue, dried epoxy, or very old, set-in residues, you need stronger solutions. These advanced techniques involve solvents. Solvents work by dissolving the glue. However, they can also affect the plastic. Always proceed with extreme caution. Testing is even more critical here. I cannot stress this enough: always test.
When using these methods, ensure good ventilation. Wear gloves to protect your skin. Keep these products away from children and pets. Safety first is my motto in cleaning.
Rubbing Alcohol (Isopropyl Alcohol)
Rubbing alcohol is a go-to solvent for many types of glue. It works well on super glue, ink, and some permanent markers. It is generally safer for many plastics than acetone.
- Test First: Apply a tiny amount of rubbing alcohol to a hidden area of the plastic. Watch for any changes. This includes clouding, softening, or discoloration. If there is no reaction, proceed.
- Apply to Glue: Soak a cotton ball or a clean cloth with rubbing alcohol. Place it on the glue stain. Let it sit for a few minutes. This allows the alcohol to penetrate and soften the glue.
- Scrub and Scrape: Gently rub the glue with the soaked cotton ball. For thicker glue, you can use a plastic scraper or an old credit card. Be careful not to scratch the plastic. Work slowly.
- Wipe Clean: Once the glue is removed, wipe the area with a damp cloth. This removes any alcohol residue. Then, dry the surface completely.
I have used rubbing alcohol successfully on countless plastic items. It is especially effective for removing sticky residue from a clear plastic phone case.
Nail Polish Remover (Acetone-Based)
Acetone is a powerful solvent. It is very effective at dissolving super glue. However, acetone is also very aggressive towards many plastics. It can melt, cloud, or permanently damage surfaces like acrylic, polystyrene, and some PVCs. Use with extreme caution.
- Critical Test: This step is non-negotiable. Apply a tiny drop of acetone to an unnoticeable spot. Wait several minutes. If the plastic clouds, becomes sticky, or discolors, do not use acetone. This link about cleaning melted plastic from an oven gives an idea of how easily plastic can be damaged by heat or strong chemicals. Similarly, care is needed to prevent damage like burnt plastic from an oven in other scenarios.
- Apply Sparingly: If the test is successful, dampen a cotton swab with acetone. Apply it only to the glue. Avoid spreading it onto the surrounding plastic.
- Soften and Remove: Let the acetone sit on the glue for a very short time. The glue should start to soften. Gently scrape or wipe the softened glue away with a plastic scraper.
- Rinse Immediately: As soon as the glue is off, rinse the area thoroughly with water. This stops the acetone from continuing to act on the plastic.
I only reach for acetone as a last resort. It is a powerful tool but requires careful handling.
Specialized Glue Removers
Many companies make specific glue removers. These are often labeled for super glue or construction adhesive. Products like Goo Gone or specific cyanoacrylate removers are examples. These products are formulated to dissolve glue without harming specific surfaces.
- Read Instructions: Always read the product label carefully. Follow all safety warnings and application instructions. Some removers are surface-specific.
- Test on Plastic: Even with specialized removers, always test on an inconspicuous area first. Some products can still react with certain plastics.
- Apply and Wait: Apply the remover as directed. Allow it to penetrate the glue for the recommended time.
- Scrape or Wipe: Use a plastic scraper or a clean cloth to remove the softened glue. Repeat if necessary.
- Clean Residue: Clean the area with soap and water to remove any chemical residue.
These products are often effective. They can be a good investment for persistent glue problems.
Tackling Specific Glue Challenges
Different types of glue require tailored strategies. While general methods apply, certain glues present unique challenges. Knowing the best approach for each ensures efficient removal. It also helps protect your plastic items. I will share specific tactics for the most common culprits: super glue, hot glue, and sticker residue.
My experience has shown that patience is a virtue here. Rushing can lead to damage. Taking the time to use the correct technique for each glue type yields the best results.
Removing Super Glue (Cyanoacrylate) from Plastic
Super glue is incredibly strong. It bonds almost instantly. Removing it from plastic can be tricky. Acetone is the most effective solvent for super glue. However, its harshness on plastic requires careful application.
- Assess Plastic Sensitivity: First, determine if your plastic can handle acetone. As I mentioned earlier, test a small, hidden area. If the plastic reacts poorly, you must use an alternative.
- Acetone Application (if safe):
- Saturate a cotton swab or the corner of a paper towel with acetone.
- Press it directly onto the super glue. Hold it for 1-2 minutes. The goal is to soak the glue, not the plastic.
- The glue should start to soften and turn gummy.
- Gently scrape away the softened glue with a plastic scraper or an old credit card. Do not use metal tools. They can scratch.
- Repeat the process if needed.
- Immediately wipe the area clean with a damp cloth after the glue is gone. This neutralizes the acetone.
- Non-Acetone Alternatives (if plastic is sensitive):
- Rubbing Alcohol: Soak the glue with rubbing alcohol. Let it sit for a few minutes. Then, rub gently with a soft cloth. This method is slower but much safer for sensitive plastics.
- Mineral Spirits/Paint Thinner: These can sometimes soften super glue. Test carefully as they can also damage some plastics. Apply with a cotton swab and scrape gently.
- Specialized Super Glue Removers: Look for products specifically designed to remove cyanoacrylate. They are formulated to be safer for various surfaces. Always follow product instructions and test first.
For very thick super glue, you might need to chip away larger pieces carefully with a plastic tool before applying solvents. This reduces the amount of glue the solvent needs to work on.
Tackling Hot Glue from Plastic
Hot glue is common in crafts. It cools and hardens quickly. Thankfully, it is one of the easier glues to remove. It does not chemically bond with plastic. It mostly adheres to the surface.
- Cooling and Hardening: Ensure the hot glue is completely cool and hard. Warm glue can smear.
- Manual Removal:
- Peel or Pick: Often, you can simply peel off larger pieces of hot glue. It forms a flexible, rubbery mass.
- Scrape: Use a plastic scraper, credit card, or even your fingernail. Gently push under the edge of the glue. The glue should lift.
- Heat Application (for stubborn bits):
- If some bits remain stuck, apply a small amount of heat. A hairdryer on a low setting works well. Do not overheat the plastic. You want to soften the glue just enough to scrape it off.
- Once softened, immediately scrape the glue away.
- Rubbing/Cleaning Residue: If a slight film remains, rubbing alcohol can help. A bit of warm soapy water will also clean up any sticky residue.
I find hot glue relatively simple to remove. The key is gentle scraping and, if needed, controlled heat.
Eliminating Sticker Residue from Plastic
Sticker residue is a common nuisance. It often leaves a sticky, unsightly film. Many common household items are effective against this type of adhesive.
- Oil-Based Solutions: My favorite method.
- Apply a generous amount of vegetable oil, olive oil, or even cooking spray to the residue. Peanut butter also works due to its oil content.
- Let it sit for 5-15 minutes. This allows the oil to break down the adhesive.
- Rub the residue with a soft cloth. It should start to ball up and lift.
- Clean the area with warm soapy water to remove the oil.
- Rubbing Alcohol:
- Dampen a cotton ball or soft cloth with rubbing alcohol.
- Rub the sticky residue firmly. The alcohol helps dissolve the adhesive.
- Wipe clean with a damp cloth afterward.
- Pencil Eraser: For very light or thin residue, a clean pencil eraser can physically lift the sticky bits. Rub gently until the residue rolls off.
- Commercial Residue Removers: Products like Goo Gone are excellent for sticker residue. They are designed for this purpose. Always follow product instructions and test on an inconspicuous area first.
I have found success using a combination of these methods for very old or stubborn sticker residue. Starting with oil then following up with rubbing alcohol for any remaining stickiness works well.
Essential Safety Precautions and Testing Procedures
Safety is paramount when removing glue from plastic. Many cleaning agents, even common household ones, can be harmful if not used correctly. More importantly, plastic can be very sensitive. It can react unpredictably to chemicals. Taking proper precautions prevents injury. It also prevents damage to your valuable plastic items. I always prioritize safety in my cleaning endeavors.
Ignoring safety steps can lead to discolored, melted, or warped plastic. It can also cause skin irritation or respiratory issues for you. These problems are easily avoidable. A little planning goes a long way.
Always Test on an Inconspicuous Area
This is the golden rule of cleaning any delicate surface. It is especially true for plastic. Plastics are polymers. They have varying chemical resistance. What works perfectly on one type of plastic can ruin another.
- Locate a Test Spot: Find a hidden area on your plastic item. This could be the underside, inside a rim, or a part that is not usually visible.
- Apply a Small Amount: Use a cotton swab to apply a tiny amount of your chosen cleaning agent. Apply it directly to the test spot.
- Observe the Reaction: Wait several minutes, or even an hour, depending on the chemical. Look for any signs of damage.
- Clouding: The plastic might turn opaque or hazy.
- Discoloration: The plastic might change color, lighten, or darken.
- Softening or Stickiness: The plastic might feel gummy or become soft.
- Cracking: The plastic might develop small cracks or become brittle.
- Proceed or Adjust: If there is no negative reaction, you can proceed with the cleaning agent. If there is a reaction, choose a different, milder cleaning solution. I learned this lesson early on. A small test saves much larger headaches later.
Ensure Adequate Ventilation
Many solvents and cleaners release fumes. These fumes can be unpleasant. They can also be harmful if inhaled in large quantities.
- Open Windows: Always work in a well-ventilated area. Open windows and doors to allow fresh air circulation.
- Use Fans: If natural ventilation is insufficient, use a fan to draw fumes away from your workspace.
- Avoid Confined Spaces: Never work in a closed room or small closet without proper airflow.
Proper ventilation protects your respiratory system. It also helps dissipate strong odors.
Wear Protective Gear
Protecting your skin and eyes is crucial. Many cleaning agents can cause irritation or chemical burns.
- Gloves: Wear chemical-resistant gloves. Nitrile or rubber gloves are good choices. They protect your hands from direct contact with solvents.
- Eye Protection: Safety glasses or goggles protect your eyes from splashes. This is especially important when dealing with liquid removers or when scraping.
- Mask (Optional but Recommended): For very strong fumes or prolonged cleaning, consider wearing a respirator mask. This offers additional protection for your lungs.
I always put on my gloves and glasses before touching any strong cleaner. It is a simple habit that keeps me safe.
Read Product Labels Carefully
If using a commercial glue remover, always read the product’s instructions and warnings.
- Directions for Use: Follow the manufacturer’s guidelines for application, dwell time, and removal.
- Safety Warnings: Pay attention to warnings about flammability, skin contact, or inhalation.
- Surface Compatibility: Check if the product is safe for use on plastic. Some removers specify which plastics they are safe for.
Manufacturers formulate products with specific uses and precautions. Following their guidance is essential for safety and effectiveness.
Restoring and Protecting Plastic After Cleaning
Once you have successfully removed the glue, your work is not entirely done. The cleaning process, especially with stronger solvents, can leave plastic looking dull or feeling dry. Some residues might also remain. Taking a few extra steps can restore the plastic’s appearance. It can also offer a layer of protection. I always finish cleaning with these restorative actions. It makes a big difference in the final look and feel of the item.
These steps ensure the plastic looks its best. They can also extend its lifespan. It is important to remove all cleaning agent residue. This prevents any long-term damage or discoloration from leftover chemicals.
Thorough Rinsing and Drying
After the glue is gone, any cleaning agent residue must be removed. This is critical. Remaining solvents or oils can attract dirt. They can also cause long-term damage to the plastic.
- Rinse with Water: If possible, rinse the entire cleaned area with clean, plain water. For larger items, wipe thoroughly with a damp cloth. Make sure to remove all traces of soap, oil, or chemical residue.
- Dry Completely: Use a soft, clean, dry cloth to dry the plastic surface. Pay attention to crevices. Moisture can lead to water spots or encourage mold growth in damp environments.
- Air Dry (if safe): If the item allows, let it air dry completely. This ensures all moisture evaporates.
I find that a complete rinse and dry step prevents any lingering issues. It leaves the surface fresh and clean.
Polishing and Conditioning Dull Plastic
Some cleaning agents can strip away the natural sheen of plastic. This leaves it looking dull or hazy. You can restore its shine. You can also add a layer of protection.
- Plastic Polish: For clear plastics, or those that have become cloudy, a specialized plastic polish can work wonders.
- Apply a small amount of plastic polish to a soft microfiber cloth.
- Rub the polish onto the plastic surface in circular motions.
- Buff away the polish with a clean, dry part of the cloth until the shine returns.
- Plastic polishes often contain fine abrasives that gently remove micro-scratches. They also create a smooth, reflective surface.
- Plastic Conditioner/Protector: For general plastic surfaces, especially those exposed to the elements, a plastic conditioner or protectant is beneficial.
- These products often contain UV inhibitors. These inhibitors prevent sun damage and fading.
- Apply the conditioner according to the product instructions. Often, you apply it with a cloth. Then you buff it gently.
- This step adds a protective barrier. It helps repel dirt and prevents future damage.
- For example, you might use a conditioner designed for car interiors on other plastic items.
I have brought many dull plastic items back to life with a good polish. It makes them look new again.
Avoiding Future Glue Accidents
Prevention is always better than cure. Taking a few simple steps can minimize future glue spills or residue issues.
- Work on Protected Surfaces: When using glue, always place newspaper, old towels, or a silicone mat underneath your project. This catches any drips.
- Control Application: Use glue sparingly. Apply only the amount needed. Use precise applicators for small jobs.
- Clean Spills Immediately: If glue spills, clean it while it is wet. Water-based glues wipe up easily with a damp cloth. For other glues, a quick wipe can prevent a hardened mess.
- Remove Labels Carefully: When removing stickers or labels, try to peel them slowly and evenly. This often leaves less residue behind. Using a hairdryer on low heat can also help soften the adhesive before peeling.
By being mindful during glue-related activities, I prevent many headaches later on.
Common Mistakes to Avoid When Cleaning Glue Off Plastic
Removing glue from plastic can be a delicate task. It is easy to make mistakes that worsen the problem or damage the item. Over the years, I have seen and made my share of errors. Learning from these mistakes helps ensure a successful cleaning process. Avoiding these common pitfalls saves time, effort, and your plastic items.
Understanding what not to do is as important as knowing what to do. It helps you protect your possessions. It also ensures your safety during the cleaning process.
Using Abrasive Tools or Materials
It is tempting to scrub vigorously or use harsh tools when glue is stubborn. This is a common mistake. Plastic surfaces scratch easily.
- Avoid Steel Wool or Scouring Pads: These will create irreversible scratches on plastic. The scratches will trap dirt. They will make the plastic look hazy.
- Do Not Use Metal Scrapers: Metal knives, razor blades, or metal spatulas can gouge the plastic. Even if the glue is hard, resist the urge.
- What to Use Instead: Opt for plastic scrapers, old credit cards, or your fingernail. For rubbing, use soft cloths, microfiber towels, or cotton balls. These are firm enough to work but gentle on the surface.
I once used a kitchen scrubber on a plastic container. It left permanent swirl marks. Never again!
Applying Excessive Force or Pressure
When glue does not come off easily, there is a natural tendency to push harder. This can lead to damage.
- Risk of Warping or Cracking: Too much pressure, especially on thin or brittle plastic, can cause it to crack or warp.
- Smearing Glue: For some glues, like hot glue that is not fully cooled, excessive force can smear it. This spreads the problem.
- Patience is Key: Let the cleaning agent do its job. Allow time for the glue to soften. Then, gently work it away. If it resists, reapply the cleaner. Give it more time.
I learned that gentle, repeated actions are more effective than brute force.
Not Testing Cleaning Agents First
This is perhaps the biggest mistake. I mentioned it before. It bears repeating. Skipping the test step can ruin your plastic.
- Varying Plastic Compositions: Not all plastics are the same. A cleaner safe for one type of plastic might melt another.
- Irreversible Damage: Damage from untested chemicals is often permanent. Clouding, stickiness, or melting cannot be easily undone.
- Always Test: This is a non-negotiable step. Always test any cleaner, even a mild one, on a hidden area first. This simple step prevents expensive mistakes.
My personal rule is, “When in doubt, test it out.” It has saved many items.
Using the Wrong Solvent for the Glue Type
Applying the incorrect solvent for a specific glue type is inefficient. It can also be damaging.
- Water on Super Glue: Water will not dissolve super glue. It might even speed up its curing process.
- Oil on Water-Soluble Glues: Oil is less effective on glues that dissolve with water.
- Acetone on Sensitive Plastics: Using acetone on acrylic or polystyrene will cause irreversible damage.
- Match the Solvent to the Glue: Research or recall the glue type. Then, choose the appropriate remover. For instance, acetone for super glue, oil for sticker residue, and water for craft glue.
I always consider the glue’s nature. This helps me select the right remover. It makes the job easier and safer.
Neglecting Ventilation and Protective Gear
Ignoring safety measures puts your health at risk. Fumes from solvents can cause respiratory issues. Skin contact can lead to irritation or burns.
- Inadequate Airflow: Working in a closed room allows fumes to build up. This can cause headaches, dizziness, or worse.
- Unprotected Skin/Eyes: Direct contact with strong cleaners can be painful and dangerous.
- Prioritize Safety: Always ensure good ventilation. Wear gloves and eye protection.
- how to clean glue off plastic
- plastic cleaning tips
- glue removal methods
- sticky residue removal
- DIY cleaning solutions