· Home Cleaning · 17 min read
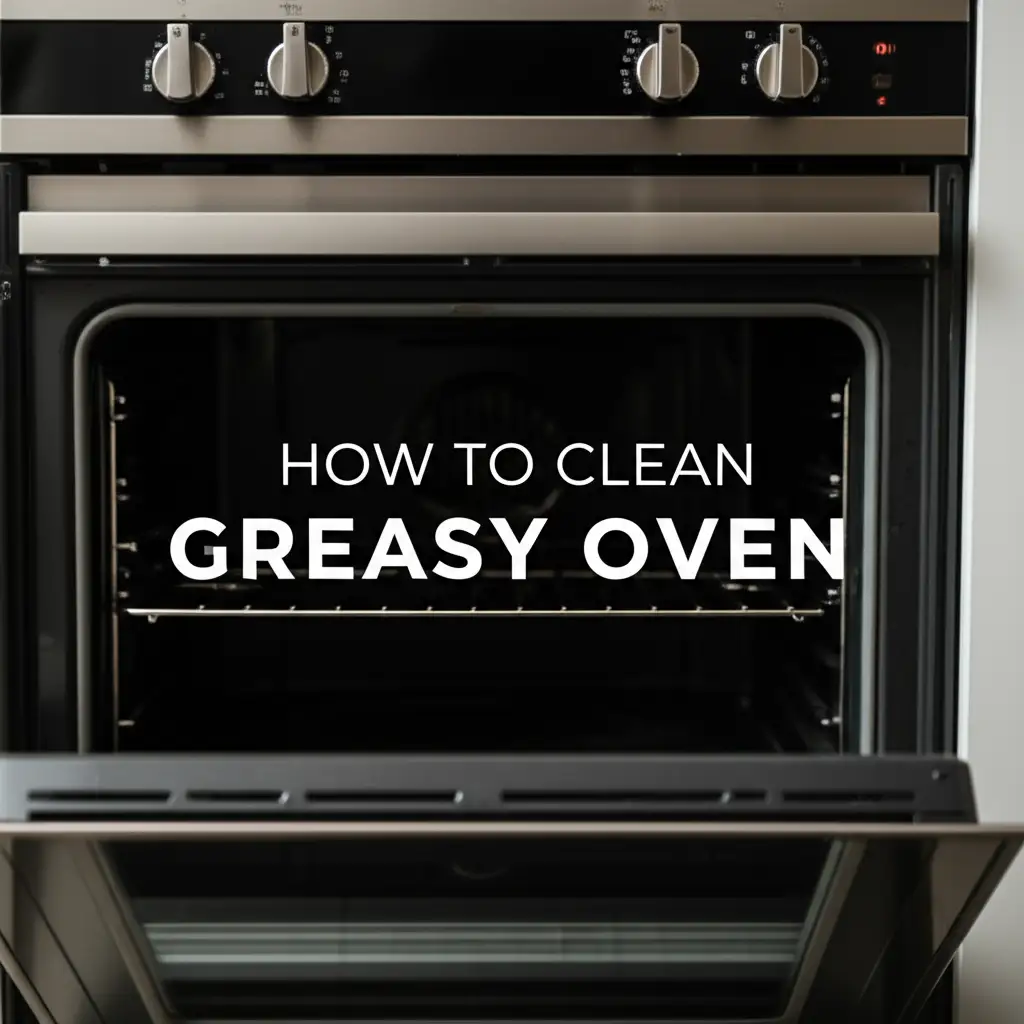
How To Clean Greasy Oven
Mastering a Greasy Oven: Your Complete Cleaning Guide
A greasy oven is a common sight in many kitchens. Splashes, spills, and food residue build up over time. This grime makes your oven less efficient. It can also create smoke and unpleasant odors when you cook. I know the frustration of opening an oven door to a sticky, brown mess. But do not worry; cleaning a greasy oven is a task you can master.
This guide will show you simple, effective ways to restore your oven’s sparkle. We will explore both natural solutions and commercial products. You will learn about the tools you need and important safety steps. I will help you tackle everything from mild splatters to tough, baked-on grease. Let’s make your oven look new again.
Takeaway
- Assess Grease Level: Determine if grease is light, moderate, or heavy. This helps you pick the best cleaning method.
- Choose Your Method: Select between natural options like baking soda and vinegar, or commercial cleaners.
- Prioritize Safety: Always wear gloves and ensure good ventilation. Follow product instructions carefully.
- Clean Components Separately: Remove racks and clean them outside the oven. Address the door glass and coils too.
- Maintain Regularly: Prevent future buildup with frequent wiping and smart cooking habits.
Main Query Answer
To clean a greasy oven, first remove loose debris. Then, apply a baking soda and water paste for natural cleaning, allowing it to sit for hours. Alternatively, use a commercial oven cleaner following product instructions. Scrub, wipe clean, and rinse thoroughly to remove all grease.
Understanding Oven Grease: Why It Happens
Our ovens work hard, day in and day out. They cook countless meals for us and our families. During this process, food particles and fats often splash and spill. This is how ovens get greasy over time. Grease can drip from roasting meats. Cheese might bubble over from a casserole. Even cooking oil can vaporize and stick to surfaces.
This buildup is more than just unsightly. It affects how your oven performs. Grease absorbs heat, making your oven less efficient. It can also cause smoke or unpleasant smells during cooking. Understanding what causes oven grease helps us clean it better. It also helps us prevent future buildup.
Common Causes of Oven Buildup
Many daily cooking activities contribute to oven grease. Roasting fatty meats, like chicken or beef, releases grease into the oven air. Baking casseroles or pizzas can lead to spills and drips. Even high-temperature baking causes oils to vaporize and condense. These airborne particles settle on walls, racks, and the oven door. They dry out and bake on with each use. This creates stubborn, sticky layers.
I have seen countless ovens accumulate layers of baked-on food. This usually happens because of infrequent cleaning. Small splatters become hard stains very quickly. The constant heat bakes them onto the oven surfaces. This makes them very difficult to remove.
Identifying Grease vs. Other Stains
Not all oven grime is simply grease. Sometimes, you might see burnt sugar, carbonized food, or even melted plastic. Grease often looks dark brown or black and feels sticky or oily. It smears easily when fresh. Burnt food turns into hard, crusty carbon deposits. These are usually very black and solid. Melted plastic, on the other hand, often looks shiny and hard. It might also have a distinct chemical smell.
Knowing the difference helps you choose the right cleaning approach. For example, some harsh chemicals might not work well on carbon. Natural cleaners are often better for fresh grease. If you have extreme oil or grease buildup, you might find our guide on how to clean oil out of oven helpful. This focuses specifically on oil spills and tough grease. Always identify the stain first to pick the most effective cleaning method.
Essential Tools and Safety First
Before you start cleaning your greasy oven, gather all the items you will need. Having everything ready saves time. It also makes the cleaning process smoother. You will need a few basic cleaning supplies. Safety gear is equally important. Cleaning products, even natural ones, can irritate skin or eyes. Oven interiors can also have sharp edges. Always protect yourself first. Proper ventilation is another crucial step. Cleaning fumes can be strong, especially with commercial products.
Taking these preparatory steps ensures a safe and effective clean. It helps you get the job done right. Never skip these steps. Your safety is always most important.
Gathering Your Cleaning Arsenal
For a natural cleaning approach, you will need:
- Baking soda
- White vinegar
- Spray bottle
- Rubber gloves
- Scrub brushes (non-scratch)
- Sponge or microfiber cloths
- Plastic scraper or old credit card
- Small bowl for mixing paste
- Warm water
If you choose a commercial oven cleaner, you will also need:
- Your chosen commercial oven cleaner (read instructions carefully)
- Old newspapers or a tarp to protect the floor
I always make sure I have a good supply of microfiber cloths. They are excellent for wiping away grime. A sturdy plastic scraper is also useful for tackling larger, baked-on bits.
Prioritizing Safety Measures
Safety is non-negotiable when cleaning an oven. Here are the key steps to follow:
- Unplug the Oven: Always disconnect the oven from its power source before you start. This prevents accidental activation. It keeps you safe from electric shocks.
- Wear Protective Gear: Put on rubber gloves to protect your hands from chemicals and grease. Safety glasses are also a good idea. They shield your eyes from splashes.
- Ensure Ventilation: Open windows and doors in your kitchen. Use a fan if possible. This helps to air out strong fumes from cleaners. This step is critical, especially with commercial products.
- Read Product Labels: If using a commercial cleaner, read the instructions completely. Understand the active ingredients. Know how long to let the product sit. Also, understand any specific safety warnings.
- Keep Pets and Children Away: Cleaning chemicals can be harmful. Keep your cleaning area clear of pets and children. Ensure they are in a separate room during the process.
Following these safety tips protects you and your home. It makes the cleaning process as safe as it can be.
Natural Cleaning Methods for a Greasy Oven
Cleaning a greasy oven does not always require harsh chemicals. Natural methods are often very effective. They use common household items you likely already have. Baking soda and vinegar are powerful cleaning agents. They react to break down grease and grime. Lemon and salt also offer a gentle abrasive and degreasing action. These natural approaches are safer for your family. They are also better for the environment. I often prefer these methods for regular cleaning. They avoid strong fumes.
These natural solutions might require a bit more dwell time. But they are worth the wait. They leave your oven clean and fresh. They do not leave behind any chemical residue.
The Power of Baking Soda and Vinegar Paste
This is my go-to method for a truly greasy oven. Baking soda is a mild abrasive. It also absorbs odors. Vinegar helps to break down grease.
- Remove Racks and Debris: Take out all oven racks. Scrape away any loose, burnt food bits. You can use a plastic scraper for this.
- Make the Paste: In a small bowl, mix about half a cup of baking soda with a few tablespoons of water. Add water slowly until you get a thick, spreadable paste. It should resemble frosting.
- Apply the Paste: Spread the baking soda paste all over the interior surfaces of your oven. Pay extra attention to greasy spots. Avoid the heating elements or fan openings. I find an old paint brush helps apply it evenly.
- Let It Sit: This is the most crucial step. Let the paste sit for at least 12 hours, or overnight. The longer it sits, the better it works to break down the grease.
- Spray with Vinegar: After the paste has dried, spray white vinegar over the dried baking soda. You will see it fizz and foam. This reaction helps lift the grease.
- Scrub and Wipe: Use a non-scratch scrub brush or sponge to scrub the loosened grease. Wipe away the grime with a damp cloth. Rinse your cloth often. You may need to repeat the spraying and wiping.
- Final Rinse: Wipe the entire oven interior with a clean, damp cloth. Remove all baking soda residue. This ensures your oven is completely clean.
This method works wonders for both grease and baked-on food. For a more detailed guide on this powerful duo, refer to our article on how to clean oven with baking soda.
Lemon and Salt Scrub for Mild Grease
For lighter grease buildup or maintaining a relatively clean oven, lemon and salt work well. Lemon juice contains citric acid. This acid helps cut through grease. Salt acts as a gentle abrasive.
- Preheat Lightly: Turn your oven on to a low temperature (around 250°F) for 5-10 minutes. This slightly warms the grease, making it easier to remove. Then turn off the oven and let it cool until it is just warm.
- Cut Lemons: Cut two or three lemons in half.
- Apply Salt: Sprinkle a generous amount of salt directly onto the cut surface of a lemon half.
- Scrub: Use the salt-covered lemon half to scrub the greasy spots in your oven. Squeeze the lemon as you scrub to release the juice. The salt provides the scrubbing power. The lemon juice cuts the grease.
- Let It Sit (Optional): For tougher spots, let the lemon juice and salt sit for about 15-20 minutes.
- Wipe Clean: Wipe away the loosened grease and salt with a clean, damp cloth. Rinse well.
This method leaves a pleasant, fresh citrus scent. It is a good choice for regular upkeep. It stops grease from becoming a major problem.
Tackling Stubborn Grease with Commercial Cleaners
Sometimes, grease buildup is too severe for natural methods. When baked-on grime becomes a rock-hard layer, commercial oven cleaners offer a powerful solution. These products contain strong chemicals designed to dissolve stubborn grease and carbon. They can save you a lot of scrubbing time. But, because they are powerful, you must use them with extreme care. Always understand the risks and follow instructions precisely. Your safety and the integrity of your oven depend on it.
I have found commercial cleaners indispensable for truly neglected ovens. They cut through layers of old grime fast. But I always prioritize safety when using them.
Choosing the Right Commercial Product
Commercial oven cleaners come in different forms. You can find sprays, foams, or gels. They also vary in strength. Some are “fume-free,” but still require ventilation. Others are heavy-duty for extreme buildup.
- Aerosol Sprays: These are popular for easy application. They coat surfaces quickly.
- Foaming Cleaners: These cling to vertical surfaces well. They provide longer contact time.
- Gels/Liquids: Some cleaners are thicker gels you paint on. They are good for targeted application.
When choosing, read product labels carefully. Ensure the cleaner is suitable for your oven type. Some cleaners are not safe for self-cleaning ovens. Others are specific to gas or electric models. Always look for a product that clearly states it is for “grease” or “baked-on food.” I prefer cleaners that come with clear instructions. I also look for brands with good reviews.
Application Techniques for Heavy Buildup
Applying commercial oven cleaner requires precision and care. Here is how I approach it:
- Prepare the Area: Lay down old newspapers or a tarp on the floor under the oven door. This protects your kitchen floor from drips. Remove all oven racks and any other items from inside the oven.
- Ventilate Thoroughly: Open all kitchen windows and doors wide. Turn on exhaust fans. Even “fume-free” products release some vapors.
- Wear Protective Gear: Put on heavy-duty rubber gloves. Wear safety glasses or goggles. A face mask is also a good idea.
- Apply the Cleaner: Following the product’s instructions, spray or spread the cleaner evenly over all interior surfaces of the oven. Avoid heating elements, pilot lights, and any openings for fans or sensors. Focus on areas with heavy grease.
- Allow Dwell Time: Let the cleaner sit for the recommended time. This could be 30 minutes, 2 hours, or even overnight. The product instructions will specify the time for different levels of dirt. I often let it sit longer for very tough grease.
- Wipe and Scrape: After the dwell time, use a damp cloth or sponge to wipe away the dissolved grease. For stubborn spots, use a plastic scraper or a non-abrasive scrub pad. Work from the top down.
- Rinse Thoroughly: This is critical. Use a clean, damp cloth to rinse all traces of the cleaner from the oven interior. Rinse the cloth often. You may need to wipe many times. Any leftover chemical residue can cause fumes when you cook.
- Air Out: After rinsing, leave the oven door ajar for several hours. This allows any lingering fumes to dissipate.
For ovens with really severe grease and grime, you might find our specific guide on how to clean grease from oven very useful. It provides more detailed steps for handling extreme situations with commercial products.
Specialized Cleaning for Oven Components
A complete oven clean goes beyond the main chamber. The various components of your oven also collect grease. Oven racks get sticky from food spills and drips. The oven door glass gets hazy with baked-on residue. Even the bottom and coils need attention. Each part requires a slightly different approach. Cleaning these components separately ensures a thorough job. It also helps your oven perform better. Neglecting these areas means your oven is never truly clean.
I always take the time to clean each part. It makes a big difference to the overall result. A clean oven is a happy oven.
Cleaning Greasy Oven Racks
Oven racks can become very sticky and dark. They collect drips and grease from everything you bake.
- Remove Racks: Pull out all oven racks.
- Soak in Hot Water: Fill a bathtub or large utility sink with very hot water. Add a generous amount of dish soap or a cup of laundry detergent. Submerge the greasy oven racks completely.
- Add Baking Soda (Optional but Recommended): For extra power, sprinkle about half a cup of baking soda over the submerged racks.
- Let Them Soak: Allow the racks to soak for several hours, or even overnight. The hot water and soap will loosen the baked-on grease.
- Scrub and Rinse: After soaking, use a stiff brush or a scouring pad to scrub away the loosened grime. It should come off much more easily. Rinse the racks thoroughly with clean water.
- Dry: Let the racks air dry completely before returning them to the oven.
This method works wonders. If you do not have a bathtub, our guide on how to clean oven racks without bathtub offers alternative solutions. For cleaning the specific wire racks, you might also find helpful tips in how to clean greasy wire racks.
Shining the Oven Door Glass
The oven door glass often shows the most grease. A hazy door prevents you from seeing your food.
- Apply Cleaner: For inside the glass, use the same baking soda paste method as for the oven interior. Spread a layer on the glass. Let it sit for 30 minutes to an hour. For the outside, you can use glass cleaner.
- Scrub: Use a non-scratch scrub pad or a plastic scraper. Gently scrape away any baked-on residue.
- Wipe Clean: Wipe the glass with a damp microfiber cloth. Make sure all residue is gone.
- Final Polish: Buff the glass with a clean, dry microfiber cloth for a streak-free shine.
Sometimes grease gets between the glass panes. This is a more complex job. It might require disassembling the oven door. I would recommend checking your oven manual or seeking professional help for that. Our guide on how to clean inside oven glass gives more detailed steps for this specific task.
Addressing the Oven Bottom and Coils
The very bottom of the oven and the heating elements also collect grime.
- Oven Bottom: This area often gets drips. Use the baking soda paste or commercial cleaner method here. Ensure you get into the corners. For specific steps on this section, our article on how to clean bottom of oven provides further detail.
- Heating Coils (Electric Ovens): For electric ovens, the coils themselves should not be submerged in water. Wipe them with a damp cloth if they are cool and unplugged. Do not use abrasive cleaners on them. For more specific cleaning information on heating elements, refer to our guide on how to clean oven coils.
- Gas Oven Grates: If you have a gas oven, the grates can also get greasy. You can often clean them the same way as oven racks, by soaking them in hot soapy water. Our specific guide on [how to clean gas oven grates](https://beacleaner.com/how to clean-gas-oven-grates) offers dedicated methods for these.
Always make sure these areas are dry before using the oven again.
Self-Cleaning Oven: When and How to Use It
Many modern ovens come with a “self-clean” feature. This setting uses extremely high temperatures to burn off food residue and grease. It turns organic matter into ash. This sounds like a miracle solution. And it can be very effective for baked-on grime. However, it is not always the best first choice. The self-cleaning cycle uses a lot of energy. It also creates strong fumes. Sometimes, it can even cause smoke detectors to go off. I use this feature carefully. I always prepare the oven and my home before running a cycle.
Activating the Self-Clean Cycle
If you decide to use your oven’s self-cleaning feature, here are the steps I follow:
- Remove Everything: Take out all oven racks, baking stones, and any foil or accessories. These items are not safe for the self-clean cycle. They can warp or discolor.
- Wipe Loose Debris: Scrape out any large food particles or heavy grease puddles. If you do not, they can create excessive smoke.
- Ensure Ventilation: Open windows and doors in your kitchen and throughout your home. Turn on exhaust fans. The cycle produces smoke and strong fumes.
- Lock the Door: The oven door will automatically lock during the cycle. Do not try to open it.
- Start the Cycle: Follow your oven’s manual for specific instructions. Start the self-clean cycle. It can last from 2 to 6 hours.
- Leave Home (Optional but Recommended): Many people prefer to leave the house during the self-clean cycle due to the fumes. This is a good idea if you are sensitive to smells.
- Allow to Cool: Once the cycle finishes, let the oven cool down completely. This can take several hours. Do not open the door until it has cooled.
The high heat burns away most of the grease. You will be left with a fine ash.
Post-Self-Clean Cleanup
After the self-cleaning cycle finishes and the oven cools, you still have one step left:
- Vacuum or Wipe Ash: Use a damp cloth or a vacuum cleaner with a brush attachment to remove the fine ash left behind. Make sure all the ash is gone.
- Wipe Racks Separately: Your racks will still be greasy or discolored. Clean them using the soaking method described earlier.
- Check for Residue: Sometimes, very stubborn spots might remain. You can use a damp cloth and a gentle scrub on these areas.
- Wipe Down: Give the entire interior a final wipe with a clean, damp cloth.
Self-cleaning is a powerful tool. But it is important to follow all steps. For more detailed instructions on what to do after a self-clean cycle, our guide on how to clean oven after self-clean provides extra insights.
Preventative Measures and Regular Maintenance
Cleaning a greasy oven is hard work. The best strategy is to prevent it from getting too dirty in the first place. Regular, light maintenance saves you hours of deep cleaning. Small actions taken often stop grease from building up. This also extends the life of your oven. It ensures it runs efficiently. I have learned that a few simple habits make a huge difference. These habits keep my oven looking good and smelling fresh. They also reduce the risk of smoke during cooking.
Prevention is always easier than a cure. These tips will help you keep your oven cleaner, longer.
Daily Habits for a Cleaner Oven
Incorporating small cleaning steps into your routine makes a big impact.
- Wipe Up Spills Immediately: If food or grease spills, wipe it up as soon as the oven cools. Fresh spills are much easier to clean. They do not bake onto the surface.
- Use a Drip Tray: Place a foil-lined baking sheet or a dedicated drip tray on the bottom rack when cooking. This catches any drips from roasts or casseroles. It saves the oven bottom from direct contact with grease.
- Wipe Down After Use: After your oven has cooled from cooking, give the interior a quick wipe. A damp cloth with a little dish soap can remove any fresh grease. This simple step stops grease from accumulating.
- Check Door Seal: Periodically wipe the oven door seal. This rubber gasket can trap grease and crumbs. Keeping it clean helps the door seal properly. This improves energy efficiency.
These small habits add up. They prevent your oven from becoming a major cleaning project.
- oven cleaning
- grease removal
- kitchen maintenance