· Vehicle Maintenance · 21 min read
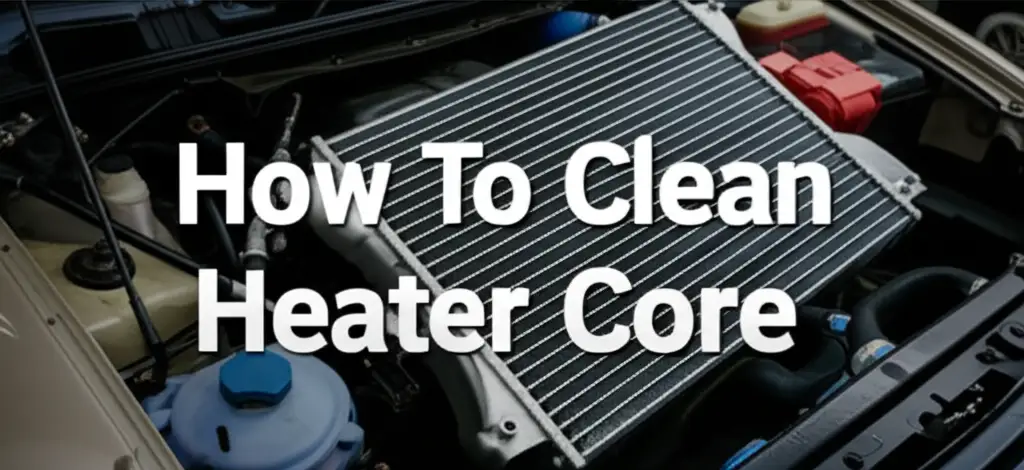
How To Clean Heater Core
Restore Your Car’s Heat: How to Clean a Heater Core Effectively
Imagine driving on a chilly morning, expecting warm air from your car vents, but getting only cold breezes. This common problem often points to a clogged heater core. A properly working heater core keeps your car’s cabin warm and comfortable during cold weather. Cleaning your heater core can fix this issue without a costly replacement. This guide shows you how to clean heater core blockages at home.
It might seem like a big job, but with the right steps, you can do this yourself. We will cover why your heater core gets dirty, what tools you need, and a clear step-by-step process for cleaning it. You will learn how to flush out debris and restore your car’s heating system. Let’s get your car’s heat working perfectly again.
Takeaway
- Identify heater core symptoms like no cabin heat.
- Gather tools, including flush chemicals and safety gear.
- Safely drain coolant and disconnect heater core hoses.
- Flush the heater core in both directions until clear.
- Refill coolant, bleed air, and test the heating system.
- Perform regular coolant flushes to prevent future clogs.
How do you clean a heater core?
You clean a heater core by flushing it. First, drain the old coolant. Then, disconnect the heater core hoses and flush water and a cleaning solution through the core. You push the solution in one direction, then reverse the flow. This removes debris and restores proper function, bringing heat back to your car’s cabin.
Understanding Your Heater Core and Why It Clogs
Your car’s heater core plays an important role in keeping you warm. It is like a small radiator tucked away in your dashboard. Hot engine coolant flows through it, transferring heat to the air blown into your car. If your car blows cold air when the heat is on, a clogged heater core is a likely culprit.
Understanding how it works helps you fix it. The heater core is a key part of your car’s cooling system. This system manages engine temperature and provides cabin heat. It uses coolant to move heat around. When the heater core gets dirty, it cannot transfer heat well.
What is a Heater Core?
A heater core is a small heat exchanger. It sits inside your car’s dashboard. Hot coolant from the engine circulates through thin tubes and fins in the core. A fan then blows air across these fins, warming the air. This warm air then enters the cabin through your vents.
Its design allows for efficient heat transfer. Coolant enters one hose and exits through another. If the flow inside slows down or stops, you lose heat. Think of it as a mini radiator for your car’s interior.
Common Symptoms of a Clogged Heater Core
Several signs point to a clogged heater core. The most obvious symptom is a lack of heat inside your car. You turn on the heater, but only cold or lukewarm air comes out. This happens even when the engine is at normal operating temperature.
Another sign can be foggy windows. If the defrost does not work well, it might be due to no heat. You may also notice a sweet smell inside your car, which indicates a coolant leak, possibly from the core itself. Finally, some people report their engine running hotter than usual because coolant flow is restricted.
- No heat or only lukewarm air from vents: This is the primary indicator.
- Foggy windows that do not clear: Lack of warm, dry air from the defrost.
- Sweet, syrupy smell inside the cabin: Could be a coolant leak from the heater core.
- Engine overheating (less common): Reduced coolant flow can sometimes affect engine cooling.
Reasons Why Heater Cores Clog
Heater cores typically clog due to debris in the cooling system. Over time, coolant breaks down. It can form rust, scale, or sludge. These particles then settle in the small, narrow passages of the heater core.
Mixing different types of coolant can also cause clogs. Different coolants might react chemically, forming gel-like substances. These gels quickly block the tiny tubes. Hard water used to mix with coolant can also leave mineral deposits. Regular coolant flushes prevent these issues. Ignoring coolant changes allows these problems to build up.
- Degraded Coolant: Old coolant loses its protective properties and breaks down.
- Rust and Scale Buildup: Metal components in the cooling system can rust.
- Sludge Formation: Additives in coolant can separate and form sludge.
- Mixing Coolant Types: Using incompatible coolants creates gel-like blockages.
- Hard Water Deposits: Minerals from tap water can deposit inside the core.
Gathering Your Tools and Safety First
Before you start any work on your car, gather all the necessary tools. Having everything ready saves time and makes the job smoother. You will need a few specific items for flushing the heater core. This preparation step is key to a successful cleaning process.
Safety is also important. Working with car fluids and hot components requires caution. Protect yourself from chemicals and hot surfaces. Always wear appropriate safety gear. This ensures your safety throughout the cleaning process.
Essential Tools and Materials
You will need several items to clean your heater core. A garden hose is crucial for flushing. You will also need a few buckets to catch old coolant. Specialized chemicals, like a cooling system flush, will help break down deposits. Air tools are not strictly necessary but can help for stubborn clogs.
Make sure you have clamps or pliers to remove hoses. You also need new coolant to refill the system. A funnel helps pour fluids without spills. Finally, have rags ready for any spills.
- Garden hose with nozzle: For flushing water.
- Two large buckets: To catch old coolant and flush water.
- Hose clamps or pliers: To remove and secure hoses.
- Screwdrivers or nut drivers: For hose clamps.
- Safety glasses: To protect your eyes from splashes.
- Rubber gloves: To protect your hands from coolant.
- Cooling system flush chemical: To dissolve blockages.
- New vehicle-specific coolant: For refilling the system.
- Funnel: For mess-free refilling.
- Rags or shop towels: For spills and cleanup.
- Optional: Air compressor with blow gun: For stubborn clogs (use with caution).
- Optional: Thermometer: To check cabin heat after cleaning.
Safety Precautions When Working with Coolant
Coolant is toxic and should be handled with care. Always wear safety glasses to protect your eyes from splashes. Rubber gloves will protect your skin from direct contact. Coolant can cause irritation. Keep pets and children away from the work area. They might be attracted to the sweet smell of coolant, but it is very dangerous if ingested.
Work in a well-ventilated area. Coolant fumes can be harmful. Never open the radiator cap when the engine is hot. Hot coolant is under pressure and can cause severe burns. Allow the engine to cool completely before starting. Dispose of old coolant properly. Do not pour it down the drain. Many auto parts stores accept used coolant for recycling.
- Wear safety glasses: Protect your eyes from splashes.
- Wear rubber gloves: Prevent skin contact with coolant.
- Work in a well-ventilated area: Avoid inhaling harmful fumes.
- Ensure the engine is cool: Never open a hot cooling system.
- Keep pets and children away: Coolant is highly toxic.
- Dispose of old coolant properly: Recycle it at an authorized facility.
- Have rags ready: Clean up any spills immediately.
Preparing Your Vehicle for Heater Core Cleaning
Proper preparation makes the cleaning process much easier and safer. Before you even think about disconnecting hoses, you need to get your car ready. This involves letting the engine cool down and safely draining the coolant. Taking these steps ensures you do not get burned and helps you handle fluids correctly.
Accessing the heater core hoses is also part of this preparation. In some cars, these are easy to reach. In others, you might need to move some components. Knowing where these hoses are saves time later on.
Cooling Down and Draining the System
First, make sure your car’s engine is completely cool. This means waiting several hours after driving, or even overnight. Working on a hot engine is very dangerous. Hot coolant can spray out under pressure and cause severe burns.
Once the engine is cool, place a large drain pan under the radiator. Open the radiator drain plug or disconnect the lower radiator hose. This will allow the coolant to flow out. Make sure you catch all the coolant in the pan. You want to collect as much as possible for proper disposal. This step ensures you work with an empty system, which is safer. Remember, you might need to clean sediment from a water heater or other systems by draining, similar to this process.
- Allow engine to cool fully: Patience here prevents burns.
- Place a drain pan: Catch all the old coolant.
- Open radiator drain plug or lower hose: Release the coolant.
- Collect all coolant: For proper and safe disposal.
Locating and Disconnecting Heater Core Hoses
The heater core hoses are typically found on the firewall of your engine bay. The firewall is the metal panel separating the engine from the passenger cabin. Look for two hoses that go through this panel. These are the inlet and outlet hoses for your heater core. They usually run from the engine or radiator to the firewall.
Once you find them, use pliers or a screwdriver to loosen the hose clamps. Carefully twist and pull the hoses off their connections. Some coolant might still be in the hoses, so have a rag ready. If they are stuck, gentle twisting can help. Be careful not to damage the hose connections or the heater core pipes. You might see a small amount of coolant leak, which is normal.
- Locate hoses on the firewall: Identify the two heater core hoses.
- Loosen hose clamps: Use appropriate tools.
- Carefully remove hoses: Twist gently if stuck.
- Prepare for minor coolant drips: Have a rag ready.
- Inspect hoses for damage: Check for cracks or wear.
Bypassing the Heater Core (Optional but Recommended)
For a more thorough cleaning, or if you suspect a very stubborn clog, you can bypass the heater core. This involves temporarily connecting the two heater core hoses together in the engine bay. Use a suitable connector or a piece of spare hose to bridge the gap. This allows you to flush the rest of the cooling system separately if needed.
However, for cleaning just the heater core, simply disconnecting the hoses is usually enough. Bypassing can be useful if you plan to run the engine for a short time while flushing. But for directly flushing the heater core, it’s not strictly necessary. We will focus on directly flushing the heater core in the next steps. This step mostly helps if you want to flush the entire engine cooling system without involving the heater core itself during that larger flush.
- Consider if necessary: Usually not needed for direct heater core flush.
- Use a suitable connector: Bridge the two disconnected heater core hoses.
- Allows flushing of main cooling system: Separates heater core from engine flush.
- Not required for direct heater core cleaning: Focus remains on the core itself.
The Step-by-Step Heater Core Flush Process
Now that your vehicle is ready, it is time to flush the heater core. This process involves using water and a cleaning solution to dislodge and remove blockages. Patience and a systematic approach are key here. You will flush in both directions to ensure all debris is removed. This method is effective for restoring flow and heat.
Follow these steps carefully to ensure a thorough cleaning. Do not rush any part of the process. A good flush can bring your heating system back to life. This is similar to how you might clean a tankless water heater by flushing its coils.
Initial Water Flush
Start with a simple water flush. Take your garden hose and direct a gentle stream of water into one of the heater core hoses. You need to identify which hose is the inlet and which is the outlet. Usually, it does not matter too much for the initial flush, but you will reverse flow later. Point the other heater core hose into an empty bucket. Turn on the water and observe what comes out.
You will likely see rust, dirt, and possibly chunks of gunk. Continue flushing until the water coming out runs clear. This step removes loose debris before you introduce any chemicals. It also helps you see the extent of the blockage. If the water flow is very slow, you have a significant clog.
- Identify hoses: Know which is inlet and outlet.
- Insert garden hose: Direct water into one heater core hose.
- Direct other hose to bucket: Catch the exiting water.
- Flush until clear: Continue until only clean water comes out.
- Observe debris: Note the amount and type of material removed.
Applying a Chemical Flush Solution
Once the initial water flush is done, it is time for a chemical flush. Use a cooling system flush product designed for removing scale and rust. Follow the instructions on the product label for mixing and application. Typically, you will pour the solution into one of the heater core hoses. You might need to use a small funnel.
Allow the solution to sit in the heater core for the recommended time. This gives the chemicals time to work on the stubborn deposits. Do not leave it in longer than specified, as some chemicals can be harsh. This step helps dissolve tough clogs that water alone cannot remove. You can often use vinegar for this too, similar to how you clean a hot water heater with vinegar.
- Choose a cooling system flush: Select a suitable chemical cleaner.
- Follow product instructions: Mix and apply as directed.
- Pour into a heater core hose: Use a funnel if needed.
- Allow to soak: Give chemicals time to work on deposits.
- Do not over-soak: Avoid leaving solution in too long.
Reverse Flushing for Stubborn Clogs
After the chemical soak, it is time for the reverse flush. This is a crucial step for dislodging stubborn blockages. Remove the garden hose and reattach it to the other heater core hose. This means water will flow through the core in the opposite direction. Direct the first hose into your bucket.
Turn on the water again. You might see a new burst of dislodged debris. The reverse flow can push out material that was stuck. Alternate between forward and reverse flushing several times. Do this until the water coming out of both hoses runs completely clear. This ensures all the chemical solution and remaining debris are out of the system. This back-and-forth action is highly effective.
- Reverse hose connection: Attach garden hose to the opposite heater core hose.
- Flush again: Send water through in the reverse direction.
- Observe new debris: Watch for more gunk being flushed out.
- Alternate directions: Flush forward and reverse several times.
- Continue until clear: Ensure all chemical and debris are removed.
Addressing Stubborn Clogs and Advanced Techniques
Sometimes, a simple flush might not be enough. Very stubborn clogs require more effort. Do not get discouraged if the first few flushes do not fully clear the heater core. There are a few advanced techniques you can try. These methods might require more caution or specialized tools.
If you have tried the basic flush and still lack heat, consider these options. They can help break apart more solidified blockages. However, always proceed carefully to avoid damaging the heater core itself.
Using Compressed Air (With Extreme Caution)
Compressed air can be very effective, but it comes with a high risk. High pressure can rupture the heater core. This would turn a simple cleaning into a costly replacement. If you choose to use compressed air, use it with extreme caution. Set your air compressor to a very low PSI, around 10-15 PSI.
Connect the air hose to one heater core hose. Point the other hose into a bucket. Briefly pulse the air, allowing water to follow. Never apply continuous high pressure. The goal is to gently dislodge debris, not to blast it out. If you hear any strain or unusual sounds, stop immediately. I strongly recommend starting with gentle water flushes first.
- Use extreme caution: High pressure can damage the core.
- Set low PSI: Keep pressure at 10-15 PSI.
- Pulse air briefly: Avoid continuous pressure.
- Alternate with water: Helps move dislodged debris.
- Stop if strained: Any unusual sounds mean to stop immediately.
Chemical Soaking for Prolonged Periods
For very stubborn scale or mineral deposits, a longer chemical soak might be needed. After the initial water flush, fill the heater core with a strong chemical flush solution. Seal both ends of the heater core hoses. You can use large hose clamps or appropriate plugs. Leave the solution to sit for several hours, or even overnight.
This extended soak allows the chemical to penetrate and dissolve very tough clogs. After the soak, perform multiple reverse flushes with water. Make sure to thoroughly rinse out all the chemical solution. This method is more aggressive and should only be used if standard flushing fails. Always follow the chemical product’s specific instructions for prolonged contact.
- Fill with strong solution: Use a potent cooling system cleaner.
- Seal both hose ends: Prevent solution from leaking.
- Soak for several hours or overnight: Allow ample time for dissolving.
- Flush thoroughly after soaking: Remove all chemical residue.
- Use only for severe clogs: This is an advanced technique.
When to Consider Professional Help or Replacement
Sometimes, a heater core is too far gone to be cleaned. If you have tried all the flushing methods and still have no heat, it might be time for professional help. A mechanic can diagnose the issue more thoroughly. They have tools like specialized flush machines that can exert more pressure safely.
If the core is corroded or leaking, cleaning will not fix it. Leaks typically require replacement. Replacing a heater core is a complex and often expensive job. It usually involves removing the entire dashboard. This job is best left to experienced mechanics. It is important to know when to call it quits on a DIY repair.
- No heat after multiple attempts: Indicates a severe or unfixable clog.
- Coolant leaks from heater core: Signs of corrosion or physical damage.
- Specialized equipment needed: Professional flush machines offer more power.
- Dashboard removal required: A sign that replacement is a big job.
- Cost vs. benefit: Weigh the cost of replacement against continued DIY efforts.
Reassembling and Testing Your Heating System
Once the heater core is clean, the next step is to put everything back together. This involves reattaching the hoses and refilling the cooling system. Proper reassembly is vital for a leak-free and effective heating system. Do not rush this stage.
After everything is connected, you need to test the system. This includes bleeding air from the coolant lines and checking for leaks. Finally, you will test the heat output to confirm your hard work paid off.
Reattaching Hoses and Securing Connections
First, make sure both heater core pipes are clean and dry. Carefully reattach the heater core hoses to their respective pipes. Push them on firmly until they are fully seated. Then, slide the hose clamps back into their original positions. Use pliers or a screwdriver to tighten the clamps securely.
Double-check that all connections are tight. Loose clamps can lead to coolant leaks. Once the heater core hoses are secure, reattach any other hoses or components you removed during the preparation phase. Ensure all connections are just as tight as they were before. This prevents any future issues.
- Clean and dry pipes: Ensure surfaces are ready for hoses.
- Reattach hoses firmly: Push them all the way on.
- Secure hose clamps: Tighten them properly.
- Double-check all connections: Verify tightness to prevent leaks.
- Reinstall other components: Put back anything else you moved.
Refilling the Cooling System
With hoses reattached, it is time to refill your cooling system. Use new coolant that matches your vehicle’s specifications. Check your owner’s manual for the correct type. Mix concentrated coolant with distilled water if required. Use a funnel to slowly pour the coolant into the radiator or coolant reservoir.
Fill the system gradually. This helps prevent air pockets from forming. Once the reservoir or radiator is full, put the cap back on loosely. This allows air to escape during the next step. Having the correct coolant is crucial for your engine’s health.
- Use new, correct coolant: Check vehicle manual for type.
- Mix if concentrated: Use distilled water if needed.
- Pour slowly with a funnel: Avoid air bubbles.
- Fill radiator/reservoir: To the proper level.
- Leave cap loose: Prepares for air bleeding.
Bleeding Air from the System
Bleeding air is a very important step. Air trapped in the cooling system can cause overheating and poor heater performance. Start the engine and let it run with the radiator cap loose or off (if applicable). Turn your car’s heater on to its highest setting with the fan on low. This opens the heater core’s valve.
As the engine warms up, coolant will circulate. Air bubbles will rise to the top and escape. You might see the coolant level drop; add more as needed. Squeeze the radiator hoses a few times to help dislodge air bubbles. Continue running the engine until it reaches normal operating temperature and no more bubbles appear. Then, fully tighten the radiator cap.
- Start engine with cap loose/off: Allows air to escape.
- Turn heater on high: Opens the heater core valve.
- Let engine warm up: Coolant circulates, pushing air out.
- Add coolant as needed: Maintain proper level.
- Squeeze hoses: Helps release trapped air.
- Run until no bubbles: Ensures air is fully bled.
- Tighten cap: Once air bleeding is complete.
Testing the Heater Output
Once the system is full and bled, it is time for the final test. Take your car for a drive. Pay attention to the temperature of the air coming from your vents. It should now be warm and consistent. Make sure the heat stays warm even at idle. If it only gets warm when you are driving, there might still be some air in the system or a minor blockage.
Check all connections again for any leaks after the test drive. Look for drips under the car or around the hoses. If the heat is still not working, repeat the bleeding process. If repeated bleeding does not help, consider repeating the flush or seeking professional advice. Celebrate your success if the heat is back!
- Drive the car: Test the heater in real-world conditions.
- Check vent temperature: Ensure warm, consistent heat.
- Observe idle heat: Confirm heat works even when stopped.
- Inspect for leaks: Check all connections after driving.
- Re-bleed if needed: Repeat air removal if heat is inconsistent.
- Enjoy your warm cabin: Confirm successful cleaning.
Maintenance Tips to Prevent Future Heater Core Clogs
Cleaning your heater core is a big job. You certainly do not want to do it again anytime soon. The best way to avoid future clogs is through regular maintenance. Proper care of your vehicle’s cooling system ensures a long life for your heater core. A little prevention goes a long way.
Following a few simple tips can save you time, money, and discomfort in the future. These practices help keep your coolant clean and free-flowing. They are key to maintaining an efficient heating system.
Regular Coolant Flushes and Changes
The most important step is regular coolant maintenance. Your car’s owner’s manual specifies a recommended interval for coolant flushes and changes. Sticking to this schedule is crucial. Over time, coolant degrades and loses its protective additives. This breakdown leads to rust, scale, and sludge.
Flushing the entire cooling system removes these contaminants before they can build up in the heater core. Always use the correct type of coolant for your vehicle. Mixing different types or using plain tap water can lead to severe clogs. Fresh, clean coolant keeps the system healthy and flowing freely.
- Follow manufacturer schedule: Change coolant at recommended intervals.
- Use correct coolant type: Refer to your owner’s manual.
- Never mix coolant types: Can lead to harmful chemical reactions.
- Avoid tap water: Use distilled water if mixing concentrate.
- Removes contaminants: Prevents rust, scale, and sludge buildup.
Monitoring Coolant Levels and Quality
Regularly check your coolant level. Do this when the engine is cool. The coolant reservoir usually has “MIN” and “MAX” marks. Keep the level between these marks. A low coolant level can indicate a leak. It also means less coolant circulating through the heater core.
Also, visually inspect the coolant for its quality. It should be clear and vibrant, matching its original color. If it looks rusty, murky, or has particles floating in it, it is time for a flush. Dirty coolant is a clear sign that problems are brewing. Catching these signs early prevents major issues.
- Check level when cool: Ensure coolant is between MIN/MAX lines.
- Look for leaks: Low levels can indicate a problem.
- Inspect coolant color: Should be clear and vibrant, not rusty or murky.
- Check for particles: Floating debris means it is time for a flush.
- Early detection prevents issues: Address problems before they become severe.
Avoiding Incompatible Coolant Mixes
As mentioned before, mixing different types of coolant is a big mistake. Modern vehicles use specific coolant formulations. These are often labeled as HOAT, OAT, IAT, or have specific color codes. Using the wrong type can cause a chemical reaction. This reaction creates a gel-like substance that rapidly clogs your heater core and other cooling system components.
- heater core
- car heat
- vehicle maintenance
- coolant system
- DIY auto repair