· Beekeeping Equipment Cleaning · 15 min read
How To Clean Honey Extractor
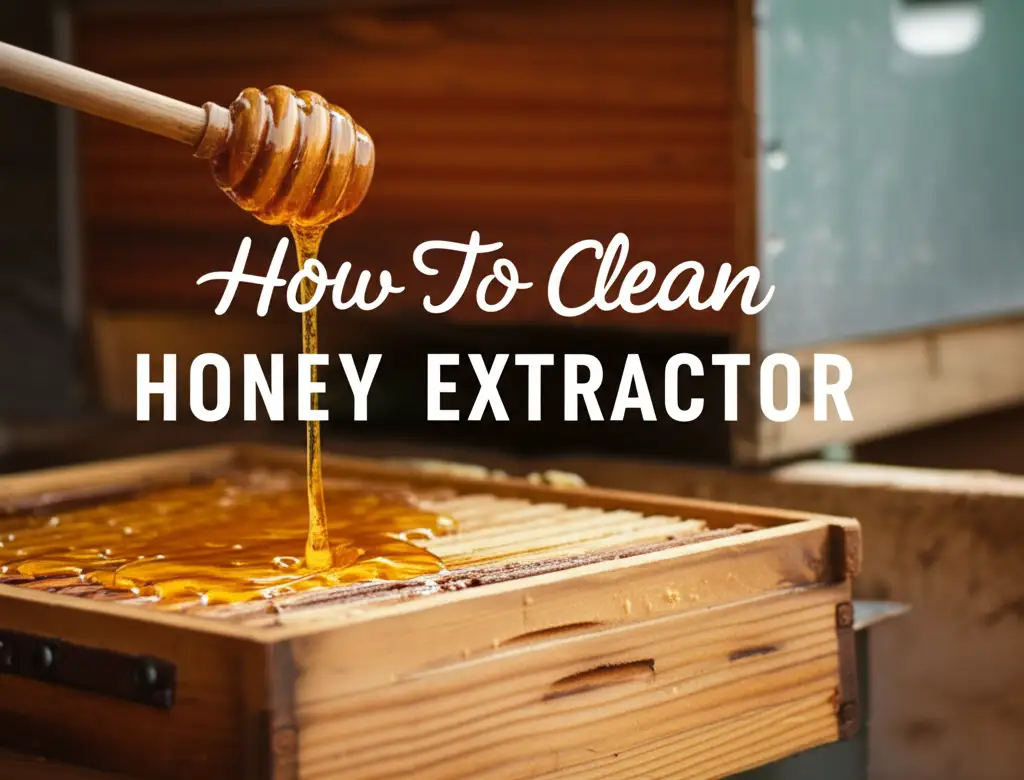
Unlock a Cleaner Harvest: How To Clean Honey Extractor Effectively
Collecting honey is a sweet reward for any beekeeper. Yet, the work does not end when the honey flows into your jars. Keeping your equipment clean is vital. A dirty honey extractor can lead to contamination. It can also shorten the lifespan of your valuable tool.
Cleaning your honey extractor ensures hygiene for your next harvest. It also protects your equipment from wear and tear. Old honey can crystalize or attract pests. We will walk you through the entire process. This guide covers preparation, cleaning steps, and proper storage. You will learn the best methods to clean honey extractor parts. Get ready to make your extractor shine.
Takeaway
- Pre-clean immediately: Remove bulk honey soon after extraction.
- Use warm water and mild soap: This combination cuts through sticky residue.
- Disassemble for thoroughness: Clean every part, big or small.
- Sanitize regularly: Vinegar or food-grade sanitizer prevents bacteria.
- Dry completely: Prevent rust and mold before storage.
To effectively clean a honey extractor, first scrape out excess honey. Then, rinse with warm water to dissolve sticky residue. Wash all parts with mild, food-safe soap and soft brushes. Rinse thoroughly with clean water, then sanitize with a diluted vinegar solution. Finally, dry every component completely to prevent rust and mold before storage.
Preparing Your Honey Extractor for Cleaning
The first step to a clean honey extractor is good preparation. Do not let honey dry inside the extractor. Dried honey becomes very hard to remove. Start the cleaning process right after you finish extracting honey.
Warm the extractor if possible. A warm extractor allows residual honey to flow easily. You can place it in a sunny spot for a while. Or, you can pour a small amount of warm water inside. This helps soften sticky honey.
You also need to gather your cleaning supplies. This includes warm water and a mild, food-grade soap. Have soft cloths, sponges, and brushes ready. A sturdy brush helps clean the basket and crevices. Make sure your workspace is clean. This prevents more dirt from getting on your extractor.
Essential Tools and Cleaning Agents
Having the right tools makes cleaning simpler. You will need a variety of items. These items help tackle sticky honey and waxy build-up. Always use tools that will not scratch your extractor’s surfaces.
- Warm Water: This is your primary cleaning agent. Warm water helps dissolve honey. It makes rinsing much easier.
- Mild, Food-Grade Soap: Choose a soap safe for food contact. Dish soap often works well. Avoid harsh chemicals that could leave residue.
- Soft Brushes and Sponges: These clean surfaces without scratching. A bottle brush is great for the spigot.
- Scraper or Spatula: Use a plastic or silicone scraper. It helps remove large chunks of honey or wax.
- Vinegar (White Distilled): Vinegar acts as a natural sanitizer. It also helps remove crystallized honey. You can learn more about how to clean with vinegar by looking at guides such as how to clean shower with vinegar.
- Clean Cloths or Towels: Use these for drying your extractor. Microfiber cloths are very absorbent.
Using proper tools protects your extractor. It also ensures food safety for your honey. Do not use abrasive pads. These can scratch stainless steel. Scratches create places for bacteria to hide.
Step-by-Step Disassembly and Initial Rinse
Taking apart your honey extractor is key. It lets you reach all areas that need cleaning. Not all extractors disassemble in the same way. Consult your extractor’s manual if you are unsure. Most extractors allow for the removal of the basket and the honey gate.
Start by draining all honey completely. Tilt the extractor if needed to get every last drop. Then, begin taking out the components. First, remove the internal basket or cage. These parts hold the honey frames. They often have the most sticky residue. Set them aside for separate cleaning. Next, remove the honey gate or spigot. This part controls honey flow. It can trap honey and sugar crystals. Pay special attention to this area.
Once disassembled, start the initial rinse. Use warm water to rinse off loose honey. You can use a hose or simply pour water inside. Let the warm water wash away the bulk of the sticky mess. This first rinse prevents honey from drying and hardening. It also makes the next steps much easier. For more tips on general cleaning of sticky residue from containers, consider reading about how to clean bottom of pan.
Removing Stubborn Honey and Wax
Sometimes, honey dries or wax builds up. These sticky problems need extra effort. Do not force them off with sharp tools. This can damage your extractor. Instead, use heat and gentle scraping.
You can warm the extractor to loosen stubborn honey. Place it in a warm room. Or, carefully pour very warm, not boiling, water inside. Let it sit for a few minutes. The heat helps melt the honey. Then, use a plastic scraper or a silicone spatula. Gently push off the softened honey and wax. Repeat this process if needed.
For wax on the basket, you can also use warm water. A soft-bristled brush works well here. Brush the wax away under running warm water. Make sure to get into all the nooks. These areas often trap small wax pieces. Cleanliness here is important.
If honey has crystallized, vinegar can help. Mix equal parts white vinegar and warm water. Pour this solution into the extractor. Let it soak for 30 minutes to an hour. The acid in the vinegar helps dissolve sugar crystals. Then, you can easily wipe them away.
Deep Cleaning the Extractor Body and Basket
After the initial rinse, it is time for a thorough cleaning. The main body and the spinning basket are your biggest parts. They need careful attention to ensure all residue is gone. This step is critical for food safety and preventing contamination.
Start with the extractor body. Fill the bottom with a few inches of warm water and a squirt of mild, food-grade soap. Use a soft sponge or cloth to scrub the inside walls. Work from top to bottom. Pay close attention to seams and corners. Honey can hide in these spots. Rinse your sponge often in clean water. Then, reapply soapy water.
For the spinning basket, place it in a large basin or tub. Fill it with warm, soapy water. Use a soft brush to scrub each part of the basket. Ensure you clean between the wires. Honeycomb bits often get stuck here. Rinse the basket thoroughly under running warm water. Make sure no soap residue remains.
Rinse the extractor body multiple times with fresh, clean water. Do this until no suds appear. A final rinse with cool water can help. It washes away any remaining warm-water residue. Inspect all surfaces visually. Run your hand over them. Feel for any sticky spots or rough areas. If you find any, repeat the scrubbing process.
Cleaning the Spigot and Gears
The spigot (honey gate) and the gears are often overlooked. Yet, they are vital parts of your extractor. They need just as much cleaning. Neglecting them can lead to sticky operation. It can also harbor bacteria.
The spigot can collect crystallized honey inside. Disassemble it as much as possible. Many spigots have a gate that slides out. Soak these parts in warm, soapy water for a few minutes. Use a bottle brush or a small pipe cleaner to clean the inside. Push the brush through the opening multiple times. This removes all sticky residue. Rinse all spigot parts very well under running water. Ensure no soap remains in hidden crevices.
The gears are usually above the main honey area. They should not get as sticky. However, honey or wax can splash onto them. Use a damp cloth to wipe down the gears. If they are very sticky, use a cloth with a small amount of mild soap. Be careful not to get water into sealed bearings. After cleaning, dry the gears immediately. You might need to oil them lightly with a food-grade lubricant. This ensures smooth operation for your next use.
Sanitizing Your Extractor for Food Safety
Cleaning removes dirt and honey. Sanitizing kills bacteria and yeast. This step is crucial for food safety. It prevents unwanted fermentation in your honey. It also stops mold growth. Mold can appear in damp, sugary environments.
After cleaning and rinsing, prepare a sanitizing solution. White distilled vinegar is a good choice. Mix equal parts white vinegar and warm water. For example, use one cup vinegar with one cup water. This creates a mild acid solution. Vinegar is safe for food contact. It also helps remove any lingering smells. If you are concerned about mold, using vinegar is a good strategy, and you can find more information about using how to clean mold with vinegar.
Pour the vinegar solution into the extractor body. Swish it around to coat all inside surfaces. You can also spray it on the outside. Let the solution sit for 5-10 minutes. For the basket and spigot, either submerge them or spray them thoroughly. Make sure the solution touches every surface.
After sanitizing, drain the vinegar solution. Rinse the entire extractor thoroughly with clean, cool water. This removes any vinegar smell or taste. Multiple rinses might be needed. The goal is to have no lingering scent. This ensures your next batch of honey tastes pure.
Dealing with Mold Prevention
Mold thrives in damp places. Even small amounts of leftover honey can provide food. Proper drying is the best defense against mold. This is especially true for equipment used with sweet, sugary substances.
After sanitizing and rinsing, do not let your extractor air dry without help. Water droplets can remain. These droplets create a perfect environment for mold. Instead, manually dry every part. Use clean, lint-free towels. Microfiber cloths work very well.
Wipe down the inside and outside of the extractor body. Pay special attention to corners and seams. Use a separate, clean cloth for the basket. Make sure to get between all the wires. Disassemble the spigot again if needed. Dry all its components thoroughly. You can also use a fan to help circulate air. This speeds up the drying process. A hairdryer on a cool setting can reach tricky spots. Ensure every part is bone dry before putting it away. Storing a damp extractor invites mold.
Proper Drying and Storage of Your Honey Extractor
Drying your honey extractor correctly is as important as cleaning it. Any moisture left behind can cause problems. It can lead to rust on metal parts. It can also encourage mold or mildew growth. These issues compromise the safety and longevity of your equipment.
After cleaning and sanitizing, wipe down every surface. Use clean, dry towels. Pay extra attention to seams, hinges, and the underside of the lid. If your extractor has plastic components, dry them well too. They can trap water. For a guide on cleaning plastic surfaces, you might find tips from articles like how to clean plastic shower helpful.
For maximum dryness, allow parts to air dry fully. Place them in a clean, dry area with good air circulation. You can set them on a rack. This allows air to reach all sides. Avoid direct sunlight for extended periods. It can degrade some plastic parts over time. Give the extractor several hours, or even a full day, to air dry. Ensure all parts feel completely dry to the touch before reassembling.
Once thoroughly dry, reassemble your extractor. Store it in a cool, dry place. A shed, garage, or dedicated storage room works well. Cover the extractor to protect it from dust and pests. A clean tarp or a large plastic bag works. This keeps your extractor ready for the next honey harvest.
Long-Term Maintenance Tips
Regular maintenance extends the life of your honey extractor. It also ensures it works efficiently. Think of it as a small investment that saves money later. A well-maintained extractor performs better. It also produces cleaner honey.
- Inspect Before Each Use: Check for any damage or loose parts. Ensure the gears move smoothly. Look for rust spots or wear.
- Lubricate Moving Parts: Apply food-grade lubricant to gears and bearings. Do this sparingly. Too much can attract dust. Lubrication ensures smooth operation.
- Store Properly: As mentioned, a dry, covered space is best. Keep it away from harsh chemicals. These can corrode metal.
- Address Issues Quickly: If you notice a small rust spot, treat it. Use fine-grit sandpaper. Then, apply a food-grade clear coat. Small problems can become big ones if ignored.
- Deep Clean Annually: Even if you clean after every use, do a thorough deep clean once a year. Disassemble everything you can. Inspect all parts closely. This catches any hidden problems.
By following these tips, your honey extractor will last for many years. It will keep providing you with pure, golden honey.
Troubleshooting Common Extractor Cleaning Challenges
Even with the best intentions, cleaning can present challenges. Honey extractors can accumulate stubborn residues. Knowing how to handle these makes the job much easier. Common problems include crystallized honey, sticky wax, and even rust.
Crystallized Honey: This is a common issue, especially if honey dries in place. Warm water is your best friend here. Fill the affected area with warm, but not boiling, water. Let it sit for 15-30 minutes. The heat helps dissolve the sugar crystals. A soft brush can then scrub them away. If it is still stubborn, a weak vinegar solution can help. The acid breaks down the sugar bonds.
Sticky Wax Buildup: Wax from honeycombs can adhere to surfaces. It feels greasy and sticky. First, try to scrape off large pieces with a plastic scraper. Then, use warm water and soap. Rub the area with a cloth or sponge. For very sticky areas, a small amount of food-grade oil can help dissolve the wax. Afterward, wash with soap and water to remove the oil.
Rust Spots: Stainless steel extractors are generally rust-resistant. However, small rust spots can appear. This often happens if the extractor is stored damp. For minor spots, use a fine-grit sandpaper or a stainless steel cleaner. Gently rub the area. After removing the rust, ensure the area is perfectly dry. You can apply a food-grade clear coat or polish to protect it.
Always remember to use gentle methods. Harsh chemicals or abrasive scrubbers can damage your extractor. Patience and the right technique will solve most cleaning challenges.
When to Consider Professional Cleaning or Replacement
Most honey extractors can be cleaned at home. However, there are times when you might need more help. Knowing when to call a professional or buy a new extractor saves time and effort.
If your extractor has severe rust, it might be time for a professional. Extensive rust can compromise the integrity of the metal. It can also pose a food safety risk. A professional cleaner might use specialized methods. They can restore the extractor’s surface. This is only viable if the rust is not too deep.
Another reason for professional help is mechanical failure. If gears are seized or parts are broken, cleaning will not fix it. A professional can assess repairs. Sometimes, the cost of repair outweighs the cost of a new unit. Think about this carefully.
Finally, consider replacement if mold or bacteria is pervasive. If you cannot fully sanitize the extractor, it is a risk. Deep scratches or cracks can harbor microorganisms. These areas are impossible to clean thoroughly. For the safety of your honey and your customers, replacement is the best option. Always prioritize food safety. A new extractor ensures a fresh start.
Frequently Asked Questions (FAQ)
How often should I clean my honey extractor?
You should clean your honey extractor immediately after every use. This prevents honey from drying and crystallizing, which makes cleaning much harder. Regular cleaning maintains hygiene and extends the life of your equipment. A thorough deep clean should happen at least once a season.
Can I use bleach to clean my honey extractor?
No, do not use bleach to clean your honey extractor. Bleach is a harsh chemical that can corrode stainless steel over time. It can also leave harmful residues. Stick to mild, food-grade soaps and natural sanitizers like white distilled vinegar for safe and effective cleaning.
What if honey has crystallized inside the extractor?
If honey has crystallized, fill the affected area with warm (not boiling) water. Let it sit for 15-30 minutes to dissolve the crystals. A soft brush can help scrub them away. A diluted white vinegar solution can also help break down stubborn sugar crystals.
Is it safe to put my honey extractor in the dishwasher?
Most honey extractors are too large for a standard dishwasher. Even if parts fit, the high heat and harsh detergents in a dishwasher can damage seals, plastic components, and sensitive mechanical parts. Handwashing with warm water and mild soap is always the safest method.
How do I prevent rust on my honey extractor?
Prevent rust by always drying your honey extractor thoroughly after cleaning. Do not store it while still damp. Store it in a cool, dry place. You can also apply a food-grade clear coat to small exposed areas if rust spots appear.
What is the best way to store a honey extractor?
After cleaning and drying, store your honey extractor in a cool, dry place. Cover it with a clean tarp or large plastic bag to protect it from dust and pests. Keep it elevated off the floor if possible to avoid moisture.
Conclusion
Cleaning your honey extractor is a critical step in beekeeping. It ensures the purity of your honey and the longevity of your equipment. Starting with immediate pre-cleaning helps immensely. Using warm water and mild, food-grade soap removes sticky residue. Remember to disassemble all parts for a thorough scrub.
Sanitizing with vinegar protects against unwanted bacteria. This keeps your honey safe and delicious. Most importantly, always dry your extractor completely before storing it. This simple step prevents rust and mold. Following these steps helps you maintain a pristine honey extractor. It will be ready for many more sweet harvests. Keep your extractor clean, and it will serve you well for years.
- honey extractor cleaning
- beekeeping equipment
- sticky residue
- sanitize extractor
- bee supplies