· Appliance Care · 23 min read
How To Clean Hoover Powerdash Pet
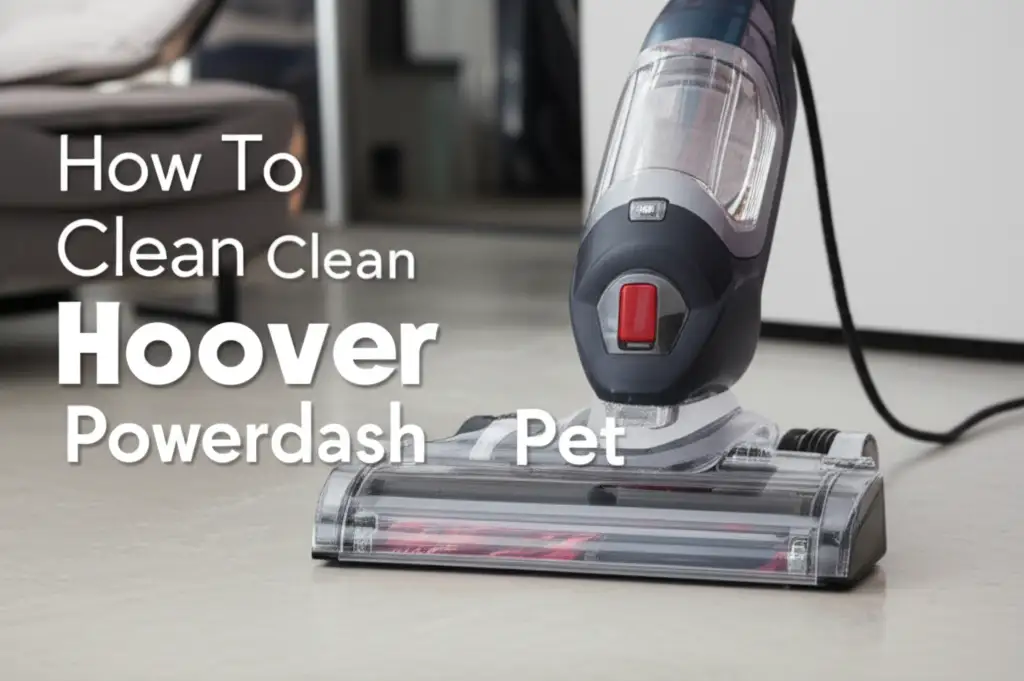
How to Clean Your Hoover Powerdash Pet for Peak Performance
As a pet owner, I know the struggle of keeping carpets clean. My Hoover Powerdash Pet carpet cleaner is a true lifesaver for tackling those unexpected pet messes. This machine works hard, pulling out dirt, stains, and pet hair that regular vacuuming misses. But just like any hardworking appliance, your Powerdash Pet needs regular cleaning itself to keep performing at its best.
Neglecting to clean your carpet cleaner can lead to bad odors, reduced suction, and even damage to the machine. You want your cleaner to be a cleaning solution, not a source of new problems. In this guide, I will walk you through the simple steps to effectively clean your Hoover Powerdash Pet. We will cover everything from emptying tanks to deep cleaning the brush roll, ensuring your machine is ready for its next job.
Takeaway
To effectively clean your Hoover Powerdash Pet and ensure it works its best, remember these key steps:
- Always unplug the machine before you start cleaning.
- Empty and thoroughly rinse both the clean and dirty water tanks.
- Remove and clean the brush roll, clearing away all pet hair and debris.
- Flush the suction nozzle to prevent clogs and maintain strong suction.
- Wipe down all exterior surfaces and allow all parts to dry completely before reassembly.
What is the best way to clean a Hoover Powerdash Pet?
The best way to clean a Hoover Powerdash Pet involves emptying and rinsing both water tanks, removing and cleaning the brush roll and suction nozzle, wiping down the exterior, and allowing all components to air dry fully. This prevents odors, maintains powerful suction, and ensures the machine continues to effectively clean pet messes from your carpets. Regular cleaning prolongs its life.
Getting Started: Preparing Your Hoover Powerdash Pet for Cleaning
Before you begin cleaning your Hoover Powerdash Pet, proper preparation is important. This step ensures your safety and makes the entire cleaning process smoother. I always start by gathering my tools and getting the machine ready. This small amount of effort saves a lot of time later.
First, safety comes first. You must unplug the Hoover Powerdash Pet from the wall outlet. This removes any risk of electric shock while you are working with water and internal components. Never attempt to clean any part of the machine while it is still plugged in. This is a basic safety rule that I always follow with any electrical appliance.
Next, you will want to get a few simple supplies ready. You probably have most of these items already in your home. I find that having everything at hand makes the job much quicker. You do not want to stop midway through the cleaning process to search for a missing tool.
Essential Tools and Supplies
You will need a few basic items for cleaning your Powerdash Pet. These tools help you reach all the areas that need attention. I keep a small cleaning kit specifically for my appliances.
Here is what I use:
- Gloves: Protect your hands from dirt and cleaning solutions.
- Soft cloths or paper towels: For wiping down surfaces and absorbing water.
- Small brush or old toothbrush: Excellent for scrubbing tight spots and removing tangled hair from the brush roll.
- A sink or large utility tub: For rinsing tanks and other components.
- Mild dish soap (optional): For stubborn grime, but plain water often works well.
- A pair of scissors or a seam ripper: Very useful for cutting through tangled pet hair on the brush.
Having these items ready helps you clean thoroughly. It helps me tackle all the dirt and grime that builds up. You will be surprised how much better your machine looks and smells after this simple prep.
Prioritizing Safety During Appliance Cleaning
Safety is not just about unplugging the machine. It also means handling dirty water and components correctly. Pet messes can carry bacteria, so good hygiene is important. I always wear gloves when handling the dirty water tank and the brush roll. This keeps my hands clean and safe from contaminants.
Make sure you work in a well-ventilated area, especially if you decide to use any cleaning solutions. You do not want to breathe in fumes. I often clean my machine in the laundry room or a garage. This allows for easy access to a sink and good airflow. Once you have everything ready, you can move on to cleaning the tanks, which is often the dirtiest part of the job.
Emptying and Rinsing the Water Tanks Thoroughly
The water tanks are key components of your Hoover Powerdash Pet, and they hold the most grime. Dirty water, pet hair, and leftover cleaning solution can sit in these tanks. This can lead to unpleasant smells and even mold growth if not cleaned properly. I make sure to clean both tanks after every use, not just when I do a deep clean of the whole machine.
The Hoover Powerdash Pet has two main tanks: the clean water tank and the dirty water recovery tank. Both need your attention. Even the clean water tank can develop residue over time. I start with the dirty water tank, as it holds the most visible muck. You will be amazed at how much dirt your machine picks up from the carpet.
Remember, removing all the dirty water and debris is the first step to preventing odors. If you leave dirty water sitting in the tank, it will start to smell very quickly. This smell can then transfer back into your carpets, which defeats the purpose of cleaning. My goal is always to have a fresh-smelling machine ready for the next job.
Handling the Clean Water Tank
The clean water tank holds the fresh water and cleaning solution you use on your carpets. While it does not get as dirty as the recovery tank, it can still develop residue. I usually empty any leftover cleaning solution after each use. Stored cleaning solution can separate or leave a film inside the tank.
Here is my process for the clean water tank:
- Empty any remaining solution: Pour out any unused water or cleaning formula.
- Rinse thoroughly: Fill the tank with clean, warm water. Swish it around vigorously to loosen any film or residue.
- Shake and drain: Shake the tank several times and then pour out the water. Repeat this step a few times until the water runs clear.
- Wipe the exterior: Use a damp cloth to wipe down the outside of the tank.
I sometimes add a tiny drop of dish soap if the tank feels particularly slimy, but I always make sure to rinse it out completely afterwards. You do not want soap suds in your next cleaning cycle. A clean clean water tank means fresh solution for your carpets.
Managing the Dirty Water Tank Effectively
The dirty water recovery tank is where all the extracted pet hair, dirt, and dirty water end up. This tank gets very messy and can be a source of foul odors if not cleaned immediately. I always empty this tank right after I finish cleaning carpets. Waiting even a few hours can make a big difference in how much it smells.
This is how I tackle the dirty water tank:
- Empty the contents: Carefully pour the dirty water into a utility sink or toilet. You will see a lot of pet hair and grime.
- Rinse with hot water: Fill the tank with hot water and swish it around. Pour it out. Repeat this several times until the water coming out is mostly clear.
- Clean the filter screen: Many dirty water tanks have a removable filter screen that catches large debris like pet hair. I always remove this screen and rinse it under running water. Use an old toothbrush to scrub away any stuck-on debris or hair.
- Clean the gasket: The rubber gasket around the tank’s opening can collect grime. Wipe this area with a damp cloth. This prevents leaks and ensures a good seal.
- Allow to air dry: Leave the tank open and upside down to air dry completely. This is very important to prevent mold and mildew growth. Air circulation helps it dry faster.
I find that proper cleaning of the dirty water tank is essential for preventing bad smells from my Powerdash Pet. If you ever have a strong pet odor coming from your cleaner, it is often due to a dirty recovery tank. Addressing lingering pet odors on surfaces themselves can be challenging, so maintaining your cleaner helps avoid new problems. You can learn more about how to clean your subfloor from pet urine if pet odors persist even after cleaning your carpets.
Deep Cleaning the Brush Roll and Nozzle
The brush roll and the suction nozzle are the workhorses of your Hoover Powerdash Pet. They are responsible for scrubbing your carpets and picking up all the dirty water and debris, including stubborn pet hair. Because they do so much work, these parts get incredibly dirty and clogged. I consider this step the most important part of keeping my machine running well.
Pet hair, fibers, and dirt wrap around the brush roll, which can prevent it from spinning effectively. When the brush roll is clogged, it cannot agitate the carpet fibers properly. This means your cleaning will not be as thorough. Similarly, the suction nozzle, which creates the path for dirty water to enter the recovery tank, can get blocked with debris. A clogged nozzle means weak suction, leaving water and dirt behind.
I make sure to inspect these parts after every use. Even if I am not doing a full deep clean of the machine, a quick check of the brush roll is a good habit. You can often see the hair wrapped around it. Taking the time to clean these specific parts ensures your Hoover Powerdash Pet maintains its strong cleaning power. It is an investment in your home’s cleanliness.
Removing and Cleaning the Brush Roll
Cleaning the brush roll can seem daunting, but it is quite straightforward. Most Hoover Powerdash Pet models have an accessible brush roll. Refer to your owner’s manual if you are unsure how to remove it for your specific model. I always find the instructions clear.
Here is how I clean the brush roll:
- Access the brush roll: Lay the machine down on its side or back. Locate the brush roll cover. It often has clips or screws that need to be undone.
- Remove the brush roll: Once the cover is off, carefully lift out the brush roll. It usually just slides out.
- Cut away tangled hair: This is often the biggest part of the job. Use scissors or a seam ripper to carefully cut through any tangled pet hair, thread, or carpet fibers wrapped around the bristles and ends of the brush roll. Be careful not to cut the bristles themselves.
- Rinse the brush roll: Hold the brush roll under warm running water. Use a small brush or an old toothbrush to scrub the bristles and dislodge any remaining dirt or grime. I focus on getting between the bristles.
- Clean the brush housing: While the brush roll is out, use a damp cloth to wipe out the brush housing area. This space can collect a lot of dirt and hair.
- Allow to dry: Let the brush roll air dry completely before putting it back into the machine. Place it upright or on a rack so air can circulate around all the bristles. This prevents mildew and keeps the brush fresh.
A clean brush roll spins freely and works efficiently. This means better agitation and deeper cleaning for your carpets. Many modern carpet cleaners share similar brush cleaning processes. For instance, if you also own a Bissell, you might find the steps familiar for cleaning a Bissell Revolution Pet Pro or even a Bissell ProHeat Pet Turbo. The principles of removing tangled hair and rinsing are very similar across brands.
Clearing the Suction Nozzle
The suction nozzle is the clear plastic part at the front of the machine that hovers over the carpet. It is designed to pull up the dirty water and loosened debris. If this nozzle gets clogged, your machine’s suction power will drop significantly. You might notice your carpets staying wetter or not looking as clean.
Here is how I clean the suction nozzle:
- Inspect for blockages: Look closely at the clear nozzle. You will often see pet hair, lint, or other debris stuck inside.
- Remove any visible clogs: For smaller blockages, sometimes you can carefully pull them out with your fingers or a pair of tweezers.
- Flush the nozzle: For more stubborn clogs or just general cleaning, remove the nozzle if your model allows. Run warm water through it from both ends. This helps to flush out any trapped dirt.
- Clean the edges: Wipe down the rubber or plastic edges of the nozzle. These edges make contact with the carpet and can collect grime.
- Check the pathway: Ensure the pathway from the nozzle to the dirty water tank is clear. Sometimes, debris can get lodged in the hose connecting these two parts.
After cleaning, ensure the nozzle is completely dry before reattaching it. A clear suction nozzle means your Hoover Powerdash Pet can pick up dirty water efficiently, leaving your carpets cleaner and drier.
Maintaining the Hose and Attachments
Some Hoover Powerdash Pet models come with a hose and additional attachments for spot cleaning or reaching upholstery. These accessories are incredibly useful for tackling pet messes on stairs, furniture, or in tight spaces. However, just like the main unit, the hose and attachments collect dirt, pet hair, and cleaning solution residue. I always make sure to clean these parts regularly, especially after I have used them for a particularly messy job.
If you neglect these attachments, they can become a source of bad smells. Dirty water and pet hair can get trapped in the hose, leading to mildew or bacterial growth. This is the last thing you want when trying to clean your home. A clean hose ensures good suction when you use the attachments, allowing them to effectively lift stains and dirt.
I find that cleaning these components right after use prevents build-up. It is much easier to flush out fresh debris than to try to remove dried, caked-on grime. Taking care of your attachments means they will last longer and perform better when you need them most.
Flushing the Hose for Clear Pathways
The hose is prone to collecting pet hair, lint, and dried cleaning solution. If you notice reduced suction when using the attachments, a clogged hose is often the culprit. Flushing the hose is a simple but important step.
Here is how I clean the hose:
- Remove the hose: Disconnect the hose from the main unit. Make sure both ends are free.
- Rinse with warm water: Take the hose to a sink or bathtub. Hold one end under warm running water and let the water flow through to the other end. You might see dirty water and debris coming out.
- Flush in both directions: I usually flush the hose from both ends to ensure everything is dislodged. This helps push out any stubborn blockages.
- Shake out excess water: After flushing, hold the hose up and shake it vigorously to remove as much water as possible.
- Allow to air dry: Hang the hose over a shower rod or clothesline, allowing air to circulate through it. This ensures it dries completely on the inside. You can also leave it connected to the machine with the clean water tank removed, and let it air dry.
It is critical that the hose is completely dry before storing it. Any moisture left inside can lead to mold and unpleasant smells.
Cleaning the Handheld Tools
The handheld tools, like the crevice tool or upholstery brush, also need attention. They come into direct contact with pet stains and can collect a lot of hair and dirt. I clean them immediately after use.
My method for cleaning handheld tools:
- Rinse thoroughly: Hold each attachment under warm running water. Use your fingers or a small brush to scrub off any visible dirt, hair, or residue.
- Pay attention to bristles: If an attachment has bristles, make sure to clean between them. Pet hair loves to get tangled here.
- Check for clogs: Look inside the nozzles and openings of the attachments for any blockages. Flush them with water if needed.
- Wipe down: Use a damp cloth to wipe the exterior of the tools.
- Air dry completely: Lay the attachments out on a clean towel or drying rack to air dry fully before putting them back into storage.
By keeping your hose and attachments clean, you ensure they are ready to tackle tough pet stains and keep your home cleaner. This also helps maintain the overall health of your Hoover Powerdash Pet system.
Wiping Down the Exterior and Air Vents
After you have cleaned the internal parts of your Hoover Powerdash Pet, do not forget the exterior. The outer casing and air vents can accumulate dust, pet hair, and splashes of dirty water over time. A clean exterior not only makes your machine look good but also helps it operate more efficiently. I always give the outside a good wipe-down after I am done with the internal components.
Dust and pet hair can block the air vents, which are important for the machine’s motor to stay cool. If the vents are blocked, the motor can overheat, potentially shortening the life of your appliance. This is an often-overlooked step in appliance maintenance, but it is just as important as cleaning the tanks. I think of it as giving the machine a complete spa day.
Keeping the exterior clean also prevents old pet odors from lingering on the machine itself. If your machine smells, it can make your whole storage area smell. My goal is for my Hoover Powerdash Pet to always look and smell fresh. This step ties everything together for a truly clean machine.
Exterior Surface Cleaning
Wiping down the outer surfaces is straightforward and does not take much time. It makes a big difference in the overall appearance of your machine. I use simple cleaning tools for this.
Here is how I clean the exterior:
- Use a damp cloth: Dampen a clean, soft cloth with plain water. You do not need harsh chemicals.
- Wipe down all surfaces: Go over the entire outside of the machine. Pay attention to areas where you hold it or where water might have splashed.
- Remove any visible dirt: If there are any sticky spots or dried-on dirt, a little mild dish soap on your cloth can help. Make sure to wipe it off completely with a clean, damp cloth afterward.
- Clean the power cord: Wipe down the power cord as well. It can collect dust and dirt.
- Dry with a clean cloth: After wiping, use a dry cloth to go over the surfaces to prevent water spots.
A clean exterior not only looks better, but it also helps identify any potential cracks or damage to the casing that might develop over time. This makes checking the machine easier when you store it.
Checking Air Vents for Optimal Airflow
The air vents are usually small slots or grilles located on the back or sides of the machine. Their purpose is to allow air to circulate, cooling the motor and preventing overheating. These vents are prone to collecting dust bunnies and pet hair.
My steps for cleaning the air vents:
- Locate the vents: Find all the vent openings on your Hoover Powerdash Pet.
- Brush away debris: Use a small brush (like an old toothbrush or a soft bristle brush) to gently brush away any dust, lint, or pet hair that has accumulated on or in the vents.
- Vacuum (optional): For stubborn dust in the vents, you can use a vacuum cleaner with a brush attachment on a low setting. This helps pull out deeper dust.
- Avoid spraying directly: Never spray water or cleaning solutions directly into the air vents. This could damage the motor or electrical components.
Ensuring your air vents are clear is important for the longevity of your Hoover Powerdash Pet. It allows the motor to breathe, keeping your machine running strong. If you encounter mold or stubborn build-up on other surfaces in your home, consider natural cleaning agents like vinegar. For example, you can learn how to clean mold with vinegar or even combine it with baking soda for tougher jobs, by reading about how to clean with vinegar and baking soda. These methods are gentle on surfaces but tough on grime.
Drying and Reassembling Your Hoover Powerdash Pet
After all the washing and wiping, the drying process is perhaps the most critical step. If you reassemble your Hoover Powerdash Pet while parts are still damp, you create a perfect breeding ground for mold, mildew, and unpleasant odors. This can ruin all your hard work and make your machine smell worse than before you cleaned it. I always emphasize complete drying to anyone asking me about carpet cleaner maintenance.
Proper drying also prevents damage to the electrical components. Although most parts that get wet are designed to handle moisture, trapped dampness in crevices can lead to issues. My rule of thumb is: if it feels even slightly damp, it needs more drying time. Patience here pays off immensely in the long run.
Once everything is thoroughly dry, reassembly is usually quick and easy. Putting the parts back together correctly ensures your machine works perfectly for its next use. It is a rewarding feeling to put a freshly cleaned and dry machine back in storage, knowing it is ready for any future pet accidents.
Ensuring Complete Dryness
This step cannot be rushed. Air drying is the best method, as it is gentle and thorough. I usually set aside a good amount of time for this, often several hours or even overnight.
Here is how I ensure complete dryness:
- Separate all components: Keep the tanks, brush roll, nozzle, and any attachments separated. Do not stack them.
- Provide airflow: Place all the parts in an area with good air circulation. A laundry room, garage, or even outdoors on a warm, dry day works well. You can also use a small fan to speed up the drying process, but keep it at a distance.
- Position for drainage: For the tanks, leave them upside down or tilted so any remaining water can drain out. For the brush roll, stand it on its end or lay it on a rack so air can get to all sides of the bristles.
- Check all crevices: Pay special attention to any nooks, crannies, or hidden channels where water might collect. Use a dry cloth or paper towel to wick away any droplets you find.
- Visual and tactile inspection: Before reassembly, visually inspect every part for signs of moisture. Then, touch each component to confirm it feels completely dry. If there is any doubt, let it dry longer.
Sometimes, for smaller parts, I might even use a very low heat setting on a hairdryer for a few seconds, but I am extremely careful not to melt any plastic. Air drying is always preferred.
Proper Reassembly and Storage
Once you are sure every single part is bone dry, you can begin reassembling your Hoover Powerdash Pet. This process is essentially the reverse of disassembly.
My reassembly and storage steps:
- Reattach the brush roll: Carefully slide the brush roll back into its housing. Make sure it clicks into place or is secured by its clips/screws. Ensure it spins freely.
- Secure the nozzle: Reattach the suction nozzle, making sure it sits flush against the machine.
- Insert the tanks: Place the clean water tank and dirty water tank back into their designated spots. Ensure they are seated correctly and securely.
- Connect the hose (if applicable): Reconnect the hose and store any attachments neatly.
- Perform a quick check: Before storing, give the machine a quick once-over. Ensure everything looks secure and there are no loose parts.
- Store in a dry place: Store your clean and dry Hoover Powerdash Pet in a dry, climate-controlled area. Avoid basements or garages prone to dampness, as moisture can still cause problems over time, even with a clean machine.
By following these drying and reassembly steps, you ensure your Hoover Powerdash Pet is not only clean but also ready for its next tough job. A well-maintained machine will always perform better and last longer, making those pet messes a little less stressful to clean up.
Troubleshooting Common Cleaning Issues and Preventative Maintenance
Even with regular cleaning, you might encounter some specific issues with your Hoover Powerdash Pet. Sometimes, despite your best efforts, stubborn residue or lingering odors can appear. Understanding how to troubleshoot these common problems helps you maintain your machine’s peak performance. I have faced a few of these myself, and I have found solutions that work.
Beyond troubleshooting, developing a routine for preventative maintenance is key. Regular, small cleaning habits prevent bigger problems from developing later. It is much easier to keep your machine clean than to perform a massive deep clean after every single use. I treat my Powerdash Pet like an investment, and proper care helps protect that investment.
These tips will help you address any challenges you face and ensure your machine remains a reliable tool for handling pet messes. A well-cared-for machine also minimizes the chances of you needing to deal with difficult cleaning tasks on your actual floors due to cleaner malfunction. For example, if your machine ever leaves excess water, you might need to know how to clean subfloor from pet urine if moisture penetrates deeply.
Addressing Stubborn Residue
Sometimes, even after thorough rinsing, you might find a stubborn film or residue inside the tanks or on the brush roll. This is especially true if you use certain carpet cleaning solutions frequently.
Here is how I tackle stubborn residue:
- Vinegar Soak: For tanks or the brush roll (if it can be fully submerged), I create a solution of equal parts white vinegar and warm water. I let the parts soak for 30 minutes to an hour. Vinegar is great at breaking down mineral deposits and mild residue.
- Gentle Scrubbing: After soaking, use a brush or sponge to gently scrub the affected areas. The residue should come off more easily.
- Baking Soda Paste: For more abrasive, yet gentle, cleaning on plastic surfaces (not internal electrical parts), I make a paste with baking soda and a little water. I apply it to the residue, let it sit for 10-15 minutes, then scrub and rinse. Baking soda is a natural deodorizer and mild abrasive.
- Rinse Thoroughly: Always rinse all parts very well with clean water after using any cleaning agents, especially vinegar or baking soda, to remove all traces.
- Repeat if necessary: For very tough residue, you might need to repeat the process.
Be cautious not to use harsh chemicals, abrasive scrubbers, or anything that could scratch or damage the plastic components of your machine.
Establishing a Regular Cleaning Schedule
Consistency is important for maintaining your Hoover Powerdash Pet. I have found that a regular cleaning schedule prevents most issues.
My recommended schedule:
- After Every Use:
- Empty and rinse both the clean and dirty water tanks. This is the absolute minimum.
- Quickly check the brush roll for large clumps of pet hair and remove them.
- Wipe down the exterior casing if it has splashes.
- Every 3-5 Uses (or Monthly, if used less often):
- Perform a more thorough cleaning of the brush roll, removing all tangled hair and scrubbing bristles.
- Hoover Powerdash Pet
- carpet cleaner maintenance
- pet stain removal
- deep cleaning
- appliance cleaning