· Home Appliance Care · 21 min read
How To Clean Irobot Roomba
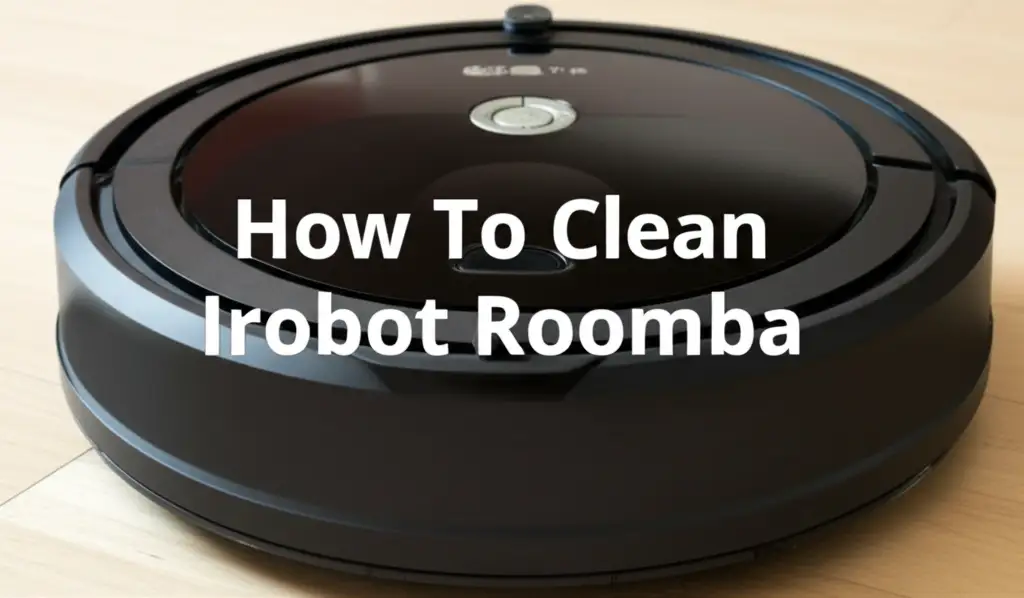
Keep Your Home Spotless: How to Clean iRobot Roomba Effectively
Your iRobot Roomba works hard to keep your floors clean. It navigates around furniture, picks up dirt, and removes pet hair. Over time, all that hard work causes dirt, dust, and hair to build up inside the robot. This buildup can make your Roomba less efficient. It can even shorten its lifespan. Knowing how to clean iRobot Roomba properly is key to keeping it running well.
This guide will show you simple, direct steps. We will cover cleaning the dust bin, brushes, wheels, and sensors. You will learn the best tools to use for each task. By the end, you will understand how to maintain your Roomba. This ensures it continues to deliver clean floors for years to come. Let’s make your cleaning routine easy and effective.
Takeaway
- Regularly empty the dust bin and clean the filter to maintain suction.
- Remove hair and debris from main brushes and side brush often.
- Clean wheels and charging contacts to ensure smooth movement and proper charging.
- Wipe sensors to prevent navigation issues and improve cleaning coverage.
- Follow specific steps for each component for optimal Roomba performance.
To clean your iRobot Roomba, you must regularly empty the dust bin, clean filters, remove tangled hair from brushes, clear debris from wheels, and wipe down sensors and charging contacts. This routine maintenance helps your Roomba pick up dirt efficiently and move freely, ensuring it cleans your home well.
Why Regular Roomba Cleaning Is Essential for Performance
Your Roomba is an important part of your daily cleaning routine. It saves you time and effort. Just like any hardworking appliance, it needs proper care. Regular cleaning is not just about keeping your Roomba looking good. It is about making sure it works at its best. Dust, hair, and debris get inside the robot during its cleaning cycles. This material can clog filters, jam brushes, and block sensors.
When components get dirty, the Roomba’s suction power drops. It struggles to pick up dirt effectively. Its navigation might also become less accurate. This means it could miss spots or get stuck more often. A well-maintained Roomba lasts longer. It also provides a better clean. Think of it as a small investment of your time that pays off in a cleaner home and a healthier robot.
Without regular cleaning, problems will start to appear. The battery might drain faster due to increased strain on the motor. Brushes might wear out prematurely. Sensors could misinterpret the environment, leading to inefficient cleaning patterns. Cleaning your Roomba prevents these common issues. It keeps your floors spotless and your robot happy. A clean Roomba is a happy and effective Roomba.
This simple maintenance keeps your cleaning buddy in top condition. It ensures it continues to clean your home efficiently. You rely on your Roomba, so give it the care it deserves. Regular cleaning is a quick process that adds great value. It protects your investment and maintains your home’s cleanliness.
Essential Tools for Roomba Cleaning
Before you start cleaning your Roomba, gather the right tools. Having everything ready makes the process smoother and faster. Most of these items are common household tools or come with your Roomba. Using the correct tools helps you clean effectively without damaging any parts. This preparation step is important for a successful cleaning session.
First, you will need a small flathead or Phillips head screwdriver. This is useful for removing certain components like the side brush. A small cleaning tool, often provided with your Roomba, is also essential. This tool usually has a small brush and a hook. It helps cut and pull out tangled hair from the main brushes. Without this tool, removing hair can be difficult.
A soft, clean microfiber cloth is another must-have. You will use it to wipe down sensors, charging contacts, and the Roomba’s exterior. Microfiber is good because it does not leave lint behind. It also cleans surfaces without scratching them. For stubborn dust in hard-to-reach areas, a can of compressed air is very helpful. It can blow out debris from crevices and around sensors.
You might also want a pair of small scissors. These are useful for cutting through heavily tangled hair on the brushes. A small trash can or a plastic bag is good for collecting all the dust and debris you remove. Having these tools ready saves you time and frustration. It allows you to focus on the cleaning itself.
Here is a quick list of the tools you will need:
- Small screwdriver: For side brush removal.
- Roomba cleaning tool (with brush and hook): For hair removal from main brushes.
- Microfiber cloth: For wiping sensors and surfaces.
- Can of compressed air: For blowing out dust from tight spots.
- Small scissors: For cutting tangled hair.
- Trash can or bag: For debris disposal.
With these tools, you are ready to tackle any Roomba cleaning task. They make the job easy and efficient.
How to Clean Your Roomba’s Dust Bin and Filter
Cleaning the dust bin and filter is perhaps the most frequent maintenance task for your Roomba. This step is critical for maintaining your robot’s suction power. If the bin is full or the filter is clogged, your Roomba cannot pick up dirt effectively. I make sure to do this after almost every cleaning cycle, especially if my home is very dusty or has pet hair. It prevents dirt from overflowing back onto the floor.
First, locate the dust bin release button on your Roomba. It is usually at the back of the robot. Press the button and pull the dust bin straight out. Once the bin is out, open its lid. Empty all the collected dirt, dust, and debris into a trash can. You will be surprised how much your Roomba picks up.
Next, focus on the filter. The filter is typically located inside the dust bin or in a slot near it. Gently pull it out. Filters often collect a lot of fine dust and allergens. Tap the filter against the inside of the trash can to shake off loose dust. Do not wash the filter with water unless your specific Roomba model’s filter is explicitly marked as washable. Most Roomba filters are not designed to get wet and can be damaged by water. If your filter is not washable, you can use a small brush or compressed air to clean it. For detailed steps on filter maintenance, you can check out our guide on how to clean Roomba filter.
After cleaning the filter, make sure the dust bin itself is clean. Some Roomba dust bins are washable. If yours is, rinse it with warm water. Make sure it is completely dry before putting it back into the Roomba. If it’s not washable, wipe the inside and outside with a damp cloth. Let it air dry completely. Never put a wet dust bin back into your Roomba. This can cause damage to the robot’s electronics.
Finally, place the clean filter back into its slot in the dust bin. Slide the empty and clean dust bin back into your Roomba until it clicks into place. This simple process takes only a few minutes. Doing it regularly ensures your Roomba always operates with maximum suction. For more specific instructions on emptying and cleaning the dust bin, refer to our article on how to clean Roomba dust bin. Keeping these two components clean is the easiest way to improve your Roomba’s daily performance.
Deep Cleaning Roomba’s Brushes and Extractors
The brushes and extractors are the heart of your Roomba’s cleaning system. They actively sweep and lift debris from your floors. Over time, these components can become tangled with hair, threads, and larger debris. This buildup severely reduces their effectiveness. It can even strain the Roomba’s motor. I find that inspecting and cleaning these brushes at least once a week is a good practice, especially if you have pets.
Start by flipping your Roomba over. You will see two main components: the multi-surface rubber brushes (or bristle brushes on older models) and the single side brush. To remove the main brushes, unlatch the brush frame. This usually involves pressing a release tab or lifting a colored lever. Once the frame is open, lift out the two main brushes.
You will likely see a lot of hair and debris wrapped around the brushes and their end caps. Use the small cleaning tool that came with your Roomba. The tool usually has a cutting edge or hook to slice through tangled hair. Pull off all the hair and debris from both brushes. Pay special attention to the yellow or green end caps. These often collect hair and need to be removed and cleaned separately. They twist off or pull straight out. Clean the hair from inside the caps and from the square or hexagonal pegs they fit onto.
Next, turn your attention to the side brush. This brush helps sweep debris from edges and corners into the Roomba’s path. It is usually held in place by a single screw. Use your small screwdriver to remove the screw. Then, lift off the side brush. Remove any hair or debris wrapped around its base or under the screw post. Wipe down the area where the side brush sits. Once clean, place the side brush back on and secure it with the screw. Make sure it spins freely.
Before reinserting the main brushes, clean the brush compartment. Use a microfiber cloth to wipe away any dust or dirt inside. You can also use compressed air to blow out fine particles. Make sure the square and hexagonal openings where the brush ends fit are clear of debris. These openings allow the brushes to spin properly.
Finally, reinsert the two main brushes. Ensure they are seated correctly, matching the square and hexagonal pegs with their corresponding holes. Close the brush frame and secure the latch. Give the brushes a gentle spin with your finger to ensure they move freely without resistance. A thorough cleaning of these brushes makes a huge difference in your Roomba’s ability to pick up dirt. It also extends the life of these vital components.
Caring for Roomba’s Wheels and Casters
Your Roomba’s wheels are crucial for its movement and navigation. They allow it to glide across various floor surfaces. Just like any moving part, they can collect dirt, hair, and debris. When the wheels get dirty or jammed, your Roomba might struggle to move in straight lines. It could also get stuck more often. Keeping the wheels clean ensures smooth operation.
First, flip your Roomba over to access its underside. You will see three main wheels: two large drive wheels and one smaller front caster wheel. Start with the two large drive wheels. Inspect them for any wrapped hair or debris. Often, long hair, threads, or even small pieces of string can get tangled around the axle of these wheels. Carefully pull out any visible debris. You can use tweezers or a small pick if needed. Spin the wheels by hand to check for resistance. They should spin freely without any grinding noise.
Next, focus on the front caster wheel. This small wheel allows your Roomba to pivot and change direction easily. It is often the first wheel to get clogged with hair and dirt because it picks up debris as the Roomba moves forward. To clean it, you usually need to pull it out. Most models have a front caster wheel assembly that pops out by pulling firmly. Once it’s out, remove any hair or debris from the wheel itself and from the axle. You may also need to clean the housing where the wheel sits. Use a clean cloth or a small brush to remove any accumulated grime.
Once you have cleaned the wheel and its housing, reinsert the front caster wheel assembly firmly until it clicks into place. Spin the wheel to ensure it rotates freely in all directions. If it feels stiff, it might not be properly seated, or there might still be some hidden debris. Sometimes, you might need to use a toothpick or a cotton swab for very tight spots.
After cleaning all three wheels, wipe down the surrounding areas on the Roomba’s underside. This includes the wheel wells and any visible sensors near the wheels. Ensuring clear wheel movement prevents your Roomba from getting “stuck” errors or moving erratically. Regular inspection of the wheels will catch problems early. It prevents them from affecting your Roomba’s cleaning performance. This simple step keeps your robot agile and efficient on all floor types.
Maintaining Roomba’s Sensors and Charging Contacts
Roomba’s sensors and charging contacts are vital for its operation. The sensors allow your Roomba to navigate your home. They detect cliffs, obstacles, and dirty spots. The charging contacts ensure your Roomba can power up. If these parts are dirty, your Roomba might not charge correctly. It might also bump into furniture or fall down stairs. Keeping them clean is a quick task that prevents many common issues.
Start by locating the cliff sensors. These are usually small, round windows located on the underside of your Roomba, near the edges. There are typically four of them. These sensors prevent your Roomba from falling down stairs or off ledges. If they get dusty or dirty, the Roomba might interpret a clean floor as a cliff. It then stops or backs up. Use a clean, dry microfiber cloth to gently wipe each cliff sensor. Make sure there is no dust or grime obstructing the sensor window.
Next, find the dirt detect sensors. These are usually two clear windows or lenses on the underside of your Roomba, often near the main brushes. They tell the Roomba where dirt is concentrated, prompting it to spend more time in those areas. Wipe these sensors with your microfiber cloth. A clean dirt detect sensor helps your Roomba clean more thoroughly where it is needed most.
Also, wipe the bumper sensor. This is the large front bumper of your Roomba. Dust can collect along its edges or in the small gap where it meets the main body. If the bumper cannot move freely, the Roomba might not detect obstacles correctly. Clean this area with your cloth, ensuring no debris is lodged there. For models with a camera or visual navigation sensor on top, gently wipe that lens as well.
Finally, clean the charging contacts. These are the two metal strips on the underside of your Roomba and on its Home Base charging station. These contacts must be clean for the Roomba to charge properly. If they are dirty, the Roomba might fail to charge, or it might show a charging error. Use a clean, dry microfiber cloth to wipe both the Roomba’s contacts and the Home Base’s contacts. For sticky residue, you can slightly dampen the cloth with water, but ensure the contacts are completely dry before placing the Roomba on the charger. For more details on this, see our guide on how to clean Roomba charging contacts.
Regular cleaning of sensors and charging contacts takes very little time. It significantly improves your Roomba’s navigation and ensures reliable charging. This small maintenance step makes a big difference in the robot’s performance and longevity.
Roomba Battery Care and Storage Tips
Taking good care of your Roomba’s battery ensures it provides consistent power for many cleaning cycles. The battery is a key component that determines how long your Roomba can clean before needing a recharge. Proper battery care extends its lifespan and keeps your Roomba running efficiently. I always pay attention to the battery health.
First, always allow your Roomba to fully charge on its Home Base after each cleaning cycle. Roomba batteries, especially lithium-ion ones, perform best when kept charged. Avoid leaving your Roomba off its charger for extended periods if it has a low battery. This can cause the battery to deep discharge, which shortens its overall life. A fully charged battery is a happy battery.
If you plan not to use your Roomba for a long time, like several weeks or months, proper storage is important. For models with a removable battery, remove the battery from the Roomba. Store both the Roomba and the battery in a cool, dry place. Avoid extreme temperatures, both hot and cold. Extreme heat or cold can damage the battery cells. Before storing the battery, charge it fully. Then, once every six months, take it out and fully charge it again. This helps maintain the battery’s health during periods of inactivity.
For Roomba models where the battery is not easily removable or if you prefer not to remove it, ensure the Roomba remains on its Home Base. The Roomba’s software manages battery charging to prevent overcharging. This keeps the battery conditioned. However, if you are storing it away from the Home Base, ensure the battery is fully charged before storage. Then, charge it every few months.
Remember that batteries have a finite lifespan. Even with the best care, Roomba batteries typically last several years before needing replacement. If you notice your Roomba’s run time significantly decreasing, or if it struggles to complete cleaning cycles, it might be time for a new battery. You can purchase genuine iRobot replacement batteries to ensure compatibility and performance. Replacing an old battery is often simpler than you think and can give your Roomba a new lease on life. Proper battery care is crucial for your Roomba’s long-term performance.
Troubleshooting Common Roomba Issues with Cleaning
Even after regular cleaning, your Roomba might occasionally encounter issues. Many common problems stem from dirt or debris that was missed during routine maintenance. Knowing how to troubleshoot these can save you time and frustration. I have learned that a quick check of certain areas often solves the problem.
One common issue is the Roomba not picking up dirt effectively. If suction seems weak, first check the dust bin and filter. An overfilled bin or a clogged filter is the most frequent cause. Ensure the filter is clean and properly seated. Next, inspect the main brushes and side brush. If they are tangled with hair or debris, they cannot sweep effectively. Remove any obstructions. Also, check the brush caps; hair often builds up there.
Another common problem is the Roomba getting stuck frequently or exhibiting erratic movement. This often points to dirty wheels or sensors. Flip the Roomba over and thoroughly clean the drive wheels and the front caster wheel. Ensure they spin freely. Then, wipe down all cliff sensors and dirt detect sensors on the underside. If these are dirty, the Roomba might mistakenly think it’s at a cliff or that it’s stuck. A dirty bumper can also cause navigation problems, so ensure it moves freely.
If your Roomba is not charging, first check the charging contacts on both the Roomba and its Home Base. Dust or grime can prevent a good connection. Wipe them clean with a dry cloth. Make sure the Home Base is plugged in and has power. If the Roomba is still not charging, or if its battery life is very short, the battery might need replacement. Batteries wear out over time, usually after a few years of regular use.
Sometimes, your Roomba might make unusual noises. A grinding or whirring sound often indicates something is caught in the brushes or wheels. Stop the Roomba immediately and inspect these areas. Remove any foreign objects. If the noise persists after cleaning, there might be a worn-out component, which might require a part replacement.
Finally, if your Roomba shows a specific error message, refer to your Roomba’s manual or the iRobot app. The app often provides detailed instructions for troubleshooting specific errors. Most Roomba errors are related to components being dirty or jammed. Simple cleaning often resolves these issues. Regular, thorough cleaning is the best defense against most Roomba problems.
Advanced Roomba Cleaning and Maintenance Tips
Beyond the basic cleaning, some advanced tips can help extend your Roomba’s life and ensure peak performance. These tips involve a bit more attention to detail but are well worth the effort. I have found that these extra steps make a big difference, especially for older models or those used in very dirty environments.
Consider a deep clean of the internal components once every few months. While you should not disassemble your Roomba entirely, you can remove the main components like the brush module, side brush, and wheels. This allows you to thoroughly clean the areas beneath them. For example, some models allow you to remove the entire cleaning head module. This provides access to areas where fine dust and pet dander can accumulate, even beyond the visible surfaces. Use compressed air to blow out dust from hard-to-reach crevices around the motor and internal pathways. Be careful not to spray directly into electronic components.
Pay attention to the Roomba’s exterior and top cover. Dust and dirt can settle on the surface, especially around buttons and seams. Use a slightly damp cloth to wipe down the entire body. For models with a transparent top, keep it clean to ensure any internal navigation sensors or cameras work effectively. A static duster can also be useful for picking up surface dust.
Periodically check the tire treads on your drive wheels. If the treads are worn smooth, your Roomba might lose traction, especially on hard floors or when climbing over thresholds. While replacing tires is more involved, knowing their condition can help diagnose movement issues. Similarly, inspect the rubber extractors for cracks or wear. If they are heavily worn, they won’t pick up debris as efficiently. Replacement extractors are available and are relatively easy to swap out.
For long-term health, always use genuine iRobot replacement parts. Filters, brushes, and batteries from third-party manufacturers might not fit correctly or perform to the same standard. This can lead to reduced efficiency or even damage to your Roomba. Investing in genuine parts ensures compatibility and maintains your Roomba’s warranty.
Lastly, update your Roomba’s software regularly. Software updates often include performance improvements, bug fixes, and sometimes even new features. Keeping your Roomba’s software current helps it operate at its most efficient. Most models update automatically when connected to Wi-Fi and on the Home Base. These advanced cleaning and maintenance tips help your Roomba stay in excellent condition for many years of spotless floors.
FAQ Section
How often should I clean my Roomba?
You should empty the dust bin after every use. Clean the filter and brushes at least once a week, more often if you have pets or a large home. Wipe sensors and charging contacts every few weeks. A deep clean of all components every 1-3 months helps maintain peak performance.
Can I wash Roomba parts with water?
Only wash the dust bin if your specific Roomba model’s manual states it is washable. Most Roomba filters are NOT washable and will be damaged by water. Brushes, wheels, and sensors should only be wiped with a dry or slightly damp cloth. Always ensure parts are completely dry before reassembling.
Why is my Roomba not picking up dirt?
This is often due to a full dust bin, a clogged filter, or tangled brushes. Empty the bin, clean or replace the filter, and remove all hair and debris from the main brushes and side brush. Check that the brush caps are also clean and properly seated.
How do I know if my Roomba needs a new filter or brush?
Filters need replacement every 2-3 months, or more often with heavy use, if suction power decreases. Brushes may need replacement every 6-12 months if bristles are worn, missing, or rubber extractors are cracked. Check for visible damage or reduced cleaning effectiveness.
What happens if I don’t clean my Roomba?
If you do not clean your Roomba, its suction power will decrease, brushes will jam, and sensors will get obstructed. This leads to inefficient cleaning, missed spots, and the robot getting stuck more often. Prolonged neglect can shorten its lifespan and even cause permanent damage to internal components.
My Roomba keeps getting stuck, even after cleaning. What’s wrong?
Even after basic cleaning, if your Roomba gets stuck, check for hidden debris around the wheels, especially the front caster wheel, and ensure it spins freely. Also, thoroughly wipe all cliff and dirt detect sensors on the underside, as lingering dust can cause false readings, leading the Roomba to stop or back up unexpectedly.
Conclusion
Your iRobot Roomba is an incredible tool that keeps your home clean with minimal effort. However, its effectiveness truly depends on how well you maintain it. We have covered every aspect of how to clean iRobot Roomba, from the simple daily tasks to more involved periodic maintenance. Remember, regular cleaning of the dust bin, filter, brushes, wheels, and sensors is not just about keeping your robot spotless. It is about protecting your investment and ensuring your Roomba continues to deliver superior cleaning performance.
By taking a few minutes each week, you can prevent common issues like reduced suction, erratic movement, and charging problems. You now know the essential tools to use and the specific steps for each component. Embrace these straightforward cleaning routines, and your Roomba will keep your floors clean, day after day. A well-cared-for Roomba means a consistently cleaner home for you. Get into the habit of cleaning your Roomba today, and enjoy the lasting benefits of a happy, efficient robot vacuum. Your floors (and your Roomba) will thank you!
- Roomba cleaning
- iRobot maintenance
- robot vacuum care
- cleaning robot
- Roomba upkeep
- vacuum cleaner maintenance

