· Small Engine Maintenance · 19 min read
How To Clean Jets On Carburetor
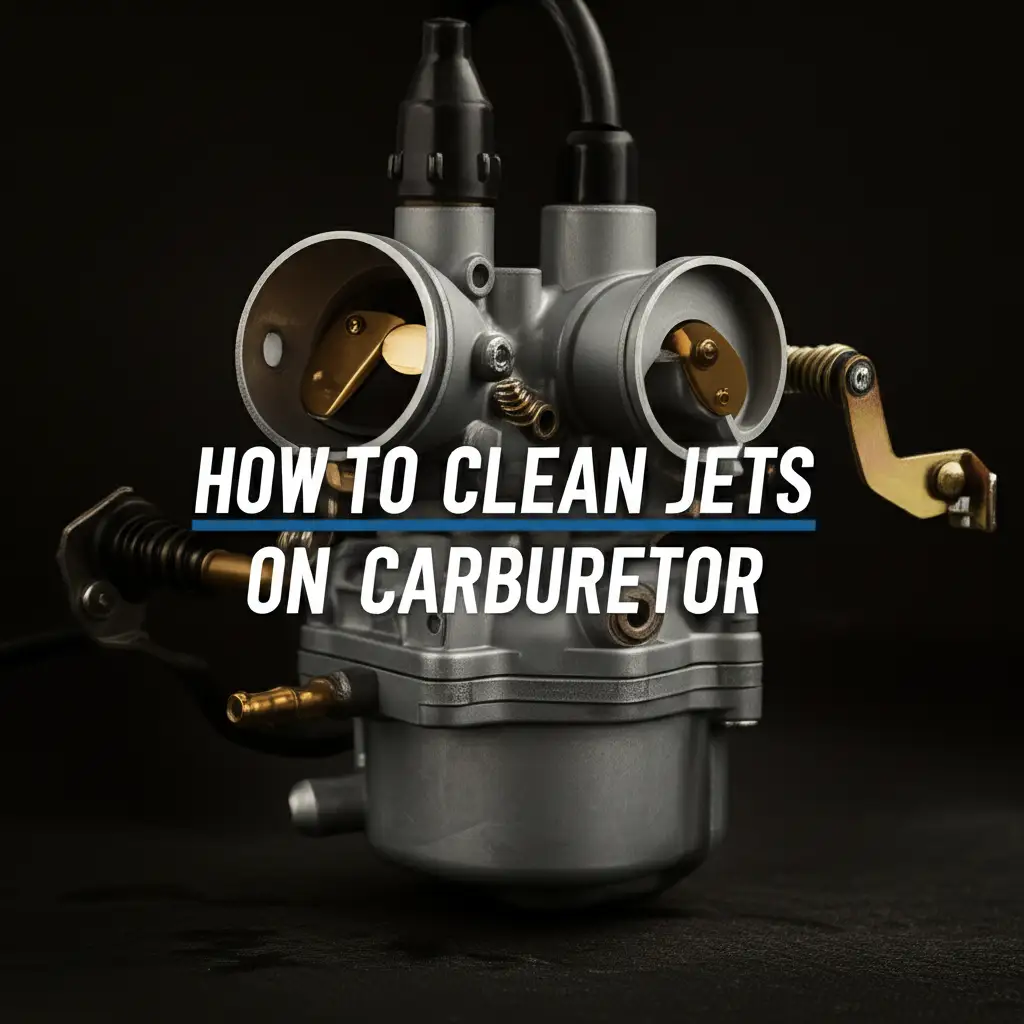
Revive Your Engine: How to Clean Carburetor Jets
Has your small engine lost its spark? Perhaps your lawnmower sputters, or your outdoor power equipment struggles to start. Often, the culprit is a dirty carburetor. Specifically, clogged jets inside the carburetor can severely impact engine performance. Knowing how to clean jets on carburetor is a vital skill for any homeowner or DIY enthusiast.
This guide will show you how to clean carburetor jets step-by-step. We will cover why jets get dirty and what tools you need. You will learn how to safely disassemble, clean, and reassemble your carburetor. This knowledge saves you money on repairs and keeps your equipment running smoothly. Let’s dive in and restore your engine’s power!
Takeaway
- Identify Clogged Jets: Recognize symptoms like sputtering, hard starting, or loss of power.
- Gather Tools: Collect essential items like carburetor cleaner, screwdrivers, and safety gear.
- Safety First: Disconnect spark plugs and drain fuel before beginning work.
- Disassemble Carefully: Take photos as you remove parts to aid reassembly.
- Clean Thoroughly: Use carburetor cleaner and fine wire to clear jet passages.
- Reassemble Precisely: Ensure all gaskets and components are correctly seated.
- Prevent Future Clogs: Use fuel stabilizers and fresh fuel to maintain clean jets.
To clean jets on a carburetor, you must first remove the carburetor from the engine. Then, disassemble it to access the jets. Use a specialized carburetor cleaner and fine wire to clear any obstructions from the tiny jet orifices. Finally, reassemble the carburetor carefully and reinstall it on the engine.
Why Carburetor Jets Clog and What It Means for Your Engine
Carburetor jets are tiny, precisely sized holes. They control the flow of fuel and air into your engine’s combustion chamber. Over time, these small openings can become blocked. This blockage often happens due to stale fuel, dirt, or varnish deposits. Modern ethanol-blended fuels are a common cause of these issues. Ethanol attracts water, leading to corrosion and fuel breakdown inside the carburetor.
When jets clog, your engine does not receive the correct fuel-air mixture. This results in poor performance. You might notice your engine running rough, sputtering, or even dying completely. Starting the engine can become very difficult. Sometimes, the engine will run but lack power or idle inconsistently. These symptoms point directly to dirty carburetor jets.
Understanding these signs helps you diagnose the problem quickly. Catching the issue early prevents further damage to your engine. Regularly checking for these symptoms saves you time and money in the long run. My own lawnmower once sputtered and died constantly. It turns out the main jet was completely blocked.
Common Causes of Clogged Carburetor Jets
- Stale Fuel: Fuel left in the tank or carburetor for extended periods breaks down. It forms gummy deposits that block jets. Always drain fuel or use a stabilizer for storage.
- Ethanol in Fuel: Ethanol attracts moisture, leading to rust and corrosion inside the carburetor. This causes fuel separation and varnish buildup.
- Dirt and Debris: Small particles of dirt or rust from the fuel tank can enter the carburetor. These particles get trapped in the tiny jet passages.
- Infrequent Use: Engines that sit idle for long periods are more prone to jet clogging. Fuel evaporates, leaving behind deposits.
Knowing these causes helps you prevent future issues. It also makes the cleaning process easier to understand. You are directly addressing the problem at its source. If you have an outboard motor, you might find similar issues, and learning how to clean outboard carburetor without removing can be very helpful.
Essential Tools and Materials for Carburetor Jet Cleaning
Before you begin cleaning your carburetor jets, gather all necessary tools and materials. Having everything ready saves time and ensures a smooth process. You will need a clean workspace, good lighting, and proper safety gear. These items ensure both your safety and the effectiveness of the cleaning. Preparing thoroughly prevents interruptions during the job.
I always lay out a clean shop towel or a piece of cardboard on my workbench. This keeps parts organized and prevents small screws from rolling away. It is frustrating to drop a tiny part in the middle of a cleaning job. Make sure you have clear containers for soaking parts if needed. This step-by-step process requires precise tools.
List of Tools and Materials
- Carburetor Cleaner: Choose a non-chlorinated, strong cleaner. It dissolves varnish and gum deposits effectively. Make sure it is safe for rubber and plastic parts.
- Screwdriver Set: You will need various sizes and types, including Phillips and flat-head. Some carburetors use Torx or hex head screws.
- Socket Set/Wrench Set: For removing the carburetor from the engine.
- Needle-Nose Pliers: Useful for gripping small parts or pulling hoses.
- Small Wire Brushes/Jet Cleaning Wires: Specific wires designed to clear tiny jet passages. Do not use anything larger than the jet opening.
- Compressed Air: For blowing out passages after cleaning.
- Safety Glasses: Protect your eyes from cleaner spray and debris.
- Chemical-Resistant Gloves: Protect your skin from harsh chemicals.
- Shop Rags/Paper Towels: For wiping down parts and cleaning spills.
- Drain Pan: To catch fuel when disconnecting lines.
- New Gaskets/Diaphragm Kit (Optional but Recommended): It is good practice to replace old gaskets to prevent leaks. Many carburetor issues stem from deteriorated gaskets.
Having these items on hand makes the job much easier. You will feel more confident tackling the task. This careful preparation sets you up for success in cleaning your carburetor jets. If you are working on a push mower, these same tools are essential, and you might find useful tips on how to clean carburetor on push mower.
Safety First: Preparing for Carburetor Jet Cleaning
Working with fuel and chemicals requires strict safety precautions. Before you touch any part of the engine, prioritize your safety. A small mistake can lead to injury or fire. Always work in a well-ventilated area. My own workshop has large doors I open when I use strong cleaners. Never rush this part of the process.
Proper preparation minimizes risks. Ensure the engine is cool before you start. Hot engines can cause burns. Disconnecting the spark plug wire prevents accidental engine starts. This step is often overlooked but very important. Taking these simple steps protects you throughout the cleaning process.
Key Safety Steps
- Work in a Well-Ventilated Area: Carburetor cleaners produce strong fumes. These fumes can be harmful if inhaled. Work outdoors or in a garage with open doors and windows.
- Wear Personal Protective Equipment (PPE):
- Safety Glasses: Protect your eyes from splashes of cleaner or debris.
- Chemical-Resistant Gloves: Prevent skin irritation or absorption of chemicals.
- Respirator (Optional but Recommended): If working in a less-than-ideal ventilation area, a respirator offers added protection from fumes.
- Disconnect the Spark Plug Wire: This prevents the engine from accidentally starting while you are working on it. Just pull the wire off the spark plug.
- Drain Fuel: Before disconnecting fuel lines, drain the fuel tank into an approved container. This prevents spills and fire hazards. Use a suitable drain pan.
- Have a Fire Extinguisher Nearby: Accidents can happen. A ABC-rated fire extinguisher provides peace of mind. Keep it within easy reach.
- Avoid Open Flames and Sparks: Carburetor cleaners and fuel are highly flammable. Do not smoke. Do not use electrical tools that can spark near the work area.
- Read Product Labels: Always follow the safety instructions on your carburetor cleaner can. Different products may have specific warnings or application methods.
Following these safety guidelines protects you from potential harm. It also creates a safer environment for your project. Do not skip these steps. They are crucial for a successful and injury-free cleaning job.
Step-by-Step Guide to Removing and Disassembling the Carburetor
Removing the carburetor is often the most daunting part for many. However, with patience and a systematic approach, it is manageable. I always recommend taking photos with your phone at each step. This visual record is invaluable for reassembly. Labeling hoses and wires also helps immensely.
Most small engine carburetors are held on by a few bolts or nuts. They connect to the engine’s intake manifold. Fuel lines and linkage rods also attach to them. Be gentle when disconnecting these parts. Do not force anything. A damaged linkage or a crimped fuel line will cause more problems.
Detailed Removal Process
- Locate the Carburetor: It sits between the air filter and the engine.
- Remove Air Filter Assembly: Unscrew or unclip the air filter cover and remove the filter element. Then unbolt the air filter housing. This exposes the carburetor.
- Disconnect Fuel Line: Use pliers to slide the hose clamp back. Gently pull the fuel line off the carburetor’s inlet barb. Have your drain pan ready to catch any residual fuel.
- Disconnect Linkage Rods/Springs: These connect the carburetor to the throttle and choke controls. Note their positions or take photos before detaching them. Use needle-nose pliers for small springs.
- Remove Mounting Bolts/Nuts: These bolts secure the carburetor to the engine. They often go through an insulator block. Carefully loosen and remove them. Keep track of any washers or spacers.
- Gently Pull Carburetor Away: Once all fasteners and connections are loose, gently pull the carburetor away from the engine. Be careful not to damage the old gaskets between the carburetor and the engine block.
Disassembling the Carburetor
Once the carburetor is off the engine, you need to open it up to access the jets. This involves removing the float bowl and sometimes other covers. Again, keep track of every small part. My method is to lay them out in the order I remove them. This simple trick saves so much time later.
- Remove the Float Bowl: This is usually at the bottom of the carburetor. It’s often held by one central bolt or a few small screws. Remove the bolt/screws and carefully pull off the bowl. Watch out for fuel still inside.
- Locate the Float and Pin: Inside the bowl area, you will see a float (often plastic or brass) connected by a small metal pin. Gently slide out this pin to remove the float and needle valve. Set these aside carefully. Do not bend the float arm.
- Identify and Remove Jets:
- Main Jet: This is often a brass fitting screwed into the center post where the float needle seat is. It might be accessible directly or require removal of a “main nozzle” tube. Use a flat-head screwdriver or a specific jet wrench to unscrew it.
- Pilot Jet (Idle Jet): This jet is usually smaller and located to the side of the main jet, often recessed in a small well. It may also be a small brass screw or a pressed-in fitting. Some carburetors have multiple pilot jets or a non-removable idle passage.
- Remove Other Components (if necessary): Depending on your carburetor model, you might need to remove other parts like the fuel mixture screw (note its original turns before removal), or other small passages. Take pictures.
Handle all parts with care, especially the small brass jets. They are delicate and can strip easily. If you are working on a lawn mower, the process is very similar to how to clean lawn mower carburetor without removing for some quick fixes, but for thorough jet cleaning, removal is best.
Detailed Cleaning Process for Carburetor Jets
Now comes the actual cleaning. This is where you directly address the clogs. The goal is to clear out all varnish, gum, and debris from the tiny passages. Be thorough, but gentle. Forcing anything can damage the delicate jets. Patience is your best tool here. I always start with a visual inspection, then apply cleaner.
Remember to wear your safety glasses and chemical-resistant gloves. Work in a well-ventilated area. My typical approach involves soaking, spraying, and then carefully probing. Do not be tempted to use anything sharp or hard that could scratch or enlarge the jet openings. Even a tiny change in jet size affects fuel delivery.
Step-by-Step Jet Cleaning
- Soak Parts (Optional but Recommended): Place the disassembled metal carburetor parts, including the jets, in a small container. Pour in carburetor cleaner, ensuring all parts are submerged. Let them soak for 15-30 minutes, or longer for heavily varnished parts, as per cleaner instructions. Some cleaners come with a dipping basket.
- Spray Carburetor Cleaner: After soaking, remove parts and place them on your shop rag. Use the spray nozzle attached to your carburetor cleaner can.
- Jets: Directly spray carburetor cleaner into and through the main and pilot jets. Ensure the cleaner flows freely through the tiny holes. You should see a clear, powerful stream.
- Carburetor Body: Spray all internal passages of the carburetor body. Pay special attention to the areas where the jets sit, the float bowl, and any air bleed holes. Look for the cleaner to exit other passages, confirming flow.
- Clear Obstructions with Wire:
- Jet Cleaning Wires: Use a specific jet cleaning wire set. Select a wire that fits snugly but does not force its way through the jet opening. Gently push the wire through the jet holes. Twist it slightly to dislodge stubborn deposits. Never use a drill bit or a wire brush bristles, as they can enlarge the jet.
- Small Passages: For tiny air bleed holes or other small passages in the carburetor body, use the smallest wires. Ensure these are also clear.
- Blow Out with Compressed Air: After cleaning with cleaner and wire, use compressed air to thoroughly blow out all jets and carburetor passages. This removes any loosened debris and residual cleaner. Make sure you can feel air moving through all relevant holes.
- Hold parts firmly. Spray in short bursts.
- Always blow through the passages, not just at the surface.
- Inspect Thoroughly: Hold each jet up to a light source. You should be able to clearly see through the tiny hole. Check the carburetor body passages too. Repeat the cleaning steps if any passages remain blocked.
This detailed cleaning ensures every tiny passage is clear. A clean jet means proper fuel delivery and a smooth-running engine. If you’re working on a Briggs and Stratton engine, these steps apply directly, and you can find more specific guidance on [how to clean Briggs and Stratton carburetor](https://beacleaner.com/how-to-clean-briggs and stratton carburetor).
Reassembly and Testing After Cleaning Carburetor Jets
Once your carburetor jets and all other components are sparkling clean, it’s time for reassembly. This step requires precision and attention to detail. Remember those photos you took earlier? Now they are your best friend. Refer to them frequently to ensure every part goes back in its correct place. Proper reassembly prevents leaks and ensures the carburetor functions correctly.
I always recommend replacing old gaskets with new ones if you have a repair kit. Old gaskets can be brittle or compressed, leading to air leaks that disrupt the fuel-air mixture. A small leak can cause big performance problems. Taking the time to replace them now saves you potential headaches later.
Reassembly Steps
- Install Jets: Carefully screw the main jet back into its position. Then install the pilot jet. Do not overtighten them, as they are brass and can strip easily. Just snug them down gently.
- Install Float and Needle Valve: Place the needle valve back onto the float arm. Carefully insert the float and needle valve assembly back into the carburetor body. Slide the float pin through the mounting tabs to secure it. Ensure the float moves freely up and down without sticking.
- Reattach Float Bowl: Place a new float bowl gasket (if replacing) onto the carburetor body or float bowl. Carefully align the float bowl and secure it with its bolt or screws. Tighten snugly.
- Install Other Removed Components: If you removed any fuel mixture screws, air screws, or other small parts, reinsert them. If you removed a fuel mixture screw, screw it in until it lightly seats, then back it out to the number of turns you noted during disassembly.
- Mount Carburetor to Engine:
- Ensure new gaskets are in place between the carburetor and the engine intake.
- Carefully position the carburetor onto the mounting studs.
- Reattach the mounting bolts/nuts. Tighten them evenly and securely, but do not overtighten.
- Reconnect all linkage rods and springs to their correct positions, referring to your photos.
- Reattach the fuel line and secure it with the hose clamp.
- Reinstall the air filter housing and air filter element.
Testing the Engine
After reassembly, it’s time to test your work. This is the moment of truth.
- Refill Fuel Tank: Add fresh, stabilized fuel to the tank.
- Reconnect Spark Plug Wire: Push the spark plug wire firmly back onto the spark plug.
- Prime Engine (if applicable): If your engine has a primer bulb, press it several times until it feels firm.
- Start the Engine: Attempt to start the engine. It might take a few pulls or cranks initially as the fuel system primes.
- Observe Performance: Listen for smooth idling and responsive acceleration. The engine should run without sputtering, hesitation, or dying.
- Check for Leaks: Visually inspect the carburetor area for any fuel leaks around the gaskets or fuel lines. Address any leaks immediately.
If the engine runs well, you have successfully cleaned your carburetor jets! This skill is particularly useful for small engines, like those found on Stihl hedge trimmers, where precision is key. For more tailored advice, you can look up resources on how to clean carburetor on Stihl hedge trimmer.
Preventative Maintenance for Carburetor Jets
Cleaning your carburetor jets is an effective solution for clogged passages. However, prevention is always better than cure. By adopting a few simple maintenance habits, you can significantly reduce the chances of your jets getting clogged again. This saves you time, effort, and the frustration of a non-starting engine. I always preach these habits to my friends.
The primary enemy of carburetor jets is stale fuel. Fuel degradation, especially with ethanol blends, creates the varnish and gum that cause blockages. Proper fuel management is the cornerstone of carburetor longevity. Investing a little extra time and money now saves you a lot more later.
Best Practices for Preventing Clogged Jets
- Use Fresh Fuel: Always use fresh gasoline. Purchase only the amount of fuel you will use within a few weeks or a month. Stale fuel is the most common cause of carburetor issues.
- Use Fuel Stabilizer: If you store your equipment for more than 30 days, always add a high-quality fuel stabilizer to the tank. Follow the product’s instructions for mixing ratios. Fuel stabilizers prevent fuel breakdown and varnish formation.
- Add stabilizer to the fuel.
- Run the engine for a few minutes to circulate the stabilized fuel through the carburetor.
- Drain Fuel for Long-Term Storage: For very long storage periods (e.g., over winter), it’s best to completely drain the fuel tank. Then, run the engine until it runs out of fuel. This empties the carburetor bowl and lines, preventing any fuel from turning stale inside the system.
- Use Non-Ethanol Fuel (if available and recommended): Some specialized fuels are available without ethanol. If your equipment manufacturer recommends it, or if you frequently face ethanol-related issues, consider using these fuels. They are more stable and less prone to moisture absorption.
- Keep Fuel Tank Clean: Ensure your fuel storage cans are clean. Dirt, rust, or water in your fuel can easily make their way into the carburetor. Use a funnel with a filter when refueling.
- Regularly Change Fuel Filter (if applicable): If your engine has a fuel filter, check it and replace it periodically. A clogged fuel filter can restrict flow, but a dirty one can also allow debris to pass through to the carburetor.
By integrating these preventative measures into your routine, you extend the life of your carburetor and ensure your small engine equipment is always ready to go. You will spend less time cleaning and more time using your tools.
Frequently Asked Questions About Carburetor Jet Cleaning
Q1: How often should I clean carburetor jets?
A1: The frequency depends on usage and fuel quality. If you use fresh, stabilized fuel and drain it for storage, you might only need to clean jets every few years. If you use stale fuel or store equipment with fuel in the tank, you might need to clean them annually or even more often if problems arise. Listen to your engine.
Q2: Can I clean carburetor jets without removing the carburetor?
A2: Sometimes, you can use a spray-through carburetor cleaner by removing the air filter and spraying into the intake. However, this is usually a temporary fix. For a thorough cleaning, especially if jets are heavily clogged, removing and disassembling the carburetor is necessary to properly access and clear the tiny jet passages.
Q3: What is the difference between the main jet and the pilot jet?
A3: The main jet controls fuel flow at mid to high engine speeds (typically above idle). The pilot jet (or idle jet) controls fuel flow when the engine is idling or at very low speeds. Both are crucial for proper engine operation at their respective RPM ranges. Both must be clean for optimal performance.
Q4: Can I use brake cleaner instead of carburetor cleaner?
A4: While brake cleaner can dissolve some deposits, it’s not ideal for carburetors. Brake cleaner can be too aggressive and may damage rubber O-rings, gaskets, and plastic components inside the carburetor. Always use a dedicated carburetor cleaner specifically formulated for these components.
Q5: What if my engine still runs poorly after cleaning the jets?
A5: If the engine still runs poorly, the issue might not be just the jets. Check other carburetor components like the float, needle valve, or diaphragm. Verify all passages are truly clear. Also, check the spark plug, fuel filter, air filter, and fuel lines for issues. Sometimes, a full carburetor rebuild kit is needed.
Q6: How do I know which jet cleaning wire size to use?
A6: Jet cleaning wire sets come with various diameters. Choose a wire that fits snugly but easily through the jet hole without forcing. It should not scratch the brass or enlarge the opening. If a wire is too big, move down to the next smaller size. Use a gentle twisting motion to clear debris.
Conclusion
Cleaning carburetor jets might seem like a daunting task at first, but with the right tools, careful attention, and a step-by-step approach, it is a very manageable DIY project. You have learned how to clean jets on carburetor, from diagnosing the problem to reassembling the unit and testing your work. This knowledge empowers you to keep your small engines running smoothly and efficiently.
Remember, a clean carburetor is the heart of a well-performing small engine. Regular maintenance and preventative measures, especially concerning fuel quality, will save you considerable time and money in the long run. Don’t let a sputtering engine ruin your outdoor plans. Take control of your equipment’s health today. If you need a more in-depth clean, consider a professional service. Otherwise, embrace the satisfaction of fixing it yourself and enjoy the reliable performance of your newly cleaned engine.
- carburetor cleaning
- engine repair
- fuel system maintenance
- clogged jets
- small engine performance