· Kitchen Cleaning · 16 min read
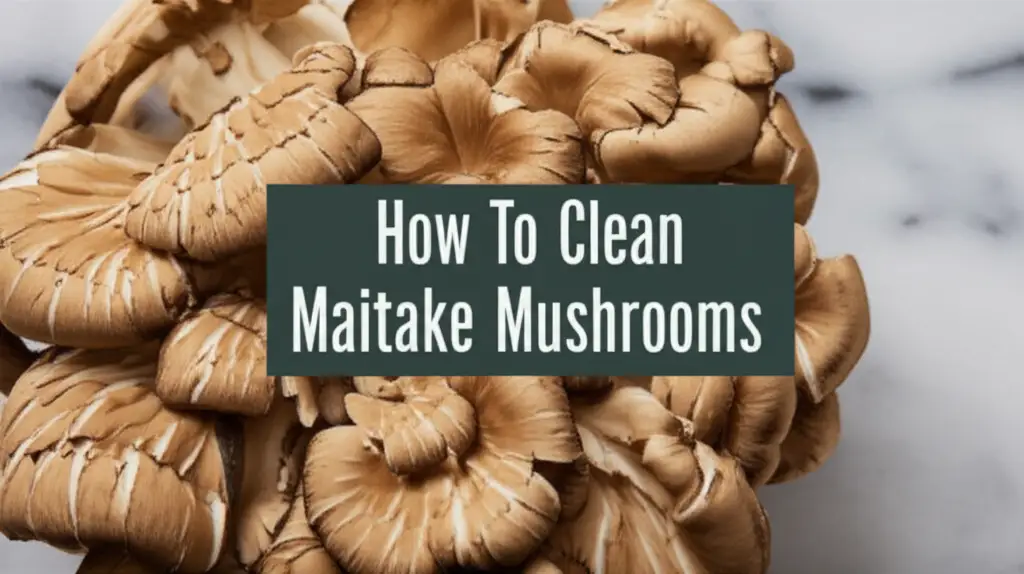
How To Clean Maitake Mushrooms
Mastering Maitake: How To Clean Mushrooms Perfectly
Maitake mushrooms, also known as Hen of the Woods, offer a unique earthy flavor and a fascinating ruffled appearance. These prized fungi are a delight in many dishes, but proper preparation is key to enjoying them. Knowing how to clean maitake mushrooms ensures you remove any dirt or debris without compromising their delicate texture and taste. Incorrect cleaning can lead to soggy mushrooms, losing their signature appeal.
I want to help you prepare these beautiful mushrooms for your next meal. This guide explores the best methods to clean maitake, from simple dry brushing to gentle rinsing when necessary. We will cover the tools you need, step-by-step cleaning instructions, and tips for proper storage. You will learn common mistakes to avoid. By the end, you will feel confident cleaning your Maitake mushrooms, preparing them for delicious culinary creations.
Takeaway
- Prioritize Dry Cleaning: Use a soft brush or damp cloth for most maitake mushrooms.
- Rinse Briefly Only If Needed: Use water only for heavily soiled maitake, then dry quickly.
- Trim Firmly: Remove tough stem bases and damaged areas.
- Store Cleaned Maitake Properly: Keep them dry and refrigerated for freshness.
To clean maitake mushrooms, gently brush off dirt and debris with a soft mushroom brush or a slightly damp cloth. Avoid soaking them, as they absorb water easily, leading to a soggy texture. Trim any tough bottom parts or damaged sections with a sharp knife. Pat them completely dry before cooking or storing to maintain their quality.
Understanding Maitake Mushrooms: Why Proper Cleaning Matters
Maitake mushrooms, known scientifically as Grifola frondosa, grow in distinct clusters at the base of trees. This growth habit means they often pick up forest debris, dirt, and even small insects. Their intricate, frilly caps provide many hiding places for these particles. Proper cleaning is important because it removes these unwanted elements, making the mushrooms safe and pleasant to eat.
The delicate texture of maitake mushrooms makes them sensitive to water. Unlike some firmer vegetables, mushrooms act like sponges. Soaking maitake in water will cause them to absorb a lot of liquid. This leads to a rubbery texture and dilutes their rich, earthy flavor. The goal of cleaning maitake is to remove contaminants while keeping them as dry as possible. This approach ensures the mushrooms retain their appealing texture and concentrated taste when cooked. You want to bring out their best qualities.
A gentle approach also helps preserve their nutritional value. Maitake mushrooms are known for their potential health benefits, including supporting immune health. Rough handling or excessive washing can strip away some of these beneficial compounds. I always recommend a light touch. Treating these mushrooms with care prepares them for optimal cooking. It also ensures you get the full flavor experience.
Gathering Your Tools: Essential Items for Cleaning Maitake
Having the right tools makes the cleaning process simple and effective. You do not need many specialized items, but having them ready saves time and ensures a thorough job. A small setup helps you prepare your maitake mushrooms quickly. I find having everything within reach helps me focus on the task.
Here are the essential items I use:
- Soft Mushroom Brush: This tool is designed to remove dirt gently from mushroom caps. Its soft bristles do not damage the delicate surface of the maitake. If you do not have a specific mushroom brush, a clean, soft-bristled toothbrush can work as an alternative.
- Damp Cloth or Paper Towels: These are perfect for wiping away dirt that brushing cannot dislodge. They should be just slightly damp, not wet. Dry paper towels are also useful for patting the mushrooms dry.
- Small, Sharp Paring Knife: A sharp knife is vital for trimming off the tough bottom stem or any bruised sections. It allows for clean cuts without tearing the mushroom flesh. Precision with this tool helps you maximize the usable parts of the mushroom.
- Clean Kitchen Towel or Paper Towels: You will need these for drying the mushrooms after any minimal exposure to water. Laying mushrooms on a clean towel allows them to air dry effectively. This step is critical for preventing sogginess.
These simple tools provide everything you need to clean maitake mushrooms effectively. They help you maintain the mushroom’s quality throughout the cleaning process. Proper tools ensure you do not damage the mushroom during cleaning.
Step-by-Step Guide to Dry Cleaning Maitake Mushrooms
Dry cleaning is the best method for maitake mushrooms. It keeps them firm and flavorful. This process minimizes water contact. It is my preferred way to prepare these delicate fungi.
Follow these steps for optimal results:
Inspect the Cluster: Begin by looking at your entire maitake cluster. Notice where the dirt is concentrated. This is often at the base or in the deeper folds. Identify any parts that look bruised or dry. I usually hold it up to the light to see all the hidden spots.
Brush Off Loose Dirt: Use your soft mushroom brush. Gently brush away any loose dirt or debris from the caps and crevices. Work from the top of the cluster downwards. Be careful not to press too hard. You just want to dislodge the particles. This initial brushing removes most of the surface dirt.
Wipe with a Damp Cloth: For more stubborn dirt, slightly dampen a clean cloth or paper towel. Wipe the soiled areas carefully. The cloth should be barely moist, not wet. Focus on areas where dirt clings. This step helps clean surfaces without soaking the mushroom. This method is similar to how you might clean other delicate fungi, ensuring you protect the mushroom’s integrity, just like when you clean mushrooms before cooking in general.
Trim Tough Base and Unwanted Parts: Use your sharp paring knife. Cut away the tough, woody base where the cluster attaches. This part is usually too fibrous to eat. Also, trim any parts that are discolored, slimy, or overly dry. This leaves you with only the best parts of the mushroom. This step is important for quality and taste.
Separate into Desired Sizes: Gently pull or cut the larger cluster into smaller, more manageable pieces. You can separate them into individual florets or leave them in small groups, depending on your recipe. Avoid tearing them roughly. This helps with even cooking later on. I often separate them into bite-sized pieces for sautéing.
Final Inspection: Give your cleaned maitake a final check. Ensure all visible dirt is gone. Confirm there are no unwanted bits remaining. They should look clean and ready for your recipe. This last look ensures you did a good job.
This dry cleaning method is usually enough for most maitake mushrooms. It prepares them perfectly for your culinary adventures. This gentle handling ensures the mushrooms taste their best.
When to Use a Light Rinse: Cleaning Heavily Soiled Maitake
While dry cleaning is preferred, sometimes maitake mushrooms come with a lot of stubborn dirt. This often happens with wild-foraged mushrooms after a rain. In these cases, a quick, light rinse becomes necessary. The key is to be fast and efficient with water.
Here is how to approach a light rinse:
Assess the Soil Level: First, look closely at the maitake. Is the dirt caked on? Are there tiny bits of leaves or pine needles deeply embedded? If brushing and wiping do not work, then a quick rinse might be needed. You only want to use water if absolutely necessary.
Rinse Under Cold, Running Water: Place the mushrooms in a colander. Rinse them briefly under a gentle stream of cold water. Do not let them sit in water. Turn them over quickly to reach all surfaces. I usually do this for no more than 10-15 seconds. The goal is to wash off the dirt, not to soak the mushrooms.
Shake Off Excess Water Immediately: After rinsing, shake the colander vigorously. This removes as much surface water as possible. You want to get rid of any standing water right away. This step is crucial to prevent sogginess.
Pat Dry Thoroughly: Lay the rinsed maitake mushrooms on a clean, dry kitchen towel or several layers of paper towels. Gently pat them dry. Use more towels if needed to absorb all moisture. You want them as dry as possible. This is a critical step for preventing mushy mushrooms when cooking. This is a similar practice to how you might handle other delicate fungi, like when you clean oyster mushrooms, which also benefit from minimal water exposure.
Air Dry If Time Allows: If you are not cooking them immediately, you can let them air dry for 10-15 minutes. Spread them out in a single layer on a clean towel. Ensure good air circulation. This helps evaporate any remaining moisture. This final drying ensures their texture remains firm.
Remember, this light rinse is a last resort. Always prioritize dry cleaning methods first. Using water sparingly helps maintain the mushroom’s integrity. It preserves its earthy flavor and firm texture.
Trimming and Preparing Maitake for Cooking
Once your maitake mushrooms are clean, the next step is preparing them for your recipe. This involves careful trimming and separation. Proper preparation ensures even cooking and highlights the mushroom’s unique characteristics. It also removes any parts that might not be pleasant to eat.
Here are the steps to trim and prepare your maitake:
Remove the Tough Base: Maitake mushrooms grow from a central, tough core or base. This part is generally woody and not good for eating. Use a sharp knife to carefully cut this firm base away from the rest of the mushroom cluster. You want to remove only the very bottom. You will see a clear change in texture where the edible part begins.
Separate into Desired Pieces: Maitake comes in large, dense clusters. For most recipes, you will want to separate these into smaller, more manageable pieces.
- Small Florets: For sautéing, roasting, or adding to stir-fries, gently pull or cut the cluster into individual florets. Try to keep some of the natural shape.
- Larger Chunks: If you are grilling or pan-frying larger pieces, you can cut sections that are 1-2 inches in size. Ensure they are relatively uniform for even cooking.
- Unlike some robust fungi, like when you clean pheasant back mushrooms which may require more aggressive trimming, maitake needs a delicate touch due to its layered structure.
Inspect for Hidden Imperfections: As you separate the pieces, take another look at each section. Sometimes, small bits of dirt or insect damage can hide deep within the folds. Trim away any parts that look discolored, bruised, or too tough. This ensures you are left with only the most tender and flavorful parts.
Uniformity for Cooking: Aim for pieces that are roughly the same size if your recipe calls for even cooking. This prevents some pieces from overcooking while others remain undercooked. Uniformity ensures a better texture and taste in your finished dish. For example, if you are roasting them, smaller pieces will crisp up more quickly.
Ready for Your Recipe: Once trimmed and separated, your maitake mushrooms are ready to be used. They should be dry and free of debris. Now you can apply your preferred cooking method. This careful preparation makes a big difference in the final dish.
Taking these few extra steps makes sure your maitake mushrooms are perfect for cooking. It enhances both their taste and texture. I always take my time with this part.
Storing Cleaned Maitake Mushrooms: Keeping Them Fresh
Proper storage is important once you have cleaned your maitake mushrooms. Mushrooms are perishable. Storing them correctly prevents spoilage and maintains their freshness. You want them to last until you are ready to cook. Incorrect storage can lead to slimy or moldy mushrooms quickly.
Here are the best ways to store cleaned maitake mushrooms:
Use a Paper Bag: The best way to store fresh or cleaned maitake mushrooms is in a paper bag. A paper bag allows the mushrooms to breathe. It absorbs excess moisture, which helps prevent sliminess and mold growth. Place the entire cleaned cluster or separated pieces directly into the bag. Do not use a sealed plastic bag. Plastic traps moisture, creating an environment ripe for spoilage.
Refrigerate Immediately: Place the paper bag with the mushrooms in the main compartment of your refrigerator. Avoid placing them in the crisper drawer, which can sometimes be too humid. The cool, dry environment of the refrigerator helps slow down their degradation. Keep them away from strong-smelling foods, as mushrooms can absorb odors.
Do Not Wash Until Ready to Use (Unless Needed): If you purchased or harvested maitake that is not heavily soiled, it is best to store them dirty and clean them right before cooking. This minimizes their exposure to moisture. However, if you have already cleaned them following the steps above, ensure they are completely dry before storing. Any residual moisture will shorten their shelf life.
Check for Freshness: Cleaned maitake mushrooms typically last for 3-5 days in the refrigerator when stored correctly. Before cooking, always inspect them. Look for any signs of spoilage, such as dark spots, a slimy texture, or an off smell. Discard any mushrooms showing these signs.
Freezing for Longer Storage (Optional): For longer storage, you can freeze cleaned maitake. First, lightly cook them (sauté or blanch) to preserve texture. Let them cool completely. Then, place them in an airtight freezer-safe bag or container. They can last for several months in the freezer. However, frozen mushrooms often have a softer texture when thawed.
Proper storage ensures your efforts in cleaning the maitake pay off. You will have fresh, flavorful mushrooms ready for your meals. I always make sure they are very dry before putting them away.
Common Mistakes to Avoid When Cleaning Maitake
Cleaning maitake mushrooms properly helps them shine in your dishes. However, some common mistakes can ruin their texture and flavor. Being aware of these pitfalls helps you avoid them. My goal is to ensure your maitake turns out perfectly every time.
Here are the mistakes to watch out for:
Soaking Mushrooms in Water: This is the most common and damaging mistake. Maitake mushrooms, like all mushrooms, are highly porous. They absorb water like sponges. Soaking them makes them waterlogged, leading to a slimy texture and diluted flavor when cooked. Always prioritize dry cleaning methods. If a rinse is needed, make it quick and follow with immediate, thorough drying.
Not Drying Thoroughly After Rinsing: If you do rinse your maitake, failing to dry them completely is a major error. Excess moisture on the mushroom surface will cause them to steam instead of sear when cooked. This results in a rubbery texture rather than the desired crispy edges. Pat them vigorously dry and consider air drying.
Using Abrasive Brushes or Tools: While you need to remove dirt, using stiff brushes or scouring pads can damage the delicate caps and frills of maitake. This causes bruising and can alter their texture. Always use a soft mushroom brush or a damp, gentle cloth. The goal is to clean, not to scrub away layers.
Neglecting to Trim Tough Parts: The base of a maitake cluster can be very woody and fibrous. Leaving this part attached can make your dish unpleasant to eat. Always cut away the tough bottom. Also, remove any bruised, dried, or insect-damaged sections. These parts do not add to the flavor or texture.
Storing in Airtight Plastic Bags: Storing mushrooms in sealed plastic bags traps moisture. This creates a humid environment that promotes mold growth and sliminess. Always use a breathable paper bag for refrigeration. Airflow is vital for mushroom freshness.
Washing Too Far in Advance: Cleaning mushrooms too far ahead of time, especially with water, can reduce their shelf life. Moisture encourages decay. If you are not cooking them within a day, it is best to clean them right before use. This keeps them at their freshest.
Avoiding these common mistakes helps you preserve the unique qualities of maitake mushrooms. Proper cleaning and handling ensure they are delicious and perfectly textured in your culinary creations.
FAQ Section
Can you wash maitake mushrooms with water?
Yes, you can wash maitake mushrooms with water, but only when necessary and very briefly. Use a quick, gentle rinse under cold, running water for heavily soiled mushrooms. Avoid soaking them, as this makes them absorb too much water. Always pat them thoroughly dry immediately after rinsing to prevent sogginess and preserve their delicate texture.
How do you get dirt off maitake mushrooms?
To get dirt off maitake mushrooms, first use a soft mushroom brush to gently brush away loose soil and debris. For more stubborn dirt, wipe the mushrooms with a slightly damp cloth or paper towel. If they are extremely dirty, a very quick rinse under cold water is acceptable, followed by immediate and thorough drying with paper towels.
Do maitake mushrooms need to be cooked?
Yes, maitake mushrooms should be cooked before eating. While some mushrooms can be consumed raw, cooking maitake enhances their flavor and improves their digestibility. Cooking also eliminates any potential raw mushroom toxins and helps release their unique earthy aromas. They are versatile and can be sautéed, roasted, grilled, or added to soups.
What are the health benefits of maitake mushrooms?
Maitake mushrooms offer several health benefits. They are rich in antioxidants, vitamins (like B vitamins and vitamin D), and minerals. Maitake is particularly known for its potential immune-boosting properties, thanks to compounds like beta-glucans. They may also help support healthy blood sugar levels and provide anti-inflammatory effects.
How long do cleaned maitake mushrooms last?
Cleaned maitake mushrooms typically last for 3-5 days when stored properly in the refrigerator. Store them in a paper bag to allow for air circulation and to absorb excess moisture. Avoid storing them in airtight plastic containers, which can trap humidity and accelerate spoilage. Always check for signs of spoilage before use.
Can I freeze cleaned maitake mushrooms?
Yes, you can freeze cleaned maitake mushrooms for longer storage. It is best to cook them lightly first, such as by sautéing or blanching, before freezing. This helps preserve their texture. Allow the cooked mushrooms to cool completely, then place them in an airtight, freezer-safe bag or container. They can last for several months in the freezer.
Conclusion
Cleaning maitake mushrooms does not need to be a complex task. With the right approach, you can ensure these unique fungi retain their best qualities. My hope is that this guide helps you prepare your maitake with confidence. Remember, the key is gentleness and minimal water.
You learned that prioritizing dry cleaning methods like brushing and wiping is best for maitake. A quick rinse is only for heavily soiled mushrooms, always followed by thorough drying. You also now understand the importance of trimming the tough base and storing the mushrooms in a breathable paper bag. By avoiding common mistakes, you preserve the maitake’s delicate texture and rich flavor. Now, you have the knowledge to properly clean maitake mushrooms for any recipe. Get ready to enjoy their deliciousness in your next meal!
- maitake mushrooms
- hen of the woods
- mushroom cleaning