· Auto Maintenance · 18 min read
How To Clean Map Sensor
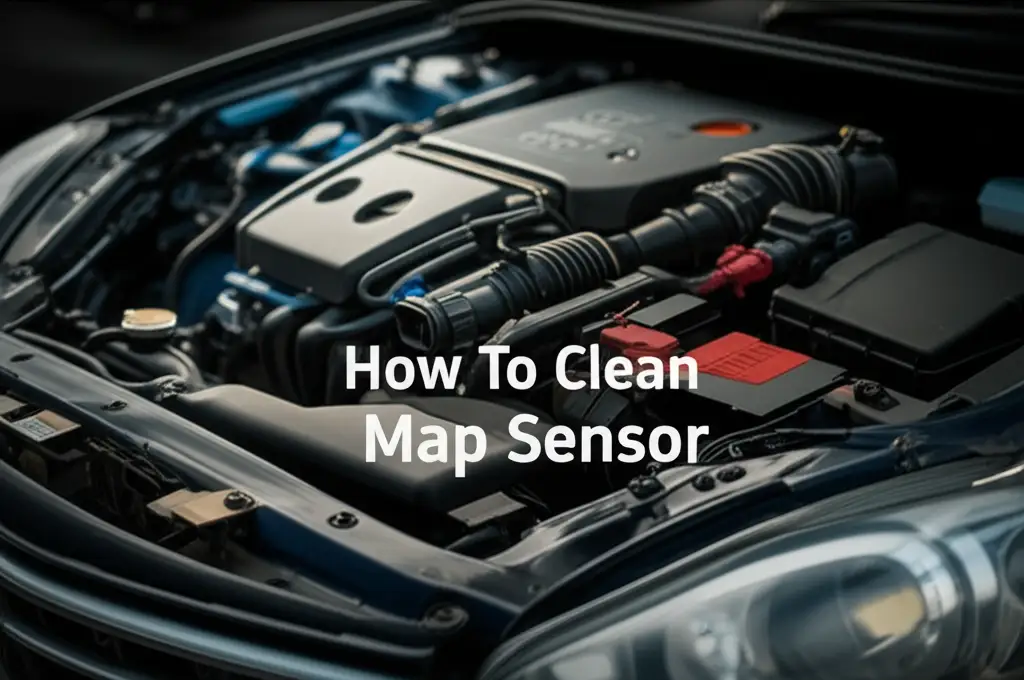
Boost Performance: How to Clean Your MAP Sensor
You want your car to run smoothly, right? A clean engine makes a big difference. One small but mighty part in your vehicle’s engine is the MAP sensor. This little sensor plays a key role in how well your engine breathes and performs. If it gets dirty, your car can experience all sorts of problems.
Cleaning your MAP sensor can help restore lost power and improve fuel economy. It is a simple maintenance task you can do yourself. This guide will walk you through everything. We will cover what a MAP sensor does, why it gets dirty, and a clear, step-by-step process for cleaning it. We will also discuss common mistakes and what to do after cleaning. Get ready to give your engine a breath of fresh air!
Takeaway
- Improve Engine Performance: A clean MAP sensor helps your engine run more efficiently.
- Save Money on Fuel: Proper sensor function can lead to better gas mileage.
- Prevent Costly Repairs: Regular cleaning avoids bigger issues down the road.
- Follow Simple Steps: The cleaning process is straightforward and DIY-friendly.
A dirty MAP sensor restricts engine performance and fuel efficiency. You can restore proper function by carefully removing the sensor, spraying its tip with a specialized sensor cleaner, allowing it to dry completely, and then reinstalling it into your vehicle. This simple process can significantly improve your car’s operation.
What is a MAP Sensor and Why Does It Need Cleaning?
The Manifold Absolute Pressure (MAP) sensor is a crucial component in your car’s engine management system. It measures the air pressure inside your engine’s intake manifold. This pressure reading tells the engine control unit (ECU) how much air is entering the engine. The ECU then uses this information to calculate the correct amount of fuel to inject. This ensures optimal combustion. A correctly functioning MAP sensor helps maintain the right air-fuel ratio. This ratio is essential for smooth running and good fuel economy.
How a MAP Sensor Works
A MAP sensor works by converting pressure readings into an electrical signal. This signal goes directly to the ECU. When you accelerate, the pressure inside the intake manifold changes. The MAP sensor detects these changes. It sends a continuous stream of data to the ECU. If the sensor provides inaccurate data, the ECU cannot properly manage fuel delivery. This leads to a wide range of engine problems. Think of it as your engine’s lung capacity monitor.
Why Does It Get Dirty?
Over time, carbon deposits, oil residue, and dirt can build up on the MAP sensor’s sensitive tip. These contaminants come from engine blow-by gases and unfiltered air entering the intake system. Even small amounts of grime can affect its ability to read pressure accurately. The sensor can become coated, sending wrong signals to your ECU. A dirty sensor cannot measure air pressure correctly. This makes the ECU miscalculate the fuel needed. This leads to poor performance.
Dirty sensors often cause engine misfires or rough idling. It is important to address this issue promptly. Cleaning the MAP sensor is a simple maintenance step. It helps keep your engine running its best. Just like you clean other vital car sensors, like an O2 sensor or a mass airflow sensor, the MAP sensor also benefits from regular attention. Cleaning ensures accurate readings and smooth engine operation.
When to Clean Your MAP Sensor: Signs and Schedule
Knowing when to clean your MAP sensor is key to preventing engine issues. Your car will often show specific signs if the MAP sensor is not working right. It is like your car telling you it needs a little help. Paying attention to these signals can save you from bigger problems later on. We will explore the common symptoms of a dirty or failing MAP sensor. We will also discuss a good schedule for preventative cleaning.
Common Symptoms of a Dirty MAP Sensor
Several signs indicate a dirty or faulty MAP sensor. One of the most common signs is a noticeable decrease in fuel efficiency. Since the MAP sensor helps control fuel delivery, a dirty one can cause your engine to use too much fuel. You might find yourself filling up at the gas station more often. Another common symptom is rough idling. Your car might shake or vibrate unusually when it is stopped. This happens because the air-fuel mixture is incorrect.
You might also experience engine misfires or hesitation during acceleration. When you press the gas pedal, the car may not respond as quickly as it should. It could feel sluggish or jerky. Sometimes, a check engine light will illuminate on your dashboard. This light signals a problem detected by the ECU. Diagnostic trouble codes (DTCs) like P0105, P0106, P0107, P0108, or P0109 often point to MAP sensor issues. If you notice any of these symptoms, inspecting and cleaning your MAP sensor is a good first step.
Preventative Maintenance Schedule
Even without obvious symptoms, cleaning your MAP sensor periodically is a good idea. Many mechanics suggest checking it every 30,000 to 50,000 miles. This general guideline helps keep your engine in top condition. However, if you drive in dusty environments or your car has high mileage, you might want to check it more often. Regular maintenance helps prevent future issues. It also extends the life of your engine components.
Consider it part of your routine car care. Just as you might clean other important sensors like your wheel speed sensor or perform regular oil changes, the MAP sensor deserves attention. A clean MAP sensor means accurate data for your engine’s computer. This translates into better performance and efficiency. You can avoid many common engine woes by staying proactive. A little time spent on cleaning now can prevent expensive repairs later.
Tools and Materials Needed for MAP Sensor Cleaning
Before you start cleaning your MAP sensor, gather all the necessary tools and materials. Having everything ready saves you time and makes the process smoother. You do not need many specialized items, but the right ones are important. Using incorrect cleaners or tools can damage the delicate sensor. We want to ensure you have a safe and effective cleaning experience.
Essential Tools
First, you will need a basic set of wrenches or sockets. The size will depend on your specific vehicle model. Most MAP sensors are held in place by one or two bolts. A small ratchet or combination wrench set usually does the trick. You might also need a flathead screwdriver or a trim removal tool. These help if the sensor has a plastic clip or electrical connector that needs gentle prying. Always use the right size tool to avoid stripping bolts or damaging plastic parts.
A flashlight can be very helpful, especially if your MAP sensor is in a hard-to-reach area. Good lighting allows you to see what you are doing clearly. You will also want some clean, lint-free cloths or paper towels. These are for wiping up any residue or spilled cleaner. Remember, precision is key when working with sensitive car parts. A clean workspace and good lighting make the job easier and safer.
Cleaning Materials
The most critical item is a specialized MAP sensor cleaner or an electrical contact cleaner. Do not use harsh chemicals like carburetor cleaner, brake cleaner, or general-purpose degreasers. These products can leave residues or damage the delicate internal components of the sensor. Sensor cleaners are designed to evaporate quickly and leave no residue. They are safe for sensitive electronics. You can find these at most auto parts stores. Look for products specifically labeled as “MAP sensor cleaner” or “mass airflow sensor cleaner.” They often work for both.
Some people prefer to wear gloves to protect their hands from the cleaner. This is optional but a good practice. You might also want a small brush with soft bristles, like a soft-bristle toothbrush or a small detailing brush. This helps dislodge stubborn debris if needed, but extreme caution is vital. Remember, the goal is to clean gently, not to scrub. Using the correct cleaner is vital for the sensor’s longevity. This small investment prevents bigger problems.
Step-by-Step Guide: How to Safely Clean Your MAP Sensor
Cleaning your MAP sensor is a straightforward process. However, it requires careful attention to detail. We will walk you through each step. Follow these instructions closely to ensure you clean the sensor effectively and safely. You do not want to accidentally damage this important component. Taking your time makes a big difference.
Step 1: Locate and Access the MAP Sensor
First, you need to find the MAP sensor in your vehicle. Its location varies depending on your car’s make and model. Generally, the MAP sensor is located on the intake manifold or sometimes on the throttle body. It is often a small, plastic component with an electrical connector. Look for a sensor that plugs directly into the engine’s air intake system. You can consult your car’s owner’s manual or search online for “MAP sensor location [your car make and model]“. Once you find it, make sure the engine is cool before you start. A hot engine can be dangerous to work on.
After locating it, disconnect the battery’s negative terminal. This prevents any accidental electrical shorts. Then, gently disconnect the electrical connector from the MAP sensor. This connector usually has a clip or a release tab you need to press. Be careful not to pull on the wires themselves. Next, remove the bolt or bolts holding the MAP sensor in place. Again, use the correct size wrench or socket. Once the fasteners are off, gently pull the sensor out of its housing. It might be slightly snug due to an O-ring seal.
Step 2: Inspect and Clean the Sensor
Once you have the MAP sensor in your hand, visually inspect it. You will likely see some carbon buildup or oily residue on the tip. This is the part that needs cleaning. Hold the sensor firmly, being careful not to touch the delicate sensing element with your fingers. Your skin oils can leave residue. Now, take your specialized MAP sensor cleaner. Spray the cleaner directly onto the sensor’s tip and the small opening. Ensure the spray covers all areas that look dirty.
Let the cleaner soak for a few seconds. It will dissolve the grime. The cleaner should evaporate quickly. You might see dirty liquid drip off. Do not wipe or scrub the sensor with a cloth or brush. This can damage the delicate wires or film inside. Simply spray it down and let it air dry completely. If it is very dirty, you can apply a second round of spray. Ensure it is completely dry before moving to the next step. Patience is important here. You want no moisture remaining when you reinstall it.
Step 3: Reinstall the MAP Sensor
After the sensor is thoroughly dry, carefully reinsert it into its housing on the intake manifold. Make sure it seats properly and the O-ring creates a good seal. Then, reattach the mounting bolt(s) and tighten them securely, but do not overtighten. Over-tightening can strip threads or crack the sensor housing. Reconnect the electrical connector. You should hear a click when it locks into place.
Finally, reconnect the negative terminal of your car’s battery. Double-check all your connections. Make sure everything is tight and secure. Your MAP sensor cleaning process is now complete. It’s time to test your car. This simple cleaning can often resolve performance issues. You can often notice an immediate improvement.
Common Mistakes to Avoid When Cleaning a MAP Sensor
Cleaning a MAP sensor seems simple, but small errors can cause damage. We want to help you avoid these pitfalls. Knowing what not to do is just as important as knowing what to do. Pay close attention to these warnings. They protect both your sensor and your wallet. Preventing damage is always easier than fixing it.
Using Incorrect Cleaning Products
This is the most critical mistake. Never use common automotive cleaners like brake cleaner, carburetor cleaner, WD-40, or parts cleaner on your MAP sensor. These products contain harsh solvents. They can permanently damage the sensitive electronic components or leave harmful residues. The sensor’s delicate wires or film are not built for such chemicals. Always use a dedicated MAP sensor cleaner or an electrical contact cleaner. These cleaners are formulated to be safe for sensors. They evaporate quickly and leave no residue. Using the wrong cleaner guarantees a faulty sensor.
Touching or Scrubbing the Sensor Element
The sensing element inside the MAP sensor is extremely delicate. It is usually a small wire or a thin film. Do not touch it with your fingers, a cloth, or a brush. Your skin’s oils can contaminate it. Scrubbing it can break the fragile components. The correct cleaning method involves spraying the cleaner onto the sensor and allowing it to air dry. The cleaner is designed to dissolve dirt on its own. Physical contact is likely to cause irreversible damage. Be gentle and let the cleaner do the work.
Not Disconnecting the Battery
Forgetting to disconnect the battery’s negative terminal before starting work is a safety hazard. It creates a risk of electrical shorts. This can damage your car’s electrical system or cause injury. Always make sure the power is off before disconnecting or connecting any electrical component in your car. This simple step protects you and your vehicle’s electronics. It ensures a safe working environment. This is standard practice for any car electrical work.
Over-tightening During Reinstallation
When reinstalling the MAP sensor, it is important not to overtighten the mounting bolts. The sensor housing is often plastic. Excessive force can strip the threads or crack the plastic housing. This would render the sensor unusable and require a replacement. Tighten the bolts until they are snug. There is no need for excessive force. Use a torque wrench if you know the specific torque specifications for your vehicle. Proper torque prevents damage and ensures a secure fit.
By avoiding these common mistakes, you ensure a successful and damage-free MAP sensor cleaning process.
After Cleaning: What to Expect and Next Steps
You have cleaned your MAP sensor. What happens now? It is time to see if your efforts paid off. We will discuss what improvements you should look for. We will also cover what to do if the problem persists. Understanding the next steps helps you properly assess the repair. This ensures your car runs as expected.
Testing Your Vehicle
After reinstalling the sensor and reconnecting the battery, start your car. Drive it for a bit, covering different speeds and conditions. Pay attention to how the engine feels. You should notice an immediate improvement in engine performance. Look for smoother idling. The engine should no longer shake or vibrate excessively when stopped. You might also feel better acceleration and responsiveness. Hesitation during acceleration should be gone or significantly reduced.
Monitor your fuel economy over the next few days. A properly functioning MAP sensor should lead to improved gas mileage. If the check engine light was on before, it might turn off on its own after several drive cycles. If it does not, or if symptoms persist, you might need to take further action. Sometimes the ECU needs a few driving cycles to adjust to the new sensor readings. Give it some time.
What if Symptoms Persist?
If cleaning the MAP sensor does not resolve your car’s issues, there could be several reasons. First, the sensor itself might be faulty or completely broken. Cleaning can only fix issues caused by dirt buildup. It cannot repair a damaged sensor. In this case, you will need to replace the MAP sensor. This is a common solution if cleaning does not work. A new sensor will provide accurate readings.
Second, the problem might not be with the MAP sensor at all. Other components can cause similar symptoms. For example, a dirty mass airflow sensor or a faulty oxygen sensor can mimic MAP sensor problems. Issues with spark plugs, fuel injectors, or a vacuum leak in the intake system can also cause similar engine performance issues. You might need to use an OBD-II scanner to read any diagnostic trouble codes. This helps pinpoint the exact problem. Professional diagnosis might be necessary if you are unsure. Do not hesitate to seek help from a qualified mechanic. They can accurately diagnose complex car problems.
Maintaining Your MAP Sensor for Long-Term Performance
Regular maintenance is the key to a long-lasting and efficient engine. Cleaning your MAP sensor is a great start. But there are other practices that help keep it and your entire engine system healthy. Thinking about long-term care helps you avoid future problems. We will look at some related maintenance tips. These tips will help keep your MAP sensor in good shape for years to come.
Regular Air Filter Replacement
The air filter is your engine’s first line of defense against dirt and debris. A clean air filter prevents contaminants from reaching your intake manifold and, consequently, your MAP sensor. If your air filter is clogged, it can restrict airflow. This forces the engine to work harder and can even draw more dirt into the system. Replace your engine air filter according to your car’s maintenance schedule. This is usually every 15,000 to 30,000 miles. A clean air filter helps keep your MAP sensor, and other components like your MAF sensor, cleaner for longer. It is a simple, inexpensive maintenance item.
Address Engine Oil Leaks and Blow-By
Excessive oil blow-by can also cause the MAP sensor to get dirty quickly. This happens when oil vapors from the crankcase enter the intake manifold. If your car has a lot of blow-by, it might indicate an issue with your PCV (Positive Crankcase Ventilation) system. A faulty PCV valve can cause oil vapors and carbon to build up faster. Check your PCV valve regularly. Replace it if it is clogged or faulty. Addressing oil leaks and maintaining a healthy PCV system helps keep your intake system cleaner. This directly benefits your MAP sensor.
Using Quality Fuel and Oil
The quality of fuel and oil you use can impact overall engine cleanliness. High-quality fuel with detergents can help reduce carbon buildup in the combustion chamber and intake system. While this does not directly clean the MAP sensor, it contributes to a cleaner engine environment overall. Similarly, using the correct type and viscosity of engine oil, and changing it regularly, minimizes sludge and carbon formation within the engine. A cleaner engine means fewer contaminants circulating. This results in less buildup on vital sensors.
By incorporating these maintenance practices, you are not just cleaning your MAP sensor once. You are setting up your vehicle for consistent, reliable performance. Proactive care extends the life of your engine’s components. It helps maintain peak efficiency. These small efforts add up to significant long-term savings. They also provide a much smoother driving experience.
FAQ Section
How often should I clean my MAP sensor?
You should consider cleaning your MAP sensor every 30,000 to 50,000 miles. If you drive in dusty conditions or notice symptoms like reduced fuel economy or rough idling, check it more frequently. Regular inspection helps prevent issues. This preventative measure supports overall engine health.
Can a dirty MAP sensor cause engine codes?
Yes, a dirty MAP sensor can absolutely cause your check engine light to come on. It can trigger specific diagnostic trouble codes (DTCs) related to manifold pressure or barometric pressure sensor circuits. Common codes include P0105, P0106, P0107, P0108, and P0109. Clearing these codes after cleaning is often necessary.
What cleaner should I use for a MAP sensor?
Always use a specialized MAP sensor cleaner or an electrical contact cleaner. These cleaners are designed to be safe for delicate electronic components. They evaporate quickly and leave no residue. Do not use brake cleaner, carburetor cleaner, or other harsh solvents, as they can damage the sensor permanently.
Is cleaning a MAP sensor hard?
No, cleaning a MAP sensor is generally a simple DIY task. It involves locating the sensor, disconnecting a single electrical plug, removing one or two bolts, and spraying the sensor tip with cleaner. Reinstallation is just the reverse. It requires minimal tools and basic mechanical knowledge.
What if cleaning doesn’t fix the problem?
If cleaning your MAP sensor does not resolve your car’s symptoms, the sensor itself might be faulty and require replacement. Alternatively, the problem could stem from another component, such as the mass airflow sensor, oxygen sensor, spark plugs, or a vacuum leak. A professional diagnosis might be necessary to pinpoint the exact cause.
Conclusion
Cleaning your MAP sensor is a simple yet impactful maintenance task for your vehicle. It is a smart way to boost engine performance and improve fuel efficiency. We covered what the MAP sensor does and why it gets dirty. We also provided a clear, step-by-step guide for cleaning it safely. Remember to always use the correct cleaning product and handle the sensor with care. Avoid scrubbing its delicate components.
By taking these proactive steps, you can help your car run smoother and last longer. If your engine has been feeling sluggish or consuming too much fuel, a clean MAP sensor could be the solution. Don’t let a small, dirty sensor hold your car back. Give your engine the clean start it deserves. Regular cleaning saves you money and trouble down the road. Take action today for a better driving experience!
- MAP sensor cleaning
- engine performance
- car maintenance