· Home Cleaning · 15 min read
How To Clean Mason Jars
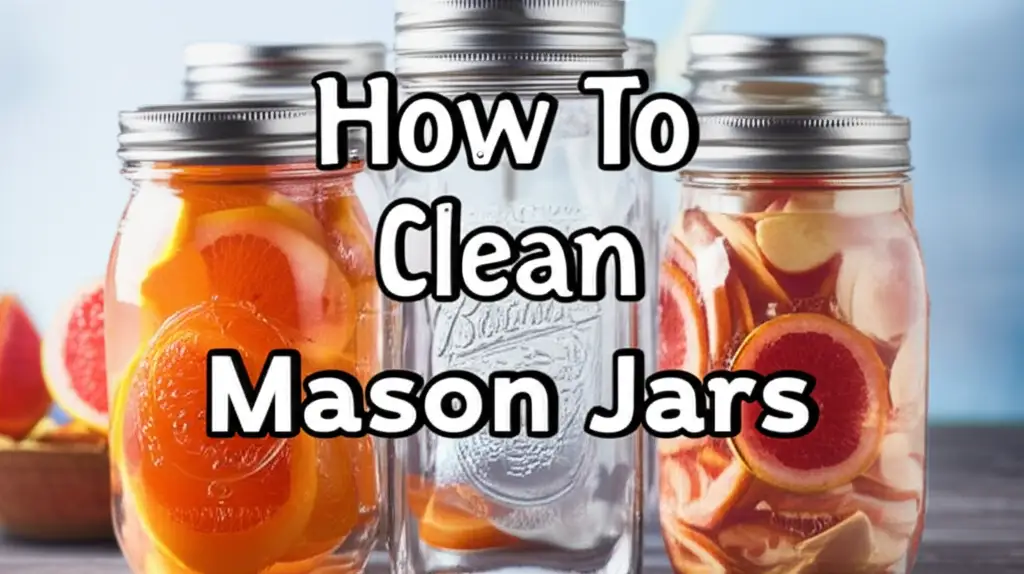
How To Clean Mason Jars: Your Guide to Sparkling Storage
Mason jars offer a versatile solution for home organization, food storage, and creative projects. People use them for drinking, canning, storing dry goods, or making crafts. Keeping these jars spotless ensures they look good and remain safe for use. A clean Mason jar extends its life. It also keeps your stored items fresh and free from contamination. I find joy in using well-maintained jars.
Cleaning Mason jars can seem straightforward, but various factors affect the process. Old food residue, cloudy glass, or mold can make cleaning challenging. This guide provides clear steps to clean Mason jars effectively. We cover basic washing and deep cleaning methods. You will learn how to remove tough stains and odors. We also discuss sterilization for canning. Prepare to achieve perfectly clean jars every time.
Takeaway
- Hand wash everyday jars with soap and warm water using a brush.
- Remove tough stains like cloudy film or odors with vinegar and baking soda.
- Clean lids and bands separately to prevent rust and ensure hygiene.
- Sterilize jars for canning using boiling, oven, or dishwasher methods.
- Dry jars completely before storing to avoid moisture and mold.
Mason jars require simple yet specific cleaning steps for optimal hygiene. You wash them by hand with warm, soapy water and a brush, focusing on all curves. For tougher grime, you can soak them in a mixture of vinegar and water. Rinse them well and allow them to air dry fully.
Why Proper Mason Jar Cleaning Matters
Clean Mason jars serve many purposes in your home. They are essential for food safety. Food stored in dirty jars can spoil quickly. This happens because bacteria or mold from previous contents remain. A thorough cleaning prevents contamination. It ensures your new food items stay fresh.
Reusing Mason jars is an eco-friendly choice. It reduces waste from single-use containers. Proper cleaning maintains the jar’s condition. It keeps the glass clear and free of lingering smells. This ensures the jar lasts for many years. Regular cleaning also prevents glass etching or permanent cloudiness.
I always make sure my jars are perfectly clean before reuse. This attention to cleanliness pays off. It protects my stored food. It also preserves the beauty and function of my Mason jars. Clean jars make my pantry look organized and inviting. They are a simple yet vital part of a tidy home.
Basic Cleaning: Everyday Mason Jars
Cleaning Mason jars for daily use is a simple task. This method works well for jars holding non-oily or non-staining contents. It is perfect for jars used for drinking or dry storage. You will need basic cleaning supplies. This process keeps your jars ready for regular use.
Gathering Your Supplies
- Dish soap: Choose your favorite liquid dish soap.
- Warm water: Hot water helps dissolve grease.
- Bottle brush or sponge: A brush with a long handle reaches the bottom.
- Clean towel or drying rack: For air drying.
Step-by-Step Hand Washing
- Empty the jar: Remove all contents from the jar. Scrape out any large food pieces.
- Rinse with warm water: Rinse the jar under warm running water. This removes loose debris.
- Add soap and water: Fill the jar halfway with warm water. Add a few drops of dish soap.
- Scrub thoroughly: Use a bottle brush or sponge. Scrub the inside surfaces of the jar. Pay attention to the bottom and threads. These areas often collect residue.
- Clean the outside: Wipe the outside of the jar with a soapy sponge. Clean any sticky spots.
- Rinse completely: Rinse the jar thoroughly under warm running water. Ensure all soap residue is gone. Soap film can make glass look cloudy.
- Air dry: Place the clean jar upside down on a drying rack. Allow it to air dry completely. This prevents water spots and mildew.
This basic cleaning method is effective for daily jar maintenance. It keeps your Mason jars sparkling. It ensures they are ready for their next purpose.
Deep Cleaning Mason Jars: Removing Stains & Odors
Sometimes Mason jars develop cloudy film, stubborn stains, or lingering odors. These issues require a more intensive cleaning approach. Common culprits include hard water deposits, coffee stains, or strong food smells. I have found specific solutions work best for these problems. These methods use simple household ingredients.
Tackling Cloudy Glass and Hard Water Stains
Cloudy glass is often due to mineral deposits from hard water. Vinegar is an excellent solution for this. I use it often for glass. Learn how to clean glass with vinegar effectively.
- Prepare a vinegar soak: Fill the Mason jar with equal parts white vinegar and warm water. You can also add a few drops of dish soap.
- Soak overnight: Let the jar soak for several hours or overnight. The acid in the vinegar breaks down mineral deposits.
- Scrub and rinse: After soaking, scrub the inside with a bottle brush. Rinse the jar thoroughly with warm water. The cloudiness should be gone.
Eliminating Stubborn Food Residue and Odors
Old food particles or strong scents can cling to jars. Baking soda is your friend here. It is a natural abrasive and odor absorber.
- Create a baking soda paste: Mix a small amount of baking soda with water. Form a thick paste.
- Apply and scrub: Apply the paste to the inside of the jar. Use a non-abrasive scrubber or bottle brush. Scrub the stained areas.
- Let it sit (for odors): For stubborn odors, fill the jar with baking soda and let it sit for a day or two. Then, empty and rinse.
- Repeat if needed: For very tough stains or odors, you may need to repeat the process. You can also combine baking soda and vinegar. Add baking soda first, then vinegar. The fizzing action helps lift grime.
These deep cleaning methods restore clarity and freshness to your Mason jars. They ensure your jars look and smell like new. You can reuse them with confidence.
Tackling Tough Challenges: Mold and Residue
Mold and persistent residue are challenging issues for Mason jars. Mold can grow if jars are not dried properly or if contents spoil. Sticky residues from labels or certain foods can also be stubborn. Addressing these problems needs specific tools and methods. I know this from experience.
Removing Mold from Mason Jars
Mold indicates moisture and organic matter were present. It is crucial to remove it completely. Ignoring mold can affect future contents. Vinegar is an effective, natural cleaner for mold.
- Isolate the jar: Keep the moldy jar separate from clean items. This prevents mold spores from spreading.
- Prepare a cleaning solution: Mix equal parts white vinegar and hot water in a bucket. Vinegar kills mold effectively. You can learn more about how to clean mold with vinegar.
- Soak the jar: Submerge the Mason jar in the vinegar solution. Let it soak for at least 30 minutes. For heavy mold, soak it for several hours.
- Scrub thoroughly: Use a sturdy bottle brush. Scrub all internal surfaces. Pay close attention to the rim and threads. Mold can hide in these spots.
- Rinse and inspect: Rinse the jar very well with hot water. Check for any remaining mold. Repeat the process if needed.
- Sanitize: After removing mold, consider sterilizing the jar, especially if it will hold food.
Dealing with Sticky Residue and Stuck-on Food
Sticky labels, glue, or dried-on food can be frustrating. Various household items can help.
- Hot soapy water soak: For dried food, fill the jar with very hot, soapy water. Let it soak for several hours or overnight. This often loosens the residue.
- Scraping tools: Use a plastic scraper or a wooden utensil to gently scrape softened food. Avoid metal tools that might scratch the glass.
- Oil for sticky labels: For label residue, apply a small amount of cooking oil (like olive or vegetable oil). Rub it into the sticky area. The oil helps dissolve the adhesive. Let it sit for a few minutes. Then, wipe it away with a cloth.
- Rubbing alcohol or nail polish remover: For very stubborn glue, dab a cotton ball with rubbing alcohol or non-acetone nail polish remover. Test a small area first to ensure it does not damage the glass. Rub the sticky spot until it is gone. Always wash the jar thoroughly with soap and water afterward.
These methods help restore even the most challenging Mason jars. Your jars will be ready for fresh starts.
Cleaning Mason Jar Lids and Bands
Mason jar lids and bands are crucial for sealing. They need separate and careful cleaning. Lids are typically two-piece: a flat lid with a sealing compound and a metal band. Both parts can trap food particles and moisture. This leads to rust or mold if not cleaned well. I always ensure these parts get proper attention.
Separating and Inspecting Components
- Separate the lid and band: Twist the band counter-clockwise to remove it. Lift the flat lid from the jar.
- Inspect for damage: Check both the lid and band. Look for dents, rust, or warped areas. Flat lids are generally single-use for canning to ensure a proper seal. Bands are reusable. If the band has significant rust, it is best to replace it.
Cleaning the Flat Lids
Flat lids have a rubber sealing compound on the underside. This part is vital for canning.
- Gentle hand wash: Wash flat lids by hand with warm, soapy water. Use a soft sponge. Do not scrub too hard on the sealing compound. Aggressive scrubbing can damage it.
- Rinse thoroughly: Rinse the lids completely to remove all soap.
- Air dry: Place lids flat or on their side to air dry fully. Ensure no water remains in the sealing groove.
Cleaning the Bands (Rings)
Metal bands are more durable but can rust.
- Hand wash or dishwasher safe: Most bands are safe for hand washing with warm, soapy water. You can also place them in the dishwasher on the top rack.
- Address rust: If you see minor rust, use steel wool or a scrub brush. Scrub the rusted spots with a paste of baking soda and a little water. This helps remove surface rust. You can get more details on how to clean Mason jar lids thoroughly. Severe rust means the band should be discarded.
- Dry immediately: This is critical. Metal bands rust easily if left wet. Dry them with a clean towel immediately after washing. Store them in a dry place.
Properly cleaning lids and bands extends their life. It also ensures food safety, especially for canning. Clean components contribute to a reliable seal.
Sterilizing Mason Jars for Canning & Preserving
Sterilizing Mason jars is a crucial step for safe canning and preserving. It ensures jars are free of bacteria, yeasts, and molds. These microorganisms can spoil food and cause health issues. Regular washing cleans, but sterilization kills. This process prepares jars for long-term food storage. I never skip this step when canning.
Understanding Sterilization vs. Cleaning
Cleaning removes visible dirt and food particles. Sterilization kills microscopic organisms. For high-acid foods (like pickles or fruit), boiling water bath canning provides enough sterilization. For low-acid foods (like vegetables or meats), pressure canning is required. The pressure canning process itself sterilizes the jars. However, it is good practice to start with clean jars. For recipes requiring pre-sterilized jars, here are common methods. You can find more information on how to clean canning jars effectively.
Methods for Sterilizing Mason Jars
Boiling Water Bath Method:
- Prepare jars: Wash jars well with hot soapy water. Rinse them thoroughly.
- Submerge in water: Place jars upright in a large pot. Use a canning rack at the bottom. This prevents jars from touching the pot directly. Cover jars with at least one inch of water.
- Boil: Bring the water to a rolling boil. Boil for 10 minutes (at sea level). Adjust time for higher altitudes.
- Keep hot: Keep jars in the hot water until ready to fill. Remove them with a jar lifter. Drain excess water.
Oven Method (Use with Caution):
- Prepare jars: Wash and rinse jars. Do not dry them.
- Place in oven: Place jars upright, without lids, on a baking sheet in a cold oven. Do not let jars touch each other.
- Heat: Turn oven to 225-250°F (107-121°C). Heat for 20 minutes.
- Remove carefully: Use oven mitts to remove jars. They will be extremely hot. Use this method only if the recipe specifically calls for it. Some manufacturers do not recommend oven sterilization due to potential glass breakage.
Dishwasher Method:
- Prepare jars: Wash jars in the dishwasher using a hot cycle. Ensure the dishwasher has a “sanitize” setting.
- Run cycle: Run a full cycle with the sanitize option.
- Use immediately: Remove jars quickly after the cycle finishes. They should be hot and dry. Fill them immediately while still hot.
Always use hot jars for hot contents to prevent thermal shock. Sterilization ensures your canned goods are safe. It also extends their shelf life.
Drying and Storing Mason Jars Properly
Proper drying and storage are just as important as cleaning Mason jars. If jars remain wet, they can develop water spots. They can also grow mold or mildew. This undoes all your hard work. Correct storage protects your jars from dust and damage. It keeps them ready for their next use. I always make sure my jars are bone dry.
Effective Drying Techniques
Air Drying is Best:
- After rinsing, place jars upside down on a clean drying rack. This allows water to drain completely.
- Ensure good airflow around each jar. Avoid stacking them too closely.
- Let them dry for several hours or overnight. You can place a clean towel underneath to catch drips.
- For faster drying, some people place jars in a slightly warm, turned-off oven for a short period. Do not use high heat.
Avoiding Water Spots:
- Using filtered water for the final rinse can help.
- Ensure the jars are completely dry before putting lids on or storing. Even small amounts of moisture can lead to cloudiness or odor.
- A clean, lint-free cloth can be used for a quick wipe down after air drying. This removes any remaining spots.
Smart Storage Solutions
Storing Mason jars correctly protects them and keeps them accessible.
- Remove Lids and Bands: Always store jars without their lids and bands attached. This allows air to circulate inside. It prevents condensation buildup and musty odors. Store lids and bands separately in a dry place.
- Store Upright or Inverted: You can store clean, dry jars upright or inverted on shelves. Inverted storage protects the inside from dust.
- Protect from Dust: If storing for long periods, cover the jars with a clean cloth or place them in closed cabinets.
- Avoid Extreme Temperatures: Store jars in a cool, dry place. Extreme temperature changes can stress the glass. This might cause breakage, especially if jars are exposed to sudden cold after being hot.
- Organize for Accessibility: Arrange jars by size or purpose. This makes finding what you need easier. You can stack jars if they are sturdy enough, but single layers are safer.
Following these drying and storage tips ensures your Mason jars remain pristine. They will be ready whenever you need them. This also extends their lifespan, making them a lasting part of your home.
FAQ Section
Q: Can Mason jars go in the dishwasher?
Yes, most Mason jars are safe for dishwasher use. Place them on the top rack to avoid direct heat from heating elements. Always remove lids and bands before washing. Lids should be hand washed. Ensure jars are completely dry before storing them.
Q: How do you get cloudy residue out of Mason jars?
Cloudy residue often comes from hard water minerals. Fill the jar with a solution of equal parts white vinegar and warm water. Let it soak for several hours or overnight. Scrub with a bottle brush. Rinse thoroughly. This method effectively dissolves mineral deposits.
Q: How do you remove mold from Mason jars?
To remove mold, soak the jar in a solution of equal parts white vinegar and hot water for at least 30 minutes. Use a sturdy bottle brush to scrub all affected areas, including the rim and threads. Rinse thoroughly with hot water. Consider sterilizing the jar afterward for food safety.
Q: Can Mason jars be sterilized in the oven?
Yes, Mason jars can be sterilized in the oven, but use caution. Place clean, wet jars upright on a baking sheet in a cold oven. Heat to 225-250°F (107-121°C) for 20 minutes. Remove them with oven mitts. Some manufacturers do not recommend this due to glass breakage risk.
Q: How do you clean old, smelly Mason jars?
For old or smelly jars, a baking soda paste works well. Mix baking soda with a little water to form a paste. Apply it inside the jar and scrub. For strong odors, fill the jar with dry baking soda and let it sit for a day or two. Then, rinse well. A vinegar soak also helps remove odors.
Q: How do I clean very narrow-necked Mason jars?
For jars with narrow necks, a specialized bottle brush is key. Look for brushes with a long handle and a flexible head. You can also fill the jar with warm soapy water and add a handful of rice or sand. Shake vigorously. The abrasive particles help scrub the inside where brushes cannot reach.
Conclusion
Keeping Mason jars clean is a simple task that offers big rewards. Sparkling jars are safe for food storage. They also look great in your kitchen or pantry. We covered basic hand washing for everyday use. We also explored deep cleaning techniques. These methods tackle stubborn stains, cloudy glass, and unpleasant odors. You now have the tools to handle mold effectively. We discussed how to clean Mason jar lids and bands. We also went through essential sterilization steps for canning and preserving.
Remember to dry your jars fully before storage. This prevents moisture problems and keeps them fresh. A clean jar is a happy jar. It is ready for your next batch of homemade preserves, overnight oats, or simply a refreshing drink. Adopt these cleaning practices. You will keep your Mason jars in top condition for years to come. Start cleaning your Mason jars today. Enjoy their lasting versatility and charm.
- Mason jars
- jar cleaning
- canning
- glass cleaning
- kitchen hygiene
- eco-friendly cleaning