· Home Maintenance · 19 min read
How To Clean Mini Split Filters
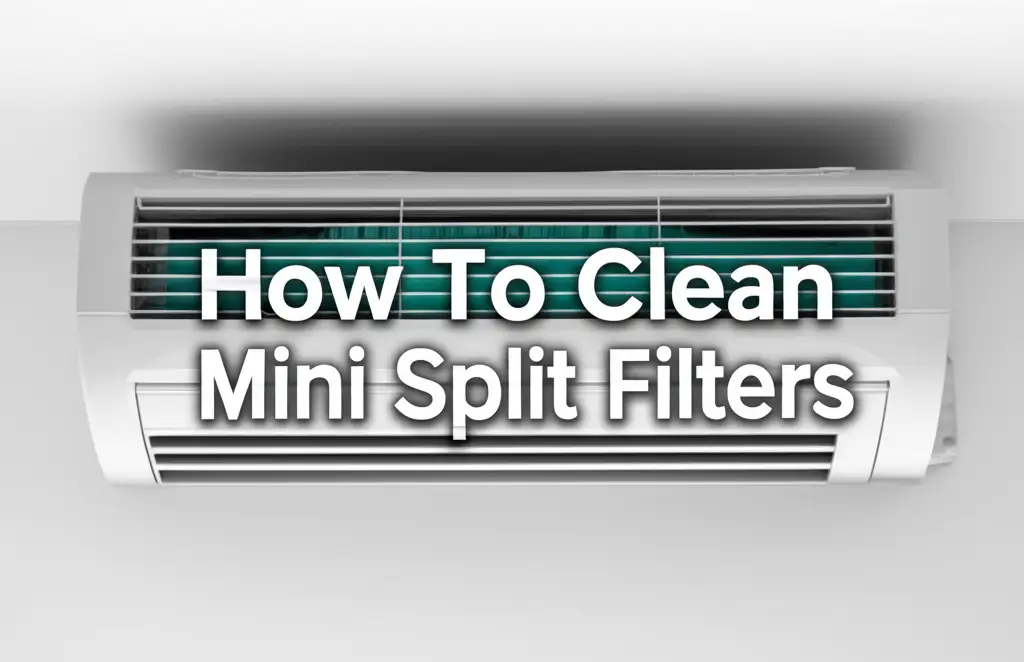
Mastering Mini Split Filter Cleaning: A Simple Guide
Mini splits offer amazing comfort and efficiency in homes. Many people love them for targeted heating and cooling. However, they need regular care to work their best. Cleaning mini split filters is a key part of this care. It helps your unit run smoothly and keeps your indoor air fresh.
This guide will show you exactly how to clean mini split filters. We will discuss why it matters and what tools you need. You will get clear, simple steps to follow. We will also share tips for other mini split maintenance tasks. Get ready to improve your home’s air quality and save money on energy bills.
Takeaway
Cleaning your mini split filters is crucial for:
- Improving indoor air quality by removing dust and allergens.
- Boosting energy efficiency, which saves you money.
- Extending the lifespan of your mini split system.
- Preventing costly repairs and system breakdowns.
- Maintaining consistent and effective heating/cooling performance.
Clear, Concise Answer
To clean mini split filters, first turn off the unit’s power. Open the front cover and gently remove the mesh filters. Vacuum loose dust, then wash them with lukewarm water and mild soap. Rinse thoroughly, let them air dry completely, and reinstall them.
Why Cleaning Mini Split Filters Matters for Your Home
Keeping your mini split filters clean is not just a chore. It is a vital part of home maintenance. Dirty filters can cause many problems for your comfort and your wallet. I have seen firsthand how much difference clean filters make. It is a small effort with big rewards.
Healthier Air for You and Your Family
Your mini split system pulls air from your room. Dust, pet dander, pollen, and other airborne particles get trapped in the filters. If you do not clean these filters, they become clogged. This means the system cannot trap new particles effectively.
Instead, your mini split can blow accumulated dust back into your living space. This reduces indoor air quality. Poor air quality can trigger allergies and asthma symptoms. Regular filter cleaning helps keep your air clean and breathable. This makes your home a healthier place for everyone.
Boosting Energy Efficiency and Saving Money
A mini split with dirty filters works much harder. It tries to pull air through a blocked screen. This extra effort uses more electricity. Your energy bills go up, and your wallet feels the strain.
Clean filters allow air to flow freely. This means your mini split can heat or cool your room more efficiently. It does not need to strain itself. This reduced workload translates directly into lower energy consumption. You will notice the difference in your monthly utility statements. It is one of the easiest ways to save money on your home’s energy use.
Extending Your Mini Split’s Lifespan
Mini splits are significant investments for your home. You want them to last for many years. Dirty filters put a lot of stress on the internal components. The fan motor works harder, and other parts can overheat. This constant strain leads to premature wear and tear.
Over time, this can cause major breakdowns. It might lead to expensive repairs or even needing a full replacement. Regular cleaning prevents this strain. It helps your unit operate within its design parameters. Proper maintenance, starting with filter cleaning, ensures your system enjoys a long and productive life. It protects your initial investment.
When and How Often to Clean Your Mini Split Filters
Understanding the right time to clean your mini split filters is important. It is not a “set it and forget it” task. Different factors affect how quickly your filters get dirty. I find that a consistent schedule works best for most homes.
Setting a Regular Cleaning Schedule
For most households, cleaning mini split filters every month is a good rule. This applies if you use your unit regularly. If you use it only seasonally, clean them before and after the season. For example, clean in spring before summer cooling and in fall before winter heating.
If your home has special conditions, you might need to clean more often. Consider cleaning every two to three weeks if certain factors apply to you. This proactive approach prevents dust buildup. It keeps your system performing at its peak.
Factors Influencing Cleaning Frequency
Several things can make your filters dirty faster. Think about how your home environment impacts your mini split. You can adjust your cleaning schedule based on these points.
- Pets: If you have furry friends, their dander and hair quickly clog filters. You will likely need to clean more frequently, perhaps every two weeks.
- Allergies and Asthma: For allergy sufferers, cleaner air is critical. More frequent cleaning helps reduce allergens in the air.
- High Usage: If your mini split runs constantly, like in a warm climate, it processes more air. This means filters get dirty faster.
- Dusty Environment: Homes near construction sites or busy roads might experience more dust. If you notice more dust settling in your home, check your filters often.
- Smoking: Smoke particles can stick to filters and create odors. Regular cleaning helps reduce these issues.
- Construction or Renovation: During home projects, airborne debris increases significantly. Clean filters immediately after any dusty work.
Signs Your Filters Need Attention
Your mini split might tell you it needs filter cleaning. Look for these warning signs. They are clues that it is time for maintenance. Do not ignore them.
- Reduced Airflow: You might feel less air coming from the unit. The airflow feels weaker.
- Poor Cooling or Heating: Your room is not getting as cool or warm as it used to. The unit seems to be struggling.
- Increased Energy Bills: A sudden jump in electricity costs without increased usage can point to clogged filters.
- Unpleasant Odors: Musty or dusty smells coming from the unit often mean dirt and possibly mold on the filters or coils.
- Visible Dust on Filters: When you open the cover, you can see a thick layer of dust on the mesh filters.
- Error Codes: Some advanced mini splits will display an error code on the indoor unit or remote control to signal a filter issue. Check your manual for specific codes.
Addressing these signs promptly saves you trouble. Cleaning the filters quickly restores your mini split’s performance.
Gathering Your Tools: What You Need to Clean Mini Split Filters
Before you start cleaning, gather all your supplies. You do not need many tools for this job. Most items are already in your home. Having everything ready makes the process quick and easy.
Essential Cleaning Supplies
You will need a few simple items to get your mini split filters sparkling clean. These tools are commonly available. You likely have most of them already.
- Vacuum Cleaner (with brush attachment): This is for removing loose dust before washing. A handheld vacuum works well, or a regular vacuum with a hose.
- Soft Brush or Old Toothbrush: Useful for gently dislodging stubborn dust.
- Lukewarm Water: For rinsing and washing the filters.
- Mild Dish Soap (optional): A tiny amount can help cut through grime, but often water is enough. Choose a gentle, non-abrasive soap.
- Clean Cloths or Microfiber Towels: For wiping down the unit and absorbing excess water.
- Air Drying Space: A clean area where filters can dry completely. This can be outdoors or indoors.
These basic supplies make filter cleaning straightforward. You do not need any harsh chemicals. In fact, strong cleaners can damage your filters.
Safety First: Precautions to Take
Safety is always the top priority when working with electrical appliances. Before you touch your mini split, take these important steps. They protect you and your unit.
- Turn Off Power: Always switch off the mini split unit completely. Do this at the wall switch or the circuit breaker for the unit. This prevents accidental startup and electrical hazards. This step is critical.
- Unplug if Possible: If your unit has a plug, unplug it from the wall outlet. Many mini splits are hardwired, so turning off the breaker is the main step.
- Read Your Manual: Every mini split model is slightly different. Your owner’s manual has specific instructions for your unit. It shows how to open the cover and remove filters correctly. Refer to it if you are unsure.
- Handle with Care: Filters can be delicate. Do not bend or force them. Be gentle when removing and reinserting them.
- Wear Gloves (Optional): If you are sensitive to dust, wearing thin gloves can be helpful.
Taking these precautions ensures a safe and effective cleaning process. You are ready to begin once your tools are gathered and safety steps are followed.
Step-by-Step Guide to Cleaning Mini Split Filters
Cleaning your mini split filters is simpler than you might think. Follow these steps carefully for the best results. I find that a systematic approach makes the job much easier.
1. Power Down Your Mini Split Unit
This is the most important first step. You must turn off all power to the unit. Do not just turn it off with the remote control. Find the main power switch for the unit. This is often on the wall near the indoor unit or at your home’s electrical panel. Flipping the circuit breaker for the mini split is the safest option. This prevents any accidental operation while you are working. Safety must come first.
2. Open the Front Cover
Most mini split indoor units have a hinged front cover. This cover usually lifts upwards. Look for small tabs or indentations on the sides to unlatch it. Gently lift the cover until it stays open on its own. Some models might have clips you need to press. Do not force the cover open. If it feels stuck, check your owner’s manual for specific instructions on opening it.
3. Carefully Remove the Filters
Inside the unit, you will see one or two mesh filters. These are usually thin, rectangular screens. They slide into slots. Gently grasp the tab or edge of each filter. Slide them out of their housing slowly. Be careful not to bend or tear them. As you pull them out, you might see accumulated dust. Try to keep this dust from falling into the unit. Place the removed filters on a clean towel or newspaper.
For some mini split models, especially Mitsubishi units, the filter removal process is very straightforward. You can often just lift a small tab and pull. For detailed steps on a specific brand, you might find guidance in an article like How to Clean Mitsubishi Mini Split. The general principles apply to most brands.
4. Remove Loose Dust with a Vacuum
Take your vacuum cleaner with the brush attachment. Gently vacuum both sides of each filter. This removes the bulk of the loose dust and debris. Work carefully to avoid damaging the delicate mesh. You will see a lot of dust come off. This step makes the washing process much cleaner and easier. It also prevents dirt from washing down your drain.
5. Wash the Filters
Now it’s time for a deeper clean. Take the filters to a sink or bathtub.
- Rinse: Hold each filter under lukewarm running water. Let the water flow through the mesh to rinse off more dust.
- Soap (Optional): If filters are very dirty or greasy, use a tiny drop of mild dish soap. Gently rub the soap onto the filter with your fingertips or a soft brush. Do not scrub hard.
- Rinse Thoroughly: Rinse the filters again under running water. Make sure all soap residue is gone. Any soap left on the filter can cause problems or odors when the unit runs. The water should run clear through the filter.
6. Dry the Filters Completely
This is a critical step. Do not rush it. Wet filters can cause mold growth inside your mini split.
- Shake Off Excess Water: Gently shake each filter to remove most of the water.
- Pat Dry: Use a clean, dry towel to gently pat the filters. This helps absorb more moisture.
- Air Dry: Lay the filters flat on a clean, dry surface. You can use a towel, a drying rack, or even a clean screen. Make sure they are in an area with good airflow. Avoid direct sunlight, which can warp some plastic filters. Let them air dry for several hours, or even overnight. They must be bone dry before you put them back. I usually leave them for at least 4-6 hours.
7. Reinstall the Filters and Close the Cover
Once the filters are completely dry, carefully slide them back into their original slots in the mini split unit. Make sure they are oriented correctly. They usually have a specific way they fit. Once both filters are in place, gently close the front cover of the mini split. Push it firmly until it latches shut. You might hear a click.
8. Restore Power
Go back to your wall switch or circuit breaker. Turn the power back on for your mini split unit. You can now turn the unit on with your remote. Enjoy cleaner, fresher air and improved performance from your mini split! You have successfully completed the cleaning process.
Beyond Filters: Other Mini Split Maintenance Tips
While cleaning filters is essential, your mini split needs other care too. Regular maintenance ensures long-term performance. I always suggest looking at the bigger picture for your unit’s health.
Cleaning the Mini Split Drain Line
The drain line removes condensation from your indoor unit. If it gets clogged, water can back up and leak. This can cause water damage or mold growth. You should check your drain line periodically.
A clogged drain line often presents with water dripping from the indoor unit. You can often clear a simple clog yourself. Use a wet/dry vacuum to suction out debris from the outdoor end of the drain line. Alternatively, you can carefully pour a mixture of warm water and a little distilled vinegar down the drain pan inside the unit (after removing filters). This helps break down slime and mold. For a deeper dive into this, an article like How to Clean Mini Split Drain Line offers complete guidance. Keeping this line clear is crucial for preventing water damage and mold.
Addressing the Blower Wheel
The blower wheel, also called the squirrel cage, circulates air through your unit. It sits behind the filters. Over time, it collects dust and grime, even with clean filters. A dirty blower wheel reduces airflow and efficiency. It can also cause musty odors.
Cleaning the blower wheel without removing it can be tricky. It requires special tools and careful work. You might need a coil cleaner spray and a special brush. Always make sure the power is off before attempting this. If you are comfortable with DIY tasks, you can find detailed instructions. A guide such as How to Clean Mini Split Blower Wheel Without Removing provides step-by-step advice. However, if you are unsure, it’s best to call a professional.
Cleaning Coils and Fins
The evaporator coils and condenser coils are critical for heat exchange. These thin metal fins also collect dust and dirt. Dirty coils reduce efficiency and make your unit work harder. You can gently vacuum the outdoor condenser coils to remove loose debris. For indoor evaporator coils, you can use a coil cleaner spray. These sprays foam up and rinse away dirt. Always follow the product instructions carefully.
Professional Cleaning vs. DIY
You can handle filter cleaning and some basic tasks yourself. However, mini splits benefit from professional deep cleaning. HVAC technicians have specialized tools and expertise. They can thoroughly clean coils, drain lines, and the blower wheel. They also check refrigerant levels and electrical connections. I recommend a professional service every 1-2 years. This ensures your unit runs optimally and avoids major issues. DIY cleaning extends the time between professional services.
Advanced Tips for Mini Split Filter Care
Beyond the basic cleaning, a few extra tips can help you maintain your mini split filters even better. These insights can extend their effectiveness and your unit’s overall health. I have learned these through experience.
Dealing with Stubborn Dirt and Odors
Sometimes, filters might have more than just dust. They might have a greasy film or persistent odors. This often happens in kitchens or homes with smokers. Simple water and soap might not be enough.
For stubborn dirt, you can try a slightly stronger solution. Mix water with a small amount of white vinegar. Use a 10:1 water-to-vinegar ratio. Soak the filters for about 15-20 minutes. Then, gently brush and rinse them thoroughly. Vinegar is a mild disinfectant and deodorizer. It helps break down greasy residue. Always ensure you rinse away all vinegar residue. It is important that filters are completely dry before reinstallation.
Proper Drying Techniques
Drying filters completely is non-negotiable. Reinstalling damp filters invites mold and mildew growth. This can lead to musty smells and even health problems. If you are in a hurry, you can speed up drying slightly.
Place the filters in a well-ventilated area. Use a fan to circulate air around them. You can also hang them on a clothesline outdoors on a sunny, non-windy day. Avoid placing them near direct heat sources like heaters or in direct, strong sunlight. This can warp or damage the plastic frame. Be patient. Ensuring they are fully dry prevents future problems.
Understanding Different Filter Types
Most mini splits use simple mesh filters. These are washable and reusable. However, some units might have additional, specialized filters. These can include:
- Activated Carbon Filters: These remove odors and smoke. They are usually not washable and need replacement.
- HEPA Filters: High-Efficiency Particulate Air filters capture very small particles. They are also disposable and require replacement.
- Anti-Bacterial/Anti-Allergen Filters: These often have special coatings. Some are reusable, others are disposable.
Always check your mini split’s manual to identify your filter types. The manual will tell you which ones are washable and which need replacement. If you have disposable filters, make sure you replace them according to the manufacturer’s recommendations. Reusable mesh filters are the most common.
Regular Visual Inspection
Make it a habit to visually inspect your filters more often than you clean them. A quick check every couple of weeks can tell you a lot. If you see visible dust buildup, it is time for a clean. This proactive approach helps you catch issues before they affect performance. It also helps you adjust your cleaning schedule based on actual usage and environment.
Troubleshooting Common Mini Split Filter Issues
Even after cleaning, you might encounter some issues. It is helpful to know how to diagnose these. Often, the solution is simple. Sometimes, it means calling a professional.
Persistent Odors After Cleaning
You have cleaned your filters, but a musty or dusty smell remains. This is a common complaint. It usually means the problem is not just the filters.
- Dirty Coils: The evaporator coil, located behind the filters, can accumulate mold and mildew. This happens especially in humid environments. Even with clean filters, the smell from the coils will persist.
- Clogged Drain Line: A build-up of stagnant water in the drain pan or line can also produce unpleasant odors. Check for water leaks as a sign.
- Blower Wheel: A very dirty blower wheel can harbor mold and dust, causing odors.
If odors persist, you need to look beyond the filters. You may need to clean the coils, drain line, or blower wheel. For severe mold, a professional deep cleaning is the best solution.
Reduced Airflow Post-Cleaning
You cleaned the filters, but the airflow still feels weak. This can be frustrating. Several factors could be at play.
- Blower Wheel Clog: A thick layer of dirt on the blower wheel severely restricts airflow. Even if filters are clean, air cannot pass efficiently through a dirty fan.
- Coil Freeze-Up: If your unit is low on refrigerant, or if the coils are extremely dirty, they can freeze up. Ice buildup blocks airflow.
- Dirty Outdoor Unit: The outdoor condenser unit also needs to be clean. If its fins are clogged with leaves or debris, the unit cannot dissipate heat properly. This reduces overall system performance.
- Other Internal Issue: There could be a more serious internal problem. This might include a faulty fan motor or a control board issue.
Check the blower wheel and outdoor unit first. If the problem continues, it is time to call for professional help.
When to Call a Professional
Knowing your limits is important. While filter cleaning is a DIY task, other issues require expert attention. Here are times when you should call a qualified HVAC technician:
- No Power or Unit Not Turning On: This indicates an electrical problem.
- Unusual Noises: Grinding, banging, or loud buzzing noises mean a mechanical issue.
- Water Leaks (Persistent): If clearing the drain line yourself does not stop leaks, there might be a more complex clog or damage.
- Refrigerant Leaks: If your unit is not cooling and you suspect a refrigerant issue (e.g., hissing sound, ice on lines), only a certified technician can handle this.
- Error Codes You Cannot Resolve: Your manual might list specific error codes. If they persist after basic troubleshooting, professional diagnosis is needed.
- System Not Heating or Cooling Effectively: If performance issues remain after all your DIY cleaning, a deeper problem exists.
- Deep Cleaning Needed: If you observe significant mold or grime on coils or the blower wheel and are not comfortable cleaning it yourself, a professional service is the safest and most effective option.
Do not attempt complex repairs yourself. This can cause more damage or pose a safety risk. Professionals have the right tools and knowledge. They can quickly diagnose and fix problems, ensuring your mini split runs safely and efficiently.
Conclusion
Cleaning mini split filters is a simple yet impactful home maintenance task. By regularly cleaning these filters, you are doing more than just wiping away dust. You are actively improving the air quality in your home. You are also boosting your system’s energy efficiency. Most importantly, you are extending the lifespan of your valuable mini split unit.
This easy routine helps you avoid costly repairs down the line. It ensures your mini split provides consistent comfort, day after day. You have learned the essential steps: powering down, carefully removing, washing, drying completely, and reinstalling. Remember to check your filters monthly and adjust your cleaning schedule based on your home’s unique needs. Taking these few minutes regularly saves you time, money, and hassle in the long run. Embrace this simple habit. You will enjoy a healthier, more comfortable home with an efficient mini split system. Start cleaning your mini split filters today for a cleaner, healthier living space tomorrow!
FAQ Section
How often should I clean mini split filters?
You should clean your mini split filters at least once a month for regular use. If you have pets, allergies, or use the unit heavily, cleaning them every two to three weeks is better. This frequency helps maintain optimal airflow and air quality.
Can I wash mini split filters in a washing machine?
No, you should not wash mini split filters in a washing machine. The delicate mesh can be damaged or warped by the agitation. Always hand wash filters gently with lukewarm water and mild soap, then let them air dry completely.
What happens if I don’t clean my mini split filters?
If you don’t clean your mini split filters, they will become clogged with dust and debris. This reduces airflow, makes your unit work harder, increases energy bills, and decreases its cooling or heating effectiveness.
- mini split filters
- AC filter cleaning
- ductless AC maintenance
- indoor air quality
- DIY cleaning