· Home Cleaning · 20 min read
How To Clean Mold Around Air Vents
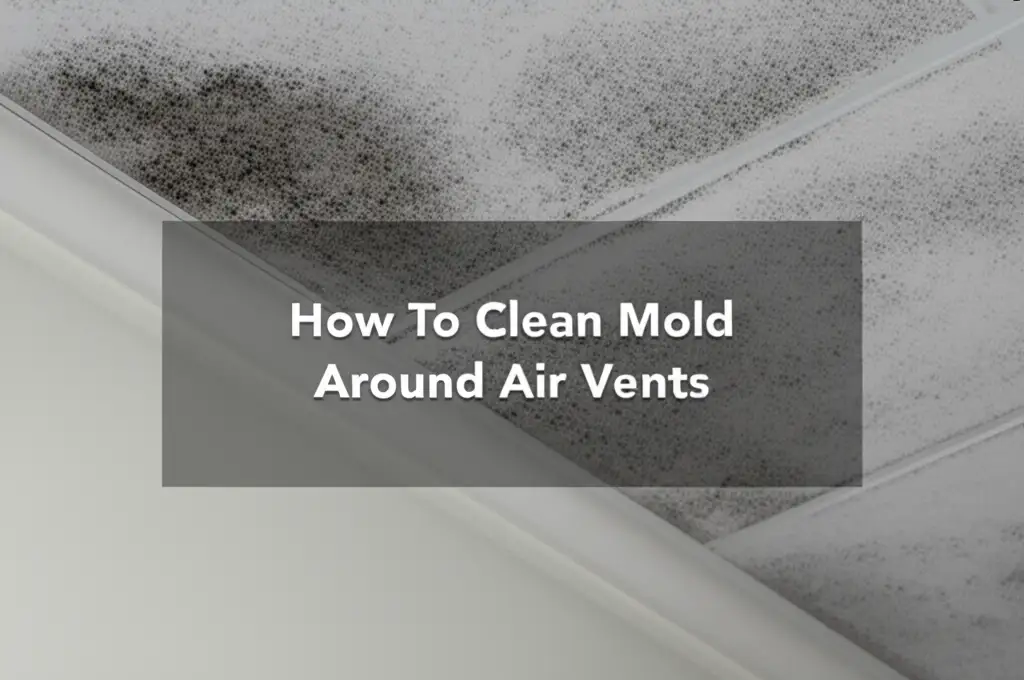
Clean Mold Around Air Vents: Your Definitive Guide
Mold around air vents is an unwelcome sight. It signals a problem with moisture and can affect your home’s air quality. Finding mold growth near your heating, ventilation, and air conditioning (HVAC) system is serious. It often means moisture is present, creating a perfect environment for mold spores to thrive. Understanding how to clean mold around air vents is important for your health and home. I will explain the steps for safe and effective mold removal.
This comprehensive guide helps you identify, clean, and prevent mold around your air vents. We will cover safety gear, necessary cleaning supplies, and a clear step-by-step process. You will learn about common causes of mold and effective prevention strategies. A clean HVAC system supports a healthy living space. Let’s make sure your air vents are mold-free.
Takeaway:
- Always wear personal protective equipment (PPE) before cleaning mold.
- Use simple, effective cleaning solutions like white vinegar or hydrogen peroxide.
- Address moisture issues to prevent mold from returning.
To clean mold around air vents, wear safety gear. Use a solution of equal parts white vinegar and water. Spray the mold directly, let it sit for 10 minutes, then scrub it. Wipe clean and dry the area thoroughly to stop mold from returning.
Understanding Mold Around Air Vents: Causes and Risks
Mold is a type of fungus. It grows in damp, dark places. Air vents are often ideal spots for mold growth. They can gather moisture from condensation, especially during hot or humid weather. Poor ventilation also contributes to this problem.
Dust and dirt around vents provide food for mold. The combination of moisture and organic matter helps mold spread. This growth can happen quickly if conditions are right. You might see black, green, or white fuzzy patches.
Common Causes of Mold Growth
Several factors lead to mold around air vents. Understanding these helps you tackle the problem effectively. High humidity is a major cause. If your home’s humidity levels are consistently above 60%, mold can grow easily. Air conditioners can also contribute if they are not maintained.
Another common cause is condensation. When warm, humid air meets cold vent surfaces, water droplets form. This happens often with metal vents in basements or during the summer. Leaky ducts also allow moisture into the system. Ducts running through unconditioned spaces like attics or crawl spaces are prone to leaks.
Poor airflow is another factor. If air cannot circulate properly, moisture gets trapped. This creates a stagnant environment. Dust accumulation inside and around vents also feeds mold. I have seen many homes where dust bunnies around vents provide ample food for mold spores.
Health Risks of Mold Exposure
Exposure to mold can cause various health problems. Mold spores become airborne easily. When you breathe them in, they can irritate your respiratory system. Common symptoms include sneezing, coughing, watery eyes, and a runny nose. Some people experience headaches or fatigue.
For individuals with allergies or asthma, mold exposure can trigger severe reactions. It can lead to asthma attacks or allergic bronchitis. Long-term exposure to high levels of mold may even cause more serious lung conditions. It is important to address mold quickly. Protecting your family from these risks starts with a clean home.
Mold on air vents directly impacts the air you breathe. As your HVAC system pushes air, it can distribute mold spores throughout your home. This makes the problem spread to other areas. Cleaning these areas is not just about aesthetics; it is about protecting your health.
Essential Safety Precautions for Mold Cleaning
Before you start cleaning mold around air vents, prioritize safety. Mold spores can irritate your lungs and skin. Some mold types produce toxins. Proper protective gear minimizes your exposure. It keeps you safe during the cleaning process.
Always ensure the area is well-ventilated. Open windows and doors if possible. Use fans to help move air out of the room. This helps clear airborne mold spores. I always make sure I have fresh air moving through the space.
Personal Protective Equipment (PPE)
Wearing the right gear is non-negotiable. This equipment protects your body from mold contact and inhalation. Do not skip any of these items. Your health is more important than convenience.
- N95 Respirator or Mask: This is crucial. A standard dust mask will not stop mold spores. An N95 respirator filters out small particles, including mold spores. Ensure it fits snugly over your nose and mouth.
- Gloves: Wear disposable rubber or nitrile gloves. Mold can irritate your skin. These gloves protect your hands from mold and cleaning solutions. Replace them if they tear.
- Eye Protection: Goggles or safety glasses protect your eyes from splashes and airborne spores. Choose ones that seal well around your eyes.
- Old Clothes/Coveralls: Wear long-sleeved shirts and long pants. Better yet, use disposable coveralls. Mold spores can stick to fabric. You want to avoid spreading them to other parts of your home. Wash these clothes immediately after cleaning or dispose of the coveralls.
- Hair Covering: If you have long hair, tie it up and cover it with a cap or bandana. This prevents mold spores from settling in your hair.
Preparing the Work Area
Proper preparation makes the cleaning process safer and more efficient. It also helps contain mold spores. I always take a few minutes to prepare the area thoroughly. This small effort makes a big difference.
- Turn off HVAC System: This is the first and most important step. You do not want the system to circulate mold spores while you are cleaning. Turn off the thermostat and any related fans.
- Contain the Area: Use plastic sheeting and painter’s tape to seal off the work area. Cover nearby furniture, flooring, and air return vents. This prevents mold spores from spreading to other rooms. It creates a contained environment.
- Remove Vent Covers: Carefully unscrew and remove the vent covers. You will clean these separately. Place them on a protected surface, like an old towel or plastic sheet.
- Gather Supplies: Have all your cleaning solutions, brushes, cloths, and a bucket ready. This avoids interruptions once you start cleaning. Being organized saves time and effort.
Taking these precautions seriously will protect you and your home. Cleaning mold safely is always the best approach.
Gathering Your Tools and Cleaning Solutions
Before you tackle mold around air vents, you need the right tools and cleaning agents. Having everything ready saves time and ensures a thorough job. You likely have many of these items already at home.
The choice of cleaning solution depends on the severity of the mold and the surface it’s on. For most surface mold around vents, common household products work well. Always test any solution on an inconspicuous area first. This checks for discoloration or damage.
Essential Cleaning Tools
These tools help you reach and scrub mold effectively. They are designed to make the cleaning process easier and safer. I always keep a dedicated set of cleaning brushes for tough jobs like this.
- Stiff-Bristle Brush: A small scrub brush with stiff bristles is perfect for scrubbing mold off vent covers and surrounding surfaces. Choose one that fits into crevices.
- Microfiber Cloths or Old Rags: You will need several of these for wiping surfaces clean. Microfiber cloths are good for trapping mold spores. Old rags work well too, especially if you plan to dispose of them afterward.
- Spray Bottle: A clean spray bottle is essential for applying your chosen cleaning solution evenly. Label it clearly.
- Bucket: A bucket for mixing solutions or rinsing cloths.
- HEPA Vacuum Cleaner (Optional but Recommended): A vacuum with a HEPA filter can capture mold spores more effectively than a standard vacuum. Use it to pre-clean and post-clean the area. Remember to use it after the mold is dead, not before, as vacuuming live mold can spread spores. If you clean black dust around air vents, a HEPA vacuum is also useful for that task. Learn more about removing common buildup here: How To Clean Black Dust Around Air Vents.
Effective Cleaning Solutions
Several solutions can kill and remove mold. White vinegar is a popular choice due to its effectiveness and safety. Hydrogen peroxide is another good option. Bleach is powerful but comes with more risks.
- White Vinegar: This is my go-to for most mold issues. White vinegar is a mild acid that kills about 82% of mold species. It is safe for most surfaces and non-toxic. Mix equal parts white vinegar and water in a spray bottle.
- Application: Spray directly onto the moldy area. Let it sit for at least 10 minutes to penetrate the mold.
- Benefits: It does not produce harmful fumes like bleach. It is also effective at preventing mold regrowth. For more tips on using natural cleaners, check out: How To Clean With Vinegar And Baking Soda.
- Hydrogen Peroxide (3% solution): This is another strong mold killer. It works well on porous and non-porous surfaces. It is non-toxic and leaves no harmful residues.
- Application: Pour 3% hydrogen peroxide into a spray bottle. Spray it directly onto the mold. Let it sit for 10-15 minutes.
- Benefits: It breaks down into water and oxygen, making it environmentally friendly.
- Bleach (Sodium Hypochlorite): Bleach is very effective at killing mold on non-porous surfaces like metal vent covers. However, it can damage porous materials and its fumes are strong. I rarely recommend it for wall surfaces unless absolutely necessary.
- Application: Mix 1 cup of bleach with 1 gallon of water. Apply with a cloth or spray bottle. Do not mix bleach with ammonia or other cleaners. This creates dangerous fumes.
- Caution: Use in very well-ventilated areas. Test on a small area first.
- Commercial Mold Cleaners: Many products are available specifically for mold removal. Always follow the manufacturer’s instructions. Ensure they are safe for your specific surfaces. These often contain fungicides or strong chemicals.
Choose the solution that best fits your situation. For most household mold around vents, white vinegar or hydrogen peroxide is sufficient and safer.
Step-by-Step Guide: Cleaning Visible Mold on Vents and Walls
Once you have gathered your tools and put on your safety gear, you are ready to start cleaning. This process focuses on visible mold around the air vent opening and on the vent cover itself. Take your time and be thorough.
Remember to keep your HVAC system turned off during this entire process. This prevents mold spores from circulating. Working carefully helps contain the mess and makes the job more effective. I always start with the vent cover first.
Step 1: Remove and Clean the Vent Cover
The vent cover is often the most visibly affected part. It collects dust and moisture directly from the airflow. Removing it allows for a more complete cleaning. Handle it carefully to avoid spreading spores.
- Unscrew the Cover: Use a screwdriver to carefully loosen and remove the screws holding the vent cover in place.
- Take it Outside (If Possible): If you can, take the vent cover outdoors for cleaning. This prevents mold spores from spreading inside your home. Lay it on a tarp or old newspaper.
- Pre-Clean: Use a dry brush or a small vacuum (with a HEPA filter) to remove loose dirt and dust from the cover. This helps the cleaning solution work better on the mold.
- Spray with Solution: Generously spray your chosen mold-killing solution (white vinegar or hydrogen peroxide) onto all moldy areas of the vent cover.
- Let it Sit: Allow the solution to sit for 10-15 minutes. This gives it time to penetrate and kill the mold.
- Scrub and Rinse: Use your stiff-bristle brush to scrub away the mold. For stubborn spots, apply more solution and scrub again. Once clean, rinse the cover thoroughly with water.
- Dry Completely: Dry the vent cover completely before reinstallation. Use a clean cloth, or let it air dry in the sun. Moisture encourages mold regrowth.
Step 2: Cleaning Mold on the Wall and Duct Opening
After cleaning the vent cover, turn your attention to the wall around the opening and the visible part of the duct. This area is crucial, as mold here can indicate deeper issues.
- Pre-Clean the Area: With a slightly damp cloth, carefully wipe away any loose dust or debris from the wall around the vent opening. Do not scrub hard, as this can spread spores.
- Apply Cleaning Solution: Spray your mold-killing solution directly onto the mold on the wall and the accessible edges of the duct opening. Be thorough but avoid saturating drywall too much.
- Let it Penetrate: Allow the solution to sit for 10-15 minutes, giving it time to kill the mold.
- Scrub Gently: Use a clean scrub brush or a damp cloth to gently scrub the mold off the wall. If the wall is painted, be careful not to remove paint. For stubborn mold on a non-porous surface like the duct metal, you can scrub more vigorously. If you encounter mold on surfaces like wood near the vent, specific methods might apply: How To Clean Black Mold Off Wood.
- Wipe Clean: Use fresh, damp microfiber cloths to wipe the area clean. Rinse your cloths frequently in a bucket of clean water.
- Dry Thoroughly: This is a vital step. Use a dry cloth to absorb as much moisture as possible. Then, use a fan or dehumidifier to ensure the area is completely dry. Mold needs moisture to grow. Ensure no moisture remains.
Step 3: Reinstall Vent Cover
Once the vent cover and the surrounding area are completely dry, you can reinstall the cover.
- Place the Cover: Carefully position the clean, dry vent cover back over the opening.
- Secure with Screws: Re-insert and tighten the screws. Do not overtighten.
- Dispose of Cleaning Materials: Safely dispose of any moldy rags, gloves, and plastic sheeting. Seal them in a plastic bag before putting them in the trash. Clean your brushes thoroughly with hot, soapy water.
This systematic approach ensures that visible mold around your air vents is effectively removed. However, remember that visible mold is often a symptom of a larger issue within your HVAC system.
Addressing Mold Inside Air Ducts (When to Call a Pro)
Cleaning visible mold around air vents is a good start. However, if you see mold around the vents, it is possible mold also exists inside your air ducts. Mold inside ducts is a more serious problem. It requires careful consideration and often professional help.
Air ducts are an enclosed system. Mold inside them can quickly spread spores throughout your entire home. This impacts indoor air quality significantly. Trying to clean extensive mold inside ducts yourself can be risky. It can spread the spores further if not done correctly.
When to Suspect Mold Inside Ducts
Several signs indicate mold may be growing within your ductwork. Paying attention to these signals helps you decide if professional intervention is necessary.
- Persistent Musty Odor: If you notice a damp, musty smell whenever your HVAC system runs, mold is likely growing somewhere in the ducts. This smell indicates active mold growth.
- Visible Mold Recurrence: If you clean mold around your vents, but it quickly returns, it means the source is deeper within the ducts. The visible mold is just the tip of the iceberg.
- Health Symptoms Worsen When HVAC Runs: If you or family members experience increased allergies, respiratory issues, or other unexplained health problems when the heating or air conditioning is on, mold spores circulating from the ducts could be the cause.
- Evidence of Moisture in Ducts: Visible water stains, rust, or condensation inside ductwork when you remove a vent cover are strong indicators of moisture problems, which lead to mold. For example, if you have a window AC unit, mold can be a recurring issue if moisture isn’t managed. Check out how to manage mold in those units here: How To Clean Mold From Window Air Conditioner.
The Limits of DIY Duct Cleaning
For small, localized patches of mold that are easily accessible (e.g., just at the very opening of the vent where you can clearly see and reach it), you might be able to handle it. However, if the mold covers a larger area, extends deep into the ductwork, or if you suspect it is widespread, DIY cleaning is not advisable.
- Inaccessibility: Ducts are hard to reach. They snake through walls, ceilings, and floors. You cannot effectively clean areas you cannot see or reach.
- Specialized Equipment: Professionals use powerful vacuums with HEPA filters, specialized brushes, and air whips. These tools dislodge and capture mold spores without releasing them into your home. Regular household vacuums will not be effective and can spread spores.
- Spore Spreading Risk: Improper cleaning can release millions of mold spores into your home’s air. This turns a localized problem into a widespread contamination issue.
- Identifying Source of Moisture: A professional HVAC technician can identify and fix the root cause of the moisture. This might be a leaky coil, a clogged condensate drain line, or inadequate insulation. For instance, a clogged AC drain line can lead to significant moisture and mold issues. Learn more about maintaining your AC system here: How To Clean AC Drain Line With Air Compressor.
When to Call a Professional
It’s time to call a professional if:
- The mold growth is extensive, covering more than 10 square feet.
- The mold is deep inside your ductwork and not easily reachable.
- You have persistent musty odors after cleaning the visible mold.
- You or family members have health issues that seem related to HVAC operation.
- You suspect the moisture source is within the HVAC system itself (e.g., a faulty evaporator coil, leaky condensate pan).
A certified HVAC technician or mold remediation specialist can inspect your ductwork. They use specialized cameras to see inside. They will then recommend the appropriate course of action. This might include duct cleaning, sealing leaks, or addressing humidity issues. Investing in professional help ensures the mold is completely eradicated. It also helps prevent its return.
Preventing Mold Recurrence Around Air Vents
Cleaning mold is only half the battle. Preventing its return is equally important. Mold needs moisture and organic matter to grow. By controlling these factors, you can create an environment where mold cannot thrive. This section offers practical strategies to keep your air vents mold-free.
Regular maintenance and proactive measures are key. I have found that a consistent approach saves a lot of headaches in the long run. Small actions can make a big difference.
Control Humidity Levels
High humidity is the primary driver of mold growth. Keeping indoor humidity below 60% (ideally between 30% and 50%) is crucial.
- Use a Dehumidifier: In humid climates or seasons, a dehumidifier is your best friend. Place it in areas prone to dampness, like basements or crawl spaces. Empty it regularly.
- Run Your Air Conditioner: Your AC unit not only cools but also removes humidity from the air. Make sure it is properly sized for your home. An oversized unit cycles too quickly, failing to dehumidify effectively. Keeping your AC unit clean, including its components like the water tank, can help prevent mold. This is especially true for portable units: How To Clean Portable Air Conditioner Water Tank.
- Improve Ventilation: Ensure bathrooms, kitchens, and laundry rooms have working exhaust fans. Use them during and after activities that generate moisture. Keep them running for at least 15-20 minutes after you finish.
Maintain Your HVAC System
A well-maintained HVAC system is less likely to develop mold. Regular check-ups and simple DIY tasks go a long way.
- Change Air Filters Regularly: HVAC filters trap dust, pollen, and mold spores. A dirty filter restricts airflow and can become a breeding ground for mold itself. Change disposable filters every 1-3 months. For reusable filters, clean them as recommended by the manufacturer.
- Inspect and Clean Drain Pans: Your AC unit has a condensate drain pan and line. These collect and remove moisture generated during cooling. If they get clogged, water can back up, leading to mold growth within the unit and potentially in ducts. Inspect them periodically for standing water or slime. Clean them with a mixture of bleach and water (1 cup bleach to 1 gallon water) or white vinegar.
- Ensure Proper Drainage: Make sure the condensate drain line is not clogged and drains freely. If it is blocked, water will pool. This creates a perfect environment for mold.
- Check for Leaks: Periodically inspect your ductwork for leaks or gaps, especially in unconditioned spaces like attics or crawl spaces. Leaks can draw in humid air or allow conditioned air to escape, leading to condensation. Seal any leaks with mastic sealant or metallic tape.
Address Water Leaks Promptly
Any water leak, no matter how small, can quickly lead to mold.
- Fix Plumbing Leaks: Repair leaky pipes, faucets, or roofs immediately. Even small drips can create enough moisture for mold to grow.
- Seal Gaps: Seal gaps around windows, doors, and foundations. This prevents water intrusion from outside.
- Check for Condensation on Pipes: Insulate cold water pipes that run through humid areas. This prevents condensation from forming on their surfaces.
Promote Good Airflow
Good airflow helps dry out areas and prevents moisture accumulation.
- Do Not Block Vents: Ensure furniture or curtains do not block air vents or return registers. Blocked vents hinder airflow. This can create pockets of stagnant, humid air around the vents.
- Keep Interior Doors Open: If possible, keep interior doors open to promote air circulation throughout your home. This helps balance temperatures and humidity.
By consistently applying these preventive measures, you can significantly reduce the risk of mold returning around your air vents and throughout your home. A clean, dry environment is the best defense against mold.
Maintaining Your HVAC System for a Mold-Free Home
Beyond directly addressing mold, ensuring your entire HVAC system is well-maintained is key to preventing future mold problems. Your heating, ventilation, and air conditioning system plays a central role in your home’s air quality. A neglected system can become a major source of mold spores.
Regular professional maintenance, combined with simple homeowner tasks, creates a strong defense against mold. It extends the life of your system and keeps your home healthier. I always recommend an annual professional check-up.
Annual Professional HVAC Servicing
Professional HVAC technicians can spot potential issues before they become major problems. They have the tools and expertise to perform thorough inspections and cleanings.
- Coil Cleaning: Evaporator coils inside your indoor unit get cold. They collect moisture and can accumulate dirt and debris. This creates an ideal environment for mold. Professionals clean these coils. This ensures proper airflow and prevents mold growth.
- Duct Inspection: Technicians can inspect your ductwork using specialized cameras. They check for leaks, damage, and mold growth deep inside the system.
- Refrigerant Level Check: Correct refrigerant levels ensure your AC cools and dehumidifies properly. Low levels can lead to coils freezing, which then melts and causes excess moisture.
- Condensate Drain Line Maintenance: Professionals ensure the condensate drain line is clear and correctly sloped. They can flush it out to remove algae or slime buildup. This prevents water backups and subsequent mold issues. You might learn about various methods for clearing blockages, such as with an air compressor: How To Clean AC Drain Line With Air Compressor.
- Overall System Performance Check: They check the entire system for efficiency and proper operation. An inefficient system might struggle to remove humidity, leading to mold.
Homeowner Maintenance Tasks
There are several tasks you can do regularly to support a mold-free HVAC system. These tasks are simple but very effective.
- Regular Filter Changes: As mentioned before, this is fundamental. Change your air filters at least every 1-3 months. If you have pets or allergies, change them more often. This traps airborne particles, including mold spores, before they enter your system.
- Keep Area Around Outdoor Unit Clear: Ensure the outdoor condenser unit is free of debris, leaves, and overgrown vegetation. Good airflow around the unit helps it operate efficiently.
- Clean Return Air Vents: These are often overlooked. Dust and debris can accumulate around return air vents, providing food for mold. Vacuum or wipe them down regularly.
- Check for Water Leaks: Periodically look for signs of water leaks around your indoor HVAC unit, ductwork, and condensate drain pan. Address any leaks immediately.
- Monitor Humidity: Use a hygrometer to monitor indoor humidity levels. Take action (e.g., use a dehumidifier) if levels consistently stay above 60%.
Considering UV Lights in HVAC Systems
Some homeowners choose to install UV-C lights in their HVAC systems. These lights are placed near the evaporator coils or inside the ductwork.
- Mold Prevention: UV-C light can kill mold spores and bacteria that pass through the system or attempt to grow on the coils. It sterilizes the air and surfaces it touches.
- Improved Air Quality: By killing microbes, UV lights can help improve overall indoor air quality.
- Professional Installation: UV light systems should be installed by a qualified HVAC technician. They ensure proper placement and safety.
- mold removal
- air vent cleaning
- HVAC mold
- indoor air quality
- home maintenance
- mold prevention