· Kitchen Cleaning · 15 min read
How To Clean Muffin Tin
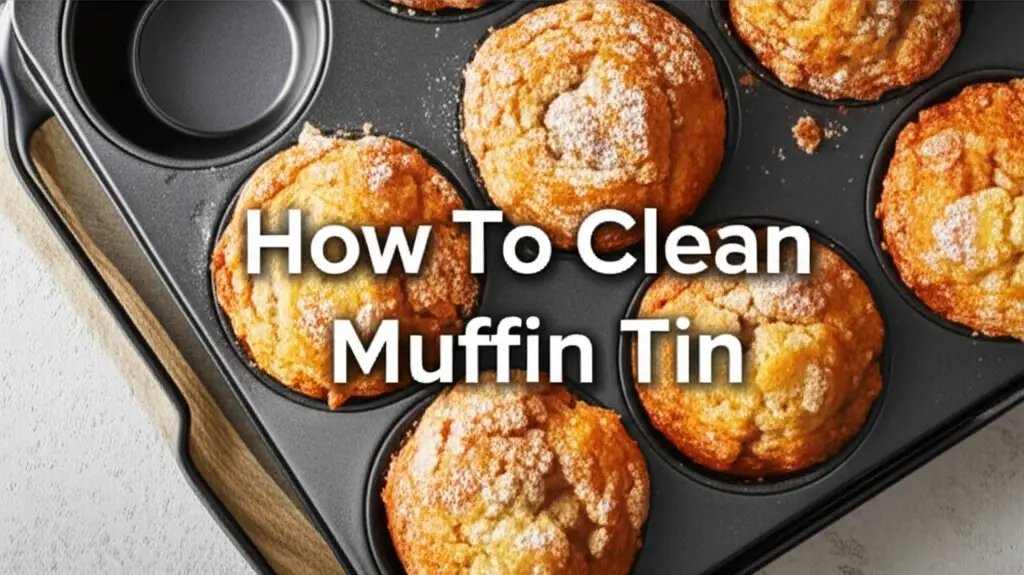
How To Clean Muffin Tin: Simple Steps for Sparkling Results
Muffin tins are kitchen workhorses. They help us create delicious muffins, cupcakes, and even savory egg bites. But after a few baking sessions, they can look pretty sad. Baked-on batter, grease, and crumbs stick to every nook and cranny. You might wonder, “How do I clean my muffin tin so it looks new again?” I understand this frustration. I have battled many sticky muffin tins myself.
Proper cleaning is not just about appearance; it extends the life of your bakeware. Neglecting a dirty muffin tin can lead to permanent stains and even rust. This guide will show you how to clean muffin tin surfaces, no matter the material. We will cover different methods for various types of stains and provide practical tips. Get ready to restore your muffin tins to their sparkling best.
Takeaway
- Pre-soak your muffin tin right after use to prevent food from hardening.
- Match your cleaning method to the muffin tin’s material (non-stick, silicone, metal, cast iron).
- Use natural cleaners like baking soda and vinegar for tough, baked-on stains.
- Always dry your muffin tin completely to prevent rust, especially for metal types.
To clean a muffin tin, immediately soak it in hot, soapy water. Use a non-abrasive sponge or brush to scrub away loose food. For baked-on grease, create a paste with baking soda and water or hydrogen peroxide. Apply it, let it sit, then scrub and rinse. Ensure thorough drying to prevent rust and maintain the tin’s condition.
Understanding Muffin Tin Materials and Their Cleaning Needs
Different muffin tin materials require specific care. What works for one type might damage another. Knowing your muffin tin’s material helps you choose the right cleaning method. This prevents damage and keeps your bakeware in good condition. I always check the material before I start cleaning.
Non-Stick Muffin Tins
Non-stick muffin tins are popular for easy food release. These tins often have a coating that prevents sticking. This coating makes cleaning easier, but it is also delicate. You must avoid harsh abrasives. Metal scrub brushes or strong chemicals can scratch the non-stick surface. Once scratched, food sticks more easily, and the tin loses its non-stick properties. Always use soft sponges or cloths. Mild dish soap and warm water are usually enough for regular cleaning. If you face stubborn residue, gentle techniques become important. Using plastic scrapers can help remove baked-on bits without harming the coating.
Silicone Muffin Molds
Silicone muffin molds are flexible and very easy to use. They naturally resist sticking. These molds are generally dishwasher safe. They can handle high temperatures but can sometimes develop a greasy film. This film attracts dust and can affect baking. A simple wash with hot, soapy water often removes this film. For a deeper clean, baking soda or vinegar works well. You can even boil silicone molds in water for a few minutes. This helps release trapped oils. Make sure to dry them completely before storing.
Metal (Aluminum, Steel) Muffin Tins
Metal muffin tins, like those made from aluminum or steel, are durable. They conduct heat well. These tins are more prone to baked-on residue and rust if not cared for. You can use a bit more scrubbing power on them compared to non-stick. However, avoid extremely abrasive pads that could scratch the surface. This can create tiny crevices where food can hide and stick. For tough spots, a baking soda paste is very effective. Remember to dry them quickly after washing. Leaving water on them can cause rust spots. I often wipe them dry with a towel, then let them air dry completely. These tips apply to general metal bakeware, similar to how one might clean the bottom of a pan.
Cast Iron Muffin Pans
Cast iron muffin pans are heavy and cook food beautifully. They last a lifetime with proper care. Unlike other materials, you should not use soap on cast iron. Soap strips away the pan’s seasoning. The seasoning is a layer of baked-on oil that makes the pan non-stick and protects it from rust. Instead, scrape off food residue with a stiff brush or plastic scraper. Rinse with hot water. Dry the pan thoroughly on the stovetop over low heat. Then, apply a thin layer of cooking oil to re-season it. This process is crucial for maintaining cast iron, much like caring for a baking steel.
Essential Supplies for Effective Muffin Tin Cleaning
Having the right tools makes cleaning muffin tins much easier. You do not need many specialized items. Most supplies are likely already in your kitchen or cleaning cabinet. Gather these items before you start to make the process smooth and efficient.
First, you will need a good dish soap. A basic liquid dish soap cuts through grease effectively. Choose one that is gentle but powerful. I find that a good quality soap makes a big difference in breaking down baked-on residue.
Next, baking soda is a cleaning superstar. It is a mild abrasive that helps scrub away stuck-on food without scratching surfaces. It also deodorizes. You can make a paste with it or sprinkle it directly. Baking soda also works wonders when combined with vinegar. This combination creates a fizzy reaction that lifts tough stains. This natural method is safe for many surfaces, just like using vinegar to clean other parts of your home, such as cleaning a shower with vinegar.
White vinegar is another essential natural cleaner. It is acidic, which helps break down grease, mineral deposits, and even some rust. You can use it diluted or full strength. It is excellent for soaking or for making a paste with baking soda. Vinegar is a versatile cleaner, effective for many household tasks, including how to clean glass with vinegar.
For scrubbing, have a soft sponge or a microfiber cloth. These are ideal for non-stick surfaces. A nylon scrub brush or an old toothbrush helps reach into the small cups and corners. These tools get into tight spots where food often collects. For very tough, baked-on stains on metal tins only, a plastic scraper can carefully remove residue. Avoid metal scrapers on non-stick.
Finally, consider hydrogen peroxide for stubborn brown stains. It works well with baking soda to create a strong, yet safe, cleaning paste. You might also want dryer sheets for a unique, surprisingly effective trick on baked-on messes. Always have clean towels ready for thorough drying. These simple supplies will equip you for any muffin tin cleaning challenge.
Step-by-Step Guide to Cleaning Muffin Tins with Stuck-On Food
Stuck-on food is the most common problem when cleaning muffin tins. Dried batter or cheese can cling tightly to the surface. But do not worry, these messes are removable with the right approach. Follow these steps to get your muffin tin clean.
1. The Immediate Pre-Soak: The best defense against stuck-on food is immediate action. As soon as your muffins come out, fill the empty cups with hot water. Add a drop of dish soap to each cup. Let the tin soak for at least 15-30 minutes, or even overnight. This softens baked-on bits and grease, making them easier to remove. I always do this; it saves so much scrubbing later.
2. Gentle Scraping and Initial Wash: Pour out the soaking water. Use a plastic scraper or a rubber spatula to gently nudge off any softened food residue. Be careful not to scratch non-stick surfaces. For metal tins, you can be a bit firmer. Once the large pieces are gone, wash the tin with hot water and dish soap using a soft sponge or a nylon brush. Pay attention to the edges of each cup. Rinse thoroughly.
3. Baking Soda Paste for Stubborn Spots: If some areas still have stuck-on food, turn to baking soda. Make a thick paste using baking soda and a little water. The paste should have the consistency of toothpaste. Apply this paste directly onto the stubborn spots. Let it sit for 15-30 minutes. This gives the baking soda time to work on breaking down the residue.
4. Scrubbing with Baking Soda: After the paste has sat, use a damp sponge or nylon brush to scrub the areas. The baking soda acts as a gentle abrasive. It helps lift the stuck food without damaging the tin. For very small crevices, an old toothbrush works well. Scrub in circular motions. You will see the residue start to lift. This method is effective for various bakeware items, including the bottom of the oven when dealing with baked-on spills.
5. Boiling Water Method for Extreme Cases (Metal Tins Only): For incredibly stubborn, caked-on messes on metal tins, the boiling water method can help. Place the muffin tin in a large pot or roasting pan. Fill it with enough water to cover the stained areas. Add a few tablespoons of dish soap. Bring the water to a boil on the stovetop. Let it simmer for 10-15 minutes. The hot water and soap will loosen the toughest grime. Carefully remove the tin, let it cool, and then scrub the softened residue. This method helps to loosen very tough baked-on residue, similar to how tough stains are addressed when cleaning an oven after a self-clean cycle.
6. Rinse and Dry: After scrubbing, rinse the muffin tin completely under warm running water. Ensure all soap and baking soda residue is gone. Dry the tin immediately and thoroughly with a clean towel. For metal tins, let it air dry completely on a drying rack for a few hours. This prevents water spots and rust.
Tackling Baked-On Grease and Stubborn Stains
Baked-on grease and dark stains can make a muffin tin look old and dirty. These stains are often caramelized oil or sugar. They bond tightly to the metal. Normal washing might not remove them. But with the right techniques, you can make your muffin tin look much better. I have had great success with these methods.
1. The Baking Soda and Vinegar Power Combo: This is a classic cleaning duo for a reason. Its fizzing action lifts tough stains.
- Step A: Sprinkle Baking Soda: Lightly sprinkle baking soda over the entire stained surface of the muffin tin. Focus on the greasiest spots.
- Step B: Add Vinegar: Pour white vinegar directly over the baking soda. It will immediately begin to fizz and bubble. This reaction helps to break down the tough grease bonds.
- Step C: Let it Work: Let the mixture sit and bubble for 15-30 minutes. For very heavy stains, you can let it sit for an hour or even longer.
- Step D: Scrub Away: After soaking, use a non-abrasive scrub brush or sponge to scrub the tin. The softened grease and stains should come off with relative ease. Rinse well with warm water. This method is similar to how you might clean other surfaces with vinegar, like walls with vinegar.
2. Hydrogen Peroxide and Baking Soda Paste: For brown, baked-on residue that looks almost burnt, hydrogen peroxide offers extra cleaning power.
- Step A: Create the Paste: Mix baking soda with just enough hydrogen peroxide (3%) to form a thick paste.
- Step B: Apply Generously: Spread a generous layer of this paste over the stained areas.
- Step C: Let it Sit: Allow the paste to sit on the muffin tin for several hours, or even overnight. The longer it sits, the more it works.
- Step D: Scrub and Rinse: Once the paste has dried and worked its magic, scrub with a damp sponge or brush. The stains should lift. Rinse thoroughly. This combination is powerful for tough spots.
3. The Dryer Sheet Trick: This method sounds odd, but it works surprisingly well for baked-on grease.
- Step A: Place Dryer Sheet: Put a dryer sheet (used or new) into each muffin cup with baked-on residue.
- Step B: Fill with Hot Water and Soap: Fill each cup with hot water and a drop of dish soap.
- Step C: Soak: Let it soak for several hours or overnight. The fabric softeners and agents in the dryer sheet help loosen the baked-on grime.
- Step D: Scrub: Remove the dryer sheets. The softened residue should now be much easier to wipe or gently scrub away.
4. Oven Cleaner (Use with Extreme Caution, Metal Tins Only): Oven cleaner is a very strong chemical. Use it only as a last resort and never on non-stick, silicone, or seasoned cast iron. Always wear gloves and ensure good ventilation.
- Step A: Spray Sparingly: Lightly spray the oven cleaner onto the stubborn, baked-on grease spots on a metal muffin tin.
- Step B: Wait: Follow the product instructions for waiting time, usually 20-30 minutes. Do not let it sit too long.
- Step C: Scrub and Rinse: Carefully scrub with a non-abrasive brush and rinse thoroughly with plenty of water. Ensure all cleaner is removed. You may need to wash the tin several times with soap and water afterward. This is a powerful solution for very heavy, baked-on stains, much like what you would encounter when cleaning the bottom of a very dirty oven.
Always remember to dry your muffin tin completely after cleaning to prevent water spots and rust. These methods will help you restore your muffin tins to a clean, usable condition.
Restoring and Maintaining Your Muffin Tins for Longevity
Proper maintenance is key to making your muffin tins last. It prevents heavy buildup and keeps them in top shape. A little care after each use goes a long way. I have learned that prevention is always easier than a deep clean.
Seasoning Cast Iron Muffin Pans
Cast iron muffin pans require unique care. They need “seasoning.” Seasoning is a baked-on layer of oil that creates a natural non-stick surface. It also protects the iron from rust.
- After Cleaning: After cleaning a cast iron pan (without soap, remember?), dry it thoroughly. You can put it on low heat on the stovetop for a few minutes to ensure it is bone dry.
- Apply Oil: Apply a very thin layer of high smoke point oil, like vegetable oil, flaxseed oil, or grapeseed oil, over the entire pan. Wipe off any excess. It should not look greasy.
- Bake to Season: Place the pan upside down in a cold oven. Place foil or a baking sheet on the rack below to catch any drips. Heat the oven to 450-500°F (232-260°C). Bake for one hour. Turn off the oven and let the pan cool completely inside. Repeat this process every few uses or when the pan starts to lose its non-stick quality. This care is essential for cast iron, similar to how one would maintain a baking steel.
Preventing Rust and Water Spots
Rust is a common issue for metal muffin tins, especially steel or aluminum ones. Water spots also occur if tins are not dried properly.
- Thorough Drying: Always dry your muffin tins immediately after washing them. Do not let them air dry for long periods, especially in humid environments. Use a clean kitchen towel.
- Air Circulation: After towel drying, you can place them upside down on a drying rack. This allows any remaining moisture to evaporate.
- No Soaking Too Long: While a short soak is good for stuck-on food, avoid leaving metal tins soaking for hours or days. This increases the risk of rust.
Proper Storage Techniques
Storing your muffin tins correctly protects them from scratches and damage.
- Avoid Stacking Directly: If you stack non-stick tins directly on top of each other, the coatings can scratch. Place a paper towel, a soft cloth, or a felt pan protector between them.
- Vertical Storage: Use a pan organizer or a dish drying rack to store tins vertically. This saves space and prevents scratches.
- Dry Environment: Store tins in a dry cabinet or drawer. Humidity can lead to rust, especially for metal tins.
Using Muffin Liners
Muffin liners are a simple way to protect your muffin tin and make cleanup a breeze.
- Reduced Sticking: Liners, whether paper, silicone, or foil, prevent batter from touching the tin directly. This means no stuck-on food or baked-on residue.
- Easy Cleanup: After baking, simply remove the muffins and liners. A quick wipe down of the tin is often all that is needed. This vastly reduces the need for deep cleaning.
- Even Baking: Liners can also help with more even baking, as they provide a slight buffer.
By following these restoration and maintenance tips, your muffin tins will stay cleaner longer. They will also perform better for all your baking adventures.
Common Muffin Tin Cleaning Mistakes to Avoid
Even with the best intentions, it is easy to make mistakes when cleaning muffin tins. These errors can damage your bakeware or make cleaning harder in the long run. Knowing what not to do is as important as knowing what to do. I have made some of these mistakes myself in the past.
Using Metal Scrubbers on Non-Stick Surfaces
This is perhaps the most common and damaging mistake. Non-stick coatings are delicate. Metal scrubbers, steel wool, or abrasive cleaning pads will scratch the coating. Once scratched, the non-stick property is gone. Food will stick worse than before. Always use soft sponges, microfiber cloths, or nylon brushes for non-stick tins. Even very gentle metal tools like forks or knives can cause damage.
Putting Certain Tins in the Dishwasher
While convenient, dishwashers are not suitable for all muffin tins.
- Non-Stick Tins: The high heat, harsh detergents, and vigorous water jets in a dishwasher can degrade non-stick coatings over time. It can also cause the tin to warp. Handwashing is always best for non-stick.
- Cast Iron Tins: Dishwashers strip away the vital seasoning on cast iron. They also cause cast iron to rust almost immediately. Never put cast iron in the dishwasher.
- Aluminum Tins: Some aluminum tins can darken or pit in the dishwasher. This is due to the reaction with certain dishwasher detergents. Check the manufacturer’s instructions. If unsure, handwash.
Not Drying Muffin Tins Thoroughly
Moisture is the enemy of metal bakeware. If you do not dry your muffin tins completely, rust can form. This is especially true for steel and aluminum tins. Water spots also become visible. After washing, always hand-dry the tin with a clean towel. Then, let it air dry completely on a rack for a few
- muffin tin cleaning
- baked-on grease
- kitchen cleaning tips
- non-stick cleaning
- silicone cleaning
- bakeware care
- rust removal