· Baby Care · 22 min read
How To Clean Munchkin Straw Cup
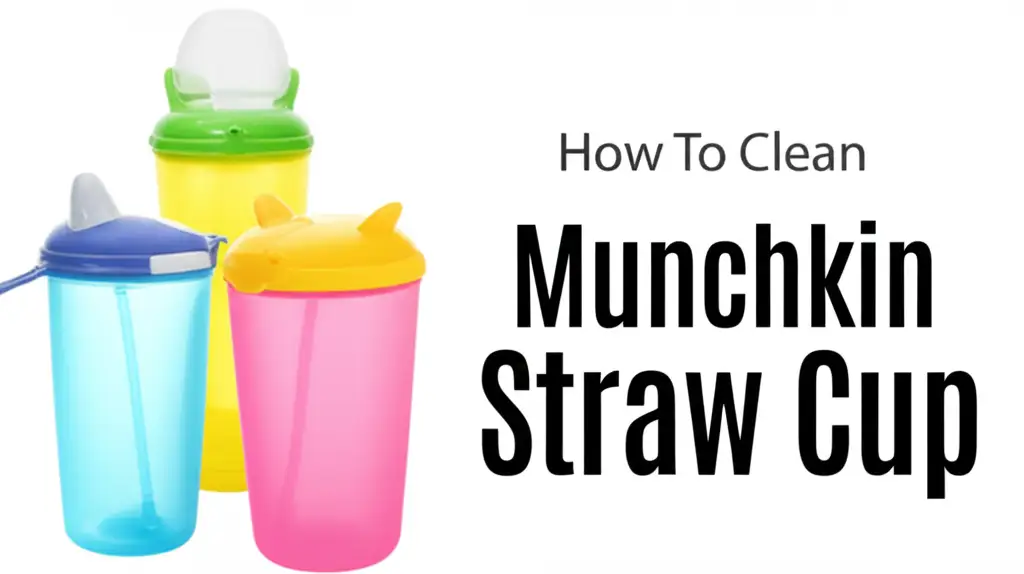
Clean Your Munchkin Straw Cup: A Complete Guide
A tiny hand reaches for their favorite cup, a familiar Munchkin straw cup. It brings a smile to your face. But later, that same cup sits, perhaps half-full, waiting for a wash. Cleaning a Munchkin straw cup might seem simple. Yet, these cups have many parts that can trap old liquid and germs. This makes proper cleaning important for your child’s health. You want to keep your little one safe from bacteria and mold. I know I do. This guide will show you how to clean Munchkin straw cup effectively. We will cover everything from daily washes to deep cleaning. We will talk about tools, common problems, and helpful tips. Get ready to make your child’s favorite cup spotless and safe.
Takeaway:
- Disassemble Completely: Take apart all cup components before washing.
- Use Proper Tools: Employ straw brushes and small bristle brushes for crevices.
- Regular Deep Cleans: Perform thorough cleans weekly to prevent mold and odors.
- Air Dry Fully: Allow all parts to air dry completely to stop moisture build-up.
To clean a Munchkin straw cup effectively, you must disassemble all parts. Wash each piece with warm soapy water and specialized brushes, paying close attention to the straw and valve. Rinse thoroughly and allow all components to air dry completely to prevent mold and unpleasant odors.
Daily Cleaning Steps for Your Munchkin Straw Cup
Cleaning your Munchkin straw cup daily is a simple step. It stops food and drink from drying inside. This daily habit keeps the cup fresh for your child. It also prevents bigger cleaning problems later. My goal is always to keep things simple and quick.
Why Daily Cleaning Matters
Dirty cups can grow germs. Milk or juice left inside creates a perfect place for bacteria. Daily washing removes these risks. It keeps your child healthy and happy. Think of it as a small effort for a big reward.
Step-by-Step Daily Wash
- Empty the Cup: Pour out any remaining liquid. Get rid of food bits. This makes the next steps easier.
- Disassemble All Parts: Munchkin cups have several parts. These include the lid, straw, valve, and cup body. Take them all apart. This helps you reach all hidden spots.
- Rinse with Warm Water: Rinse each part under warm running water. This removes loose debris. It gets ready for the soap.
- Wash with Soapy Water: Fill your sink with warm water and a few drops of dish soap. Use a bottle brush for the cup body. Use a small straw brush for the straw. Make sure to scrub inside the straw thoroughly. You can learn more about how to clean inside a straw effectively. how to clean inside a straw.
- Scrub the Lid and Valve: The lid and valve often hide grime. Use a small brush or even a cotton swab for tiny crevices. Pay special attention to these parts. They can harbor sticky residues.
- Rinse All Parts Again: Rinse everything under fresh, clean water. Ensure all soap suds are gone. Leftover soap can leave a taste or film.
- Air Dry Completely: Place all cleaned parts on a drying rack. Let them air dry fully. Do not put them away wet. Moisture leads to mold growth.
Daily cleaning might seem like a chore. But it saves you from bigger cleaning tasks. It protects your child’s health. This simple routine makes a big difference.
Deep Cleaning Your Munchkin Straw Cup to Prevent Build-Up
Daily cleaning is great, but sometimes you need more. A deep clean gets rid of unseen grime. It prevents stubborn stains and odors. This is vital for cups used every day. I recommend doing a deep clean once a week.
Why Deep Cleaning is Essential
Over time, even with daily washes, residues can build up. These residues can cause cloudy plastic. They also create a breeding ground for mold and bacteria. Deep cleaning tackles these hidden issues. It ensures your Munchkin straw cup stays hygienic. It also extends the life of the cup.
Methods for Deep Cleaning
Soaking Method
Soaking helps loosen tough grime. It makes scrubbing easier. This method works well for all cup parts.
- Disassemble and Rinse: Take apart your cup. Rinse all pieces under warm water. Remove any large food particles.
- Prepare Soaking Solution:
- Vinegar Soak: Mix equal parts white vinegar and warm water in a basin. Vinegar is a natural disinfectant. It also helps with odors. You can read more about how to clean mold with vinegar. how to clean mold with vinegar.
- Baking Soda Paste (for stains): For stubborn stains, make a paste with baking soda and a little water. Apply it directly to the stain. Let it sit for 15-30 minutes.
- Soak All Parts: Place all cup components into the soaking solution. Ensure they are fully submerged. Let them soak for at least 30 minutes. For very dirty cups, soak overnight.
- Scrub Thoroughly: After soaking, scrub each part with appropriate brushes. Pay extra attention to the straw and valve. The soaking will have softened any build-up.
- Rinse and Dry: Rinse all parts thoroughly with clean water. Make sure no vinegar smell remains. Air dry completely on a rack.
Dishwasher Method (if applicable)
Many Munchkin straw cup parts are top-rack dishwasher safe. Always check the manufacturer’s instructions first.
- Disassemble: Separate all cup components.
- Place on Top Rack: Arrange the parts on the top rack of your dishwasher. Ensure smaller pieces are secure. Use a mesh bag for straws and valves. This stops them from falling to the bottom.
- Run a Cycle: Use a normal wash cycle. Use your usual dishwasher detergent.
- Air Dry: Remove the parts after the cycle. If they are still damp, let them air dry completely.
Deep cleaning is a crucial step. It keeps your Munchkin straw cup truly clean. It gives you peace of mind. Your child deserves a truly clean cup.
Dealing with Stubborn Stains and Odors in Munchkin Cups
Even with regular cleaning, Munchkin straw cups can sometimes develop problems. Stubborn stains from juice or milk can appear. Unpleasant odors can linger, especially in the straw or valve. These issues are frustrating. But they are fixable. I have faced these challenges myself.
Tackling Stubborn Stains
Stains often come from colored drinks. Think of fruit juice or tomato-based liquids. These can leave a residue on the plastic.
- Baking Soda Paste: This is my go-to for many stains. Mix baking soda with a small amount of water to form a thick paste. Apply the paste directly onto the stained areas. Let it sit for at least 30 minutes, or even a few hours for tough stains. The abrasive nature of baking soda helps lift the stain. After waiting, scrub the area with a brush. Rinse thoroughly.
- Lemon Juice and Sunlight: Lemon juice has natural bleaching properties. Squeeze fresh lemon juice onto the stain. Place the cup parts in direct sunlight for a few hours. The sun’s UV rays combined with lemon juice can help fade the stain. This method works well for white or light-colored plastic.
- Vinegar Soak (again): A stronger vinegar solution can also help. Soak the stained parts in undiluted white vinegar for an hour. Then scrub with a brush. Vinegar is a gentle acid. It breaks down the molecules causing the stain.
Eliminating Lingering Odors
Munchkin straw cups can hold onto smells. Old milk or sour juice are common culprits. The plastic can absorb these odors over time.
- Baking Soda Soak: Baking soda is a powerful odor absorber. Fill the cup with warm water. Add 2-3 tablespoons of baking soda. Let it soak overnight. For the straw and valve, soak them in a separate bowl with baking soda and water. Rinse thoroughly the next day. This method often removes even the strongest odors.
- Vinegar Rinse/Soak: White vinegar also neutralizes odors. After washing, rinse the cup and its parts with undiluted white vinegar. Let it sit for a few minutes. Then rinse with clean water. You can also soak the parts in a vinegar solution for a few hours. The vinegar smell will dissipate as it dries.
- Sunlight Exposure: Sunlight is a natural deodorizer. After washing and drying, place the cup parts outside in direct sunlight for an hour or two. The UV rays help break down odor-causing compounds. Make sure the cup is completely dry first. This prevents moisture-related issues.
- Activated Charcoal (for extreme cases): For very stubborn odors, place a small piece of activated charcoal inside the cup overnight. Ensure the charcoal does not touch the plastic directly. Activated charcoal absorbs odors very well.
Dealing with stains and odors takes patience. But these methods are effective. They ensure your Munchkin straw cup is clean and fresh. Your child will not notice any lingering smells.
The Importance of Regular Disassembly for Straw Cup Hygiene
The design of a Munchkin straw cup is convenient. But it also presents cleaning challenges. The straw and valve components are especially tricky. They hide away from easy scrubbing. This is why regular disassembly is not just helpful. It is essential. I always emphasize this to other parents.
Why Disassembly is Key
Think about the liquids that go into a straw cup. Milk, juice, water – they all pass through the straw and valve. Over time, tiny particles of food or drink get stuck. If you do not take the cup apart, these bits stay there. They become a breeding ground for bacteria and mold. You cannot clean what you cannot reach.
When you disassemble the cup, you gain access to every surface. You can see any build-up. This allows for a thorough scrub. It ensures true cleanliness. It stops mold before it starts. This is especially true for plastic, where mold can cling. Learning how to clean mold off plastic is a great skill for parents. how to clean mold off plastic.
Understanding Munchkin Cup Components
Most Munchkin straw cups have these parts:
- The Cup Body: This is the main container. It is usually easy to clean.
- The Lid: This often has a built-in straw mechanism or a flip-top. It can have nooks and crannies.
- The Straw: This is usually removable. It can be a simple tube or have a weighted end.
- The Valve: This small, flexible part controls liquid flow. It is often hidden inside the lid or at the base of the straw. This is where most issues occur.
Each of these parts needs individual attention. They all need to be separated for a proper clean.
Best Practices for Disassembly
- Check Instructions: Always check the cup’s instructions first. Some Munchkin models have specific disassembly steps. My experience tells me this is always a good starting point.
- Gentle Removal: Be gentle when taking apart the straw and valve. These parts are often made of soft silicone. They can tear if pulled too hard.
- Inspect Each Part: Once disassembled, look closely at each piece. Check for discoloration. Look for sliminess or unusual smells. These are signs of build-up.
- Dedicated Cleaning: Use specialized tools for the small parts. A thin straw brush is a must for the straw. Tiny brushes or even pipe cleaners work for the valve.
- Reassemble Correctly: After cleaning and drying, reassemble the cup. Make sure the valve is seated correctly. If it is not, the cup might leak or not work properly.
Regular disassembly is not just about cleaning. It is about understanding your cup. It is about preventing health issues. It gives you confidence that your child’s cup is truly clean. It is a small but mighty step in daily hygiene.
Tools and Supplies for Effective Munchkin Straw Cup Cleaning
Having the right tools makes cleaning much easier. It also makes it more effective. Trying to clean a Munchkin straw cup with just a sponge is tough. You need specialized items. These items help you reach every crevice. I found this out quickly as a parent.
Essential Cleaning Tools
- Straw Brushes: These are non-negotiable. Munchkin straws are narrow. A regular bottle brush cannot fit inside. Straw brushes come in different sizes. Choose one that fits your cup’s straw. They have thin bristles. They reach all the way through the straw. This gets rid of milk residue or juice pulp. Without this, mold can easily grow inside. This is like cleaning a Brita water bottle straw, you need a specific tool. how to clean brita water bottle straw.
- Small Bristle Brushes: These are great for lids and valves. Lids have grooves. Valves have tiny openings. A small brush can get into these tight spots. Look for brushes with stiff but soft bristles. They should not scratch the plastic.
- Bottle Brush: While not for the straw, a good bottle brush is essential for the cup body. It reaches the bottom. It scrubs the sides. Choose one with a comfortable handle.
- Basin or Sink: A clean basin is useful for soaking. You can use your kitchen sink. Make sure it is clean before you start. You do not want to cross-contaminate.
- Drying Rack: Air drying is best. A dedicated drying rack for baby bottles and cups is ideal. It allows air to circulate. This speeds up drying. It prevents moisture from building up.
Recommended Cleaning Supplies
- Dish Soap: Choose a gentle, food-safe dish soap. Some parents prefer unscented soap. This avoids any lingering smell on the cup. A good quality soap helps break down grease and food residue.
- White Vinegar: This is a natural cleaner and disinfectant. It is excellent for deep cleaning. It neutralizes odors. It also helps remove mineral deposits. Always use distilled white vinegar.
- Baking Soda: Another natural powerhouse. Baking soda is a mild abrasive for scrubbing. It is fantastic for absorbing odors. It helps lift stubborn stains.
- Sterilizer (Optional): For extra peace of mind, especially for infants, a sterilizer can be used. Electric steam sterilizers or microwave sterilizer bags are available. Check if your Munchkin cup parts are heat-safe.
Using the right tools makes the cleaning process effective. It makes it less daunting. Invest in these simple items. They will keep your Munchkin straw cup clean. They will help it last longer. Your child will thank you.
Common Mistakes to Avoid When Cleaning Munchkin Straw Cups
Cleaning your Munchkin straw cup seems straightforward. But small errors can lead to big problems. These include mold, lingering smells, or damaged cups. I have made some of these mistakes myself. Learning from them helps. Knowing what to avoid saves time and keeps your cups truly clean.
Not Disassembling Fully
This is the most common mistake. Many people just rinse the cup. They do not take it apart. The straw, valve, and lid have hidden areas. Liquid and food particles get trapped there. If you do not take every piece apart, these areas never get clean. Mold loves dark, damp, hidden spots. Always separate the cup, lid, straw, and valve.
Skipping the Straw Brush
A regular sponge or bottle brush cannot clean the inside of a straw. The straw is a narrow tube. Residue clings to its inner walls. Without a straw brush, you are leaving a perfect breeding ground for bacteria. Invest in a good straw brush. Use it every time you wash the cup. It is a small tool that makes a huge difference.
Not Cleaning the Valve Properly
The valve is often the trickiest part. It controls the flow of liquid. It usually has tiny slits or folds. These can trap liquid. They can get slimy very quickly. Just rinsing is not enough. Use a tiny brush, a cotton swab, or even a toothpick (carefully!) to clean inside the valve’s crevices. Ensure no residue remains.
Not Air Drying Completely
Putting away a wet cup is a recipe for mold. Moisture helps mold and bacteria grow fast. After washing, place all cup parts on a drying rack. Ensure good airflow. Let them dry completely before reassembling or storing. Some parts might take longer to dry. Be patient. My family knows the drying rack is a crucial step.
Using Harsh Chemicals or Abrasives
Munchkin cups are usually made of plastic. Harsh chemicals like bleach can damage the plastic. They can leave harmful residues. Abrasive scrubbers can scratch the surface. Scratches create tiny grooves. These grooves can trap more germs. Stick to gentle dish soap, vinegar, and baking soda. These are effective and safe.
Not Cleaning Immediately
Leaving a dirty cup sitting for hours or overnight makes cleaning harder. Liquids dry. Food sticks. This means more scrubbing later. Rinse the cup as soon as your child finishes using it. A quick rinse can prevent a tough scrubbing session. It also keeps odors from settling in.
Avoiding these common mistakes ensures your Munchkin straw cup stays clean. It stays hygienic. It prolongs the life of the cup. Your child will have a safe, clean drinking experience every time.
Maintaining Your Munchkin Straw Cup for Longer Life
Cleaning your Munchkin straw cup properly is crucial. But maintenance goes beyond just washing. It is about how you handle, store, and care for the cup. Good maintenance extends the cup’s life. It saves you money. It also keeps your child’s cup in top condition. I learned these tricks over time.
Proper Handling and Use
- Avoid Extreme Temperatures: Do not put Munchkin cups in the freezer. Do not boil them unless the manufacturer states it is safe. Extreme heat can warp the plastic. Extreme cold can make it brittle. Check the care instructions for specific temperature guidelines.
- Supervise Use: Encourage your child to use the cup for its intended purpose. Chewing on the straw or dropping the cup repeatedly can damage it. While cups are durable, constant abuse shortens their life.
- Use for Intended Liquids: Munchkin straw cups are great for water, milk, and juice. Avoid putting hot liquids or carbonated beverages in them. Hot liquids can damage the plastic or create pressure. Carbonated drinks can also build pressure. This can cause leaks or even cause parts to pop off.
Smart Storage Practices
- Store Dry: As mentioned, always store cup parts completely dry. Storing wet or damp parts encourages mold growth. This can ruin the cup and pose health risks.
- Store Disassembled (if possible): For long-term storage, store the cup disassembled. This allows air to circulate. It prevents moisture from getting trapped. It also helps prevent plastic from holding onto odors.
- Organize Parts: Keep all cup parts together. Small parts like valves can easily get lost. A designated bin or drawer for cup parts helps keep them organized. It also prevents you from searching for missing pieces.
Recognizing Wear and Tear
Even with the best care, cups do not last forever. Knowing when to replace parts or the entire cup is important.
- Check for Mold: Regularly inspect all parts for mold. Mold can appear as black, green, or even pink spots. If mold is deep-seated or cannot be removed, replace the part or cup.
- Inspect for Cracks or Damage: Look for cracks in the plastic cup body or lid. Check for tears or holes in the silicone straw or valve. Damaged parts can harbor bacteria. They can also leak. A damaged straw can be a choking hazard if pieces break off.
- Assess Odors: If a persistent odor remains despite deep cleaning, the plastic might have absorbed it permanently. This is a sign it is time for a new cup.
- Straw Softness/Color: Over time, straws can become discolored or lose their firmness. This means they are nearing the end of their life.
Proper maintenance and knowing when to replace parts ensure your child always has a safe and clean drinking experience. It is a proactive approach to hygiene and longevity.
Sanitizing Your Munchkin Straw Cup for Extra Protection
Sometimes, you want an extra layer of cleanliness. Sanitizing goes beyond cleaning. It kills most germs. This is especially useful if your child has been sick. It also helps if the cup has gone unused for a while. It gives me extra peace of mind.
When to Sanitize
- After Illness: If your child has been sick, sanitizing the cup helps prevent re-infection.
- New Cup: Sanitize new cups before first use. This removes any manufacturing residues.
- Occasional Boost: Sanitize once a month for general hygiene.
- Extended Storage: If a cup has been stored for a long time, sanitize it before use.
Methods for Sanitizing
1. Boiling Method (Check Manufacturer First!)
Boiling is a traditional and effective way to sanitize. But check if your specific Munchkin cup parts can withstand boiling water. Most plastics can, but some soft silicone parts might not.
- Clean First: Always clean the cup parts thoroughly before sanitizing. Remove all visible dirt.
- Prepare Pot: Fill a large, clean pot with water.
- Add Parts: Place the disassembled cup parts into the pot. Ensure they are fully submerged.
- Boil: Bring the water to a rolling boil. Let the parts boil for 5 minutes.
- Cool and Dry: Carefully remove parts with tongs. Place them on a clean drying rack. Let them cool completely. Allow them to air dry fully.
2. Dishwasher with Sanitize Cycle
If your dishwasher has a “sanitize” cycle, this is an easy option. Again, ensure the cup parts are dishwasher safe.
- Clean First: Wash the cup parts first, either by hand or a regular dishwasher cycle.
- Place on Top Rack: Put the parts on the top rack of the dishwasher. Secure small items.
- Run Sanitize Cycle: Select the sanitize cycle. This cycle uses higher water temperatures. It kills more germs.
- Air Dry: Remove parts when the cycle finishes. Let them air dry completely.
3. Steam Sterilizer
Electric steam sterilizers are common for baby bottles. They also work for Munchkin cup parts.
- Clean First: Ensure all cup parts are clean before placing them in the sterilizer.
- Arrange Parts: Place the disassembled parts inside the sterilizer as per its instructions.
- Run Cycle: Follow the sterilizer’s instructions to run a cycle. Steam kills germs very effectively.
- Cool and Dry: Remove parts carefully. Allow them to cool and air dry fully.
4. Sterilizing Tablets/Solution (Cold Water Sterilization)
These are useful if you do not have access to boiling water or a sterilizer.
- Clean First: Wash all cup parts thoroughly.
- Prepare Solution: Follow the tablet or liquid instructions. Dissolve the tablet or add the solution to cold water in a clean basin.
- Submerge Parts: Place the cup parts completely submerged in the solution. Ensure no air bubbles are trapped.
- Soak: Leave them for the recommended time (usually 30 minutes).
- Remove and Dry: Remove parts. No rinsing is usually needed with these solutions. Let them air dry completely on a clean rack.
Sanitizing provides an extra layer of protection. It ensures your child’s Munchkin straw cup is not just clean. It is germ-free. This extra step is worth it for peace of mind.
Troubleshooting Common Munchkin Cup Cleaning Issues
Even with the best cleaning habits, problems can arise. Maybe a stubborn stain appears. Or a strange smell just won’t go away. These issues can be frustrating. But most have simple solutions. I’ve encountered these many times.
Issue 1: Persistent Odors
Problem: The cup smells like sour milk or juice, even after washing. Solution:
- Baking Soda Soak: This is my first line of defense. Fill the cup with warm water and 2-3 tablespoons of baking soda. For the straw and valve, soak them separately in a baking soda solution. Let it sit overnight. Baking soda absorbs odors. Rinse thoroughly the next day.
- Vinegar Rinse: After washing, rinse all parts with undiluted white vinegar. Let it sit for a few minutes. Then rinse with clean water. The vinegar smell will disappear as it dries.
- Sunlight Exposure: Place the clean, dry cup parts in direct sunlight for a few hours. UV rays naturally break down odor-causing compounds.
Issue 2: Mold in the Straw or Valve
Problem: You see black, green, or pink spots inside the straw or valve. Solution:
- Immediate Disassembly: Take the cup apart immediately.
- Soak in Hot Soapy Water: Soak all moldy parts in very hot, soapy water for at least 30 minutes.
- Vigorous Scrubbing: Use a straw brush for the straw. Use a tiny brush for the valve. Scrub vigorously. Ensure all visible mold is gone.
- Vinegar Soak: After scrubbing, soak the parts in a solution of equal parts white vinegar and hot water for an hour. Vinegar is a natural mold killer.
- Rinse and Sanitize: Rinse thoroughly. Then, consider sanitizing using boiling or a steam sterilizer for extra safety. If the mold cannot be removed, replace the part.
Issue 3: Cloudy Plastic
Problem: The clear plastic of the cup or lid looks cloudy or hazy. This often happens with milk. Solution:
- Vinegar Soak: Soak the cloudy plastic parts in undiluted white vinegar for an hour. Vinegar helps break down mineral deposits and milk film.
- Baking Soda Scrub: Make a paste with baking soda and water. Gently scrub the cloudy areas with the paste and a soft cloth or sponge. Rinse well.
- Dishwasher Detergent Residue: Sometimes cloudiness is from dishwasher detergent. Ensure you are not using too much detergent. Also, check your dishwasher’s rinse aid. A full rinse cycle helps.
Issue 4: Leaking Cup
Problem: The cup leaks after cleaning. Solution:
- Check Valve Placement: The most common reason for leaks is an improperly seated valve. Remove the valve. Re-insert it carefully. Ensure it is snug and flat in its slot.
- Inspect for Damage: Check the valve and the lid’s seal for any tears, cracks, or warping. Even a tiny flaw can cause a leak. If damaged, replace the part.
- Straw Seal: Ensure the straw is inserted correctly and fully into the lid’s opening. Sometimes, if it is not pushed in all the way, it can create a small gap.
By understanding these common issues, you can quickly address them. This ensures your Munchkin straw cup remains fully functional and clean. It saves you from having to buy new cups often.
Frequently Asked Questions About Cleaning Munchkin Straw Cups
How often should I deep clean my Munchkin straw cup?
You should deep clean your Munchkin straw cup at least once a week. This prevents the build-up of residues, stains, and odors that daily washing might miss. If your child uses the cup frequently for milk or juice, consider deep cleaning every few days.
Can I put Munchkin straw cup parts in the dishwasher?
Many Munchkin straw cup parts are top-rack dishwasher safe. Always check the specific care instructions that came with your cup. Small parts like straws and valves should be placed in a mesh bag to prevent them from falling through the rack during the wash cycle.
What causes black mold in my Munchkin straw cup?
Black mold in your Munchkin straw cup is typically caused by trapped moisture and food particles. This happens when the cup, especially the straw or valve, is not thoroughly cleaned or fully air-dried. Disassembling all parts and using a straw brush are key to prevention.
How do I get rid of the sour milk smell from my cup?
To remove sour milk smell, first wash the cup thoroughly. Then, soak all disassembled parts in a solution of warm water and a few tablespoons of baking soda overnight. Alternatively, soak in an equal parts white vinegar and water solution
- Munchkin cup cleaning
- straw cup hygiene
- baby cup care
- toddler cup
- clean plastic cups