· Retro Gaming Maintenance · 17 min read
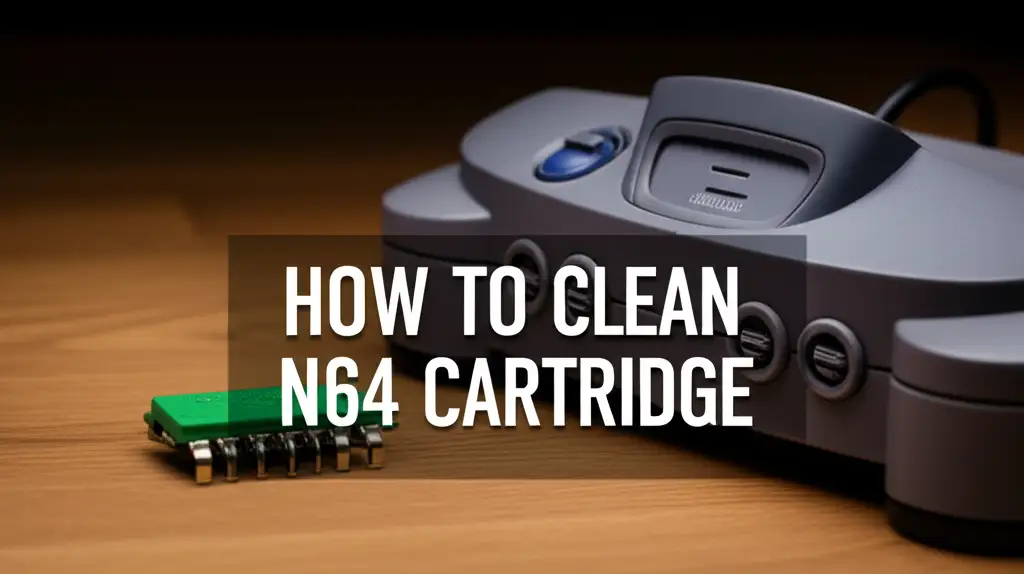
How To Clean N64 Cartridge
Revive Your Retro: How To Clean N64 Cartridge for Best Play
Do you remember the joy of blowing into an N64 cartridge, hoping it would make the game work? Many retro gamers have this shared memory. Often, the real problem was not magic breath, but dirty contacts. A dusty or corroded Nintendo 64 game cartridge can stop your favorite titles from loading.
Learning how to clean N64 cartridge pins is simple. This process helps your classic games run smoothly again. You can avoid frustrating reboots and improve your gameplay. This guide will walk you through the essential steps. We will cover tools, techniques, and important tips. Get ready to bring your beloved N64 games back to life.
Takeaway
- Gather Proper Tools: Use 90% or higher isopropyl alcohol, cotton swabs, and a 3.8mm security bit.
- Open and Inspect: Carefully open the cartridge to check for dirt, corrosion, or damage.
- Clean Pins Thoroughly: Gently scrub the gold contact pins with alcohol and swabs until shiny.
- Clean Casing: Wipe down the plastic casing and label with a mild cleaner or damp cloth.
- Prevent Future Issues: Store games properly and handle them with clean hands.
To clean an N64 cartridge, you need to gently scrub its gold contact pins with 90% or higher isopropyl alcohol and cotton swabs. You may also need to open the cartridge with a special security bit to clean thoroughly and address any grime on the casing. This process removes dirt and corrosion, allowing your game to connect properly with the console.
Why Your N64 Cartridge Needs Cleaning: Common Issues
Older N64 cartridges often face performance issues. Games may not start. They might freeze during play. This happens for a few main reasons. The primary culprit is often dirty contact pins. These are the gold connectors at the bottom of the cartridge.
Dust, grime, and oxidation build up on these pins over time. Every time you insert a game, small bits of debris can transfer. This debris creates a barrier. The Nintendo 64 console cannot read the game data properly. This leads to the “game not working” problem many of us remember. Cleaning these contacts is crucial for reliable play. I have experienced this many times myself.
Beyond the pins, the cartridge casing itself collects dirt. Fingerprints, spills, and general dust make the plastic look dull. Labels can peel or get sticky. While these issues do not stop the game from playing, they affect the cartridge’s appearance. Keeping the entire unit clean preserves its condition. It also makes your collection look better. Regular cleaning helps prevent these problems from getting worse.
Moisture or extreme temperature changes also harm cartridges. They can cause internal components to corrode. This makes the game unplayable. Proper storage helps prevent this. However, if corrosion has started, a thorough cleaning might be necessary. You protect your investment by keeping cartridges clean. This ensures your games last for many more years of fun.
Essential Tools and Materials for N64 Cartridge Cleaning
Before you start, gather all your supplies. Having everything ready makes the cleaning process smooth. You do not want to stop halfway through. The right tools ensure a safe and effective clean. Using incorrect items can damage your valuable games.
The most important item is 90% or higher isopropyl alcohol. Do not use rubbing alcohol with lower percentages. Lower concentrations contain more water. Water can leave residue or cause corrosion. You can find high-percentage isopropyl alcohol at pharmacies or electronics stores. It evaporates quickly and leaves no harmful traces.
Next, you will need cotton swabs. Standard Q-tips work well. You might also want some lint-free cloths or microfiber towels. These are good for wiping down the cartridge casing. Avoid using paper towels. They can leave fibers behind.
For opening the cartridge, a 3.8mm security bit is essential. N64 cartridges use a unique screw type. A regular screwdriver will not work. You can buy these bits online or from specialty retro gaming shops. This bit allows you to access the circuit board inside. This is where the contact pins are located.
An art eraser (white, kneaded, or gum eraser) can be helpful. This is for stubborn grime or light oxidation on the contact pins. Make sure it is a non-abrasive type. Some people use a pencil eraser, but a dedicated art eraser is safer. Always test on a small area first.
Optional tools include a small brush (like a soft toothbrush or paint brush). This helps remove loose dust from inside the cartridge. A can of compressed air can also blow away dust. Be careful when using compressed air. Hold the can upright to prevent propellant from spraying out. These simple items help you clean N64 cartridge effectively.
Step-by-Step Guide: Cleaning the N64 Cartridge Pins
Cleaning the gold contact pins is the most critical part. These pins carry the game’s data. Dirt here causes reading errors. Follow these steps carefully to ensure a good connection. This process will make your N64 games work like new again.
- Open the Cartridge: Use your 3.8mm security bit to unscrew the two screws on the back of the cartridge. Place the screws in a safe spot. Gently pull the top half of the casing away from the bottom. The circuit board will usually stay in the front half. Do not force anything.
- Remove the Circuit Board: Carefully lift the circuit board out of the plastic casing. Hold it by the edges. Avoid touching the gold contact pins with your bare fingers. Finger oils can leave residue. Place the board on a clean, flat surface.
- Inspect the Pins: Look closely at the gold contact pins. You might see dark spots, grime, or a dull appearance. This is oxidation or dirt. Note any areas that look particularly bad. This inspection helps you focus your cleaning efforts.
- Initial Wipe (Optional): If there is visible dust, use a can of compressed air or a soft brush to gently blow or brush it away. Do this before applying any liquid. This removes loose debris.
- Clean with Isopropyl Alcohol: Dampen a cotton swab with 90% or higher isopropyl alcohol. Do not soak it. You want it damp, not dripping. Gently rub the cotton swab across the gold contact pins. Use light to medium pressure. Rub in one direction, from the top of the pin towards the bottom.
- Rotate Swabs: As the swab picks up dirt, you will see it turn dark. Discard the dirty swab. Use a fresh, clean swab dampened with alcohol. Repeat this process until the cotton swab comes away clean. This shows the pins are free of dirt.
- Address Stubborn Spots (Optional): For very stubborn grime or light corrosion, you can use an art eraser. Gently rub the eraser over the affected gold pins. Follow up with another alcohol swab to remove any eraser residue. Remember, use an art eraser, not a common pencil eraser, to avoid damage.
- Allow to Dry: Let the circuit board air dry completely. Isopropyl alcohol evaporates quickly. This usually takes only a few minutes. Make sure it is bone dry before reassembly. This prevents any short circuits.
- Reassemble the Cartridge: Carefully place the cleaned circuit board back into its casing. Align the screw holes. Put the two halves of the casing back together. Insert and tighten the security screws. Do not overtighten them. Your N64 cartridge pins are now clean.
Advanced Cleaning Techniques: Dealing with Corrosion and Stubborn Grime
Sometimes, basic alcohol and cotton swabs are not enough. This happens with cartridges that have seen rough conditions. You might encounter stubborn grime or actual corrosion. This section covers more advanced methods. These techniques require more care. I learned these tricks after fixing many old games.
For Stubborn Grime: If a simple alcohol wipe does not work, increase your pressure slightly. Still, be gentle. You can try a new cotton swab and repeat the alcohol cleaning process multiple times. Sometimes, layers of dirt need several passes. The goal is to see the gold pins shine.
An art eraser (like a white, vinyl eraser) is excellent for this. Gently rub the eraser across the gold contacts. The eraser helps abrade the surface just enough to remove the grime without damaging the gold plating. After using the eraser, always follow up with a fresh isopropyl alcohol swab. This removes any eraser crumbs. It also ensures the pins are perfectly clean. Avoid using anything too abrasive, like sandpaper or steel wool. These will permanently damage the pins.
Dealing with Corrosion: Corrosion often looks like green or black discoloration on the gold pins. This is oxidation. Isopropyl alcohol can often break down light corrosion. Use firm, but not excessive, pressure with the alcohol-dampened swab. You may need many swabs. Keep changing them until no more discoloration comes off.
For more severe corrosion, a fiberglass pen can be used. These pens have tiny fiberglass strands. They offer very light abrasive action. Gently stroke the pen across the corroded area. Use extreme caution. This tool can remove the gold plating if misused. Use only a few light passes. Immediately follow with isopropyl alcohol to remove any debris. This is a last resort. Do not use this tool unless you are confident.
When to Seek Professional Help: If the corrosion is extensive, or if it reaches other components on the circuit board, stop. Do not attempt further cleaning yourself. This level of damage often needs professional repair. A professional can assess the board and perform specialized repairs. They have tools like ultrasonic cleaners for deep corrosion. Trying to fix severe corrosion yourself can ruin the game. Your goal is to clean, not to cause more damage. This applies to many things beyond games, like cleaning out sediment from a well or even stubborn stains on walls, where professional help can save you from bigger problems.
Cleaning the N64 Cartridge Casing: Beyond the Pins
After cleaning the crucial internal pins, turn your attention to the cartridge’s outer shell. A clean casing makes the game look much better. It also feels nicer to handle. This step helps preserve the overall condition of your retro game. I always clean the shell because it makes a big difference.
Tools for Casing Cleaning: You will need a clean, soft cloth or microfiber towel. For cleaning solutions, a small amount of mild soap mixed with water works well. You can also use diluted isopropyl alcohol (around 50-70%) or a plastic-safe cleaner. Do not use harsh chemicals. Avoid anything with ammonia or bleach. These can damage the plastic or fade the label. For specific plastic cleaning needs, you might find tips on how to clean a plastic shower.
Cleaning the Plastic Shell:
- Wipe Down: Dampen your soft cloth with your chosen cleaning solution. Wring out excess liquid. You want the cloth damp, not wet. Gently wipe down the entire plastic casing. Pay attention to grooves, corners, and areas that often get held.
- Remove Stubborn Grime: For sticky residue or tougher grime, you might need a little more effort. Rub in small circular motions. A cotton swab can reach tight spots. If there’s mold, consult resources like how to clean mold off plastic for specific instructions.
- Dry Thoroughly: After cleaning, use a dry, clean cloth to wipe away any moisture. Ensure the casing is completely dry before reassembling the game. Trapped moisture can cause internal damage over time.
Cleaning the Label: Cleaning the game label requires extreme care. Many N64 labels are paper-based. They are very sensitive to liquids.
- Dry Clean First: Use a very soft, dry cloth to gently wipe the label. This removes loose dust.
- For Minor Smudges: If absolutely necessary, very lightly dampen a corner of a cloth with water. Gently dab the smudge. Do not rub. Rubbing can lift the ink or damage the paper.
- Avoid Chemicals: Never use isopropyl alcohol or cleaning solutions directly on the label. They can dissolve the ink.
- Leave as Is: If a label is heavily stained or damaged, sometimes it is best to leave it alone. Attempting to clean it can worsen the damage. A damaged label is better than no label at all.
This full cleaning process for both internal and external parts brings your N64 cartridge back to a great state.
Preventative Maintenance for Your N64 Cartridges
Cleaning N64 cartridges is important, but preventing them from getting dirty again is even better. Good habits keep your games working for years. This saves you time and effort. I always try to take good care of my games.
Proper Storage is Key: Store your N64 cartridges in a dry, cool place. Avoid areas with high humidity or extreme temperature changes. Basements and attics are often bad choices. These conditions encourage dust, dirt, and even mold growth. Proper storage helps keep internal components safe. It also protects the plastic casing.
Many collectors use plastic dust covers for their cartridges. These covers fit over the contact pins. They block dust and debris. If you do not have dust covers, store games upright in a box or drawer. This keeps the contact pins from being exposed to open air. You can also find storage bins designed for video games. These keep your collection organized and protected.
Handle with Care: Always handle cartridges by the plastic casing. Avoid touching the gold contact pins. Your fingers leave behind oils and dirt. These residues build up over time. This creates a barrier on the pins. Clean hands are important when playing or storing games.
Insert and remove cartridges gently from the console. Forcing them can damage the pins on both the game and the console. A smooth motion is all that is needed. Do not leave games in the console for extended periods if you are not playing them.
Regular, Light Cleaning: Even with good storage, dust accumulates. Every few months, give your cartridges a light wipe down. Use a dry microfiber cloth on the outside. You can also lightly wipe the exposed gold pins with a cotton swab and a tiny amount of isopropyl alcohol. This helps prevent major buildup. This light maintenance is quick. It prolongs the life of your games. It also means you will not need to do a deep clean as often. Thinking about how often you clean a water filter for optimal performance, a similar mindset applies to your games. Regular small cleanings are better than infrequent large ones.
Common Mistakes to Avoid When Cleaning N64 Cartridges
Cleaning N64 cartridges is straightforward, but mistakes can happen. Some common errors can cause more harm than good. Knowing what to avoid is as important as knowing what to do. I have seen many good intentions lead to damaged games.
Using the Wrong Alcohol: Do not use rubbing alcohol with a percentage lower than 90%. Many rubbing alcohols contain 70% isopropyl alcohol. The other 30% is mostly water. This water content can leave residue on the pins. It can also promote corrosion. Always aim for 90% or higher. It evaporates cleanly and quickly.
Using Abrasive Materials: Never use sandpaper, steel wool, or harsh scrubbing pads on the gold contact pins. These materials are too abrasive. They will scratch and remove the delicate gold plating. Once the gold plating is gone, the underlying copper will corrode quickly. This can permanently damage the game. Stick to cotton swabs, art erasers, and fiberglass pens (with extreme caution).
Applying Too Much Liquid: Do not soak your cotton swab. You want it damp, not dripping. Excess liquid can seep into the cartridge. It can get onto sensitive electronic components. This can cause short circuits or corrosion on other parts of the board. A little bit of alcohol goes a long way. If you accidentally use too much, immediately dry the area with a clean cloth. Allow extra time for it to air dry completely.
Touching the Pins with Bare Hands: After cleaning the pins, avoid touching them with your fingers. Even clean hands leave behind natural oils. These oils can cause new grime buildup. They can also attract dust. Handle the circuit board by its edges. Reassemble the cartridge quickly after cleaning.
Ignoring the Drying Time: Always allow the isopropyl alcohol to dry completely before reassembling and testing the game. While alcohol evaporates quickly, rushing this step is risky. Inserting a wet cartridge into your N64 console can cause damage. It can short out the console or the game itself. Give it a few minutes in a well-ventilated area. A visual check ensures it is dry.
Using Household Cleaners on the Casing: Avoid using harsh household cleaners on the plastic casing or labels. Products like window cleaner, bleach, or strong degreasers can discolor the plastic. They can also lift or fade the game label. Stick to mild soap and water or diluted isopropyl alcohol for the casing. For labels, stick to dry wiping or very lightly dampened water.
By avoiding these common pitfalls, you protect your N64 cartridges. You ensure a safe and effective cleaning process. This means more happy gaming.
Frequently Asked Questions About N64 Cartridge Cleaning
Q1: How often should I clean my N64 cartridges? A1: You do not need to clean them very often. If games are stored properly, clean them only when they stop working reliably. For actively used games, a light cleaning of the contact pins every 6-12 months can be good. This prevents major dirt buildup. Prevention helps.
Q2: Can I use something other than isopropyl alcohol to clean the pins? A2: Isopropyl alcohol (90% or higher) is the best choice. It evaporates cleanly and is safe for electronics. Some people use specialized electronic contact cleaner, but avoid household cleaners, water, or anything that leaves residue. Do not use vinegar, as it can be corrosive to electronics, unlike its uses in general cleaning like how to clean mold with vinegar.
Q3: What if my N64 game still does not work after cleaning? A3: If your game still fails, the problem might be with the console’s cartridge slot. Clean the N64 console’s slot using an old game cartridge wrapped with a microfiber cloth and isopropyl alcohol. If the issue persists, the game itself might have internal damage. In that case, professional repair may be needed.
Q4: Is it safe to open my N64 cartridge? Will it damage the game? A4: Opening the N64 cartridge is safe if you use the correct 3.8mm security bit. Be gentle. Do not force anything. Proper handling prevents damage. Opening the cartridge allows for a thorough and effective cleaning of the pins and internal components.
Q5: Can I clean the N64 cartridge label? A5: Clean the N64 cartridge label with extreme care. Use only a dry, soft cloth for dusting. Avoid liquids, especially isopropyl alcohol, as they can damage or remove the ink. For very minor smudges, a very lightly dampened cloth with water can be dabbed, but avoid rubbing. It is often best to leave heavily stained labels alone.
Q6: What is the purpose of the 3.8mm security bit? A6: The 3.8mm security bit is a special screwdriver. Nintendo used unique screws on N64 cartridges and other consoles. This bit allows you to open the cartridge casing. Without it, you cannot access the internal circuit board. Access is key for thorough pin cleaning.
Conclusion
Bringing your old N64 games back to life is very rewarding. Cleaning your N64 cartridge is a simple, yet powerful way to do this. You can resolve common issues like games not loading or freezing. This process requires only a few basic tools and a bit of patience. We covered everything from gathering the right materials to performing a thorough clean.
Remember to use 90% or higher isopropyl alcohol. Always use new cotton swabs. Be gentle when cleaning the gold contact pins. Also, take care when cleaning the plastic casing and especially the sensitive game label. Proper storage and careful handling of your cartridges will help keep them in good condition for years. This means less cleaning for you in the future.
Do not let dusty pins keep you from enjoying classic Nintendo 64 adventures. Grab your supplies, follow our guide, and rediscover the joy of reliable retro gaming. Dive back into Hyrule, race on Rainbow Road, or battle your friends in Smash Bros. Your cleaned N64 cartridge will thank you. Start cleaning today and relive those golden gaming moments!
- N64 cleaning
- Nintendo 64 cartridge cleaning
- retro game maintenance
- clean game cartridge
- dirty N64 games