· Home Cleaning · 15 min read
How To Clean Oil Spill On Floor
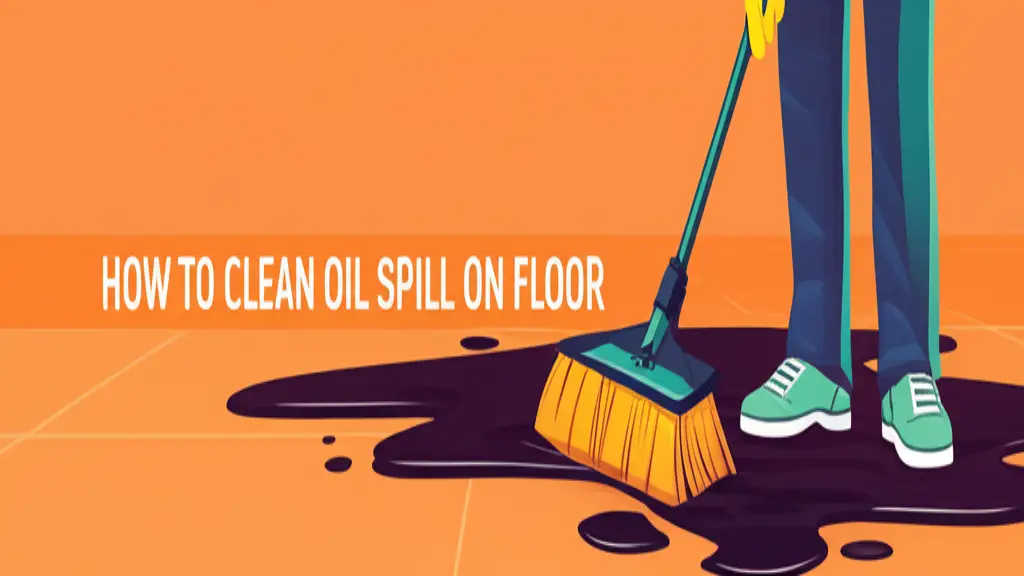
Clean Oil Spill on Floor: A Step-by-Step Guide
Uh-oh, did oil just spill on your floor? It happens to everyone. Whether it is cooking oil in the kitchen or a car oil leak in the garage, an oil spill creates a slippery mess. Knowing how to clean oil spill on floor quickly and correctly helps a lot. This guide helps you tackle oil spills on any floor type. You will learn about immediate actions, specific methods for different floor materials, and the right tools. I will also share tips to prevent future spills and common mistakes to avoid.
Takeaway
Cleaning an oil spill requires quick action and the right steps.
- Act Fast: Address the spill immediately to prevent spreading and staining.
- Absorb First: Use absorbent materials to soak up most of the oil.
- Clean Deep: Apply a degreaser or cleaning agent specific to your floor type.
- Rinse Well: Ensure no residue remains to avoid slippery surfaces.
- Prevent Future Spills: Store oil safely and use protective mats.
To clean an oil spill on your floor, first, contain the spill and absorb as much oil as possible using absorbent materials like cat litter or baking soda. Next, apply a degreasing cleaner or a mixture of dish soap and hot water to the affected area. Scrub gently, then rinse thoroughly with clean water. Finally, dry the floor completely to prevent slipping.
Immediate Actions for Oil Spills
When oil spills on your floor, acting fast is very important. A quick response stops the oil from spreading. It also prevents the oil from soaking deeply into your floor. This makes the cleaning job much easier later. I always grab my cleaning supplies right away.
The first step is to secure the area. Place towels or old rags around the spill. This creates a barrier. It stops the oil from moving to other parts of your floor. This simple step saves you from a larger cleaning task.
Next, get ready with your personal protective gear. Oil can be slippery and sometimes harmful to your skin. Put on gloves and maybe old clothes. Ensure you have good ventilation in the area, especially if the oil has a strong smell. My own safety comes first when facing a spill.
After securing the area, start absorbing the liquid oil. Do not try to wipe it up right away. That will only spread the oil further. Instead, pour an absorbent material directly onto the spill. Common household items work well for this.
Good absorbent choices include cat litter, cornstarch, or baking soda. You can also use sawdust or sand if you have them. Pour enough material to completely cover the oil puddle. Let it sit for at least 15-20 minutes. This gives the material time to soak up the oil. I find that leaving it longer for bigger spills is better.
Once the absorbent material has done its job, carefully scoop it up. Use a dustpan and brush for this. Dispose of the oil-soaked material properly. Do not flush it down the drain, as it can clog pipes and harm the environment. Bag it and throw it in the trash. This initial absorption removes most of the liquid oil, making the next steps simpler.
Cleaning Oil from Concrete Floors
Concrete floors are tough, but they are also porous. This means they can absorb oil spills deeply. Removing oil from concrete floors needs specific methods. I find that a good degreaser is essential for this type of spill.
First, make sure you have already absorbed the loose oil. Sprinkle a generous amount of an absorbent material like cat litter or sawdust over the remaining stain. Grind it into the stain using your foot or a stiff brush. Let it sit for several hours, or even overnight, to draw out more oil. This helps lift the stain from deep within the concrete.
Next, mix a strong degreasing cleaner with hot water. You can find degreasers at hardware stores. For a DIY option, mix liquid dish soap with warm water. I often use heavy-duty degreasers for garage spills. Apply the degreasing solution generously to the oil stain.
Let the solution soak into the concrete for about 15-20 minutes. This gives the degreaser time to break down the oil. Do not let the solution dry on the concrete. If it starts to dry, add more. For more tips on cleaning tough concrete stains, you can learn about cleaning concrete basement floor after a flood.
After soaking, scrub the area vigorously with a stiff-bristled brush. A wire brush works best for stubborn stains on concrete. Work the degreaser into the stain, creating a foamy lather. You should see the stain starting to lift. This scrubbing action is key for porous surfaces.
Rinse the area thoroughly with clean water. Use a hose if you are outside, or a wet mop and bucket if indoors. Make sure to remove all the cleaner and oil residue. Repeat the process if the stain is still visible. Sometimes, very old or deep stains need several treatments. My experience shows patience pays off with concrete.
Removing Oil from Hardwood Floors
Hardwood floors add beauty to any room. However, they are sensitive to spills, especially oil. Cleaning oil from hardwood floors requires a gentle but effective approach. You want to remove the oil without damaging the wood finish. I always test any cleaning solution on a hidden spot first.
Start by absorbing the fresh oil spill immediately. Do not rub the oil; just blot it gently. Use paper towels or a clean cloth. Press down firmly to soak up as much oil as possible. If you rub, you might spread the oil or push it deeper into the wood grain. This initial blotting is very important for wood.
For fresh oil stains, sprinkle a generous amount of baking soda or cornstarch directly onto the spill. These powders are excellent at absorbing oil. Let the powder sit on the stain for at least 15-30 minutes. For older or larger spills, let it sit for a few hours or even overnight. The longer it sits, the more oil it can draw out. After it sits, gently sweep or vacuum up the powder. This step helps pull the oil from the wood surface.
Next, create a mild cleaning solution. Mix a few drops of dish soap with warm water. You can also use a specialized hardwood floor cleaner. Dip a clean cloth into the solution. Wring out the cloth very well. You want it damp, not soaking wet. Excess water can damage hardwood. I use a microfiber cloth for this step.
Gently wipe the stained area with the damp cloth. Use light, circular motions. Do not scrub hard. The goal is to lift the remaining oil residue. After wiping, immediately dry the area with a clean, dry cloth. This prevents water from sitting on the wood. For more insights on keeping your wooden floors clean, you might find tips on how to effectively clean cat urine from wood floor or even how to clean an area rug on hardwood floor helpful. Repeat the process if needed, always drying the wood quickly.
For stubborn, set-in oil stains on hardwood, you might need a stronger approach. Some people use mineral spirits or a wood cleaner specifically designed for oil. Apply a small amount to a clean cloth. Gently wipe the stain. Always test these stronger cleaners in an inconspicuous area first. After cleaning, you might need to re-wax or re-seal the spot if the finish was affected. My own experience says prevention is best for hardwood.
Tackling Oil on Tile and Vinyl Floors
Tile and vinyl floors are less porous than concrete or wood. This makes them somewhat easier to clean. However, oil can still create slippery hazards and leave residue. Removing oil from tile and vinyl floors needs careful steps to ensure safety and cleanliness. I find these surfaces respond well to common household cleaners.
First, as with all spills, absorb the excess oil immediately. Use paper towels or a clean rag. Blot the spill; do not wipe it. This stops the oil from spreading across the smooth surface. Quickly covering the spill helps prevent accidents. My first thought is always to prevent anyone from slipping.
After blotting, sprinkle an absorbent material like baking soda or cornstarch over the remaining oil film. Let it sit for about 10-15 minutes. This helps to soak up any lingering greasy residue. Then, sweep or vacuum the powder away. This simple step tackles the majority of the oil.
Next, prepare a cleaning solution. For tile and vinyl, a mixture of dish soap and hot water works very well. Dish soap is excellent at breaking down grease. You can also mix vinegar and baking soda for a powerful, natural cleaner. This combination creates a fizzy action that helps lift stains. For more ways to use these common items, check out how to clean with vinegar and baking soda.
Apply the cleaning solution to the affected area. Use a sponge or a soft brush to gently scrub the stain. You do not need to scrub too hard on these surfaces. The soap or vinegar solution will break down the oil. Let the solution sit for a few minutes, but do not let it dry completely. Keep the area wet with the cleaning solution.
Finally, rinse the area thoroughly with clean water. Use a damp mop or a clean cloth. Make sure to remove all soap residue. Soap film can make the floor slippery or attract more dirt. After rinsing, dry the floor completely with a clean towel or mop. A dry floor prevents slips and ensures a spotless finish. Repeat the cleaning process if any greasiness remains.
Essential Tools and Materials
Having the right tools ready makes cleaning an oil spill much simpler. I always keep a few key items in my cleaning caddy. Being prepared helps you react fast. You will need absorbent materials, cleaning agents, and some protective gear.
Here is a list of what you should have:
- Absorbent Materials:
- Cat Litter: Granular and highly absorbent. It works well for large spills.
- Baking Soda: Good for smaller spills and helps deodorize.
- Cornstarch: Also effective for absorbing oil, especially on delicate surfaces.
- Sawdust or Sand: Useful for garage or workshop spills.
- Paper Towels or Old Rags: For initial blotting and wiping.
- Cleaning Agents:
- Liquid Dish Soap: A powerful degreaser, readily available. I use it for most oil spills.
- Heavy-Duty Degreaser: For stubborn stains, especially on concrete or metal surfaces. This works great for tackling issues similar to how you would clean burnt oil from a stainless steel pan.
- White Vinegar: An acidic cleaner that helps break down grease and lift stains.
- Specialized Floor Cleaner: Use one specific to your floor type (e.g., hardwood cleaner).
- Cleaning Tools:
- Stiff-Bristled Brush: Essential for scrubbing concrete and other tough surfaces.
- Soft-Bristled Brush or Sponge: For more delicate floors like hardwood or tile.
- Dustpan and Brush: For scooping up absorbent materials.
- Mop and Bucket: For rinsing and general floor cleaning.
- Vacuum Cleaner (Shop-Vac): Can be useful for picking up dry absorbent materials.
- Protective Gear:
- Rubber Gloves: Protect your hands from oil and cleaning chemicals.
- Old Clothes or Apron: To protect your regular clothing.
- Safety Glasses: If there is a risk of splashes.
Having these items on hand means you can tackle any oil spill effectively. I organize my cleaning supplies so I can grab them quickly when a spill happens. This preparedness reduces panic and makes the cleanup process efficient.
Preventing Future Oil Spills
Preventing oil spills is better than cleaning them. A few simple habits can save you a lot of effort. I try to be mindful of how I handle oil-containing items. Taking proactive steps ensures your floors stay clean and safe.
First, store oil properly. Keep cooking oils in sealed containers. Place them in a stable spot in your pantry. For motor oils or other automotive fluids, store them in sturdy, leak-proof containers. Keep them on shelves or in cabinets, not directly on the floor. This stops accidental tipping or leaks from reaching your floor.
Use protective mats in high-risk areas. Place a drip tray under your car in the garage. Put a mat in front of your stove in the kitchen. These mats catch spills before they hit your floor. They are much easier to clean than the floor itself. I always use a silicone mat under my air fryer for this reason.
When transferring oil, use funnels. Whether you are pouring cooking oil into a small bottle or topping up engine oil, a funnel directs the flow. This prevents splashes and drips. It is a simple tool that makes a big difference. I always keep funnels handy in the kitchen and garage.
Clean up minor drips immediately. Do not wait for small drops to turn into a big mess. Wipe up any small spills as they happen. This stops them from spreading or becoming stubborn stains. A quick wipe with a paper towel can prevent a larger cleaning job later.
Maintain your equipment and vehicles. Check for leaks in your car regularly. Ensure cooking appliances are in good repair. A leaky oil pan or a faulty deep fryer can cause significant spills. Addressing these issues early can prevent oil from ever reaching your floor. I schedule regular checks for my car and kitchen appliances.
By following these simple prevention tips, you reduce the chances of oil spills. A proactive approach keeps your floors clean and safe from slippery hazards. It saves you time and effort in the long run.
Common Mistakes to Avoid
When cleaning oil spills, it is easy to make mistakes. These errors can make the spill worse or damage your floor. I have learned from experience what not to do. Avoiding these common pitfalls helps you clean more effectively and safely.
First, do not rub the spill. Your first instinct might be to wipe the oil. This is a common mistake. Rubbing spreads the oil over a larger area. It also pushes the oil deeper into porous surfaces. Always blot the oil first with an absorbent material. This lifts the oil rather than spreading it.
Second, do not use excessive water. Especially on hardwood or laminate floors, too much water can cause damage. Water can warp wood or seep into subflooring. Always use a damp cloth, not a soaking wet one. Wring out mops or cloths very well before use. Dry the floor quickly after cleaning.
Third, avoid harsh chemicals without testing. Strong solvents or abrasive cleaners can strip finishes or discolor floors. Always test any new cleaning product on a small, hidden area of your floor. This helps ensure it will not cause damage. My rule is: if in doubt, test it out.
Fourth, do not ignore safety precautions. Oil spills are slippery. They can also involve chemicals. Always wear gloves to protect your hands. Ensure good ventilation, especially with strong-smelling oils or cleaners. Place warning signs around the spill area to prevent slips and falls. Your safety is most important.
Fifth, do not use a regular vacuum cleaner for liquid spills. A standard vacuum is not designed for liquids. It can get damaged or even cause an electrical hazard. Use a shop vacuum if you need to vacuum liquids. For most oil spills, absorbent materials are safer and more effective.
Sixth, do not delay the cleanup. The longer an oil spill sits, the harder it is to remove. Fresh spills are much easier to clean. Oil can penetrate surfaces, leading to stubborn stains. Tackle the spill as soon as you notice it. My experience shows speed is key.
By avoiding these common mistakes, you can clean oil spills on your floor more efficiently. You also protect your floor from damage and ensure your own safety. A careful approach leads to better results.
FAQ Section
Q1: Can I use hot water on an oil spill? Hot water can help break down some types of oil, especially cooking oil. However, too much hot water can spread the oil and make it soak deeper into porous surfaces. Use hot water sparingly and always with a degreasing agent like dish soap. Ensure you blot first, then clean with warm, not scalding, water.
Q2: What is the best absorbent for oil spills? The best absorbent for oil spills depends on the size and type of spill. For small household spills, baking soda, cornstarch, or cat litter work well. For larger spills, commercial absorbents, sawdust, or sand are effective. Always apply enough material to fully cover the oil and let it sit.
3: How do I remove old oil stains? Removing old oil stains needs more effort. For concrete, a heavy-duty degreaser or poultice method (mixing absorbent with a solvent) often works. For hardwood, a commercial wood cleaner designed for oil or gentle scrubbing with mineral spirits might be needed. Repeat applications may be necessary.
Q4: Is dish soap effective on oil spills? Yes, liquid dish soap is very effective on oil spills. It is a powerful degreaser. Dish soap breaks down the oil, making it easier to lift and rinse away. Mix a few drops with warm water to create a cleaning solution. It works well on most floor types, especially tile and vinyl.
Q5: When should I call a professional for an oil spill? You should call a professional for large industrial oil spills or spills of hazardous chemicals. If the oil spill is too large for you to handle safely, or if it involves a substance you cannot identify, contact a professional cleaning service. They have specialized equipment and knowledge.
Conclusion
Cleaning an oil spill on your floor might seem like a daunting task. Yet, with the right approach, it is very manageable. We covered the critical steps from immediate action to prevention. Remember to act fast, absorb the oil first, and choose the correct cleaning method for your floor type. Whether it is concrete, hardwood, or tile, specific techniques ensure a clean result.
Having the right tools, like absorbents and degreasers, makes a big difference. By avoiding common mistakes, you protect your floors and ensure a safer cleaning process. Knowing how to clean oil spill on floor properly keeps your home safe and spotless. Keep your cleaning supplies ready, and you will be prepared for any unexpected spill. A clean floor is a happy floor!
- oil spill cleanup
- floor cleaning tips
- grease removal
- concrete cleaning
- hardwood floor care
- spill remedies