· Home Care · 18 min read
How To Clean Old Door Hardware
How To Clean Old Door Hardware
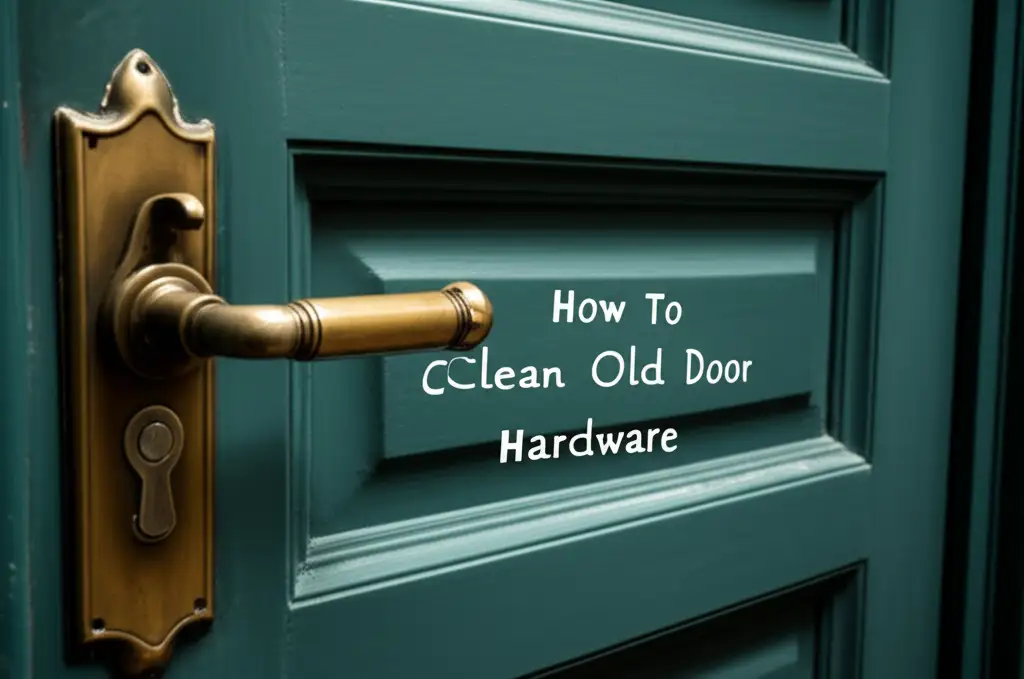
Do you have old door hardware that looks dull or dirty? It can lose its original charm over time. Faded door knobs, handles, and hinges often gather grime and tarnish. But you can make them look new again. Learning how to clean old door hardware effectively helps restore their beauty.
I often see vintage hardware that has lost its shine. This guide helps you bring that shine back. We will identify different materials and explore various cleaning methods. We will also discuss safety measures and long-term care. By the end, you will know how to clean old door hardware like a pro.
Takeaway
- Identify your hardware material before cleaning.
- Gather proper tools and prioritize safety with gloves and ventilation.
- Use gentle, natural solutions for brass and bronze to remove tarnish.
- Tackle rust on iron and steel with suitable abrasives and rust converters.
- Polish chrome and nickel with mild cleaners for a mirror-like finish.
- Protect cleaned hardware with a wax or lacquer coating to prevent future damage.
Main Query Answer
To clean old door hardware, first identify its material. Then, choose an appropriate cleaning method. Use gentle approaches for brass and bronze. Tackle rust on iron and steel. Finish by polishing the hardware and applying a protective coating to preserve its renewed appearance.
Understanding Your Hardware: Material Identification Is Key
Before you start any cleaning, you must know what kind of metal your door hardware is made from. Different materials react differently to cleaners. Using the wrong product can cause damage. Identifying the metal ensures you use the safest and most effective cleaning method.
Many old door hardware pieces are brass, bronze, iron, steel, chrome, or nickel. Each material has unique properties. Knowing these helps you pick the right tools and solutions. A simple magnet test can often help with identification.
Common Materials and Their Characteristics
- Brass: Brass often has a yellowish, golden appearance. It can tarnish to a dull brown or green over time. A magnet will not stick to brass. This material is soft and scratches easily.
- Bronze: Bronze looks darker than brass, often a reddish-brown color. It also tarnishes, but to a deeper, more uniform brown patina. A magnet will not stick to bronze either. Bronze is very durable.
- Iron and Steel: These metals are generally gray or black. They are very hard and magnets stick to them strongly. Iron and steel rust easily, forming reddish-brown flakes. Rust is a common problem with these materials.
- Chrome and Nickel: These materials usually have a bright, shiny, silvery finish. Chrome is often colder in color, while nickel can have a warmer, slightly yellow tint. Magnets may or may not stick to them, depending on the base metal. They are often plated over other metals.
Take a close look at your hardware. Observe its color and texture. Does it show signs of green tarnish or red rust? Does a magnet stick to it? These observations help confirm the material. Knowing the material is the first step in successful cleaning.
Preparing for Cleaning: Essential Tools and Safety
Proper preparation makes the cleaning process smoother and safer. You need the right tools before you begin. Gathering everything beforehand saves time. It also prevents interruptions during cleaning.
Safety is important when handling old hardware and cleaning solutions. Some cleaners can irritate skin or cause fumes. Always protect yourself and your work area. A little preparation goes a long way.
Gathering Your Tools
You do not need many specialized tools for cleaning. Most items are common household supplies.
- Soft cloths: Microfiber or cotton cloths work well for general cleaning.
- Soft brushes: An old toothbrush or a small nylon brush can reach crevices.
- Gloves: Rubber or latex gloves protect your hands from chemicals.
- Bowls: Small bowls hold cleaning solutions.
- Warm water: For rinsing hardware.
- Mild dish soap: A basic, gentle cleaning agent.
- Vinegar: White vinegar is useful for various cleaning tasks. You can learn more about how to clean with vinegar for glass or general surfaces. how to clean glass with vinegar, how to clean shower with vinegar
- Baking soda: A gentle abrasive and deodorizer.
- Fine steel wool (0000 grade) or brass brush: For tougher tarnish or rust on specific metals. Use with caution.
- Metal polish: Specific polish for brass, bronze, chrome, or nickel.
- Protective wax or lacquer: To seal and protect the cleaned surface.
Prioritizing Safety Measures
Your safety is key. Protect your skin and respiratory system during cleaning.
- Wear gloves: Always wear rubber or latex gloves. This protects your hands from harsh cleaners and grime.
- Ensure ventilation: Work in a well-ventilated area. Open windows and doors. This helps fresh air circulate. It prevents inhaling strong fumes from cleaners.
- Test in an inconspicuous area: Before applying any cleaner to the entire piece, test it. Choose a small, hidden spot. This helps ensure the cleaner does not damage the finish. Wait a few minutes to see the reaction.
- Protect surfaces: Lay down old newspapers, towels, or a drop cloth. This protects your work surface from spills and scratches.
- Handle carefully: Old hardware can have sharp edges or loose parts. Handle each piece gently. Be careful when removing or reattaching them. If you are working on hinges, consider tips for how to clean door hinges without removing them to minimize handling.
Once you have your tools and safety measures in place, you are ready to start cleaning. Each material requires a specific approach. Following these steps helps you prepare effectively.
Cleaning Brass and Bronze Hardware: Gentle Restoration
Brass and bronze door hardware can look stunning when clean. They often develop a dark tarnish over time. This tarnish can hide their natural beauty. The key to cleaning these metals is gentleness. Aggressive cleaning can damage the patina.
We aim to remove the grime and tarnish without stripping the metal. This method helps restore a warm shine. There are several effective ways to clean these materials. You can find more specific information on how to clean antique brass hardware or how to clean brass door handles for detailed tips.
Natural Cleaning Solutions
Many common household items work wonders on brass and bronze. These solutions are gentle and effective.
Soap and Water:
- Mix warm water with a few drops of mild dish soap.
- Submerge the hardware if possible. If not, use a soaked cloth.
- Gently scrub with a soft cloth or an old toothbrush.
- Rinse thoroughly with clean water.
- Dry completely with a soft, clean cloth. Water spots can cause new tarnish.
Lemon and Salt Paste:
- Cut a lemon in half.
- Sprinkle a small amount of salt onto the cut surface of the lemon.
- Rub the salted lemon directly onto the tarnished brass or bronze.
- Alternatively, mix lemon juice with salt to form a paste. Apply this paste to the hardware.
- Let it sit for a few minutes.
- Gently rub with a soft cloth.
- Rinse well and dry thoroughly.
Vinegar, Salt, and Flour Paste:
- Combine equal parts white vinegar, salt, and flour to create a thick paste.
- Apply the paste evenly over the hardware.
- Let the paste sit for 10-30 minutes, depending on the tarnish. Do not let it dry completely.
- Rub gently with a soft cloth.
- Rinse off the paste with warm water.
- Dry the hardware completely to prevent water marks.
When to Use Commercial Cleaners
Sometimes, natural methods are not enough. Heavily tarnished brass or bronze may need a stronger solution.
- Choose a reputable brass/bronze cleaner: Look for products specifically designed for these metals. Read the label carefully.
- Follow product instructions: Apply the cleaner as directed by the manufacturer.
- Test in a hidden area: Always test a small spot first. This confirms it does not harm the finish.
- Use minimal product: A small amount often goes a long way. Do not over-apply.
- Buff to a shine: After cleaning, buff the hardware with a clean, soft cloth. This helps achieve a beautiful luster.
Remember, aim for restoration, not stripping. A light tarnish or patina on old hardware can add character. Remove only the unwanted grime and heavy oxidation. Your brass and bronze hardware will look much better.
Restoring Iron and Steel Hardware: Tackling Rust
Old door hardware made of iron or steel often suffers from rust. Rust is iron oxide and appears as a reddish-brown, flaky coating. It can weaken the metal over time. Removing rust is crucial for both appearance and function.
Cleaning rusted iron and steel hardware requires a different approach than brass. These metals are harder. They can withstand more abrasive methods. But care is still important to prevent damage. You might find some parallels with cleaning general old metal hinges. For specific insights, check out information on how to clean old metal hinges.
Mechanical Rust Removal
For light to moderate rust, mechanical methods work well. These involve scraping or scrubbing the rust off.
Wire Brush or Steel Wool (0000 grade):
- Wear protective gloves and eye protection.
- Use a stiff wire brush or fine steel wool (0000 grade, the finest) to scrub the rusted areas.
- Apply firm pressure. Work in small sections.
- For intricate designs, use a small brass brush or an old toothbrush.
- Brush off loose rust particles as you go.
- This method is effective for surface rust.
Scraping Tools:
- For thick, caked-on rust, you might need a scraping tool.
- Use a plastic scraper or a dull knife.
- Be careful not to scratch the underlying metal deeply.
- Follow up with a wire brush or steel wool.
Chemical Rust Removal
Chemical rust removers dissolve the rust. They are useful for heavy rust or intricate pieces.
Vinegar Soak:
- Place the rusted iron or steel hardware in a container.
- Pour enough white vinegar to fully submerge the items.
- Let them soak for several hours or even overnight. The soaking time depends on the rust severity.
- Check periodically.
- After soaking, remove the hardware. Scrub off loosened rust with a wire brush or steel wool.
- Rinse thoroughly with water. Dry immediately to prevent new rust.
Oxalic Acid (Rust Remover Products):
- Many commercial rust removers contain oxalic acid.
- Always follow the manufacturer’s instructions.
- Wear strong gloves and eye protection. Work in a well-ventilated area.
- Apply the product. Allow it to work as directed.
- Scrub and rinse thoroughly.
- Oxalic acid is strong. Use it as a last resort for stubborn rust.
Baking Soda Paste:
- Mix baking soda with a little water to form a thick paste.
- Apply the paste to the rusted area.
- Let it sit for an hour or two.
- Scrub with a brush or steel wool.
- Baking soda is a mild abrasive. It helps lift light rust.
Finishing Iron and Steel
After removing rust, iron and steel are vulnerable to re-rusting. You must protect them.
- Thorough Drying: Dry the hardware completely immediately after rinsing. Use a clean cloth. You can also use a hairdryer.
- Oil Coating: Apply a thin layer of machine oil, mineral oil, or clear wax. This creates a barrier against moisture. Rub it in with a clean cloth.
- Rust-Inhibiting Primer/Paint: For pieces that will be painted, apply a rust-inhibiting primer first. This provides long-lasting protection.
Restoring iron and steel hardware makes a big difference. It brings back its strength and appearance. Proper protection ensures your hard work lasts.
Polishing Chrome and Nickel Hardware: Achieving Mirror Shine
Chrome and nickel hardware have a distinct bright, silvery finish. They do not tarnish like brass or rust like iron. Instead, they can become dull, hazy, or develop water spots. Fingerprints and general grime are also common. The goal is to restore their reflective, mirror-like shine.
These plated finishes are durable but can scratch. Always use gentle methods. Avoid abrasive cleaners or tools that might damage the plating. A little care goes a long way.
Gentle Cleaning for Shine
Mild cleaners work best for chrome and nickel. These solutions clean without scratching.
Soap and Warm Water:
- This is often the first and best step.
- Mix a few drops of mild dish soap with warm water.
- Dip a soft cloth into the solution.
- Wipe down the hardware gently.
- For stubborn spots, use a soft-bristle brush (like an old toothbrush).
- Rinse with clean water.
- Dry immediately and buff with a dry, clean microfiber cloth. This prevents water spots and streaks.
Vinegar Solution:
- White vinegar is excellent for cutting through grime and water spots.
- Mix equal parts white vinegar and water in a spray bottle.
- Spray the solution onto the chrome or nickel.
- Let it sit for a minute or two.
- Wipe clean with a soft cloth.
- Rinse with clear water.
- Dry and buff to a shine with a separate, dry microfiber cloth. This method helps remove mineral deposits.
Rubbing Alcohol:
- For greasy smudges or fingerprints, rubbing alcohol is effective.
- Dampen a soft cloth with rubbing alcohol.
- Wipe the hardware.
- The alcohol evaporates quickly. This leaves a streak-free shine.
- No rinsing is needed for this method.
Tackling Stubborn Stains and Haze
Sometimes, simple cleaning is not enough. You might need a slightly stronger touch for stubborn marks.
Baking Soda Paste (Very Mild Abrasive):
- Mix baking soda with a small amount of water to make a paste.
- Apply the paste to a soft cloth.
- Gently rub the stained or hazy areas. Do not scrub hard.
- Baking soda is a very mild abrasive. It can help lift minor stains.
- Rinse thoroughly with water.
- Dry and buff for shine. Use this method sparingly.
Commercial Chrome/Nickel Polish:
- For a deeper shine or very light surface imperfections, use a specialized metal polish.
- Ensure the polish is safe for chrome or nickel.
- Apply a small amount to a soft cloth.
- Rub gently in small circles.
- Buff off with a clean, dry cloth. This restores a mirror-like finish.
Aluminum Foil (for light rust spots on chrome):
- If you notice tiny rust spots on chrome (these are rare, usually from a damaged plating), try aluminum foil.
- Crumple a piece of aluminum foil.
- Dip it in water.
- Gently rub the rust spots with the damp foil. The chemical reaction between the aluminum and chrome helps lift the rust without scratching.
- Wipe clean and buff.
Always prioritize softness when cleaning chrome and nickel. These finishes rely on their smooth, reflective surface. Harsh abrasives cause irreversible damage. Your shiny door hardware will brighten any space.
Special Considerations for Painted or Lacquered Hardware
Not all old door hardware is bare metal. Many pieces have a protective coating. This can be paint or lacquer. This coating preserves the metal underneath. It also changes how you clean the hardware. Aggressive cleaning can strip this important layer.
You must be gentle when cleaning painted or lacquered hardware. The goal is to clean the surface, not remove the finish. Removing the finish exposes the metal to air and moisture. This leads to new tarnish or rust.
Identifying the Coating
It is important to know if your hardware has a coating.
- Lacquered Hardware: This often looks like clear varnish over brass or bronze. The metal underneath stays bright. If you see green tarnish on lacquered brass, it means the lacquer is failing. The tarnish forms under the lacquer. You must remove the lacquer to clean this properly.
- Painted Hardware: This is usually obvious. The hardware is covered in a solid color of paint. It can be thick or thin. Often, it is applied over iron or steel.
Cleaning Painted Hardware
Cleaning painted hardware is similar to cleaning painted walls. You want to remove dirt without stripping paint.
Mild Soap and Water:
- Mix warm water with a very small amount of mild dish soap.
- Dampen a soft cloth with this solution. Wring it out well.
- Gently wipe down the painted hardware. Do not scrub hard.
- Rinse the cloth with clean water. Wipe the hardware again to remove soap residue.
- Dry immediately with a clean, dry cloth. This prevents water spots or streaks.
- Avoid using abrasive sponges or harsh chemicals. These will scratch or dissolve the paint.
Avoid Solvents:
- Do not use paint thinners, nail polish remover, or strong alcohols. These can easily strip the paint.
- Test any unknown cleaner in a hidden spot first.
Cleaning Lacquered Hardware
If lacquer is intact and clean, a gentle wipe is enough. If the lacquer is peeling or tarnished underneath, you have two choices.
If Lacquer is Intact and Clean:
- Simply wipe the hardware with a damp, soft cloth.
- Use a mild soap solution if needed.
- Dry immediately.
If Lacquer is Damaged or Tarnish is Underneath:
- You must remove the old lacquer to clean the metal properly.
- Use a lacquer thinner: Apply a small amount of lacquer thinner to a soft cloth.
- Gently rub the hardware. The lacquer should start to dissolve.
- Work in a well-ventilated area. Wear gloves.
- Once the lacquer is off, you can clean the bare metal as described in the “Cleaning Brass and Bronze Hardware” section.
- After cleaning and polishing, consider applying a new coat of clear lacquer. This protects the metal from future tarnish.
Cleaning these types of hardware requires patience. Preserving the original finish adds to the hardware’s value. When the finish is too far gone, removing it and starting fresh is the best approach. Always think about the hardware’s original state.
Long-Term Care: Protecting Your Cleaned Hardware
You have worked hard to clean your old door hardware. Now, you want to keep it looking great. Proper long-term care helps prevent future tarnish, rust, and grime buildup. This protects your investment. It also reduces how often you need to perform deep cleaning.
Protecting cleaned hardware is often simpler than the initial cleaning. A few regular steps can maintain its shine. This includes applying protective coatings and routine wiping.
Applying Protective Coatings
Once your hardware is clean and dry, apply a protective layer. This creates a barrier against moisture and air. This barrier slows down tarnishing or rusting.
Clear Lacquer:
- This is ideal for brass or bronze that you want to keep shiny.
- Ensure the metal is completely clean and dry before applying.
- Use a clear lacquer specifically for metals. It comes in spray or brush-on forms.
- Apply thin, even coats. Follow the product instructions for drying times.
- Lacquer provides a durable, long-lasting barrier. It will need reapplication if it chips or peels.
Wax (Microcrystalline or Renaissance Wax):
- Wax offers a softer, more traditional protective layer. It is suitable for all metals, including iron and steel.
- Apply a thin coat of wax with a soft cloth.
- Allow it to dry to a haze.
- Buff gently with a clean, soft cloth until shiny.
- Wax protection is not as long-lasting as lacquer. It needs reapplication every few months, especially on frequently touched hardware.
Mineral Oil or Linseed Oil (for Iron/Steel):
- For iron and steel, a thin coating of mineral oil or boiled linseed oil helps prevent rust.
- Apply with a cloth. Wipe off any excess.
- This is a good option for hardware with a more rustic look.
Routine Maintenance Tips
Regular, light cleaning is better than infrequent, heavy cleaning. Incorporate these habits into your home care routine.
Regular Wiping:
- Wipe down door hardware with a soft, dry cloth weekly. This removes dust, fingerprints, and light smudges.
- For more persistent grime, dampen the cloth with warm water. Then dry thoroughly.
Avoid Harsh Cleaners:
- Do not use abrasive sponges, harsh chemicals, or scouring powders for routine cleaning. These will damage finishes and protective coatings.
- Stick to mild soap and water for general wiping.
Handle with Care:
- Minimize touching hardware with greasy or dirty hands.
- Encourage guests to use the door knob, not the decorative plates.
Check for Wear:
- Periodically inspect your hardware for signs of wear. Look for chipping lacquer or new rust spots.
- Address these issues promptly. Reapply protective coatings as needed.
Control Humidity:
- High humidity can accelerate tarnishing and rusting.
- Ensure good ventilation in your home. Use dehumidifiers in damp areas if necessary.
By following these simple long-term care steps, your cleaned door hardware will stay beautiful. It will retain its renewed charm for many years. This careful approach ensures your efforts pay off.
FAQ Section
How often should I clean my old door hardware?
Clean your hardware based on its material and how much you use it. For frequently touched pieces, wipe them weekly. A deeper clean every few months or once a year is usually enough. If you notice tarnish or grime, clean it sooner.
Can I use the same cleaner for all metal types?
No, you cannot. Different metals need different cleaners. Acidic cleaners work for brass or bronze. They can damage plated chrome or nickel. Harsh abrasives good for rust on iron can scratch softer metals. Always identify your hardware material first.
What if my hardware is painted and I want to restore the metal underneath?
If the paint is old or chipped, you can strip it. Use a paint stripper designed for metal. Follow product instructions carefully. Once the paint is off, clean the bare metal using the appropriate method for its type. Remember to wear safety gear.
Is it safe to remove old door hardware for cleaning?
Yes, it is often safer and more effective. Removing hardware allows you to clean all surfaces. It also prevents damage to your door. Take photos before removal. This helps you remember how to reassemble it correctly. Keep all screws organized.
How do I remove green tarnish from brass hardware?
Green tarnish on brass indicates oxidation. Mix lemon juice and salt into a paste. Apply it to the tarnished area. Let it sit for a few minutes. Gently rub with a soft cloth. Rinse well with water. Dry completely to restore shine.
What should I do if my hardware has deep scratches or pitting?
Deep scratches or pitting are harder to fix. You might need professional help. Metal restoration specialists can repair severe damage. For minor scratches, a fine-grade polishing compound might help. However, it cannot fill deep pits.
Conclusion
Cleaning old door hardware brings new life to your home. It restores the beauty of historical pieces. We discussed the importance of identifying your hardware’s material. This helps you choose the right cleaning method. We covered gentle approaches for brass and bronze, rust removal for iron and steel, and polishing techniques for chrome and nickel. Remember to always prioritize safety. Use proper tools.
I hope this guide helps you restore your door hardware. Protecting your cleaned hardware ensures its beauty lasts. A little care goes a long way. Now, take action. Start your cleaning project today. Enjoy the renewed look and historical charm of your home’s door hardware. Your efforts will truly shine.
- door hardware
- cleaning tips
- antique restoration
- home improvement
- DIY cleaning
- metal polishing
- brass cleaning

