· Home Improvement · 6 min read
How To Clean Out An Old Hand Dug Well
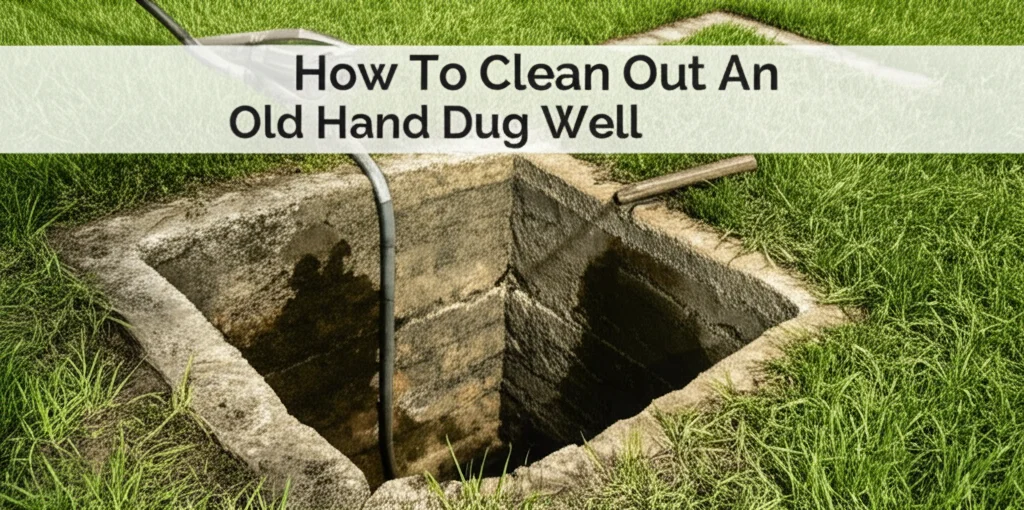
Revitalize Your Water Source: How To Clean Out An Old Hand Dug Well
Have you discovered an old hand-dug well on your property? These wells, relics of a bygone era, can be a fantastic source of water, but they often require significant cleaning and restoration. Cleaning an old hand-dug well isn’t just about removing debris; it’s about ensuring the water is safe and usable. This article will guide you through the process of cleaning out an old hand-dug well, covering everything from safety precautions to the actual cleaning steps. We’ll help you understand what’s involved in restoring this valuable resource to its former glory.
Can you clean an old hand-dug well yourself? Yes, with careful planning, the right equipment, and a commitment to safety, you can clean out an old hand-dug well. However, it’s a physically demanding task and requires understanding potential hazards.
Key Takeaways:
- Prioritize safety with proper ventilation and protective gear.
- Remove debris carefully, avoiding damage to the well structure.
- Disinfect the well thoroughly to eliminate bacteria and contaminants.
- Test the water quality after cleaning to ensure it’s safe for use.
Understanding Hand Dug Wells and Why Cleaning is Crucial
Hand-dug wells differ significantly from modern drilled wells. They are typically wider in diameter and shallower, constructed by physically excavating the earth. Because of their open nature, they are more susceptible to contamination from surface runoff, animal intrusion, and general debris accumulation. Over time, sediment, leaves, and even small animals can find their way into the well, impacting water quality.
Regular cleaning is vital for several reasons. First, it removes accumulated sediment that can harbor bacteria and reduce water flow. Second, it eliminates potential contaminants that could pose health risks. Finally, cleaning helps maintain the structural integrity of the well itself, preventing further deterioration. Ignoring well maintenance can lead to unsafe drinking water and costly repairs down the line.
Safety First: Essential Precautions Before You Begin
Before you even think about lowering yourself into the well, safety must be your top priority. Hand-dug wells can present several hazards, including confined spaces, potential for toxic gases, and unstable structures. Here’s a breakdown of essential safety precautions:
- Confined Space Awareness: Wells are considered confined spaces. Never enter a well without proper training and equipment.
- Ventilation: Wells can accumulate dangerous gases like methane and carbon dioxide. Use a blower to continuously ventilate the well for at least 24 hours before entering.
- Gas Monitoring: Invest in a multi-gas meter to check for oxygen levels, combustible gases, and toxic fumes before and during the cleaning process.
- Personal Protective Equipment (PPE): Wear a hard hat, safety glasses, gloves, a respirator, and waterproof boots.
- Buddy System: Never work alone. Have a reliable person stationed above the well to assist and monitor your safety.
- Structural Integrity: Carefully assess the well’s walls for stability. Avoid dislodging stones or causing collapses.
- Lockout/Tagout: If the well has any electrical components (like a pump), ensure they are properly disconnected and locked out.
Gathering Your Tools and Equipment
Having the right tools will make the job significantly easier and safer. Here’s a list of essential equipment for cleaning out an old hand-dug well:
- Blower: For ventilating the well.
- Multi-Gas Meter: To monitor air quality.
- Safety Harness and Rope: For secure descent and ascent.
- Buckets and Rope: For removing debris.
- Shovels and Scoops: For loosening and collecting sediment.
- High-Pressure Nozzle (attached to a hose): For dislodging stubborn sediment.
- Disinfectant: Household bleach (sodium hypochlorite) is commonly used.
- Stiff-Bristled Brush: For scrubbing the well walls.
- Water Testing Kit: To assess water quality after cleaning.
- Well Sealant (optional): To repair minor cracks or leaks.
Step-by-Step: The Well Cleaning Process
Now that you’re prepared, let’s dive into the cleaning process. Remember to proceed slowly and cautiously.
- Ventilate and Monitor: As mentioned earlier, ventilate the well for at least 24 hours and continuously monitor air quality with a multi-gas meter.
- Remove Standing Water: If there’s standing water, carefully bail it out using buckets and a rope. Dispose of the water responsibly, away from other water sources.
- Debris Removal: Begin removing loose debris like leaves, twigs, and rocks. Use a shovel or scoop to collect sediment from the bottom of the well. Work slowly to avoid disturbing the well structure.
- Wall Cleaning: Use a high-pressure nozzle attached to a hose to dislodge sediment clinging to the well walls. A stiff-bristled brush can help scrub away stubborn buildup. Be careful not to damage the well lining.
- Disinfection: This is a crucial step. Prepare a solution of household bleach (sodium hypochlorite) and water, following the manufacturer’s instructions. Pour the solution down the well, ensuring it reaches all surfaces. Allow it to sit for at least 24 hours.
- Flush the Well: After disinfection, thoroughly flush the well with clean water to remove any residual bleach. Continue flushing until the water runs clear and has no chlorine odor.
- Inspect and Repair: Inspect the well walls for cracks or leaks. Small cracks can be sealed with a well-specific sealant. Larger repairs may require professional assistance.
Restoring Water Quality: Testing and Ongoing Maintenance
Cleaning the well is only half the battle. You must verify that the water is safe to drink. After cleaning and flushing, collect a water sample and send it to a certified laboratory for testing. The test should include checks for bacteria (coliform and E. coli), nitrates, and other potential contaminants.
Ongoing maintenance is key to preventing future problems. Regularly inspect the well area for signs of contamination, such as cracks in the well casing or nearby sources of pollution. Consider installing a well cap to prevent debris from entering the well. Periodic water testing (at least annually) is also recommended.
Frequently Asked Questions (FAQs)
Q: How often should I clean my hand-dug well? A: It depends on usage and surrounding conditions, but generally, every 3-5 years is a good guideline. More frequent cleaning may be needed if you notice changes in water quality or flow.
Q: Is it safe to drink well water immediately after cleaning? A: No. You must disinfect the well and then have the water tested before it’s safe to drink. The testing will confirm the water is free of harmful contaminants.
Q: What if I find animal remains in the well? A: Remove the remains carefully, disinfect the well thoroughly, and have the water tested for bacteria.
Q: Can I use chemicals other than bleach to disinfect the well? A: While other disinfectants exist, household bleach is the most readily available and cost-effective option. Always follow the manufacturer’s instructions carefully.
Conclusion: A Valuable Resource Restored
Cleaning out an old hand-dug well is a challenging but rewarding task. By following these steps and prioritizing safety, you can restore this valuable water source and ensure a reliable supply of clean water for years to come. Remember, regular maintenance and water testing are crucial for protecting your health and preserving the integrity of your well. Don’t hesitate to consult with a professional well contractor if you encounter any difficulties or have concerns about the safety of the process. Taking the time to properly clean and maintain your hand-dug well is an investment in your property and your well-being.
- well cleaning
- hand dug well
- water well maintenance
- well restoration
- water quality