· Cleaning Tips · 15 min read
How To Clean Oyster Mushrooms
Clean Oyster Mushrooms: Your Simple Guide
Oyster mushrooms are beautiful and flavorful. They add a unique taste to many dishes. However, they are delicate. Proper cleaning helps keep their texture and flavor. Cleaning oyster mushrooms correctly ensures they are ready for cooking. It also removes any dirt or debris. I want to show you the best ways to prepare them. This article explains why gentle cleaning matters. It covers the tools you need. I will guide you through different cleaning methods. You will also learn about storage. Finally, I will share common mistakes to avoid.
Takeaway
- Oyster mushrooms absorb water easily. Do not soak them.
- Use a soft brush or damp cloth for most cleaning.
- Trim the tough base stem only.
- Dry mushrooms immediately after any quick rinse.
- Store cleaned mushrooms in a paper bag in the refrigerator.
Cleaning oyster mushrooms requires a gentle approach. Use a soft brush or a slightly damp cloth to wipe away dirt. Avoid soaking them, as they absorb water quickly and lose their delicate texture. Trim the tough stem base. Dry the mushrooms thoroughly before cooking or storing. This method keeps them fresh and flavorful.
Understanding Oyster Mushrooms: Why Gentle Cleaning Matters
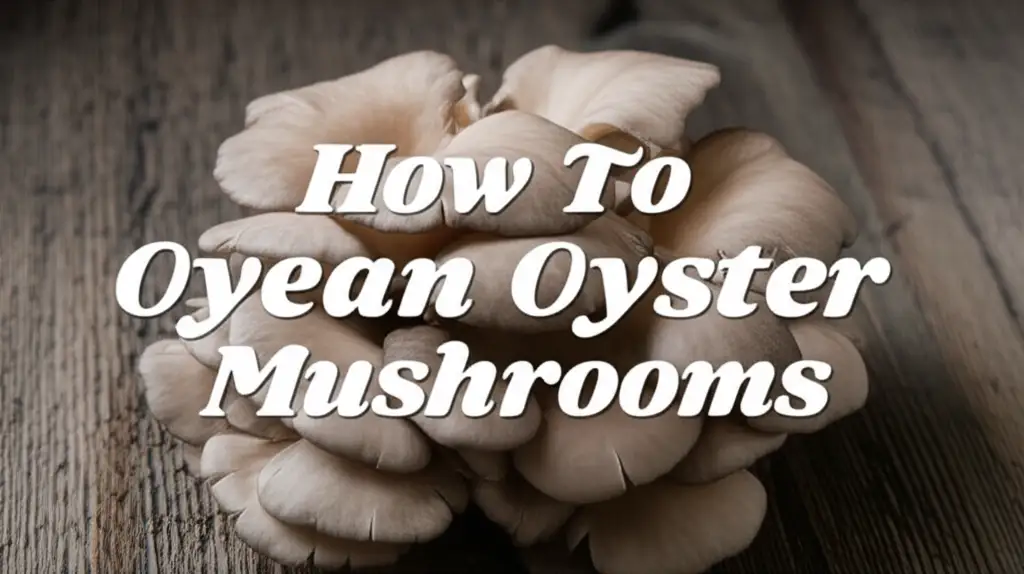
Oyster mushrooms are unique. They have a delicate, fan-shaped cap. Their texture is tender. They also have a mild, earthy flavor. These characteristics make them popular in many recipes. However, their structure means they need special care. I always treat them gently.
The Anatomy of an Oyster Mushroom
Oyster mushrooms grow in clusters. They have a central stem. The caps spread out like oysters. Their gills are soft and thin. These gills can trap small bits of dirt or debris. The entire mushroom absorbs liquid easily. This absorption is important for cleaning. We do not want them to become soggy.
The stem of an oyster mushroom can be tough. The part where the cluster attaches often has woody bits. You will want to remove this part. The caps and gills are the main edible parts. These parts are very tender. They bruise easily.
The Impact of Water on Mushroom Texture
Most mushrooms are like sponges. Oyster mushrooms are no exception. They absorb water quickly. Soaking them makes them waterlogged. Waterlogged mushrooms lose their firm texture. They become slimy or rubbery. Their flavor also dilutes.
This is why I avoid rinsing them under running water. A quick rinse might be okay for very dirty ones. But it must be brief. Drying them immediately is crucial. The goal is to clean them without changing their natural qualities. Gentle methods preserve their delicate taste and texture. Always remember that excess water is the enemy of a good mushroom dish.
Essential Tools for Cleaning Oyster Mushrooms
Proper tools make cleaning oyster mushrooms easier. You do not need many items. Simple kitchen tools work best. I keep these items handy whenever I buy mushrooms. Having them ready saves time and effort.
Basic Cleaning Kit
Here are the tools I use:
- Soft Brush: A soft-bristled brush is perfect. It removes loose dirt without damaging the mushroom. A clean pastry brush or a dedicated mushroom brush works well. I often use a very soft toothbrush I keep only for kitchen tasks.
- Damp Cloth or Paper Towels: A clean, slightly damp cloth or paper towel is essential. You use it to wipe away stuck-on dirt. The key is “slightly” damp. You want moisture, not saturation.
- Small Paring Knife: A sharp knife helps trim the tough parts. It allows for precise cuts. This is important for removing the woody base.
- Cutting Board: A clean surface is always necessary. A cutting board provides a stable area to work.
Using the right tools protects the mushrooms. It also makes the cleaning process efficient. You will find that these simple items are very effective. They help ensure your oyster mushrooms are perfectly clean.
Preparing Your Work Area
Before you start, set up your space. A clean counter or cutting board is a must. I usually lay down some dry paper towels. This helps absorb any moisture. It also catches debris from the mushrooms.
Keep your cleaning tools close by. Arrange your mushrooms on one side. Have a discard bowl ready for trimmings. A well-organized area makes the process smooth. It also helps maintain hygiene. Cleanliness is very important when preparing food. Following these simple steps sets you up for success.
Step-by-Step Guide: Dry Cleaning Method
The dry cleaning method is my preferred way to clean oyster mushrooms. It is gentle and effective. This method prevents water absorption. It helps keep the mushrooms firm and flavorful. I use this method for most store-bought oyster mushrooms. They usually have minimal dirt.
Brushing Away Debris
Start with your soft brush. Gently brush the mushroom caps. Brush from the center towards the edges. This pushes any loose dirt or dust off the mushroom. Pay attention to the gills. Small bits of substrate or dust can hide there. Be very gentle. The gills are delicate. A light hand prevents bruising. I often hold the mushroom by its stem. This gives me a good grip. It also lets me access all parts easily.
This step removes the majority of superficial dirt. It is very satisfying to see the dust come off. Your goal is to make the surface look clean. Do not scrub hard. Just a light sweep is enough.
Wiping with a Damp Cloth
After brushing, some stubborn spots might remain. This is where your slightly damp cloth or paper towel comes in. Dampen the cloth just enough. It should not drip water. Gently wipe the caps and stems. Use short, light strokes. This removes any clinging dirt or bits of debris.
If the cloth gets dirty, use a clean section. You might need to re-dampen it. The key is to avoid excess moisture. The mushroom should feel almost dry after wiping. This step ensures thorough cleaning. It also preserves the mushroom’s texture. For general advice on cleaning produce, you might find this guide helpful: how to clean mushrooms before cooking. It shares principles that apply to many types of fungi.
Trimming the Stems
Oyster mushrooms often come in clusters. The base of the cluster can be tough. It might have a woody or discolored part. Use your sharp paring knife for this. Carefully trim away the hard, woody base. Only remove the non-edible portion. The individual stems are generally edible. They are just firmer than the caps.
Separate the individual mushrooms from the cluster if desired. You can also leave smaller clusters intact. This depends on your recipe. Trim any parts that look bruised or dry. Discard these tough or damaged pieces. This ensures you only cook the best parts of the mushroom.
When to Use a Quick Rinse (And How)
Sometimes, dry cleaning is not enough. This is especially true for wild oyster mushrooms. They might have more dirt or debris stuck to them. In these cases, a very quick rinse might be necessary. It is not my first choice. But it can be done carefully. Remember, speed is key here.
The “Flash Rinse” Technique
If your oyster mushrooms are very dirty, use a “flash rinse.” Do not submerge them. Do not let them sit in water. Place the mushrooms in a colander. Rinse them briefly under cool, running water. This should be quick, maybe 10-15 seconds total. I mean just a very fast spray. The water pressure should be low.
Focus the water on the dirtiest areas. Quickly move the mushrooms around. This helps dislodge stubborn particles. The goal is to get the dirt off fast. You do not want the mushrooms to absorb water. This technique is a last resort. It is only for mushrooms that are too dirty for brushing.
Immediately Drying Mushrooms
This step is critical after any rinse. As soon as you rinse them, dry them. Gently place the mushrooms on clean paper towels. You can also use a clean kitchen towel. Blot them very well. Press down lightly to absorb moisture. Flip them over to dry both sides.
You want them as dry as possible. Any leftover water will make them soggy when cooked. It will also reduce their shelf life. I sometimes use a salad spinner for this. If you have one, place the rinsed mushrooms inside. Spin them briefly. This helps remove surface water quickly. After spinning, still pat them dry with paper towels. The drier they are, the better. This ensures they cook beautifully and maintain their texture.
Handling Wild vs. Cultivated Oyster Mushrooms
There is a difference between wild and cultivated oyster mushrooms. This difference impacts how I clean them. Knowing their source helps me choose the right cleaning method. I always consider where they came from.
Cleaning Foraged Oyster Mushrooms
Wild oyster mushrooms grow outdoors. They attach to trees or logs. This means they often have more dirt. They might have leaves, twigs, or insects. These are natural occurrences. Cleaning foraged mushrooms usually requires more effort.
Here is how I approach them:
- Initial Inspection: First, I do a thorough visual check. I look for any obvious debris. I also check for signs of insects.
- Gentle Brushing: I start with a soft brush. I brush off as much loose dirt as possible. I pay close attention to the gills.
- Targeted Wiping: If dirt remains, I use a slightly damp cloth. I wipe specific dirty spots. I avoid wiping areas that are already clean.
- Quick Rinse (If Needed): For very dirty wild mushrooms, I might use the “flash rinse” technique. This is only if brushing and wiping are insufficient. I ensure it is very quick.
- Immediate Drying: After any rinse, I dry them thoroughly. I use paper towels. I want them completely dry before storing or cooking.
Cleaning wild mushrooms takes more time. It is worth the effort. It ensures they are safe and pleasant to eat. Every bit of dirt removed improves the eating experience. For more specific mushroom cleaning tips, particularly for wild varieties, you might find this article on how to clean pheasant back mushrooms helpful, as wild mushrooms often share similar cleaning needs.
Cleaning Store-Bought Oyster Mushrooms
Cultivated oyster mushrooms grow in controlled environments. They are usually much cleaner. They typically come on a substrate block. They have less direct contact with soil or outdoor elements. This makes cleaning them much simpler.
For store-bought mushrooms, I almost always use the dry cleaning method:
- Remove Packaging: Take them out of their container.
- Trim the Base: Cut off the tough, woody base where they were attached to the growing block.
- Gentle Brush/Wipe: Most of the time, a soft brush or a dry paper towel is enough. I gently brush or wipe away any visible dust or substrate.
- No Rinsing Needed: I rarely need to rinse store-bought oyster mushrooms. They are usually clean enough. Rinsing often adds unnecessary moisture.
Store-bought mushrooms are generally ready to go with minimal fuss. This makes them very convenient. Always check them, even if they look clean. A quick inspection and wipe ensures they are perfect.
Proper Storage After Cleaning
Once your oyster mushrooms are clean, proper storage is crucial. It keeps them fresh. It extends their shelf life. This means you can enjoy them longer. Incorrect storage leads to spoilage. Mushrooms can become slimy or moldy quickly. I always store them correctly.
Air Circulation is Key
Mushrooms need to breathe. They release moisture. If moisture gets trapped, it speeds up spoilage. Do not store mushrooms in sealed plastic bags. This traps humidity. It creates an ideal environment for bacteria and mold.
Instead, use a paper bag. A brown paper bag is ideal. It allows for air circulation. It also absorbs excess moisture. This helps keep the mushrooms dry. You can also wrap them in a clean, dry paper towel. Then place them in a loosely covered container. The goal is to let air move around them.
Refrigeration Tips
Always store cleaned oyster mushrooms in the refrigerator. The cold temperature slows down spoilage. Place them in the main compartment. Avoid putting them in the crisper drawer if it is too humid.
Here are my tips for refrigeration:
- Use a Paper Bag: As mentioned, a paper bag is best. It absorbs moisture. It allows air flow.
- Do Not Wash Until Ready: If you are not using them immediately, clean them just before cooking. If you clean them and then store, ensure they are completely dry first. This is very important.
- Keep Away from Strong Odors: Mushrooms can absorb smells. Store them away from strong-smelling foods. Onions or garlic can impart their scent to mushrooms.
- Check Daily: Before using, quickly inspect them. Look for any signs of sliminess, dark spots, or mold. Discard if they show spoilage.
Proper storage can keep oyster mushrooms fresh for 3-7 days. This depends on their initial freshness and how well they were cleaned. Freshness ensures the best flavor and texture in your meals.
Common Mistakes to Avoid When Cleaning Oyster Mushrooms
Cleaning oyster mushrooms seems simple. But some common mistakes can ruin them. Avoiding these pitfalls ensures your mushrooms stay perfect. I learned these lessons through experience. Now, I always remember them.
Avoiding Waterlogging
The biggest mistake is soaking mushrooms. As I said before, mushrooms are like sponges. Soaking them makes them absorb too much water. This leads to:
- Soggy Texture: They lose their firm, meaty bite. They become slimy.
- Diluted Flavor: Water washes away their delicate earthy taste.
- Poor Cooking Results: Waterlogged mushrooms do not brown well. They steam instead of searing. This prevents them from developing deep flavors.
Always remember: A quick wipe or brush is usually enough. Only use a flash rinse if absolutely necessary. And always dry them immediately. Your dishes will thank you. For more general guidance on preparing food, consider how you might clean other items like those discussed in how to clean mushrooms before cooking, as the principles of minimizing water apply broadly to many delicate ingredients.
Preserving Flavor and Texture
Another mistake is being too harsh. Rough handling can damage the mushrooms. This affects both flavor and texture.
- Harsh Scrubbing: Scrubbing breaks the delicate cap and gills. It can bruise the mushroom. Bruised mushrooms turn dark and lose their appeal.
- Using Detergents: Never use soap or detergents. Mushrooms are porous. They will absorb chemicals. This makes them unsafe and unpleasant to eat. Plain water or a dry brush is all you need.
- Leaving Dirt On: While avoiding water is key, not cleaning them at all is also a mistake. Dirt, grit, or debris can ruin a dish. It creates an unpleasant mouthfeel. Always take the time to clean them thoroughly, but gently.
By avoiding these mistakes, you preserve the natural qualities of oyster mushrooms. You ensure they remain delicious. This attention to detail makes a big difference in your cooking.
FAQ Section
Can you wash oyster mushrooms with water?
You can rinse oyster mushrooms with water, but only very quickly. Avoid soaking them completely. Use a “flash rinse” under cool, low-pressure running water for 10-15 seconds. Immediately pat them dry with paper towels to prevent them from becoming waterlogged. This preserves their delicate texture and flavor.
How do you clean oyster mushrooms without water?
To clean oyster mushrooms without water, use a soft-bristled brush, like a mushroom brush or a pastry brush. Gently brush off any loose dirt or debris from the caps and gills. For stubborn spots, use a slightly damp cloth or paper towel to wipe them clean. This dry method is ideal for most cultivated mushrooms.
How long do oyster mushrooms last after cleaning?
After cleaning, thoroughly dried oyster mushrooms can last 3-7 days in the refrigerator. Store them in a brown paper bag. The paper bag allows for air circulation and absorbs excess moisture. Avoid sealing them in plastic, as this traps humidity and promotes spoilage.
Do you clean wild oyster mushrooms differently?
Yes, wild oyster mushrooms often require more thorough cleaning than cultivated ones. They might have more dirt, debris, or small insects. Start with dry brushing, then use a damp cloth. A quick flash rinse might be necessary for heavily soiled wild mushrooms, followed by immediate and thorough drying.
What parts of oyster mushrooms are edible?
The caps and gills of oyster mushrooms are fully edible and highly prized for their delicate texture and flavor. The stem base where the cluster attaches can be tough or woody, especially in larger clusters. You should trim and discard this tough bottom portion, but the individual stems leading to the caps are generally edible.
Is it okay to eat oyster mushrooms with dirt on them?
No, it is not okay to eat oyster mushrooms with dirt or debris on them. While small specks might not be harmful, dirt can ruin the texture and taste of your dish. It can be gritty and unpleasant. Always clean your mushrooms thoroughly before cooking to ensure a pleasant eating experience.
Conclusion
Cleaning oyster mushrooms is a simple but important task. It helps keep their delicate flavor and texture intact. Remember, gentleness is key. Avoid soaking them in water. Instead, use a soft brush or a slightly damp cloth. This method removes dirt without causing them to become soggy.
I find that proper cleaning makes a huge difference. It ensures your dishes turn out perfectly. Always dry your mushrooms well after any cleaning. Store them properly in a paper bag in the refrigerator. By following these steps, you will enjoy fresh, delicious oyster mushrooms every time. Go ahead, clean your oyster mushrooms with confidence, and make something wonderful!
- oyster mushroom cleaning
- mushroom preparation
- food cleaning
- cooking tips
- edible fungi